- Loading…
The collaboration with FLA participants during the Field Activity was a valuable learning experience. She contributed professional suggestions and practical perspectives in the preparation, code development, testing, and optimization stages, helping me avoid many detours and improve the quality of the project and the lesson. More importantly, her perspectives made me change from a “technical implementer” to a “comprehensive lesson designer”, realizing the importance of considering the needs of learners and practical application scenarios in lesson development. This collaborative experience not only improved my programming and practical operation skills but also enhanced my communication and collaborative abilities, which will be of great help to my future study and work.
Students who demonstrate understanding can:
2-LS2-1.Plan and conduct an investigation to determine if plants need sunlight and water
Disciplinary Core Ideas
· Plants depend on water and light to grow. (2-LS2-1)
Crosscutting Concepts
Events have causes that generate observable patterns. (2-LS2-1)
My lesson plan using Micro:bit, digital fabrication, and STEM is multidisciplinary.It combines skills from science, technology, math, and design, but each subject remains distinct rather than fully merged.To move it to interdisciplinary, I will have students intentionally combine coding, measurement, design, and problem-solving to complete one unified project, where skills from each area depend on one another.To reach transdisciplinary, I would center the project on a real-world student-led challenge that transcends subject labels, letting learners apply whatever knowledge is needed to solve an authentic problem.
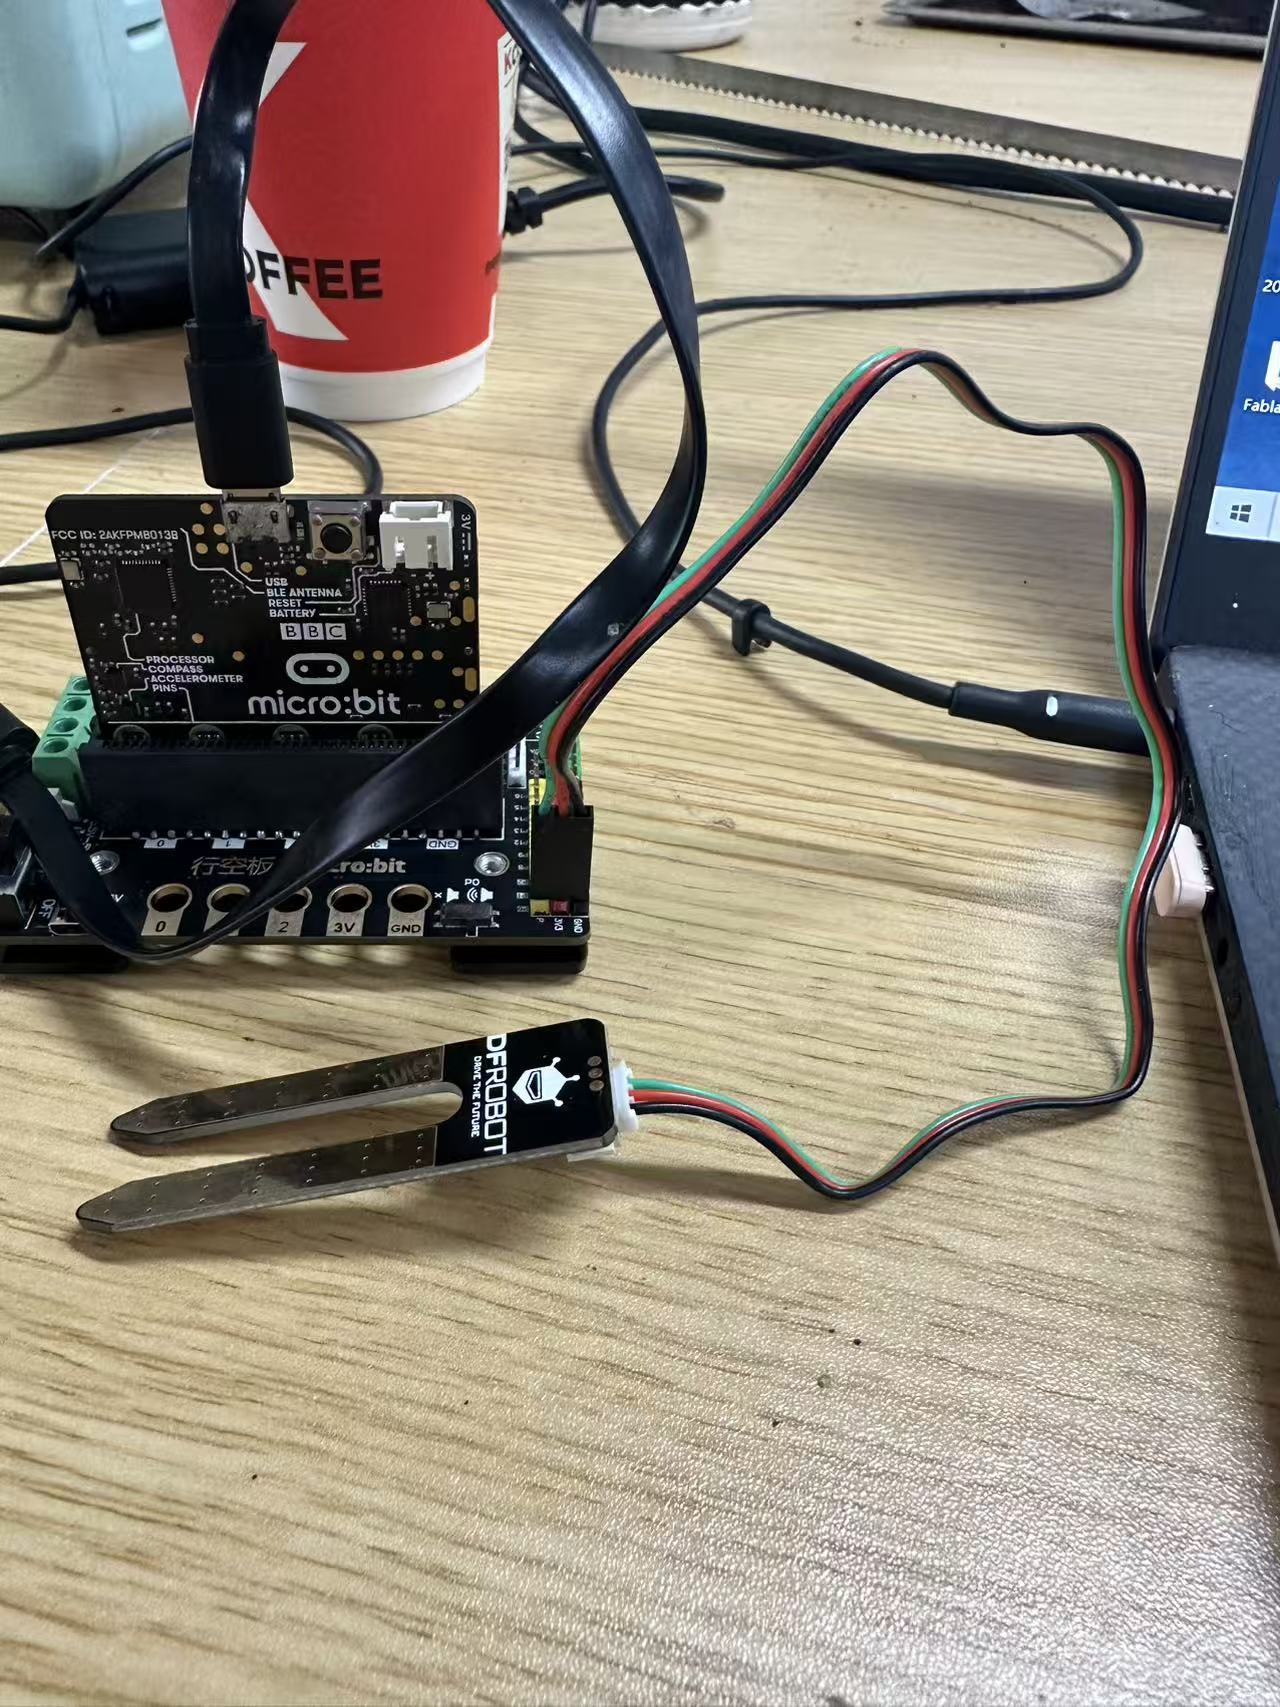
Guide students to observe the micro:bit V1 circuit board, identify the pads, chip, and switch on the board, and let them experience the physical object by looking at the LED lights and switch on the front side of the board.Next, show them the second expansion board, explain how to connect the sensors, and help them distinguish the positive and negative poles.Allow students to try the connections themselves.
Show them the second expansion board, explain how to connect the sensors, and help them distinguish the positive and negative poles.Allow students to try the connections themselves.
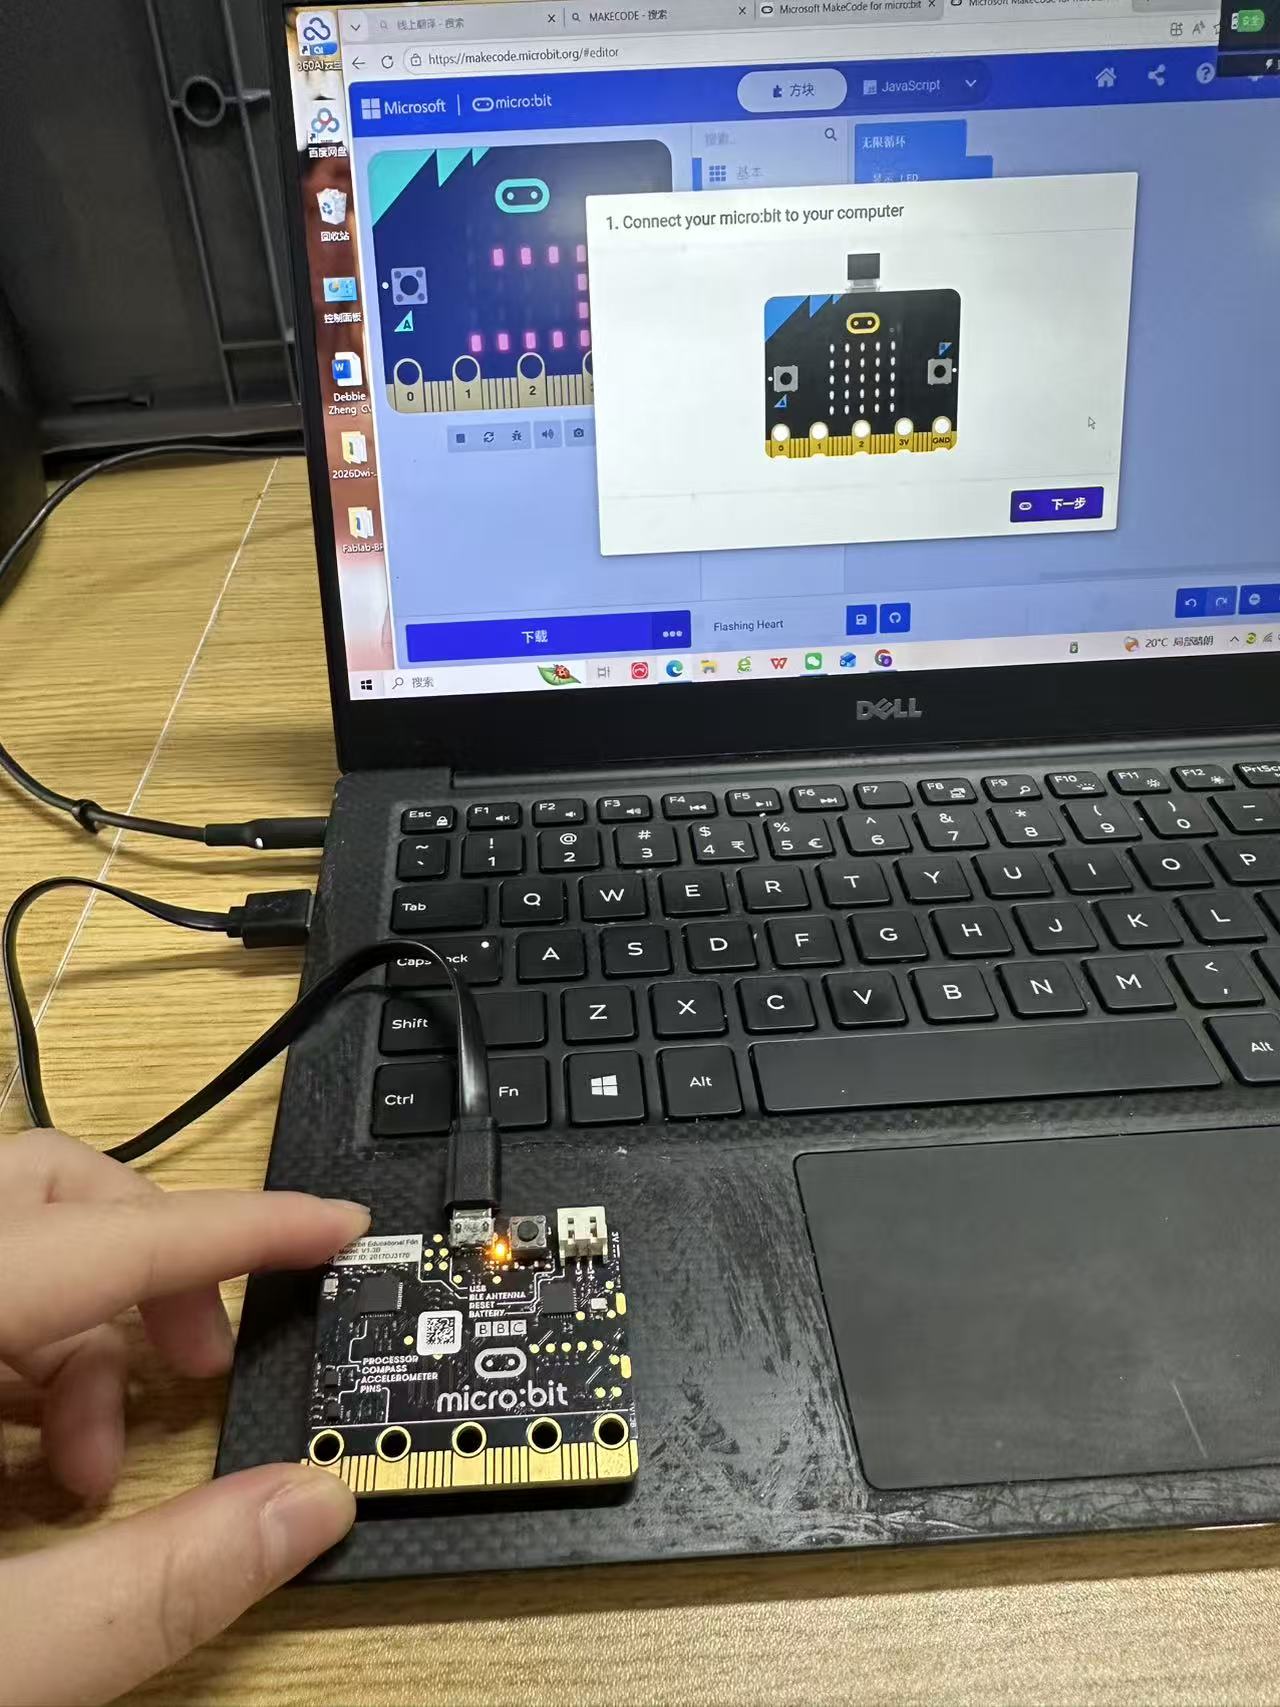
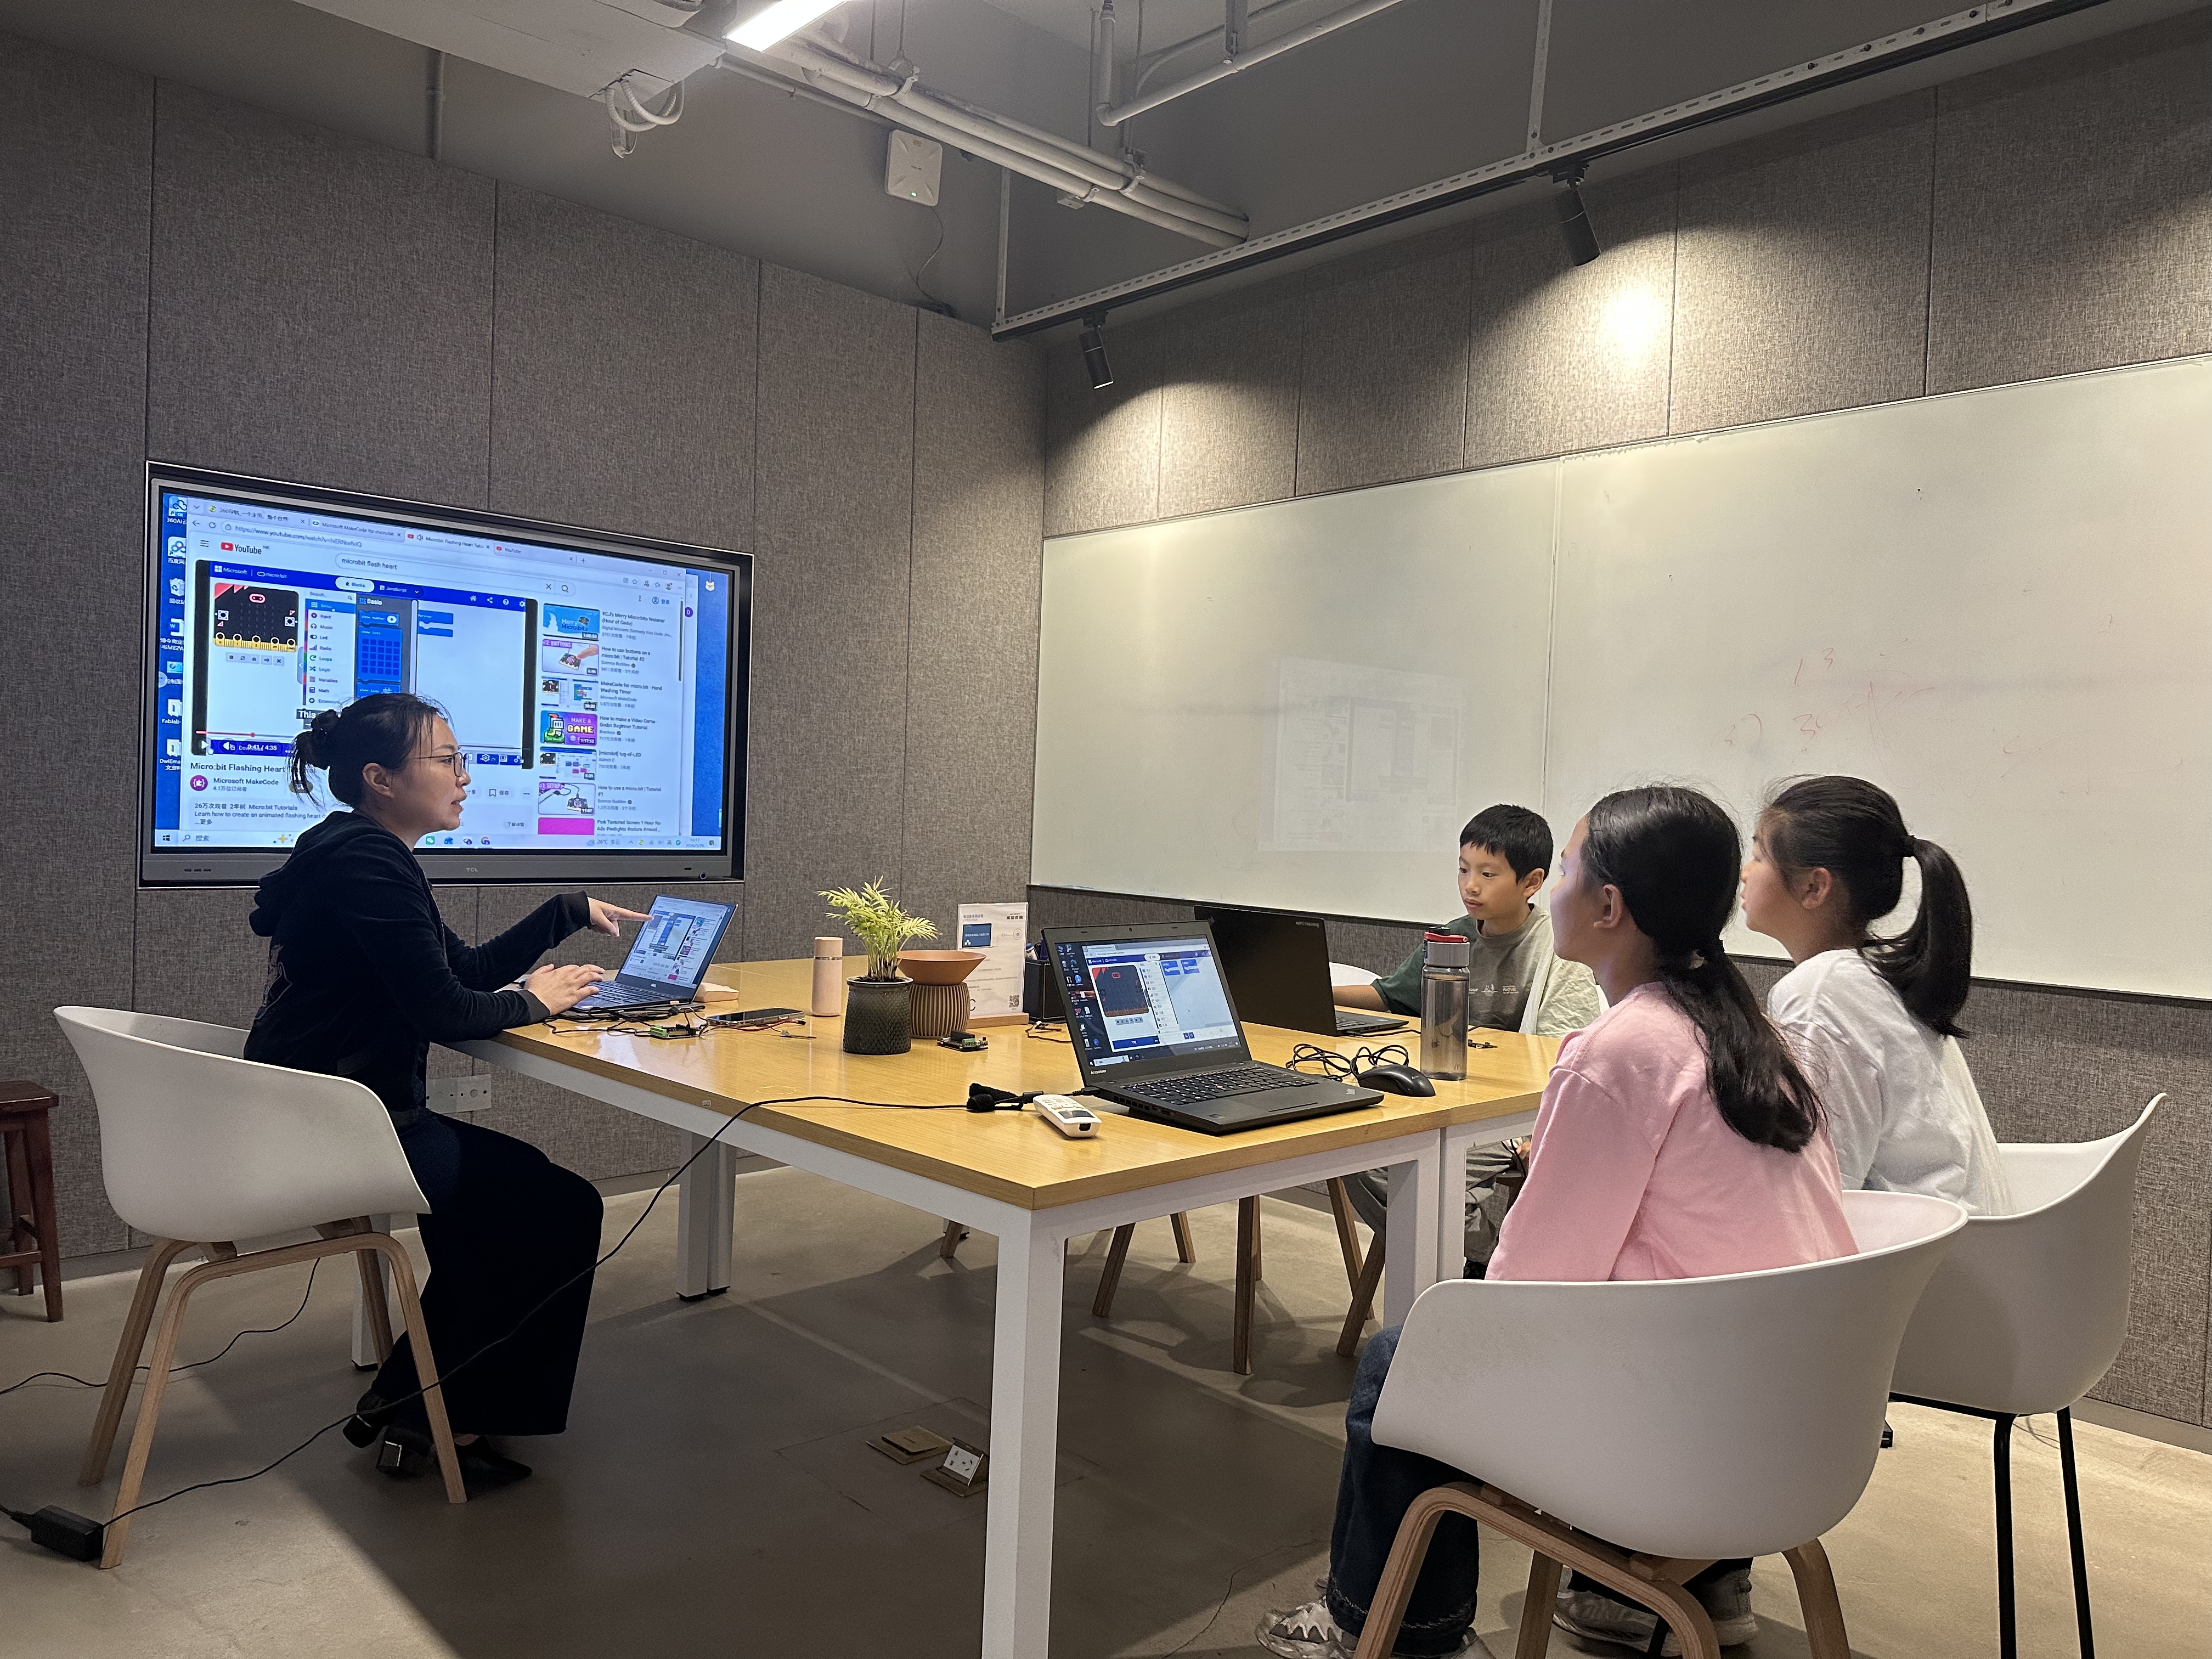
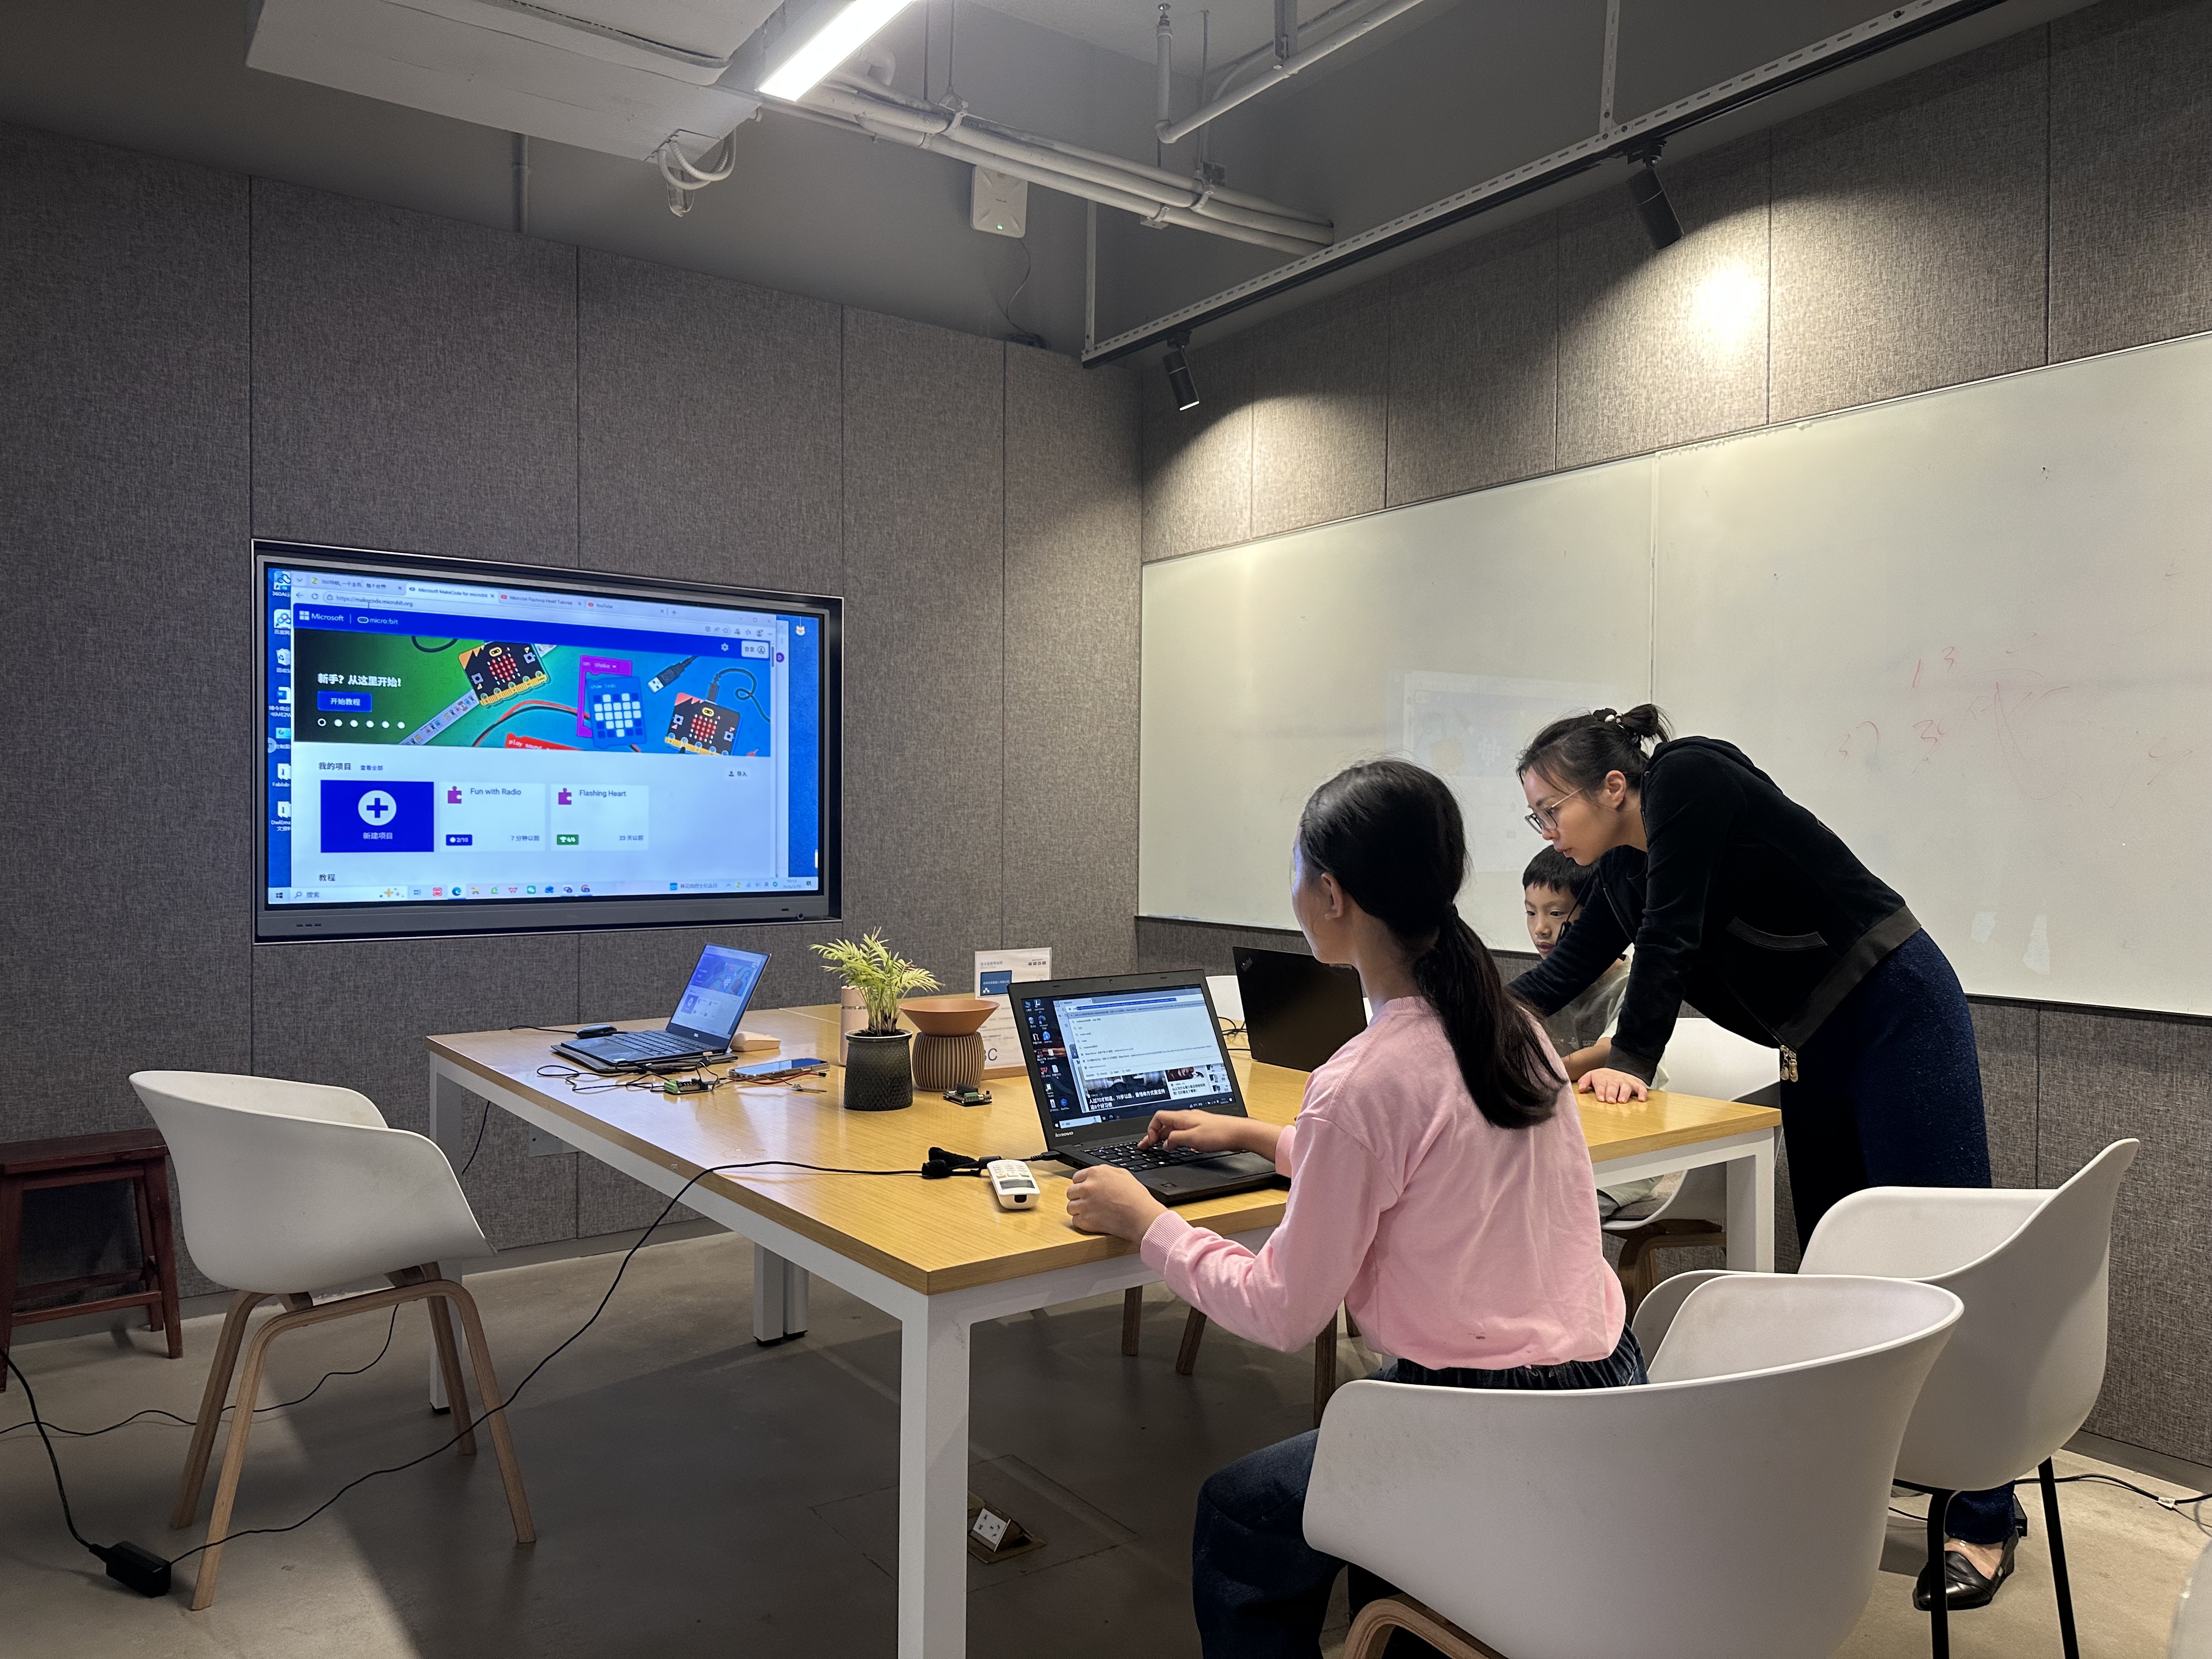
Turn on the PC and log in to the official Micro:bit website
https://makecode.microbit.org/ https://www.youtube.com/watch?v=hiERNxxfxJQ Follow the instruction and let kids to make their own code.
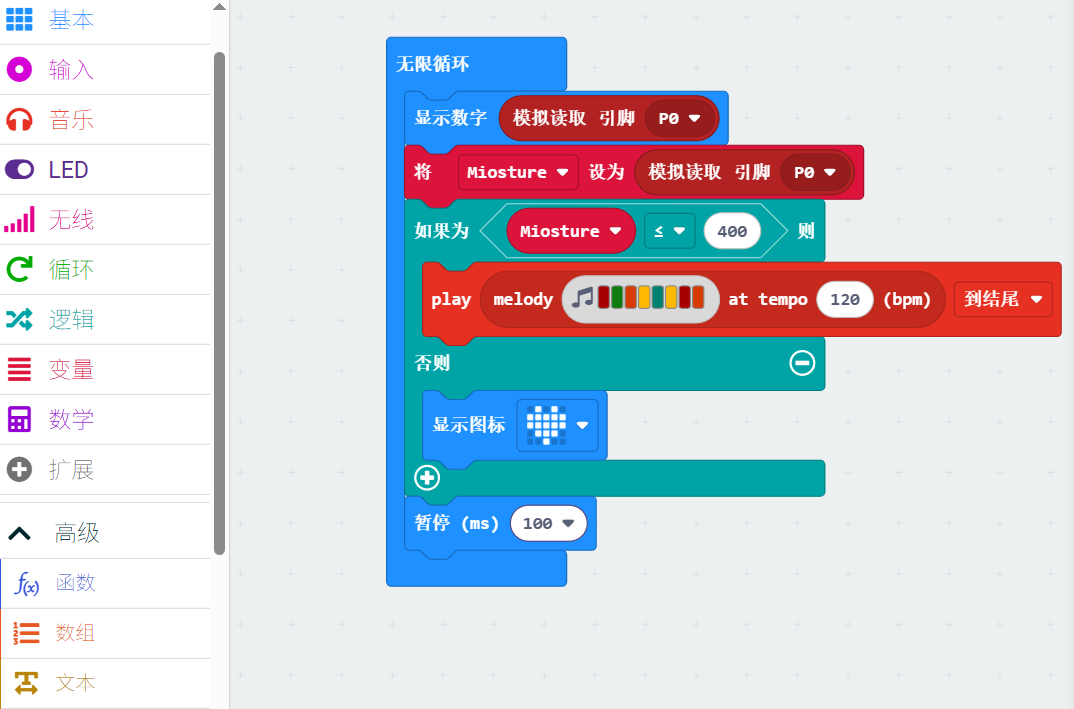
Adjust the settings according to the humidity value you expect the humidity sensor to measure, and learn to write the corresponding code.Two groups can discuss their plan.
Students show their work with PC . then we will switch the data cable to power bank.
Have the students test the sensor’s humidity readings in air, in soil, and in water respectively, and adjust the parameter settings in the code.
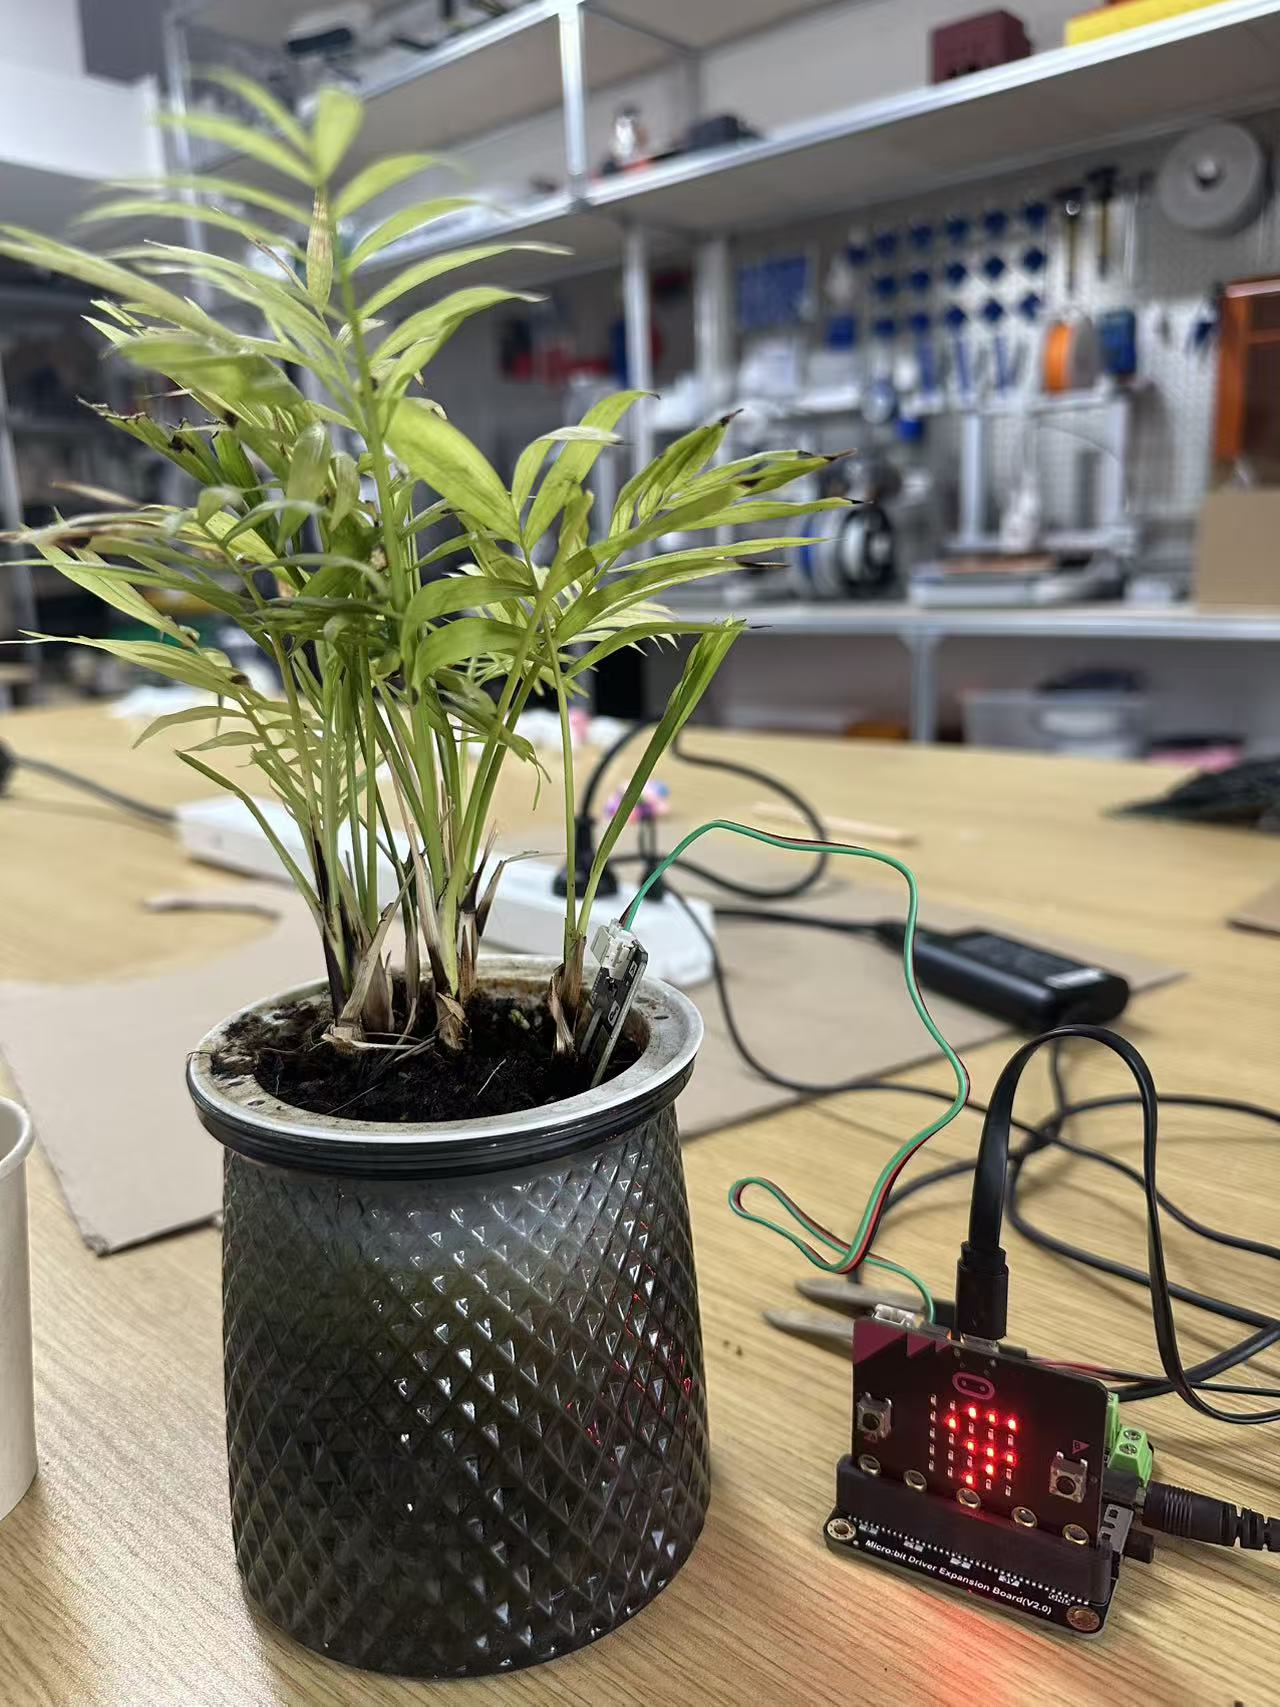
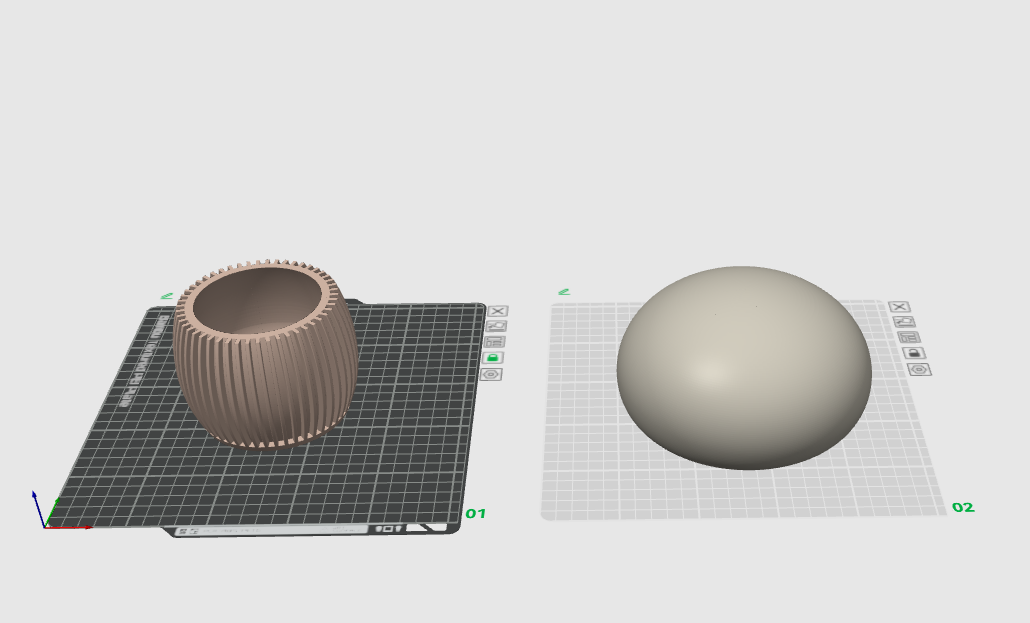
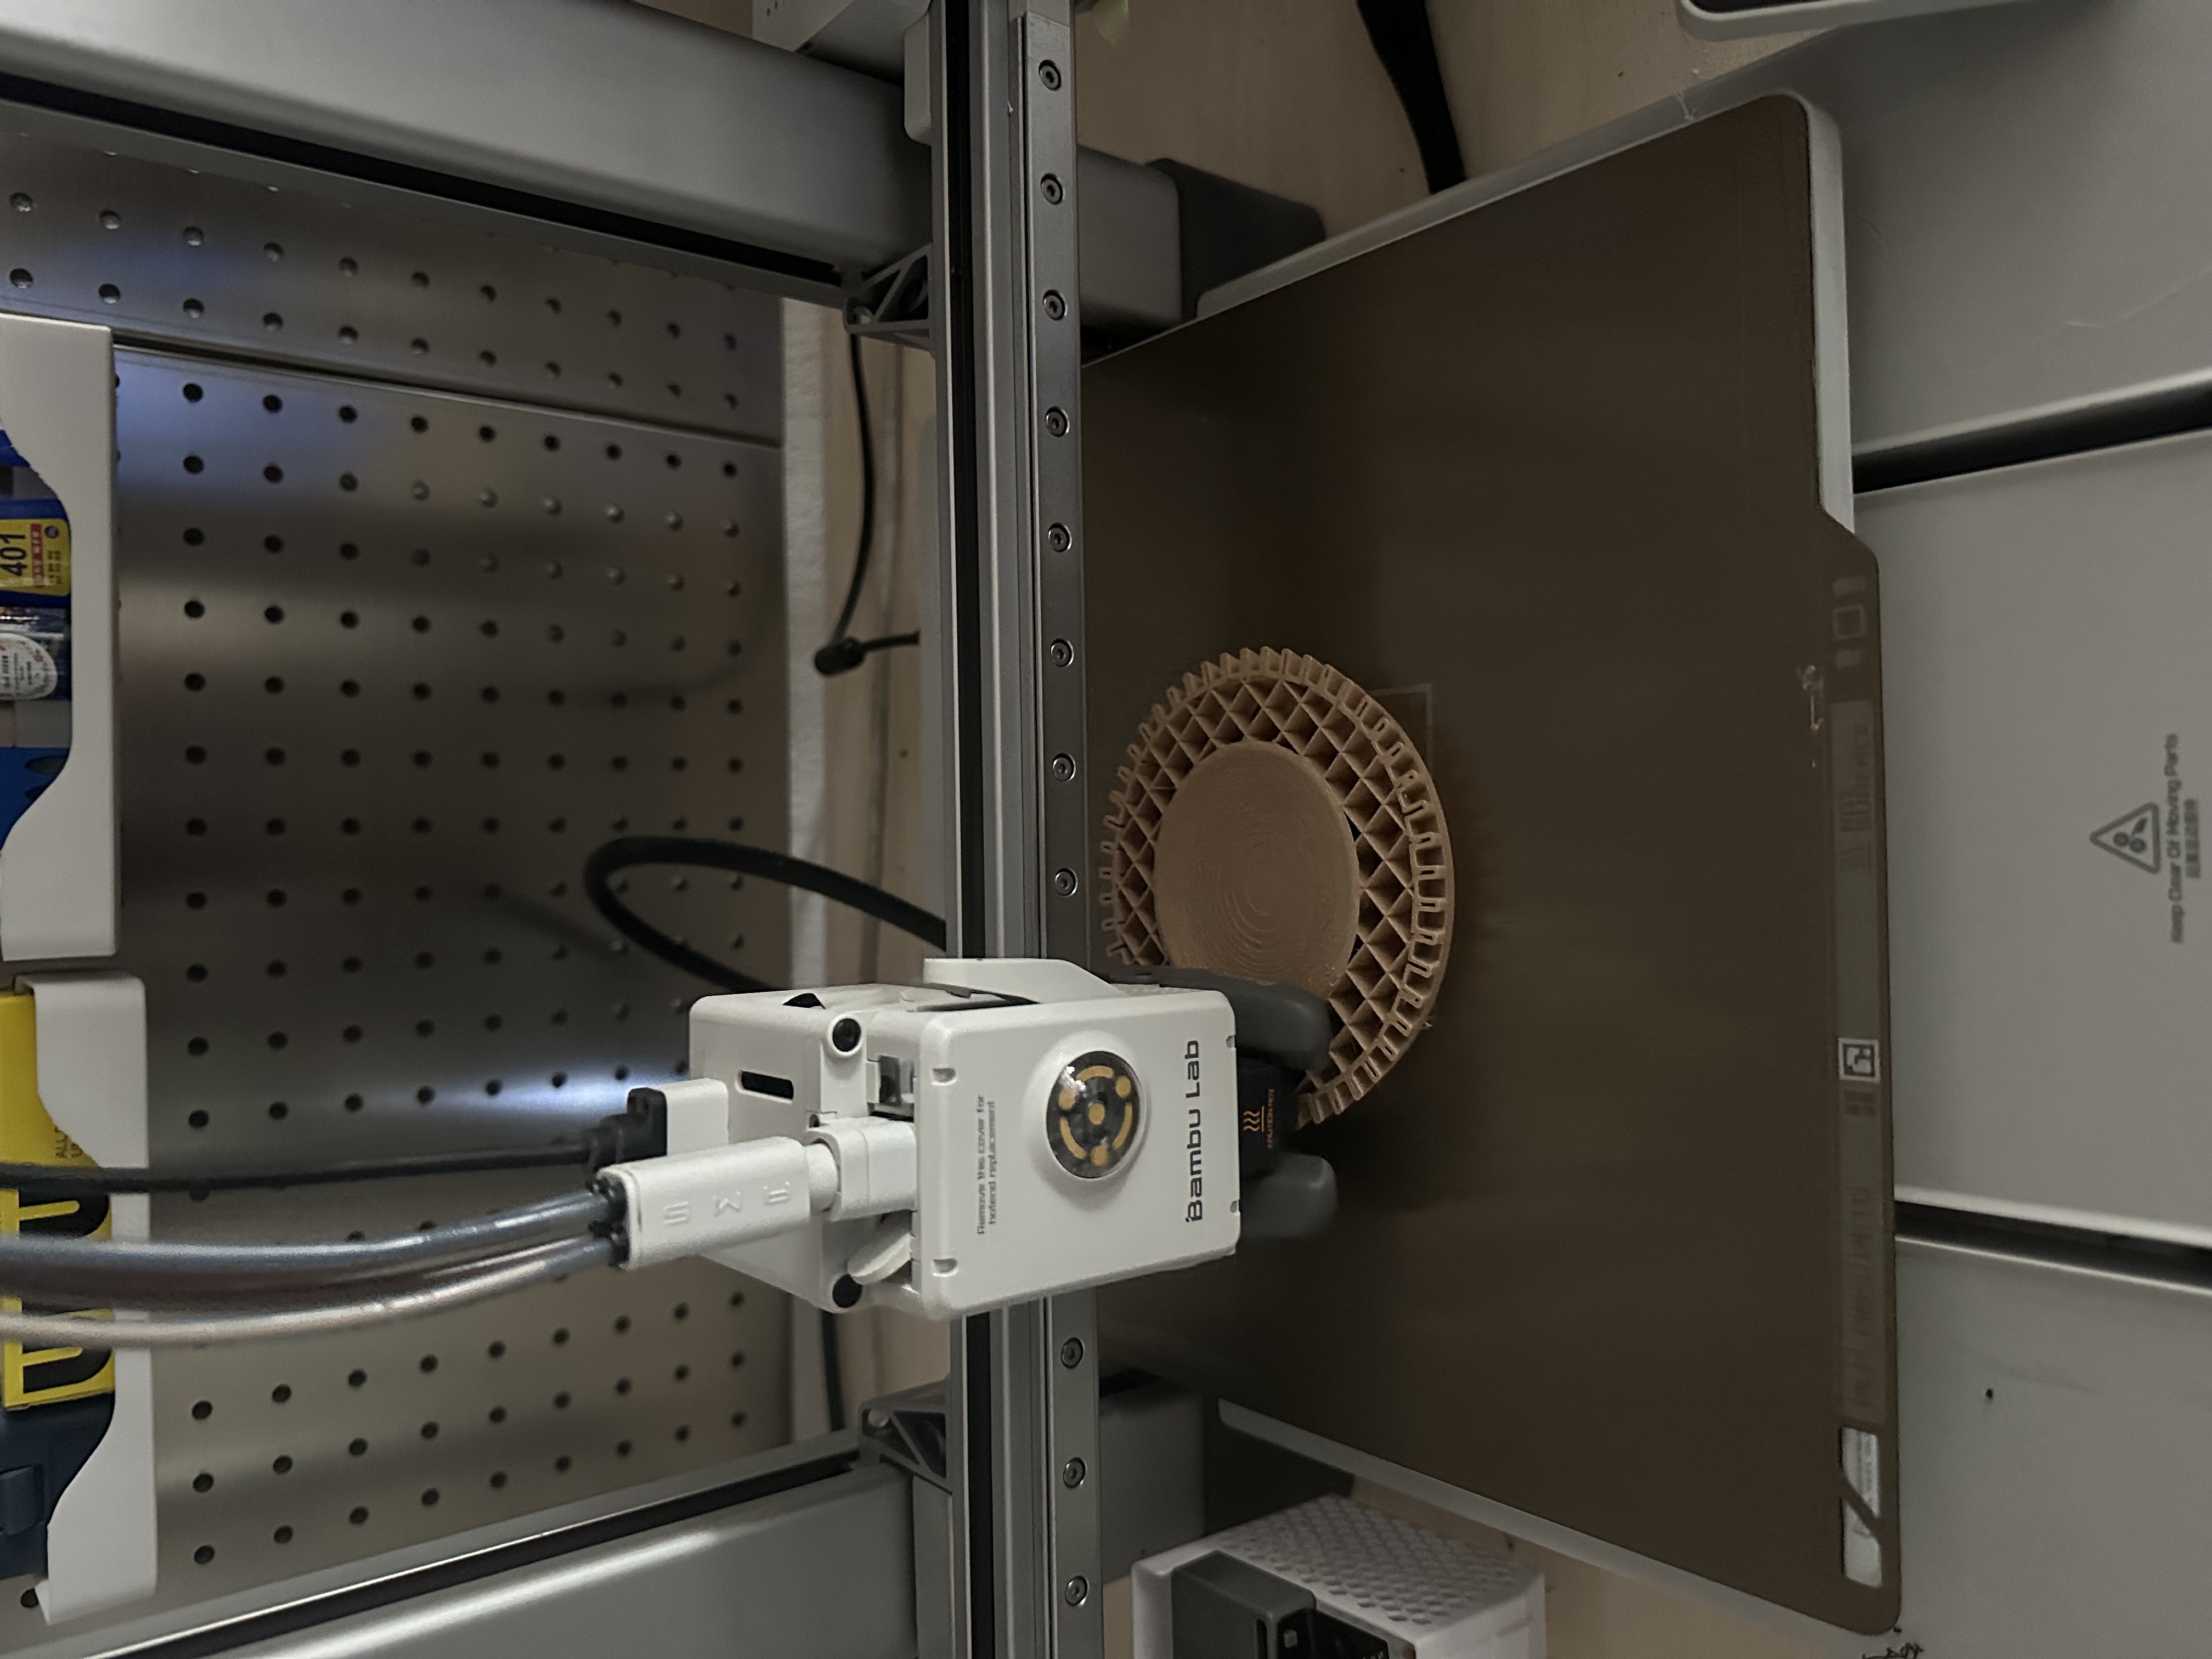
After editing the humidity sensor code, open the modeling software to design your own container shape with an open design. Students can design according to their preferred colors and shapes.
Pay attention to the dimensions of the sensor and the circuit board to ensure the circuit board can fit inside the container, making it both aesthetic and functional.
Having trouble? Let us know by completing the form below. We'll do our best to get your issues resolved quickly.
"*" indicates required fields