- Loading…

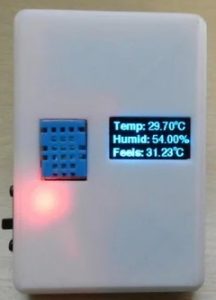
This is a diy project for kids between 10-16 years old.in this project we will developed a pocket weather station that anyone can carry with them, using basic electronic components, like Arduino, temperature humidity sensor, etc. If 3d printer is available student can design and print customize casing for assembled weather station.
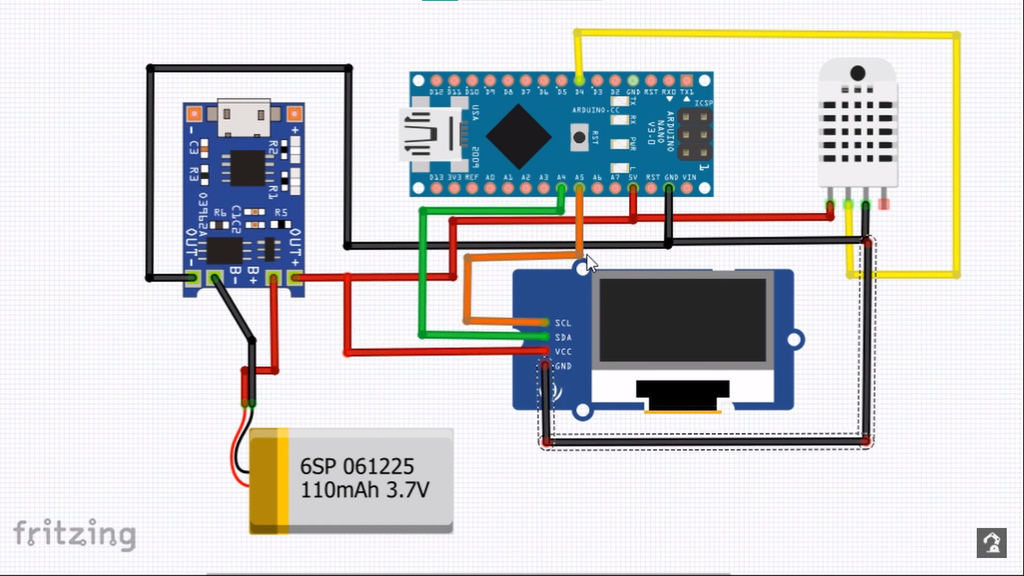
Components:
1. Arduino Nano with Cable
2. DHT11 Temperature Sensor Module
3.0.96″ OLED Display
4. TP4056 Battery Small Battery (I used 160mAh lipo battery)
5. Slide Switch
6. Jumper Wires
Tools:
1. Soldering Iron
2. Hot Glue Gun
3.3D Printer (for enclosure optional)
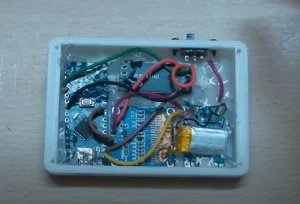
Interface all the electronic components as per given circuit diagram, before moving onward, student must be aware of Arduino, input output devices, digital analog signals.
Programming the Arduino with given code.
1.Download the Arduino ide software from Arduino.com website.
2.Download zip file library for DHT sensor and OLED from given link, then go to sketch menu and add zip file, select library to be install, Once it is installed .You will see “library installed “message at bottom of ide.
3.Open the new sketch, delete all previous data, copy the given code.
4.Understand the program line by line(try to build your own).
5.Go to tools, select Arduino Nano board, select bootloader as old at mega 128,then select port after connecting usb cable after connecting to Arduino.
6.Upload the program to Arduino.
7.observe the message on display.
Having trouble? Let us know by completing the form below. We'll do our best to get your issues resolved quickly.
"*" indicates required fields