- Loading…
This lesson works better if students had some previous experience working with Scratch or similar coding software.
The lesson focuses on students creating a reaction game with simple materials and using a Microbit microcontroller to program the game.
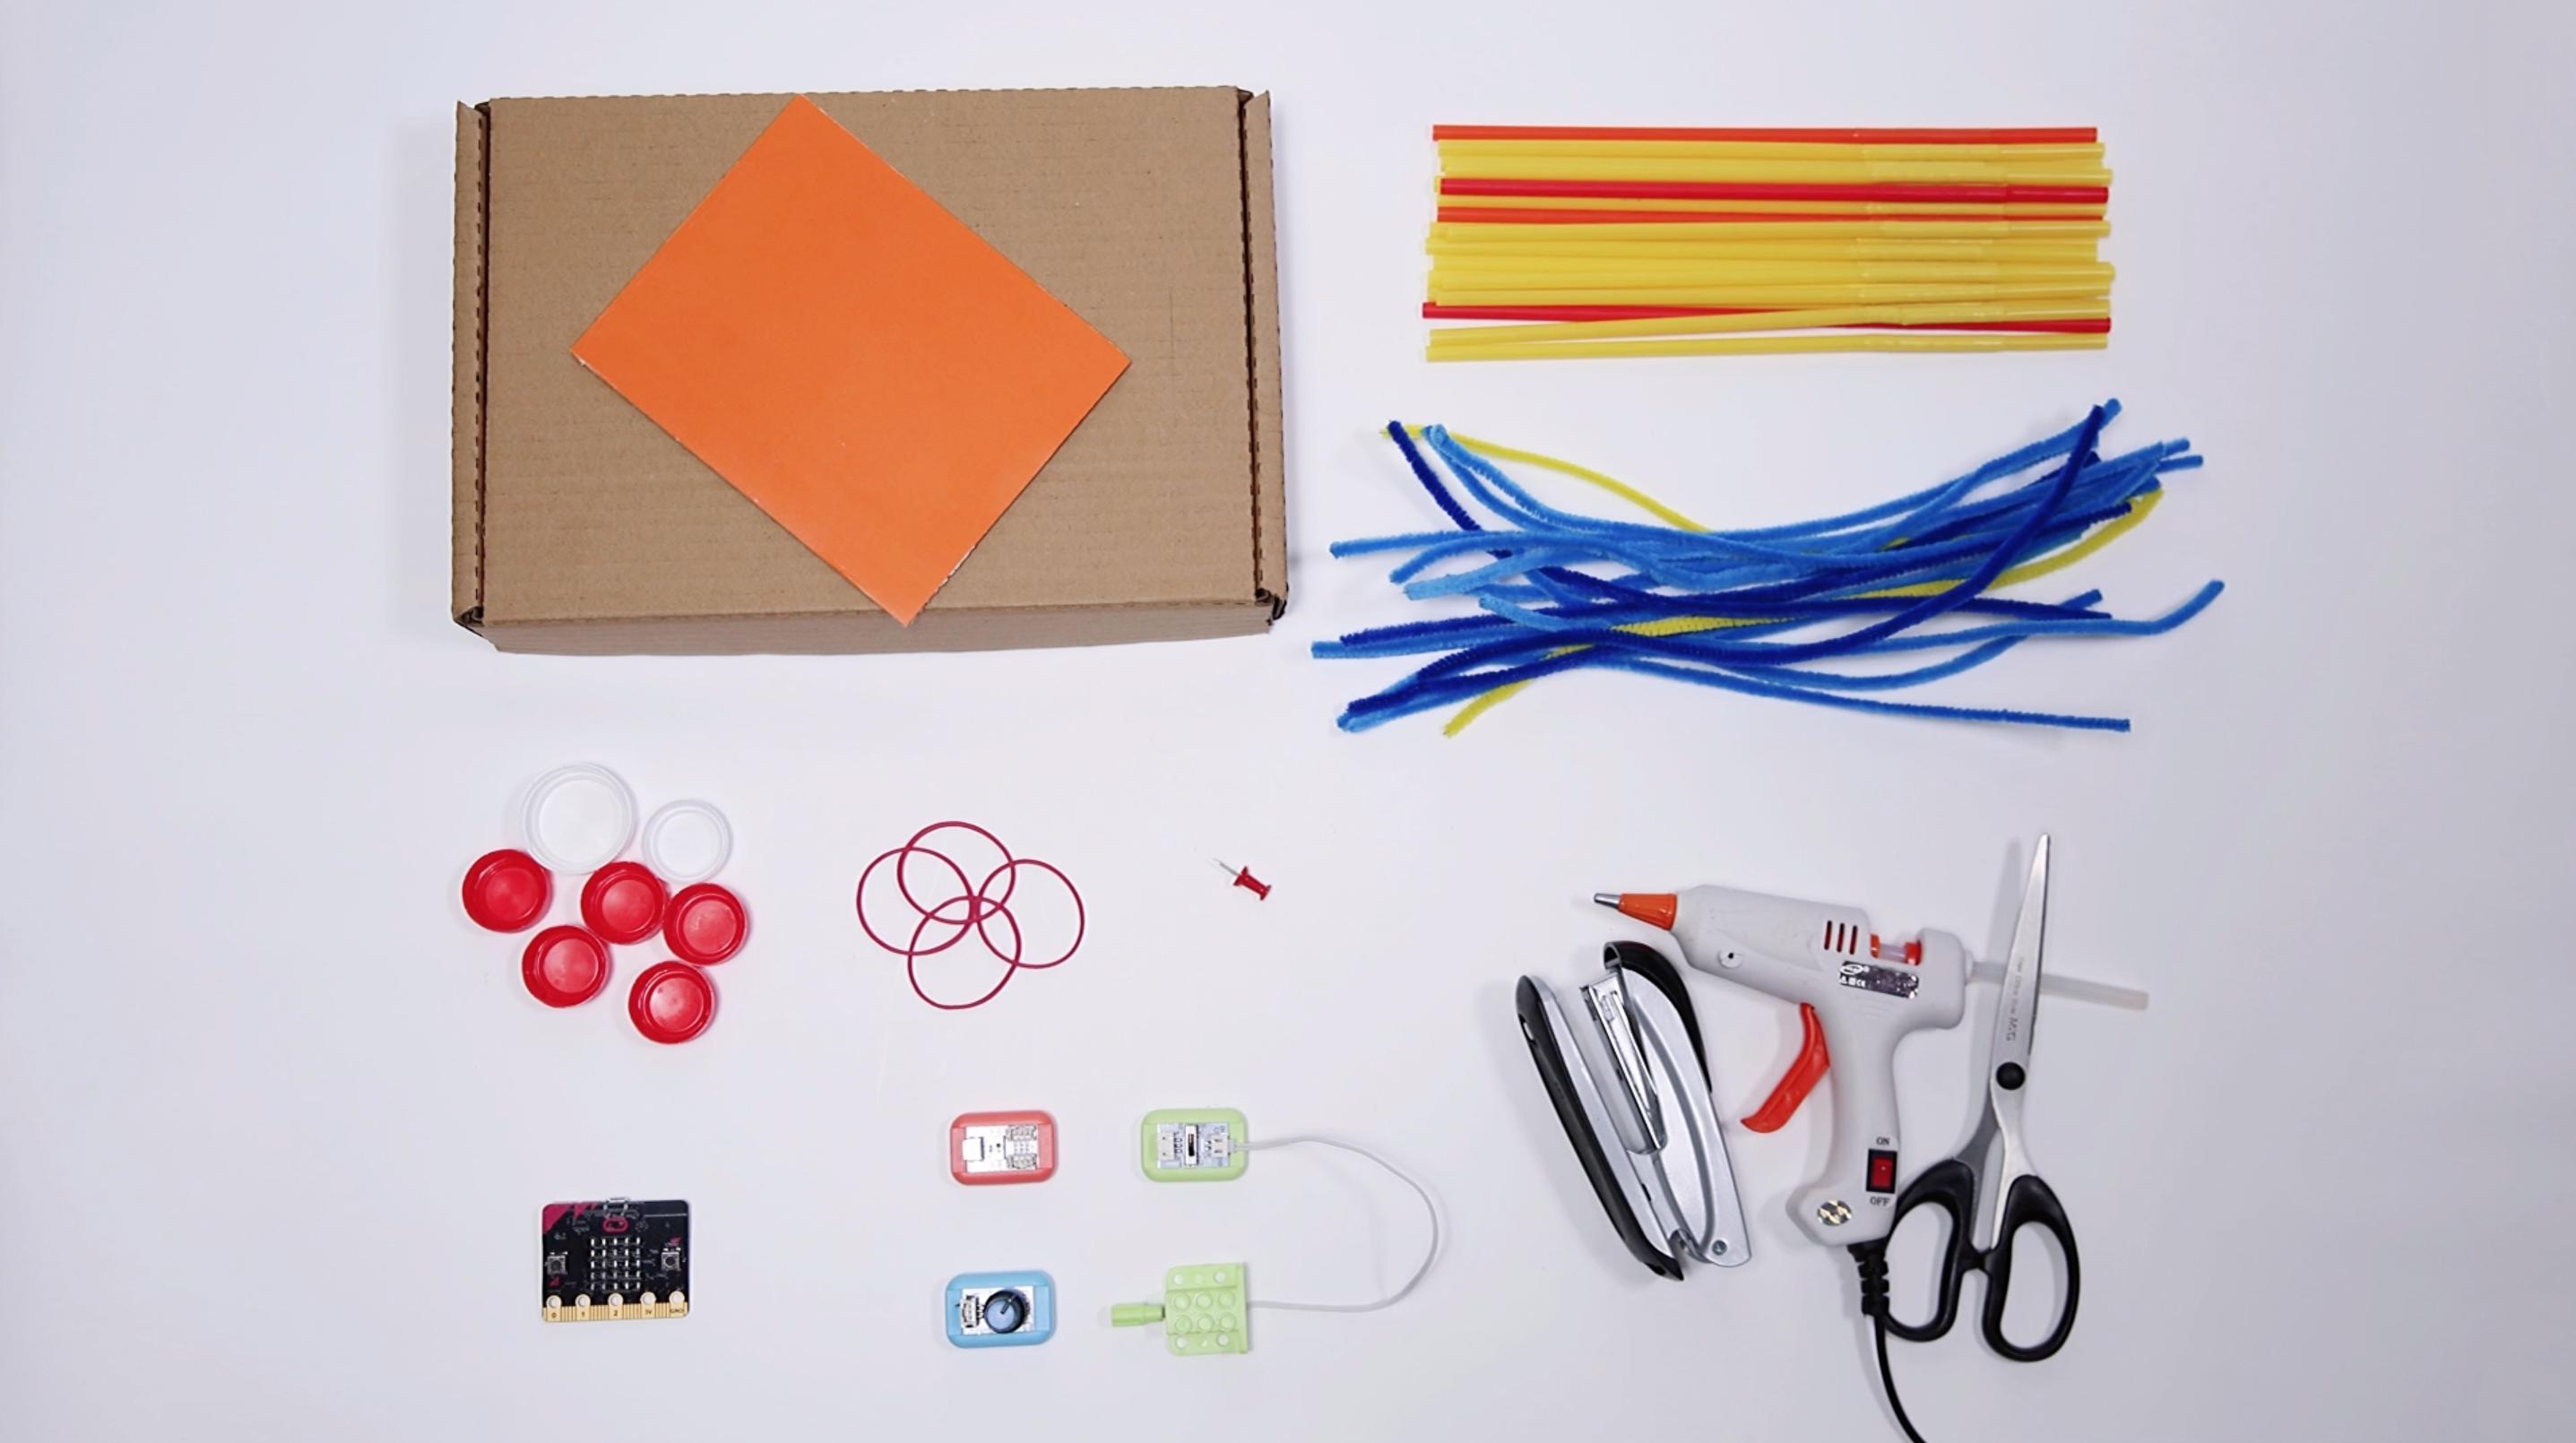
Materials needed
By the end of the lesson, students will be able to:
Through this task I developed my ability to design and teach an engaging lesson that introduces basic electronics and coding concepts through a practical and hand-on activity.
Starter activity to introduce the micro:bit and make a very simple code to show the coding environment and how to downloaded to the microcontroller.
Show a very simple MakeCode program on the board
Ask: “What do you think this will do?” Then run it on the micro:bit.
Briefly explain: micro:bit, inputs, outputs, and block coding interface.

Present the two-player reaction game, learning objectives, and success criteria.
Show a short demo of the reaction game.
Explain the challenge:
Highlight key ideas: input (pins), output (LED display), random delay and variables.
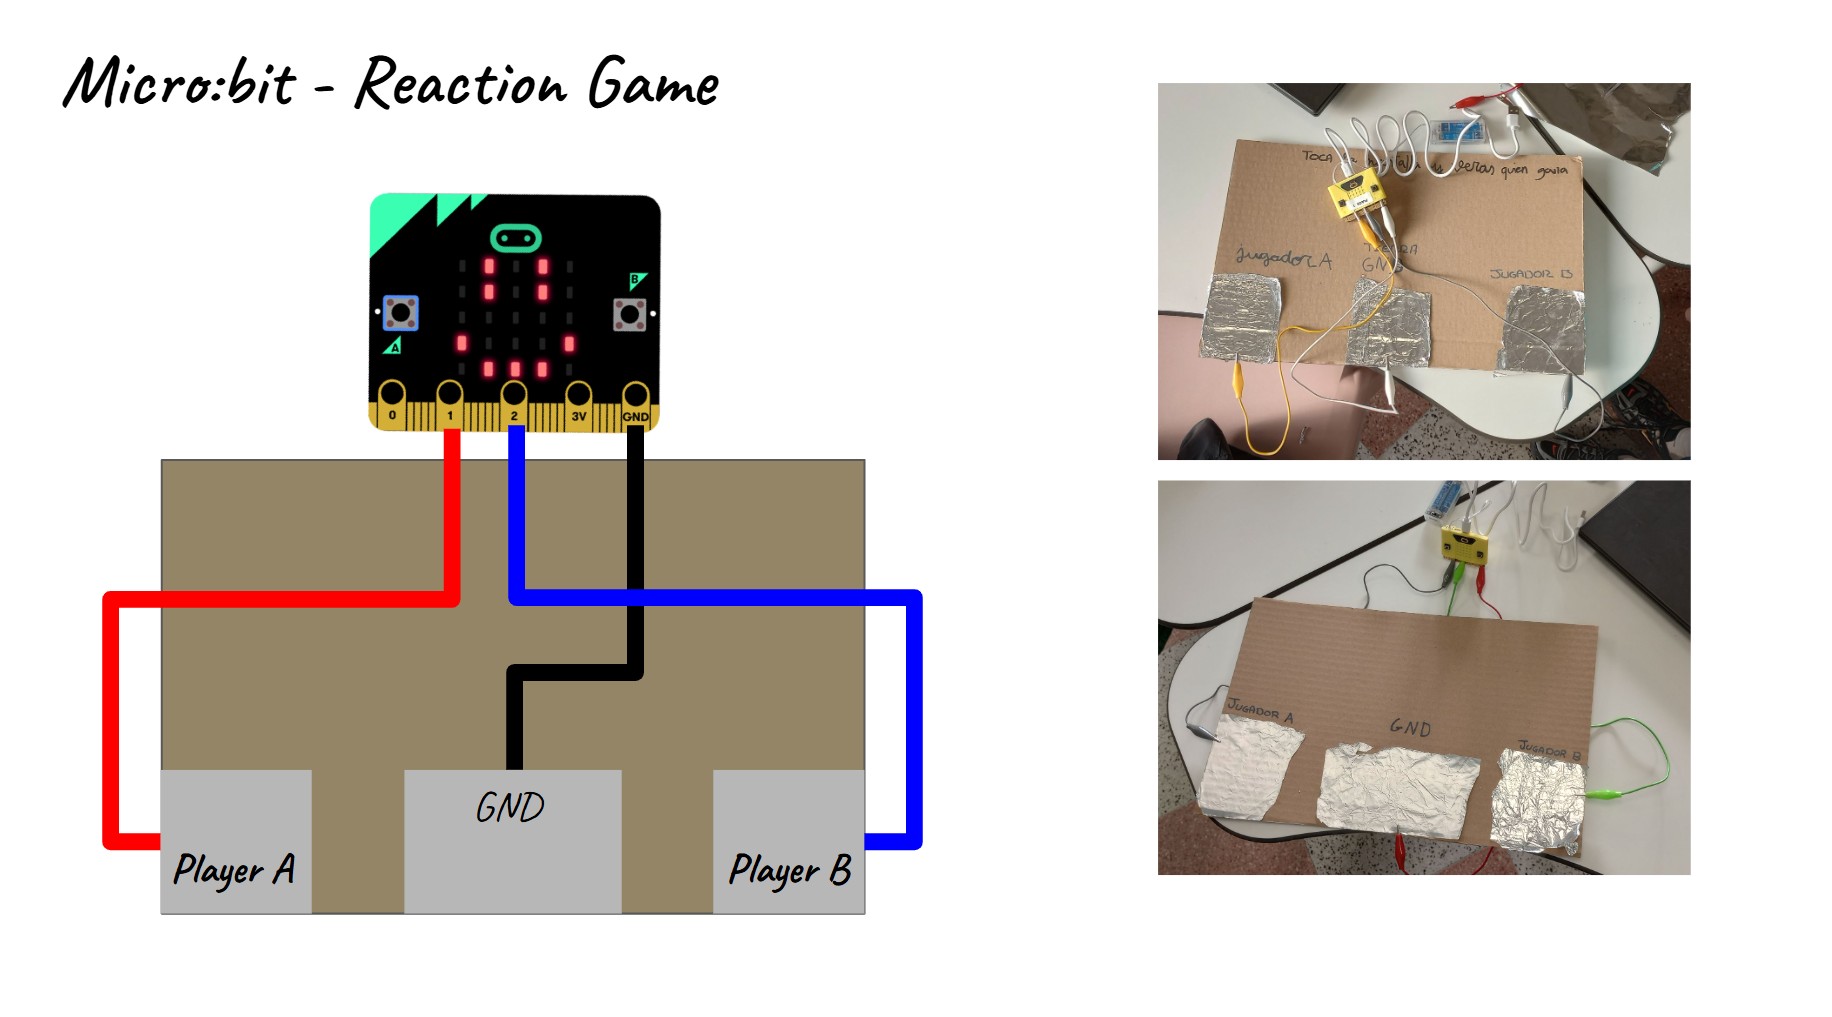
Students create simple external buttons using craft materials and connect them to the micro:bit pins.
Give each pair: micro:bit, crocodile clips, cardboard, aluminium foil and glue or tape.
Model connecting:
Ask students to build and connect their own buttons, following a simple diagram on the board.
Students create the core reaction game program using variables, random pause, and a loop to check for button presses.
Ask students to open MakeCode and create a new project called “Reaction Game”.
Provide a partially completed starter file or show the blocks step by step:
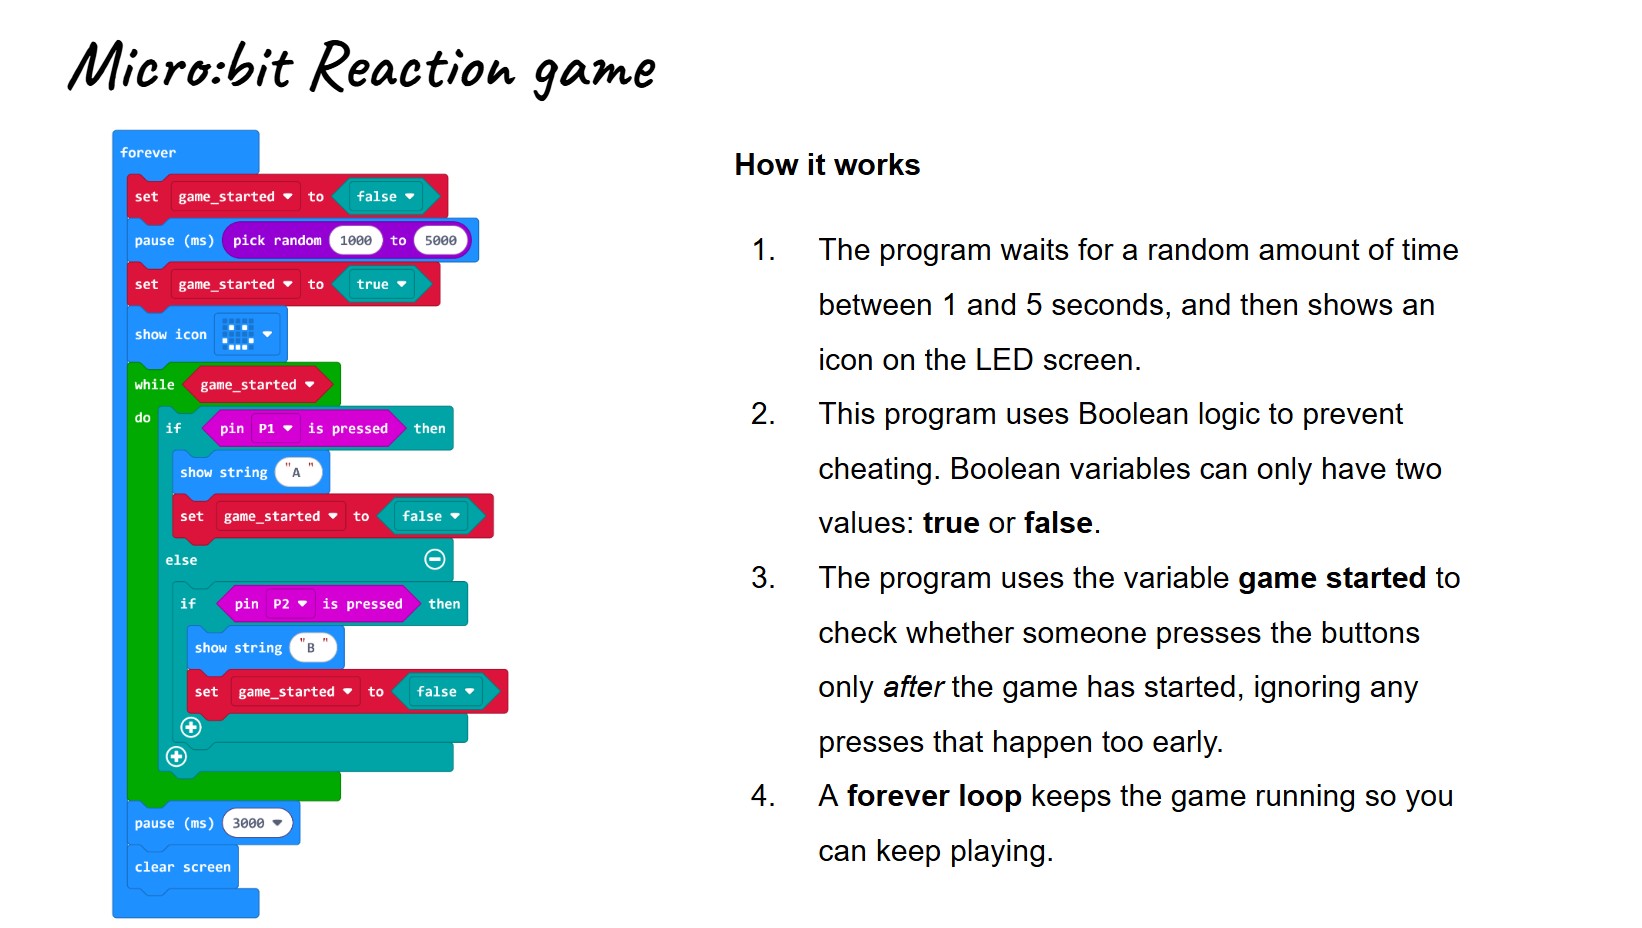
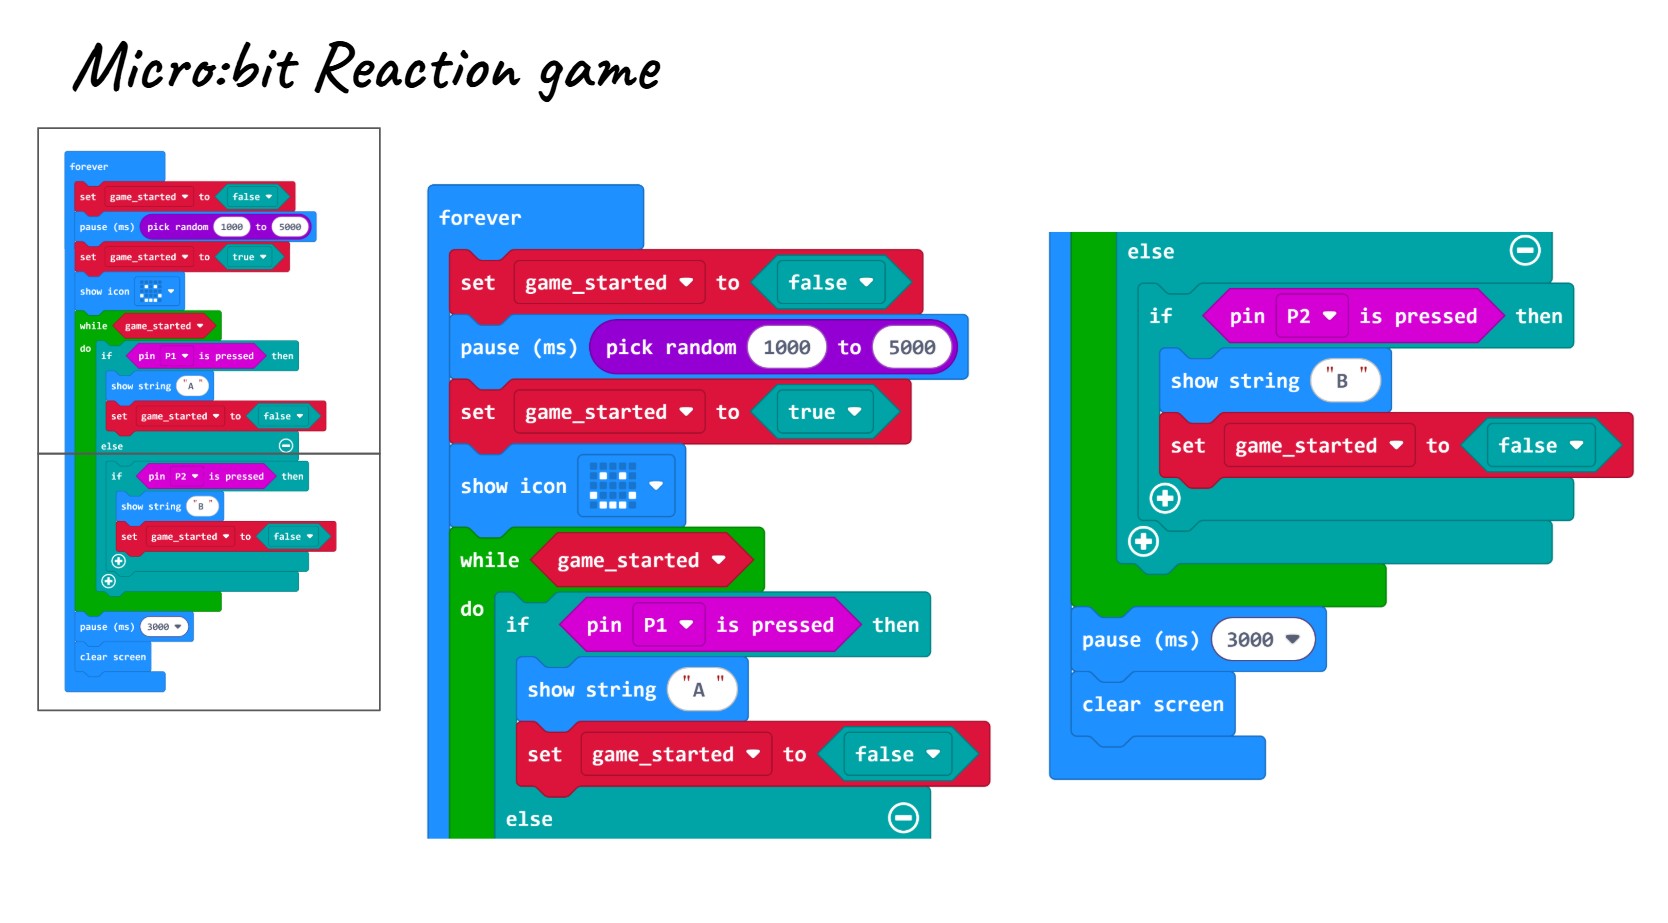
Link to code: https://makecode.microbit.org/S69668-42472-58413-57435
Students test their reaction game, fix problems, and reflect on how to make it fair and fun.
Ask pairs to test their game several times
If it does not work as expected, guide them to:
Briefly discuss as a class:

Optional challenges to extend students who finish early or need extra stretch.
Students may choose one or more of the following:
Students may need to use more variables: start, end and false start to complete the extension activities.
Here there is an example of how the code may be completed implementing the extensions above.

Link to code:
Having trouble? Let us know by completing the form below. We'll do our best to get your issues resolved quickly.
"*" indicates required fields