- Loading…

Rings are customizable, simple objects to 3D print. Over the course of five classes (hours), students will design and print rings to wear and share with classmates.
This lesson uses TinkerCAD, a free, web-based design software to design student rings. The lesson also utilizes Cura to prepare student’s designs for printing (Note: it is recommended to use this or a similar software provided by the 3D printer manufacturer).
Fab Instructors will help students design and print their rings.
3D Printer
Pipe Cleaners (x2-3 per student)
Ruler
Tweezers (for support structure removal)
Computer (one per student)
Design Process Data Sheet
Pencil
Software: TinkerCAD & Cura (or CAM/Slicer for 3D Printer)
Create an online class for students to join on TinkerCAD
Before any instruction, the instructor will want to create an online class for their students to join. These classes allow students to save their work in one location and the instructor to access their designs for the purpose of providing help, downloading for print, and evaluation.
To do this, visit www.tinkercad.com and select “Join Now” to create an account. Choose “Educators, start here” and provide the necessary information. Once logged into your account, select “Classes” from the menu bar in the top right to create your class(es). After your class is created, the instructor will need to enter a student’s name and “nickname”. Nicknames are the name students will use to access the online class. Students will also need the class code to input while logging on to Tinkercad. This code is unique to each class and provided under the “Class Code” button.

Challenge: Create a 3D printed ring to celebrate you! Identify: Articulate the criteria and constraints of the challenge (10-15 minutes).
As students enter the class, the teacher should have an example ring designed and printing on the 3D printer. Allow students to watch the 3D printer produce a portion of the ring.
Share with students the following or similar images about 3D Printing:
3D Printing, also known as Additive Manufacturing, is a process that creates objects by stacking or adding layers of a material together. It’s possible to 3D print a number of materials, including plastics, metals, woods, biotic matter, and food products. 3D printing allows for the customization of products. Attached in this lesson is a document showing examples of wearable devices that were 3D printed or modeled specifically for their user. Share these images with students.
Pass out Engineering Design Process Sheets. Under “Identify”, ask students in groups to create a list of criteria and constraints around the project. Inform them that 3D printing on most printers is a time-consuming process. Some suggestions may include:
Research: Analyze one or several example solution(s) (rings) to this challenge (5-10 minutes). Develop Solutions: Sketch initial ideas for rings on paper (15-20 minutes).
Share with students the completed ring from the 3D printer along with other example rings. Ask the students “in what ways does this ring, or solution, meet your own criteria and constraints?”(Strengths) or “in what ways could this ring be improved?” (Weaknesses). After discussing, refer students to their data sheets to record these responses under “Research”.
Optionally: the instructor may allow students to search online for ideas of rings. If so, have students find and select one of these rings and record their answers to the previous questions.
Pass out computers to students. Instruct them to select “Join Now”, then “Students, join your class”. Provide to students the nickname and class code set up earlier in this lesson. Once they are logged in, instruct students to select “Create new design”.
Allow students 10 minutes to explore Tinkercad without answering their design questions. This will give students a better understanding of this online tool and sense of self or peer-reliance.
After 10 minutes, have students return to their data sheets. Under “Develop Solutions”, direct students to draw at least three unique ring ideas. It is important for students to formulate an idea initially before spending more time on TinkerCAD. Once their sketches are completed, have students attempt to design these sketches online.
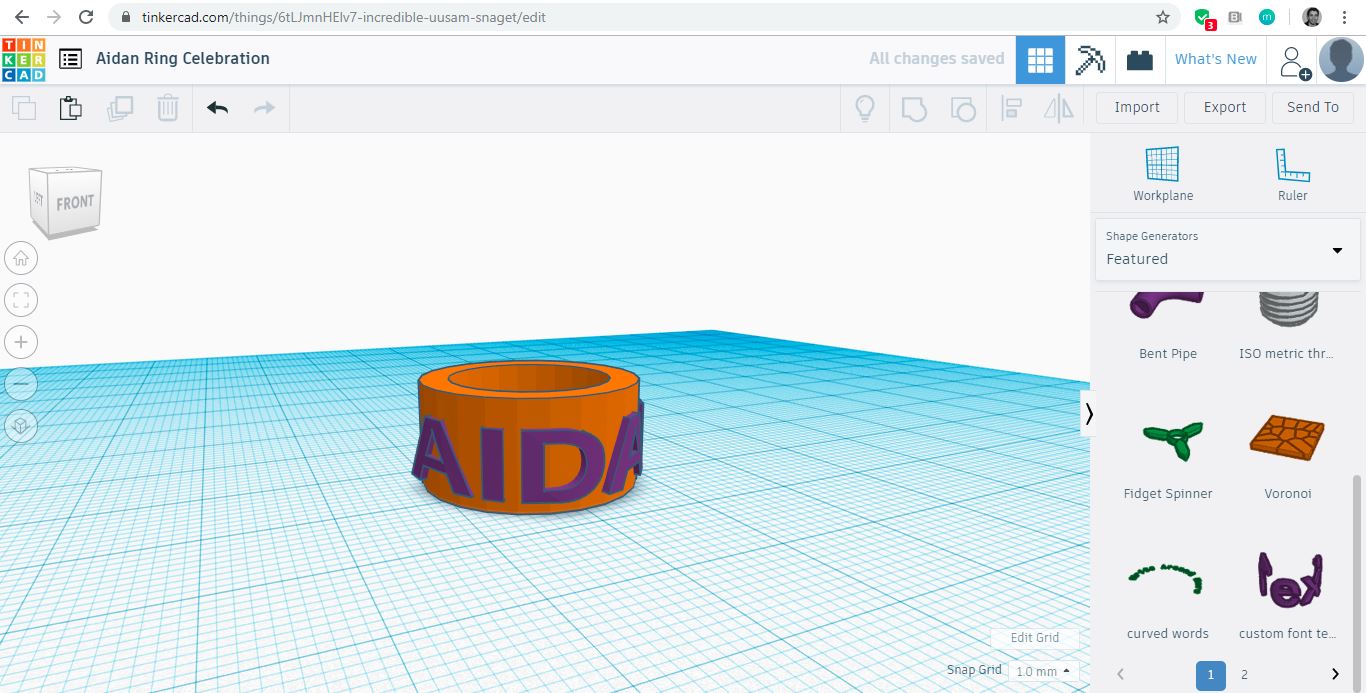
Note: If this is a student’s first time designing with TinkerCAD, it’s recommended to use either the “Ring” or “Tube” shapes as the base of the ring. See Step 6 for more detail.
Debrief students current understanding of TinkerCAD and their project goals. (10-15 minutes)
Once all students have three sketches on paper, the instructor will encourage students to demonstrate their knowledge of Google Drawing. Students should be able to complete the following tasks:
After students have demonstrated these skills, encourage them to share their current progress with one another. Students should share one skill they learned with their peers.
To further explain the function of the 3D printer, pass out pipe cleaners to students. Tell students the 3D printer uses a spool of plastic (or other material) which feeds into the extruder and hot end to melt the inserted strand into the designed shape. This is an example of computer controlled manufacturing.
To demonstrate the difference between human and computer controlled manufacturing, tell the students they have 1 minute to use one consistent strand of pipe cleaner to form one of their rings. The added designs on top (such as a heart or diamond) must be formed from the same strand of pipe cleaner and not separate. As students will quickly see, it’s difficult to complete this task, but a computer controlled machine can do it multiple times with ease.
Pass out rulers to students. Guide students through measuring their ring finger at the widest point, or second knuckle, as seen in the picture above. Alternatively, students may trace their hand and use a ruler to measure the distance between the line tracings. Have students record this number on their data sheets.
Select Solution: Choose and refine the ring to digitally design (10-15 minutes).
Students should select one design from “Develop Solutions” to sketch to scale on paper in “Select Solution”. This will clarify the goals of their design to anyone that might help them, especially the instructors. Additionally, applying scale to their design on paper will give students an understanding of it’s actual size separate from that which may appear on their computer screen.
In a new design document, students should create a larger, scaled version of their selected ring.
Provide students with a necessary modification to their ring (5-10 minutes).
Note: If this is a student’s first time designing with TinkerCAD, it’s recommended to use either the “Ring” or “Tube” shapes as the base of the ring.
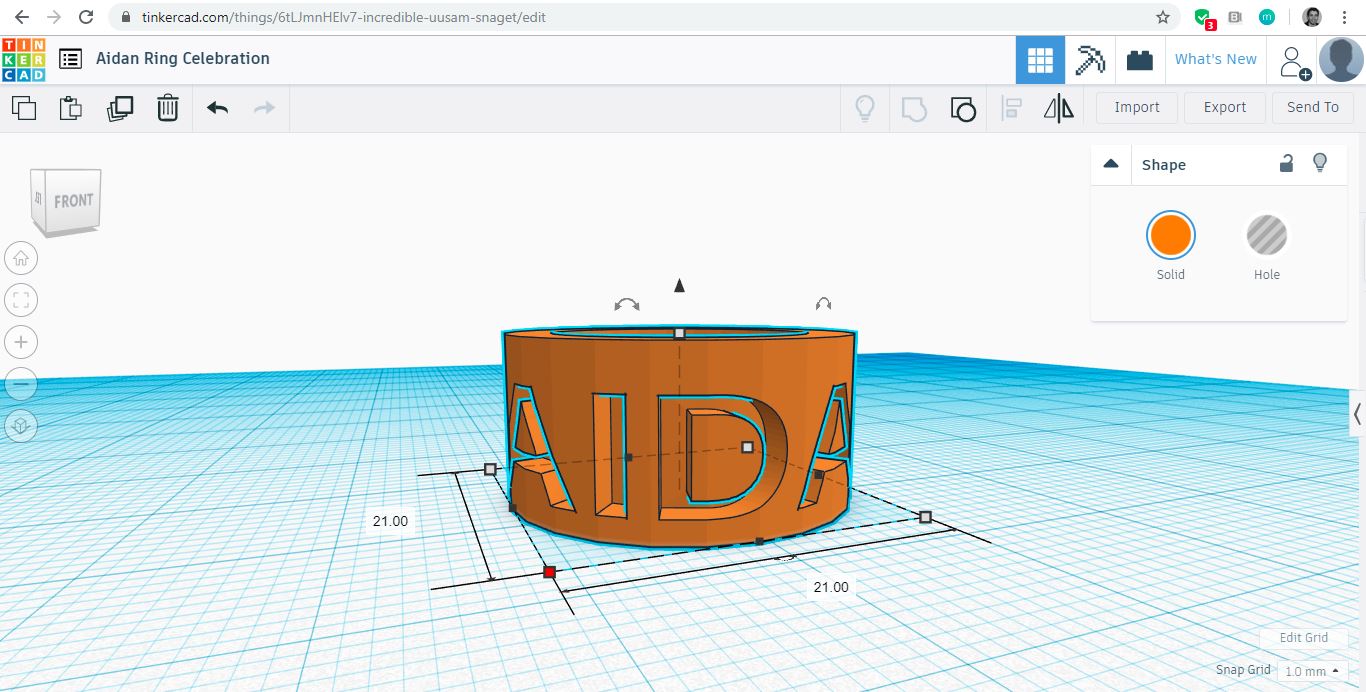
Inform students that if they are using the Ring or Tube shapes to design their rings, there, they must adjust the size of their ring in order for it to fit their finger. The number they recorded with the ruler is the diameter of the ring’s inner circle. However, Tinkercad measures the width of an object from end to end. In order for the ring to fit their finger they need to account for the total width of the object using the image below.
Example: If a student’s finger is 19mm and they want to design a ring with the “Tube” object, they would add eight to the width and height of their ring (19mm—> 27mm).
Alternatively, if a student is designing a ring from scratch, they could add and resize a cylinder to their measured value and give it the property of a “Hole”. After that they can add the resized cylindrical hole to any shape in order to form the rest of their ring.
Prototype: Finalize student designs and prepare them for the 3D printer.
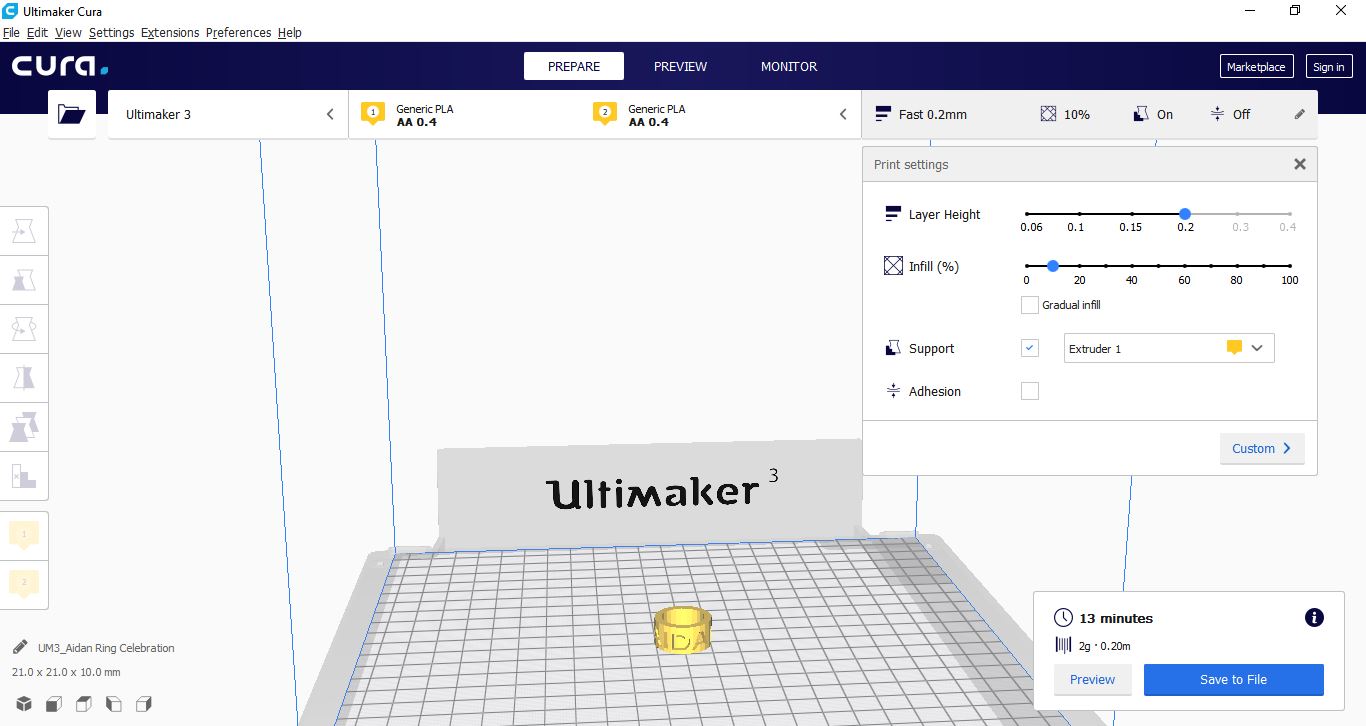
Allow students time to finish their ring designs. When they are complete, the instructor or student can download the file by selecting “Export” in the top right of the page. Select “.stl” and open the downloaded in the Cura CAM/slicer software.
The Cura software will calculate the time required to print their rings. Rings may not take longer than 15 minutes to print as a constraint established earlier in this lesson. If a ring takes longer than 15 minutes with a “Layer Height” of 0.2 and “Infill” of 10%, instruct the student to return to TinkerCAD and modify their ring (Example: lower the overall thickness of their ring, or reduce the size of an added feature)
(Safety note: The hot end of the 3D printer reaches around 200C (~400F). To ensure student safety, it is recommended that only the instructor operate these machines.)
Completed ring designs will take time to 3D print. The instructor may want to 3D print the rings between classes. However, it’s important to be in the room while the machine is 3D printing for the safety of the students and machine. It’s safe to print up to about five rings at a time. Once rings are all printed, hand students their completed rings!
Test: Examine the effectiveness of the ring (5-10 minutes). Evaluate: Gather feedback from a classmate (5-10 minutes). Communicate: Brainstorm ideas to improve the ring and share with a group (5-10 minutes).
Redirect students’ attention to their datasheets. Under “Test”, allow students to answer the questions regarding the function, strength, and weakness of their ring. Refer students back to the “Identify” and “Research” sections to help answer their “Test” questions.
For “Evaluate” partner students to provide feedback on their peers rings. Student and peer should swap Design Sheets. Peers should write down constructive input about a partner student’s ring on the swapped Data Sheet. Afterwards, return the Data Sheets. If there is any confusion surrounding the design, students may explain the choices they made for their ring.
Finally, students should document at least two features about their ring they want to improve for “Communicate”. Students should utilize the feedback they received from their peers about their design. If classes have the time, instructors may allow students to develop solutions for a redesigned ring within TinkerCAD and apply the design process once more!
Typical errors students will make their first time designing in 3D
Students may not properly connect all pieces or features of their ring. If this is the case, instruct them that if they don’t embed the features into the base, they will print separately. Additionally, ensure they wanted a feature with a positive (“solid”) or negative (“hole”) property before printing.
Another common mistake is to underestimate the fragility of the plastic material at this size. In the example shown below, not only is the ring not entirely attached to the base of the ring, the diamond will likely snap off if printed. Reduce the size of the diamond and embed the tip slightly more into the ring to avoid this issue.
Having trouble? Let us know by completing the form below. We'll do our best to get your issues resolved quickly.
"*" indicates required fields


I successfully used this lesson to instruct on 3D modeling & printing at a public library using Sindoh 2X printers. Rings can be more accurately modeled using ring sizers for finger guage. After my students determined their rings size, I instructed on the use of digital calipers to measure the inside diameter of the ring. Students using the tube or ring shapes added Aiden’s recommended measurements to model a ring with accurate fit. For rings created out of a solid shape achieved accurate size by setting the diameter of a hole-cutting cylinder to match that measurement taken with the calipers. Great lesson!
Thank you for the great feedback, Pokosun!