- Loading…
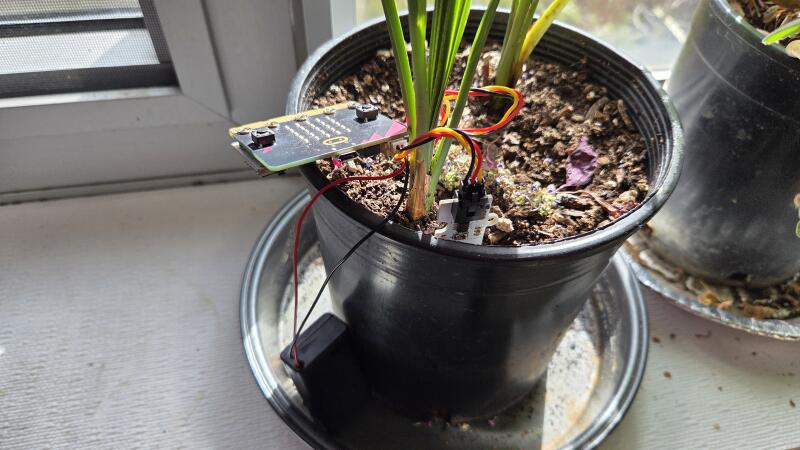
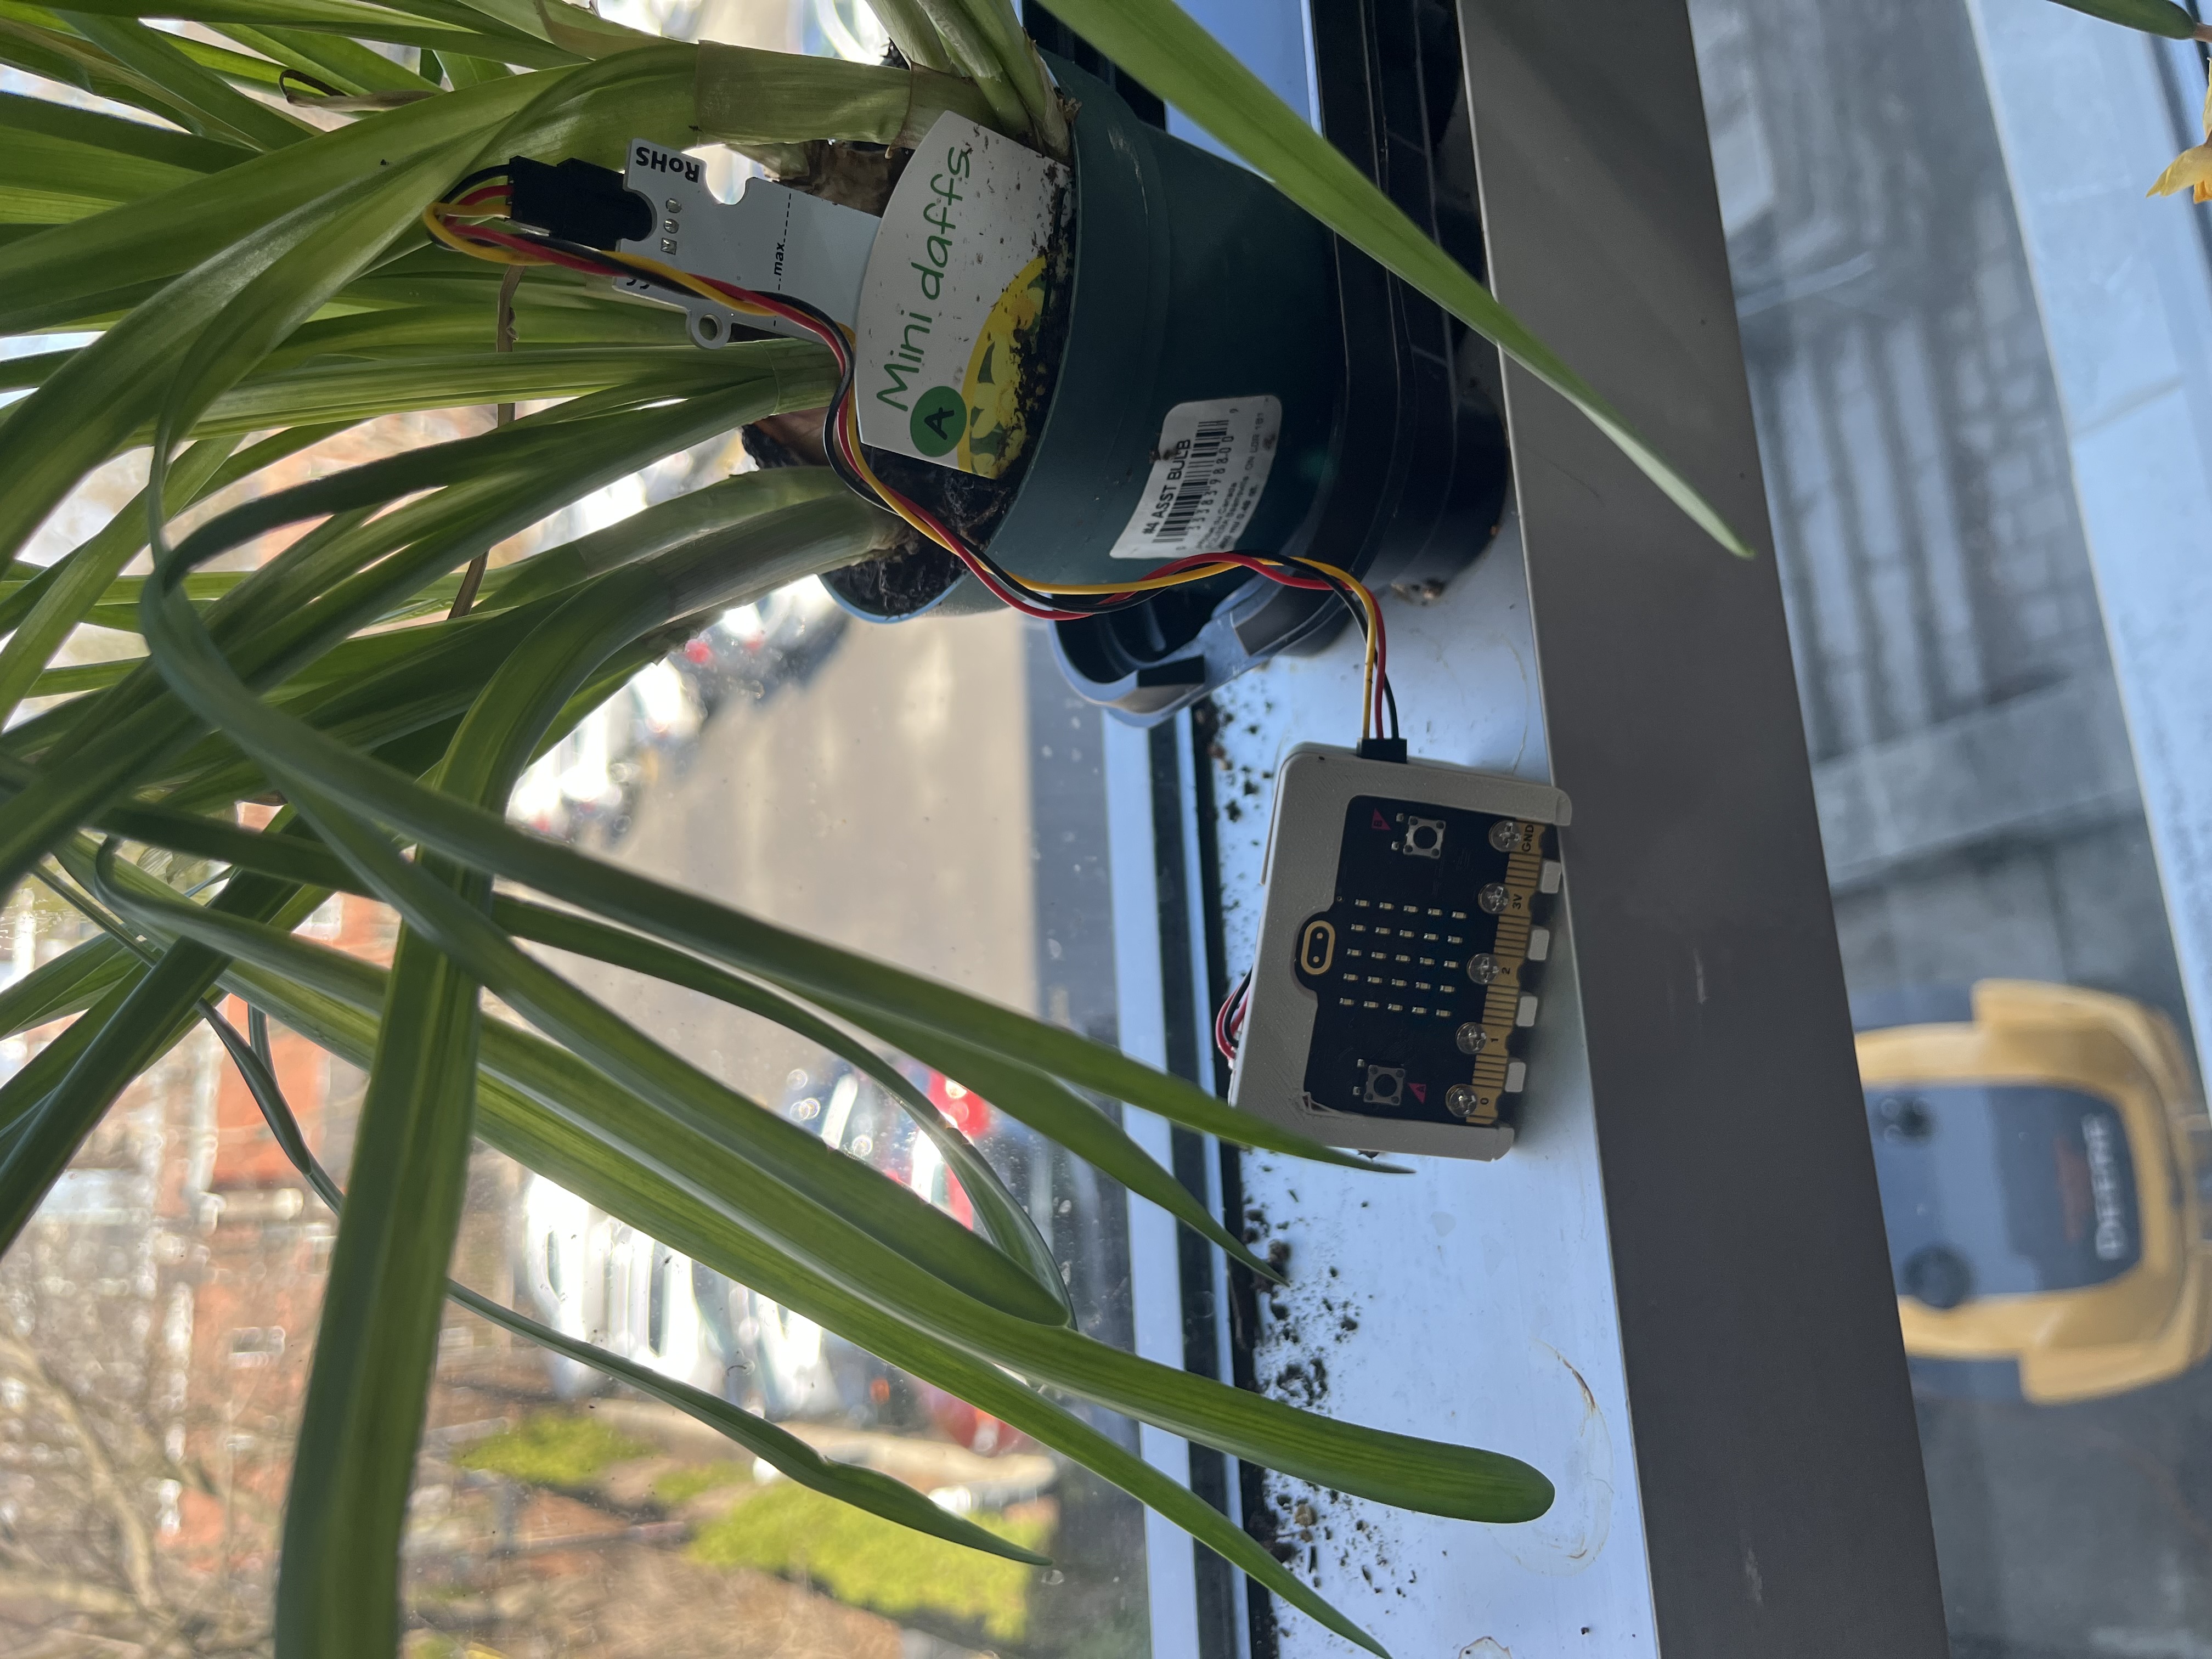
Students will design and grow a plant in a custom 3D-printed pot while building a micro:bit-based sensor system to monitor environmental conditions (light, temperature, and soil moisture). They will use data to make informed decisions about plant care.
The primary learning objectives for this activity are for students to understand:
Secondary learning objectives include:
Collaboration: Reflect on how you worked with colleagues or FLA participants during the Field Activity. At what stages of development and testing did the collaborator contribute? Please be detailed in your description. How did your collaborator’s perspective change the way you developed the lesson?
The collaboration between myself and Brady Snyder (LCC Fab Lab) was highly productive and iterative throughout the development of our Field Activity. Early in the process, we met to share and refine our initial ideas. Brady proposed designing a lesson centered on optics, integrating Physics, Design, and Environmental Systems Science. I, on the other hand, proposed an interdisciplinary unit connecting Design with our school gardening club, where students would use sensors to collect data on sunlight, temperature, and soil moisture to better understand and support plant growth.
After discussing both concepts, we quickly brainstormed implementation possibilities and decided to move forward with my idea, as it was more feasible within our school context and could be implemented more efficiently with available resources.
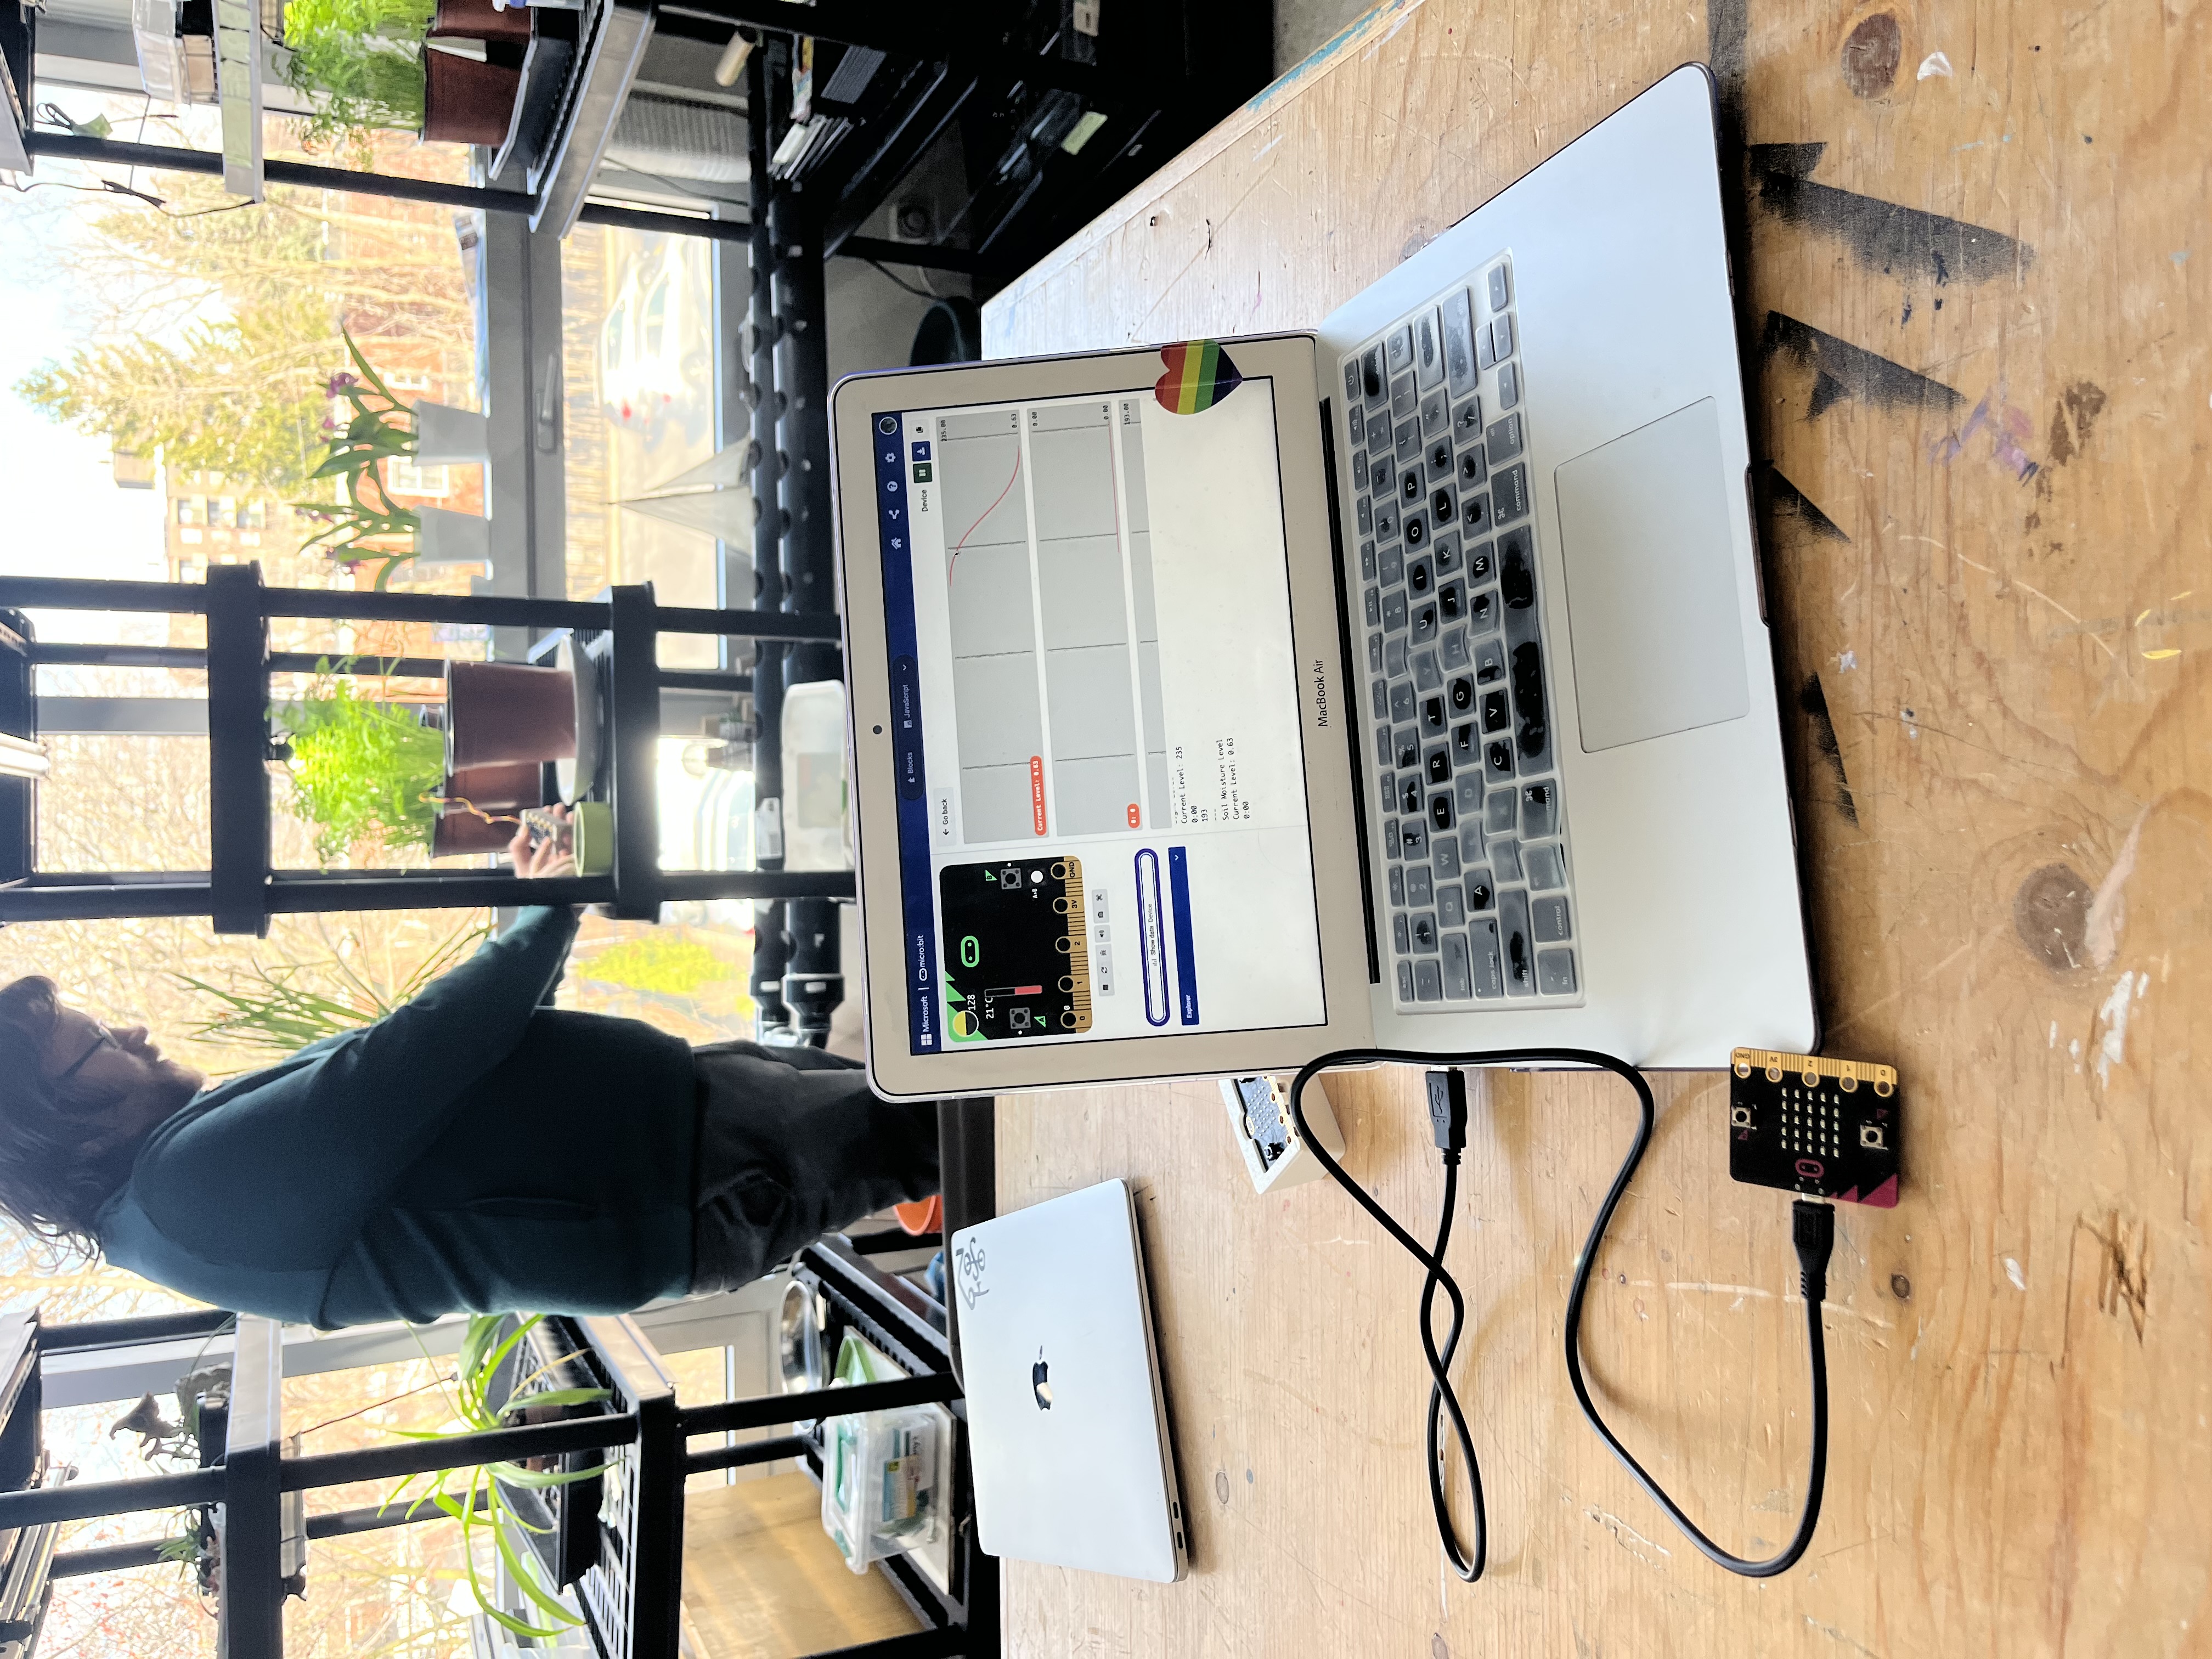
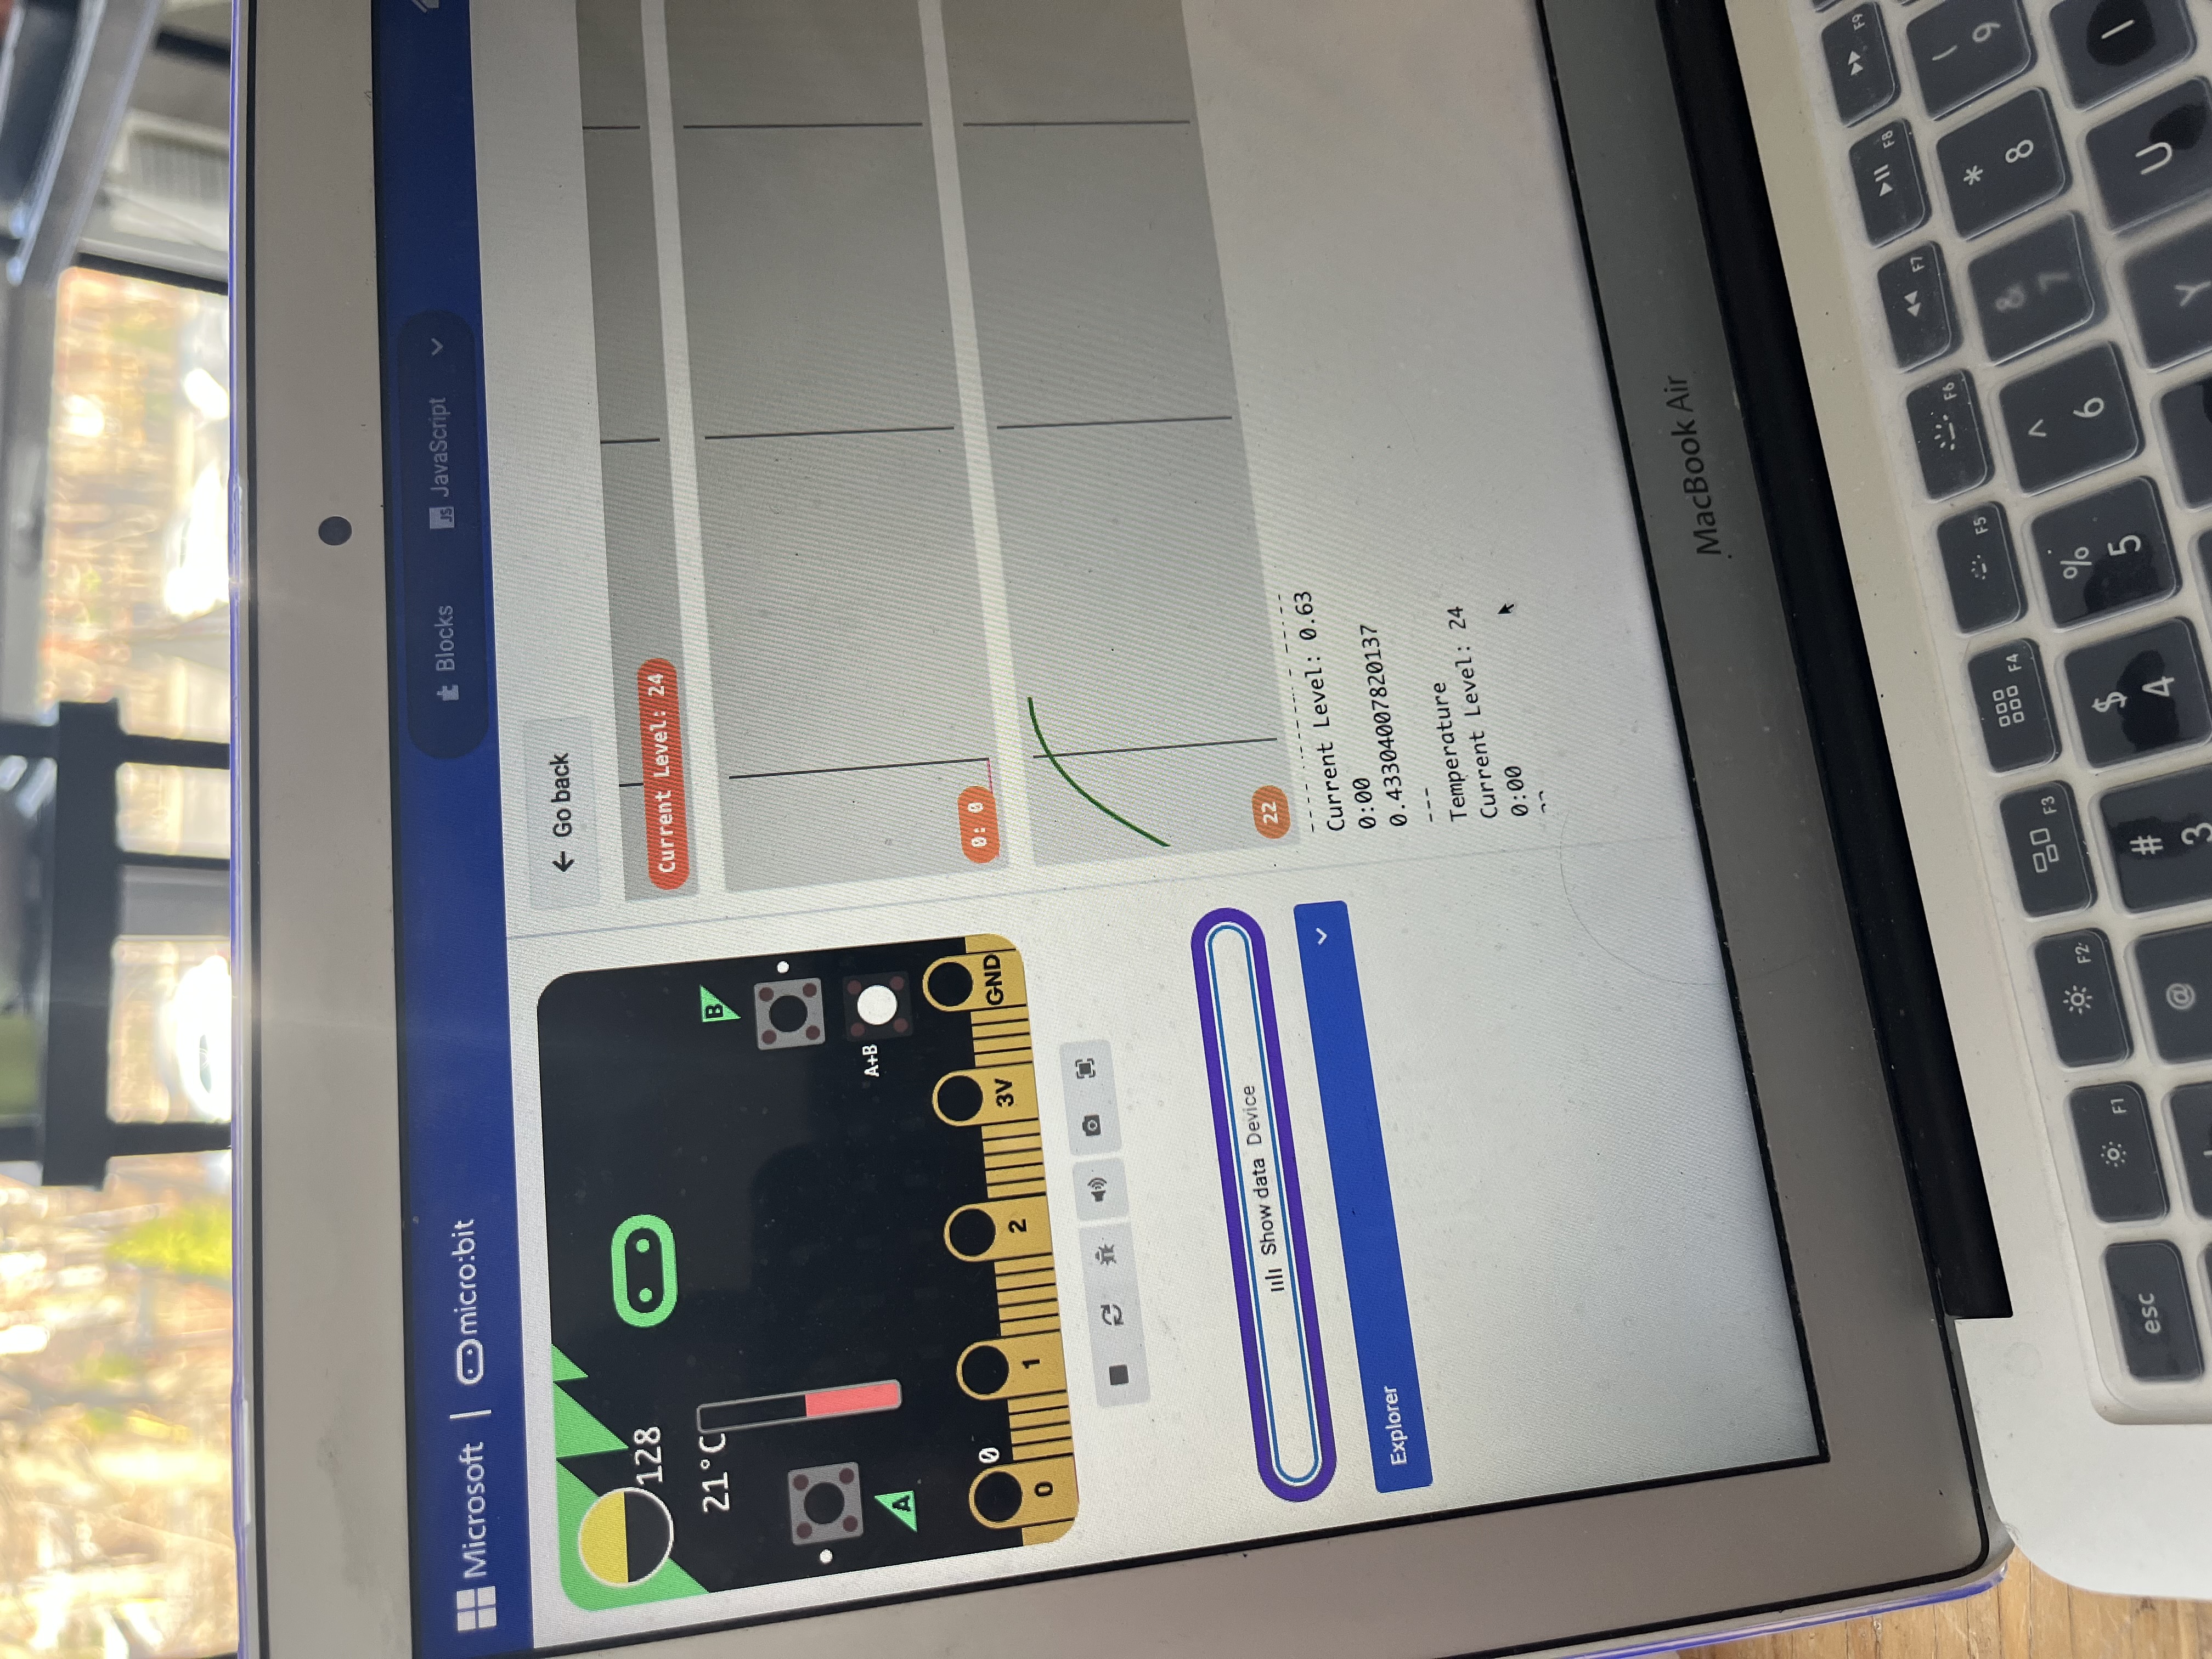
Our collaboration continued through the development and testing phase. We both experimented with coding solutions for data collection, comparing approaches and combining the most effective elements from each. This iterative process led us to refine and ultimately develop our own custom code. We also worked jointly to troubleshoot and successfully implement the Micro:bit radio communication between devices. In addition, we tested the soil moisture sensors together to ensure accuracy and reliability in real-world conditions.
For the final presentation, we divided responsibilities based on strengths and interests: I focused primarily on the research component and the 3D-printed elements of the project, while Brady concentrated on the coding and technical implementation.
This collaboration significantly shifted my perspective on data collection and system design. Initially, I envisioned a continuous, real-time data monitoring system that would allow remote access at any moment. However, through discussion with Brady, I recognized the limitations of this approach in terms of complexity and reliability. He suggested instead collecting data at regular intervals (e.g., every hour), which ultimately proved to be a more practical and effective solution for our context.
Instructional Challenges: What challenges did you encounter while teaching this lesson? How did you address or plan to address them? How are diverse learners’ needs being met in the lesson plan facilitation?
One of the main instructional challenges encountered during this lesson would be maintaining consistent student engagement. Given the age group, students can become easily distracted, and even well-structured, time-bound activities require ongoing redirection and support to keep learners focused and on task.
Another challenge is managing students being overwhelm. Although the lesson is intentionally designed with a low floor and high ceiling to support a wide range of abilities, some students can still be hesitant when presented with optional extension tasks such as advanced Micro:bit programming or more complex environmental data analysis. To address this, scaffolding and tiered entry points can be used so that all students could successfully begin the task, while extensions were framed as optional explorations rather than expectations.
Time constraints also significantly impacted instruction. With only one class period per week, continuity is fragile. Absences, school-wide events, or student participation in extracurricular activities can easily lead to missed instruction and learning gaps. To mitigate this, the lesson sequence was designed in modular steps, allowing students to re-enter the work at different points without losing overall progress, and key instructions were documented to support catch-up when needed.
Diverse learner needs is also addressed through differentiation built into the task structure. Students can engage at their own level through multiple entry points, collaborative work opportunities, and optional extensions. This ensures that students who required more support can focus on core outcomes, while those ready for additional challenge can deepen their learning through more advanced technical and analytical components.
Integrating Disciplines: Where does your lesson plan fall on the continuum and why? How might you move the lesson plan along the continuum to the next level? Multidisciplinary Interdisciplinary Transdisciplinary
While the lesson incorporates some transdisciplinary features—particularly in the way tools and methods from one subject are applied to address challenges in another—it remains primarily interdisciplinary in nature. The emphasis currently leans more heavily toward design thinking and technical problem-solving than toward the underlying scientific principles. To move this work further toward a truly transdisciplinary approach, greater collaboration with grade-level science teachers would be beneficial. This would allow for a deeper exploration of the biological factors that influence plant care and growth. For example, students could investigate why different plants have distinct environmental needs by comparing species such as a succulent (e.g., Echeveria) and a culinary herb like Thai basil. Examining the physiological and structural differences between these plants would provide a stronger scientific foundation for their design decisions. Expanding the inquiry in this way could also open the door to broader discussions about biodiversity and adaptation, while still anchoring the learning in the central challenge of understanding and responding to the specific needs of a chosen plant.
AI Usage: If you used AI, describe how it was used and in which steps of the Field Activity.
An LLM was used only at the final stage of the process, as a tool for critical review of the completed lesson plan. It was not used in the design or development of the lesson’s procedures, instructional flow, or technical components.
Reflect on the course in general: How has your teaching changed as a result of this course? What are some concepts that you would like to learn more about? How can you support other teachers in your practice to use digital fabrication with their students?
As a result of this course, my teaching practice has evolved significantly, particularly in my confidence and willingness to integrate digital fabrication tools into my instruction. I am now much more comfortable using Fab Lab equipment such as 3D printers, the vinyl cutter, laser cutter, Micro:bit systems, and a range of basic electronics. This increased familiarity has made it easier for me to meaningfully incorporate these tools into lesson plans rather than treating them as isolated or supplementary activities.
In addition, I have become more confident in designing interdisciplinary learning experiences that combine multiple tools and techniques within a single unit. Rather than focusing on one technology at a time, I now see greater value in blending different fabrication methods to support more authentic, problem-based learning.
Another key shift has been my willingness to share my work and actively seek feedback from colleagues within the Fab Lab community. This collaborative mindset has helped improve my practice and opened up new perspectives on how to refine and strengthen lesson design.
Moving forward, one area I would like to deepen my knowledge in is prototyping—particularly how to better support students in rapidly iterating and refining their designs in a structured way.
In terms of supporting other teachers, I can contribute by sharing detailed lesson plans and demonstrating how accessible these tools can be with practice. By modeling entry-level activities and providing guidance, I can help colleagues become more comfortable integrating digital fabrication technologies into their own classrooms.
Students will research the plants that they will be caring for, and assess their most essential needs.
Students will develop three design ideas for an effective pot environment for their chosen plant, then select a final design to carry forward.
Students will learn the basics of 3D CAD design and transform their initial ideas into a three-dimensional object.
Students will establish the logic of the program they are going to need to create for their plant's environmental sensors.
Students will test their 3D-printed pots and sensors to assess whether their goals were accomplished.
Having trouble? Let us know by completing the form below. We'll do our best to get your issues resolved quickly.
"*" indicates required fields