- Loading…

This project will promote learning digital fabrication using the constructionist learning theory, providing students space to learn through open-ended project-based experiences and helping students understand the real world value of digital fabrication.
Materials List
3/8ӠDowel Rods
Size 64 Rubber Bands
Protractor
Computer with Internet Connection
Tinkercad Online 3D design application
3D printer with Computer Assisted Manufacturing (CAM) software
3D printer filament
Ruler
Digital Fabrication Equipment Details
3D scanning and printing
Design Files attachment:
2 STL models for connectors to build triangular pyramid and cube
ConnectorCube.stl
ConnectorTriangularPyramid.stl
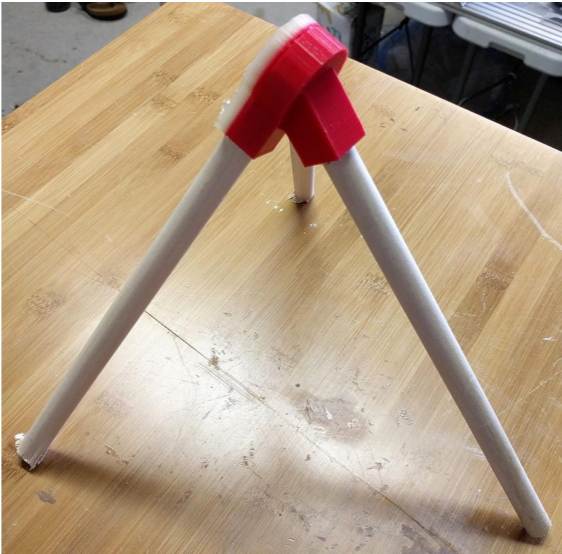
Step 1: Design and print 3D connectors
Build excitement by showing students examples of what the 3D printer can do while the machine prints a new object. The examples will be more than just static toys. Many 3D printers are formed from 3D printed parts, and seeing this application can help students think beyond sculptural 3D printing.
For Next Steps covering the 3D design and print prompts and instructions, see facilitation/procedure further documentation attachment.
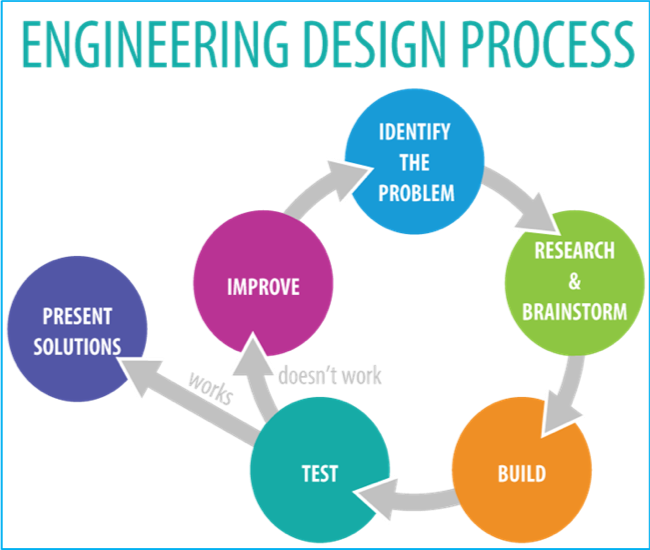
Step 2: Engineering Design Cycle
Explain the Engineering Design Cycle and how each aspect of the activity fits into the cycle.
PROBLEM – Need a sturdy shelter to cover one person that can be quickly assembled and disassembled.
DESIGN – Determine what shapes will be used to construct your structure
BUILD – Construct a prototype structure with dowel rods and rubber bands
TEST – Test the structure to ensure you can fit inside, and it will not fall over.
IMPROVE – Measure, design and print couplers to replace rubber bands to create a structure that can be easily taken apart and reassembled
(University of Toronto)
Step 3: Form groups and distribute materials

Step 4: Demonstrate building basic structures

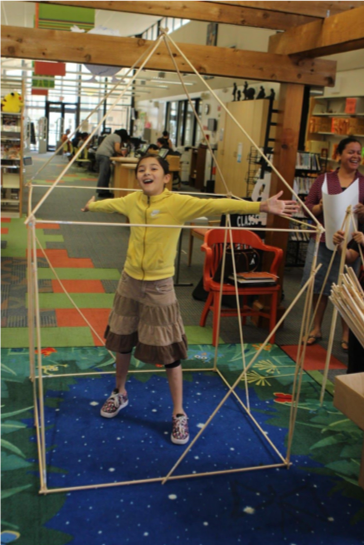
Step 5: Group Build Challenge
Share activity prompt- use the rubber bands and dowel rods to build a structure large enough for a person to stand beneath.
Having trouble? Let us know by completing the form below. We'll do our best to get your issues resolved quickly.
"*" indicates required fields
Thank you for your fab contribution!