- Loading…

Students are introduced to the Engineering Design Process by creating a cardboard container to hold the contents of their pocket. In this rapid prototyping activity, each step of the EDP will be addressed while creating a prototype device out of craft materials. This lesson follows the 5E Instructional Model and will prepare students for lessons within the GE Brilliant Career Lab Collection.
This lesson was featured in an article by the same author as part of the SCOPES resource page.
NOTE: Digital fabrication tools are not used in this lesson. This lesson serves as an introduction for future use of digital fabrication tools.
Materials (per student)
Engineering Design Process Data Sheet (per student)
Introduce students to the Engineering Design Process
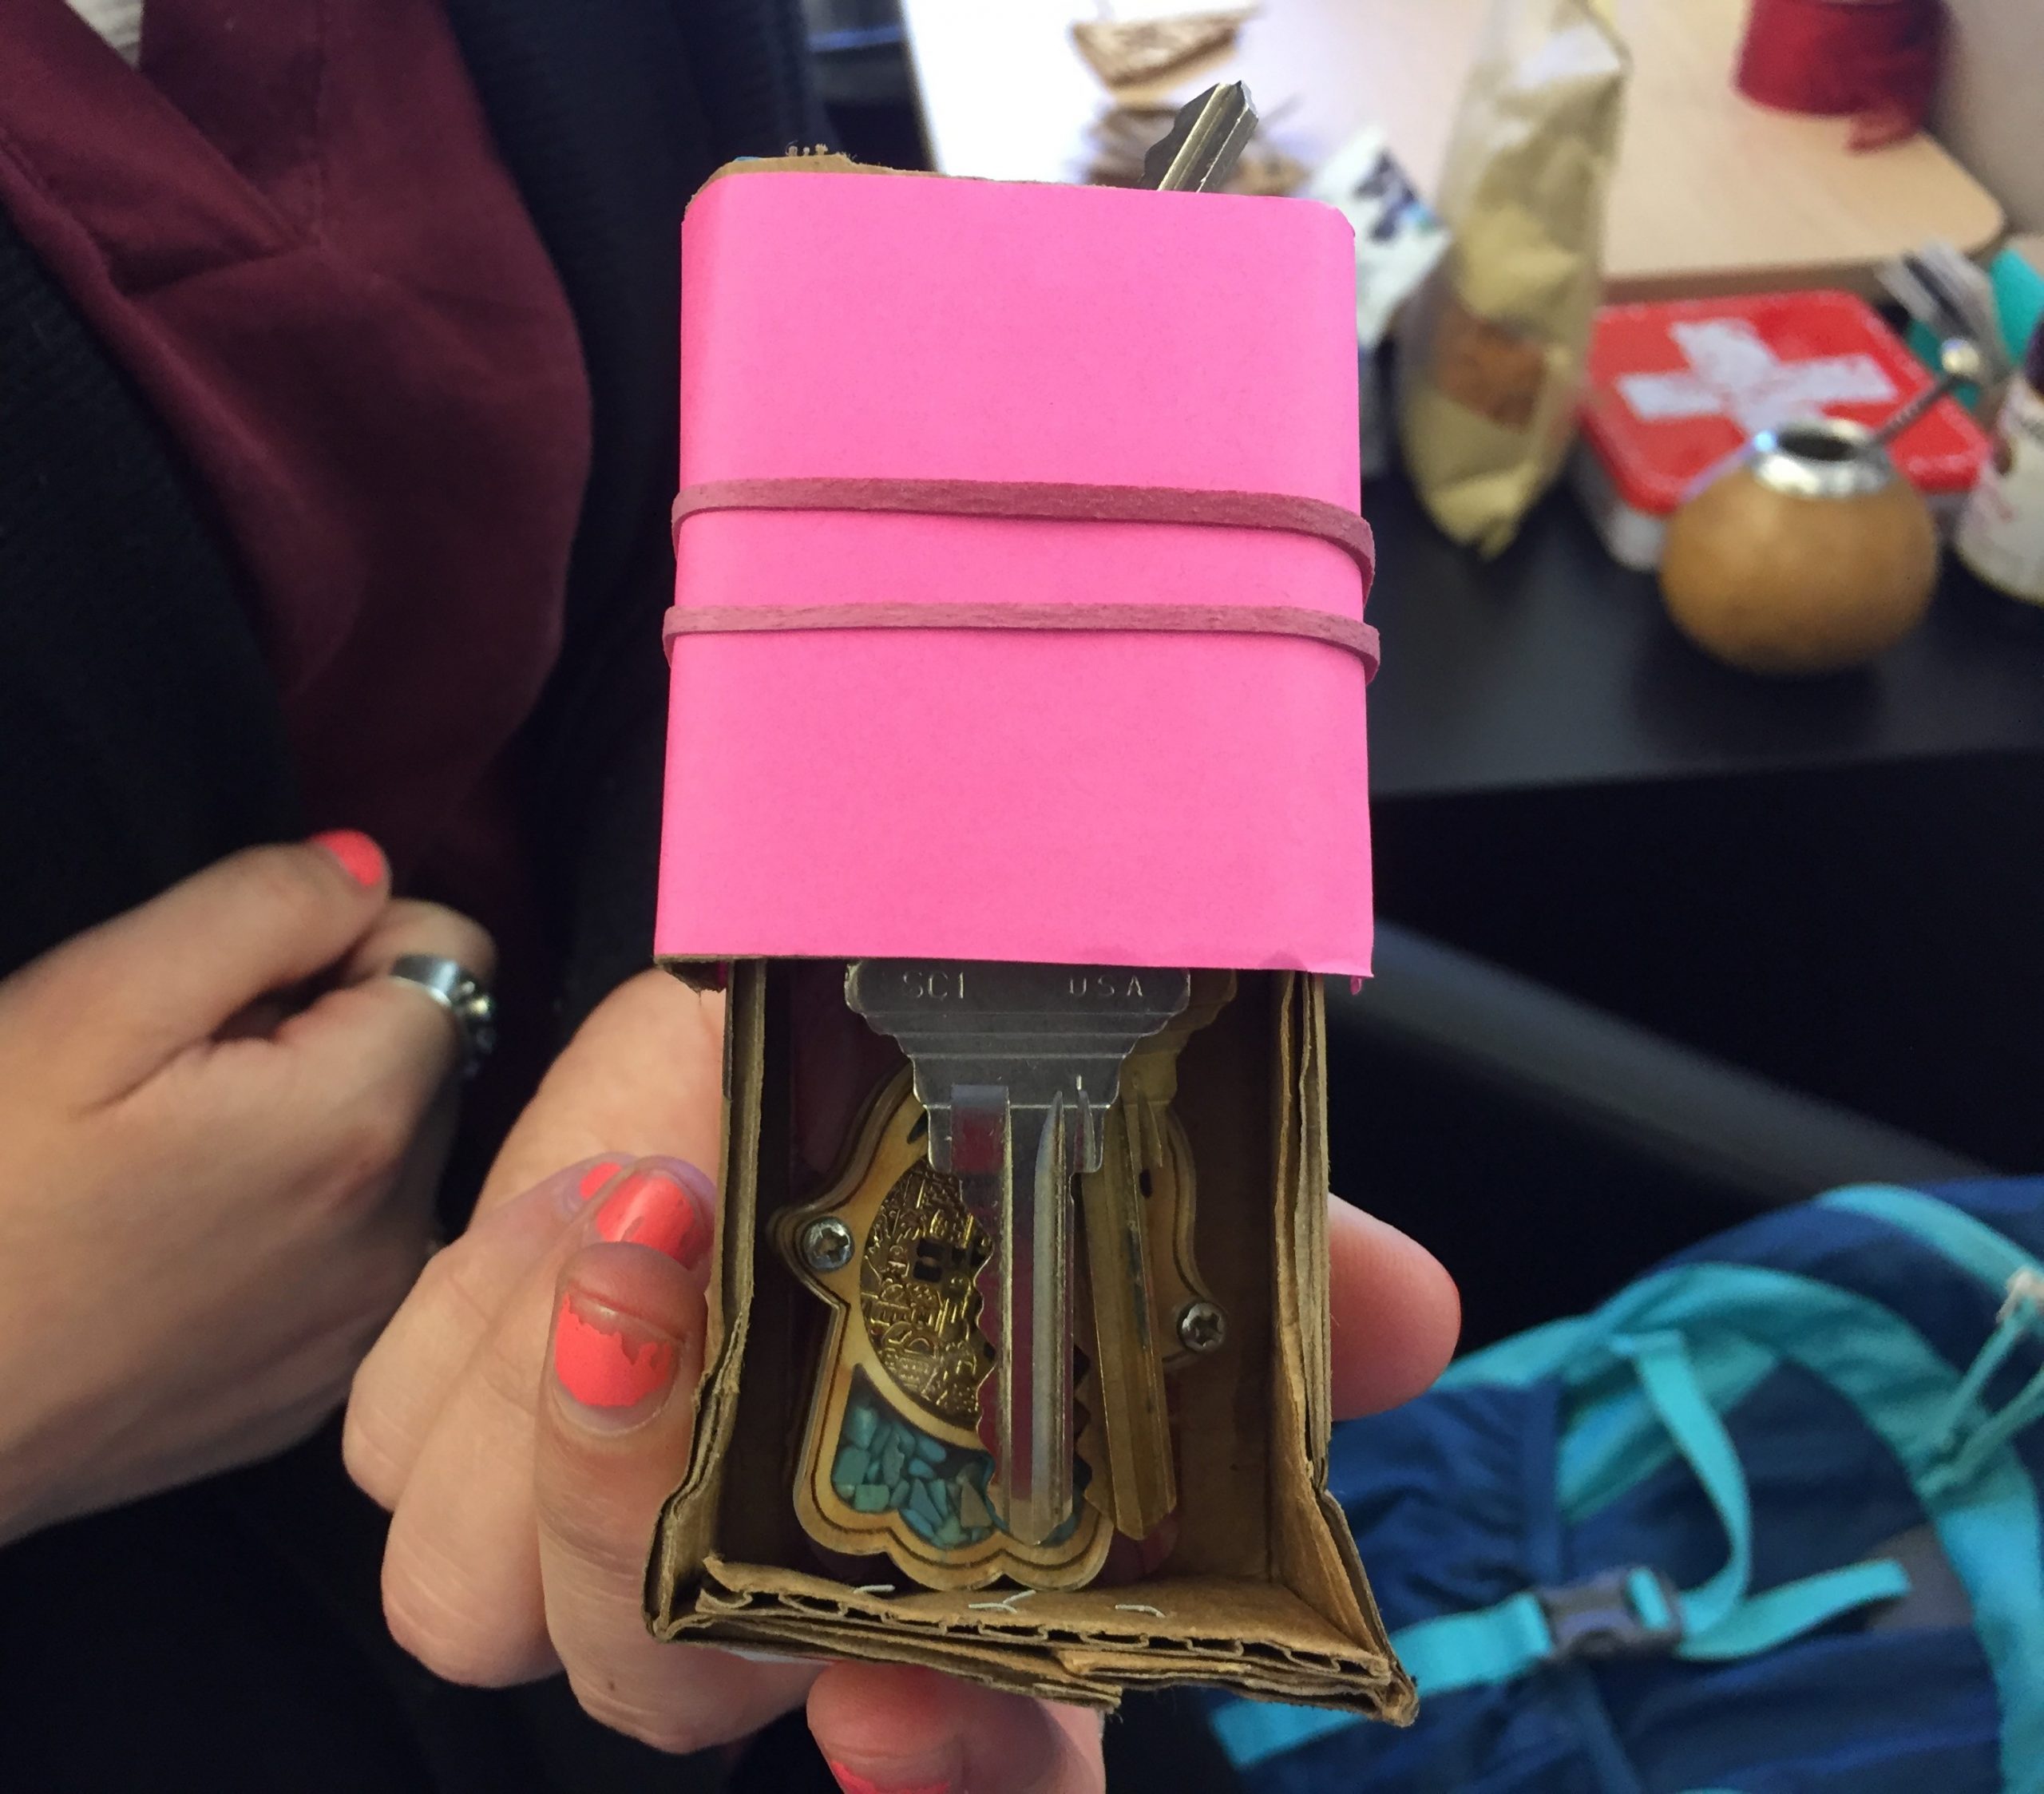
Before class, create an example cardboard container. The instructor is highly encouraged to go through each step of this lesson when completing their container.
Students will work individually or in groups of two to create unique solutions for this challenge.
Hand out the attached Engineering Design Process Data Sheet
Discuss key points of the engineering design process:

Challenge: Design a container to hold the contents of your pocket. Alternatively, the container could hold the contents of your backpack, purse, or locker.
Problem: This container (organizer, protector, dispenser) may not be assembled using any adhesive, including tape, glue, or stick material.
Generate interest in the activity by allowing students to generate criteria of the problem.
Identify (5 minutes)
Identify the criteria and constraints of the challenge as a group:
Materials can be displayed buffet style at the front of the room or in the center of student tables for later in the activity. The instructor may choose to give every student the same amount, assign a budget and cost to each materials, or another option entirely.
Ask probing questions about the materials and share an example solution to the problem in order to direct student investigations.
Research (5-10 minutes)
Share the instructor created example cardboard container with students.
Ask students “What are the Pros & Cons of my design? Specifically, what design elements do you think you might use or exclude for your container design?”
Guide students through planning and explaining their proposed solutions.
Develop Solutions (5 – 10 minutes)
Students will sketch or diagram multiple (at least 3) ideas for a container that could hold their belonging(s). Students will have 5-10 minutes to draw these designs. They do not need to but may include all available materials in their design. Students may use partners, peers, or the internet as a resource to brainstorm their sketches.
Select Solutions (5-10 minutes)
Allow students to discuss the designs they sketched with their group or table. Students should gather feedback from peers about their sketches and decide which design they want to prototype. Encourage students to create a detailed sketch of their container using measurements or a ruler.
Allow students to use their plans to create their prototype devices.
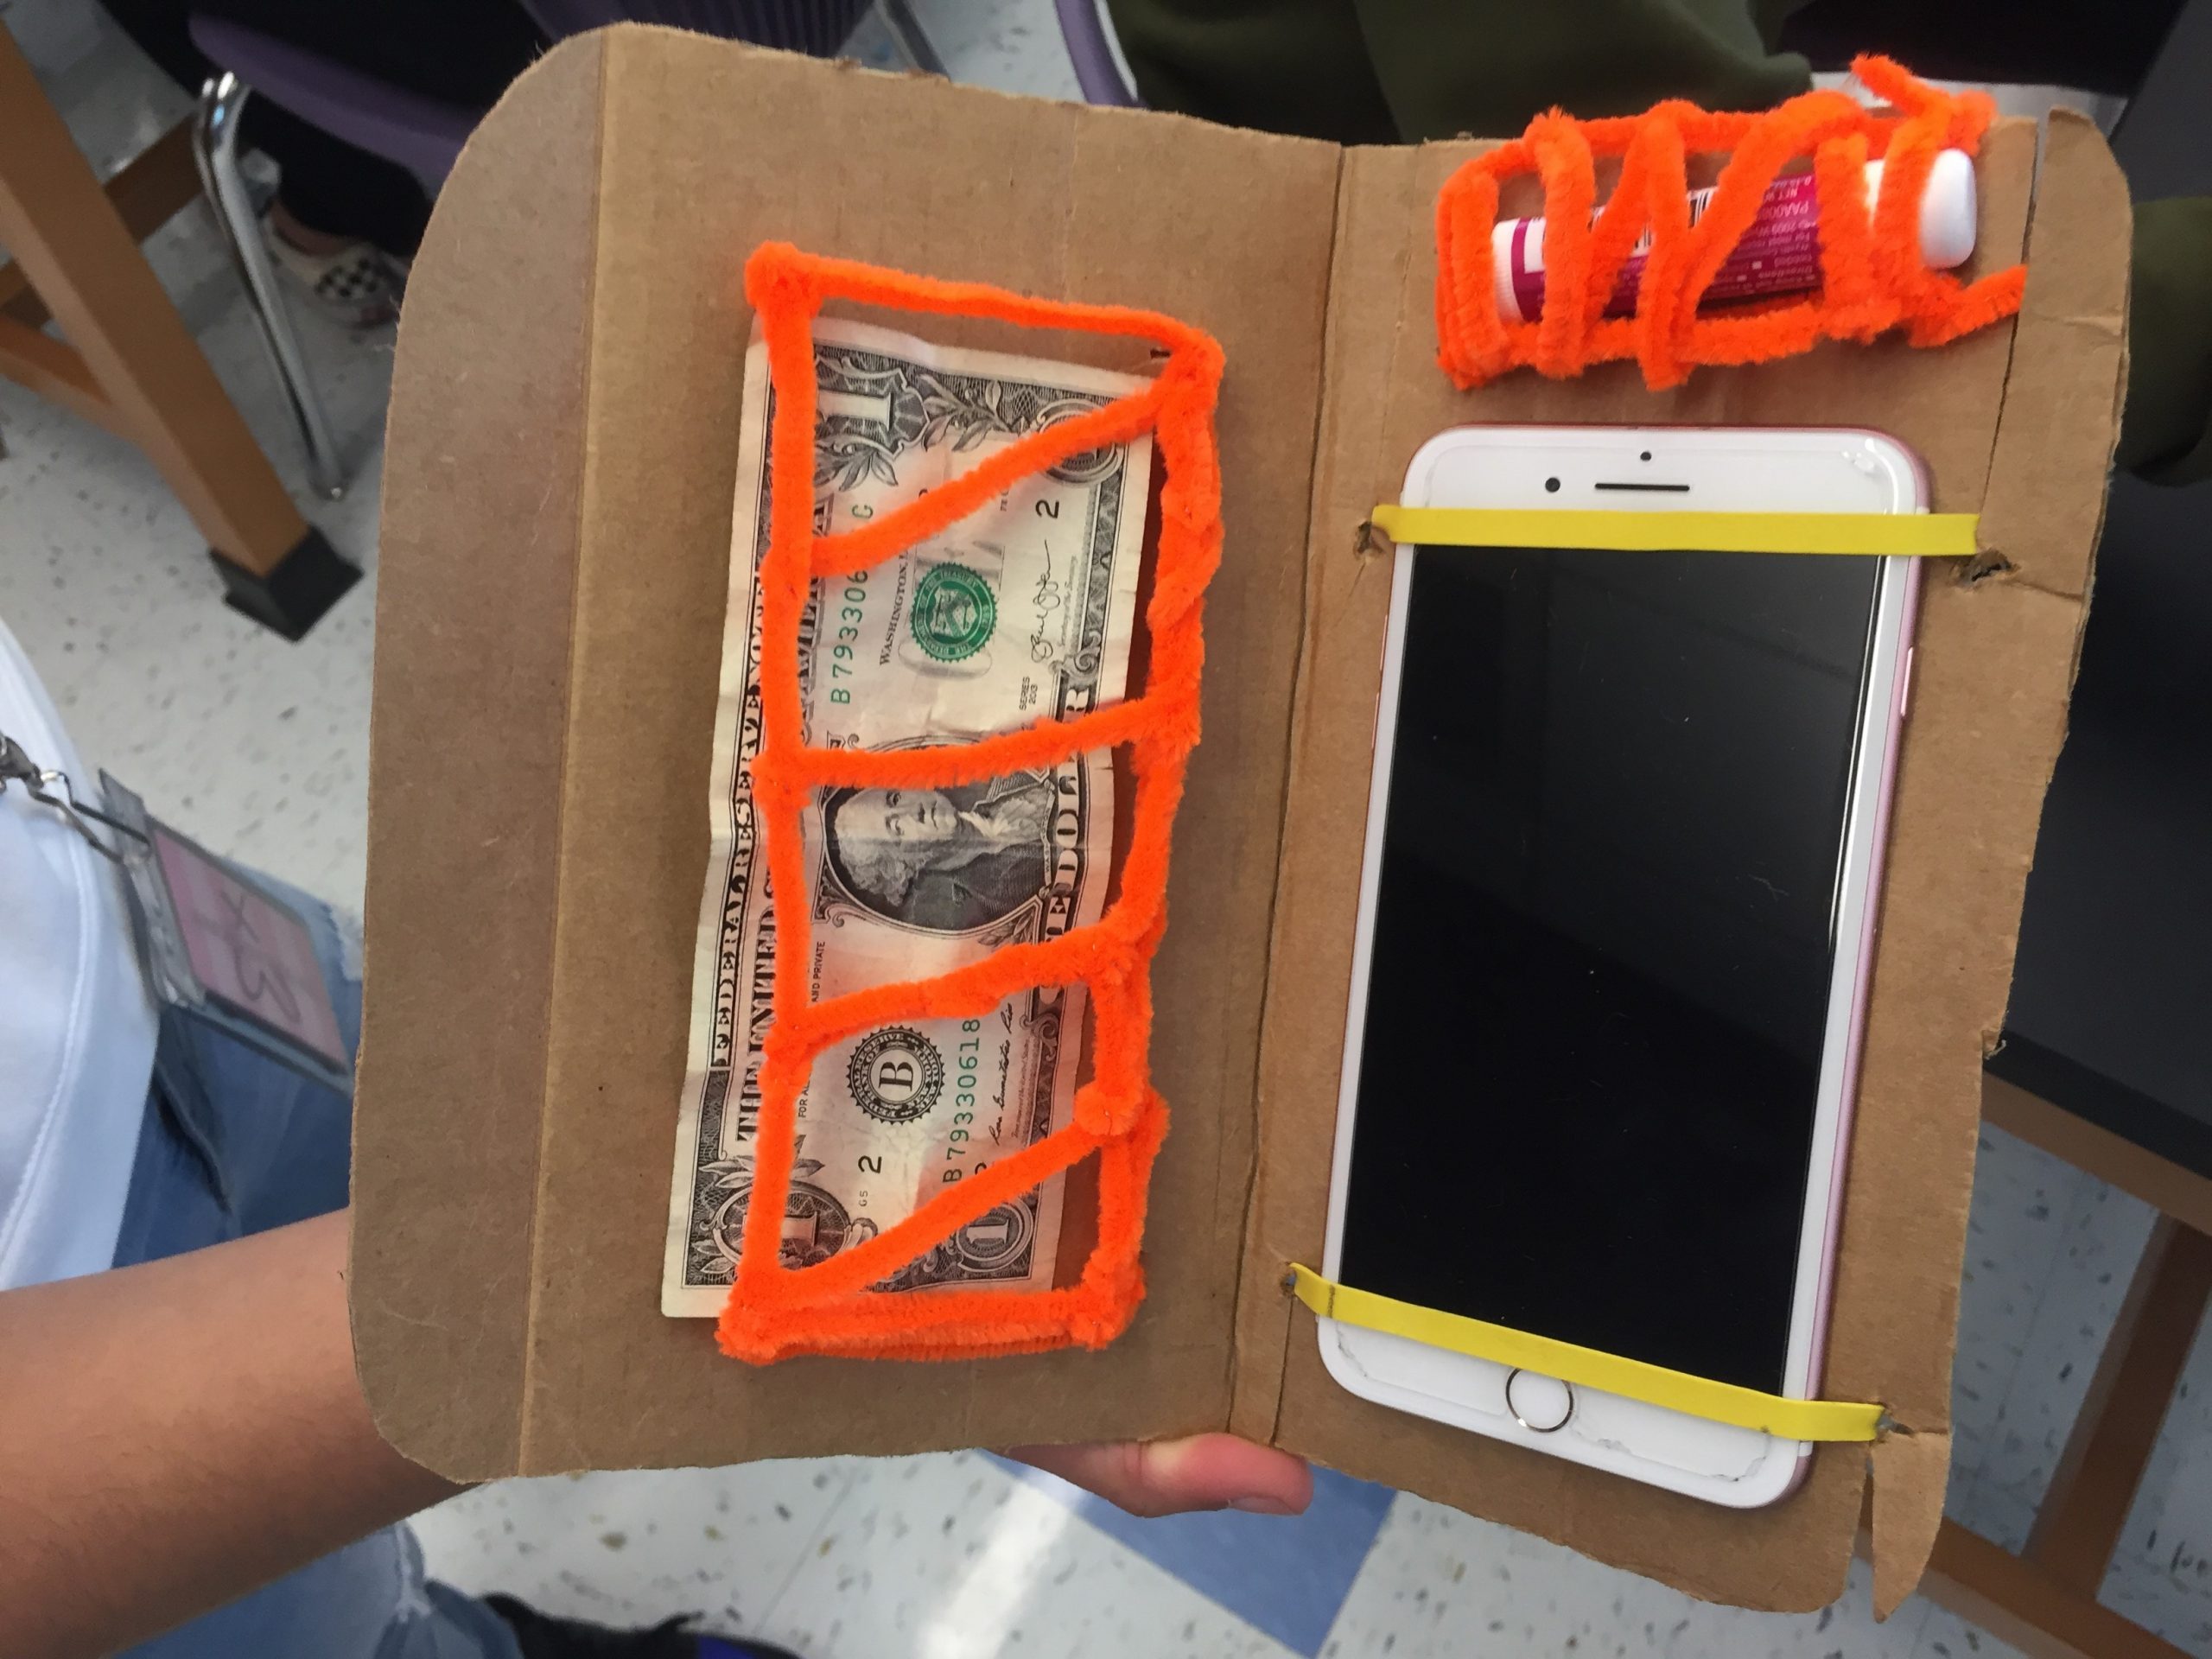
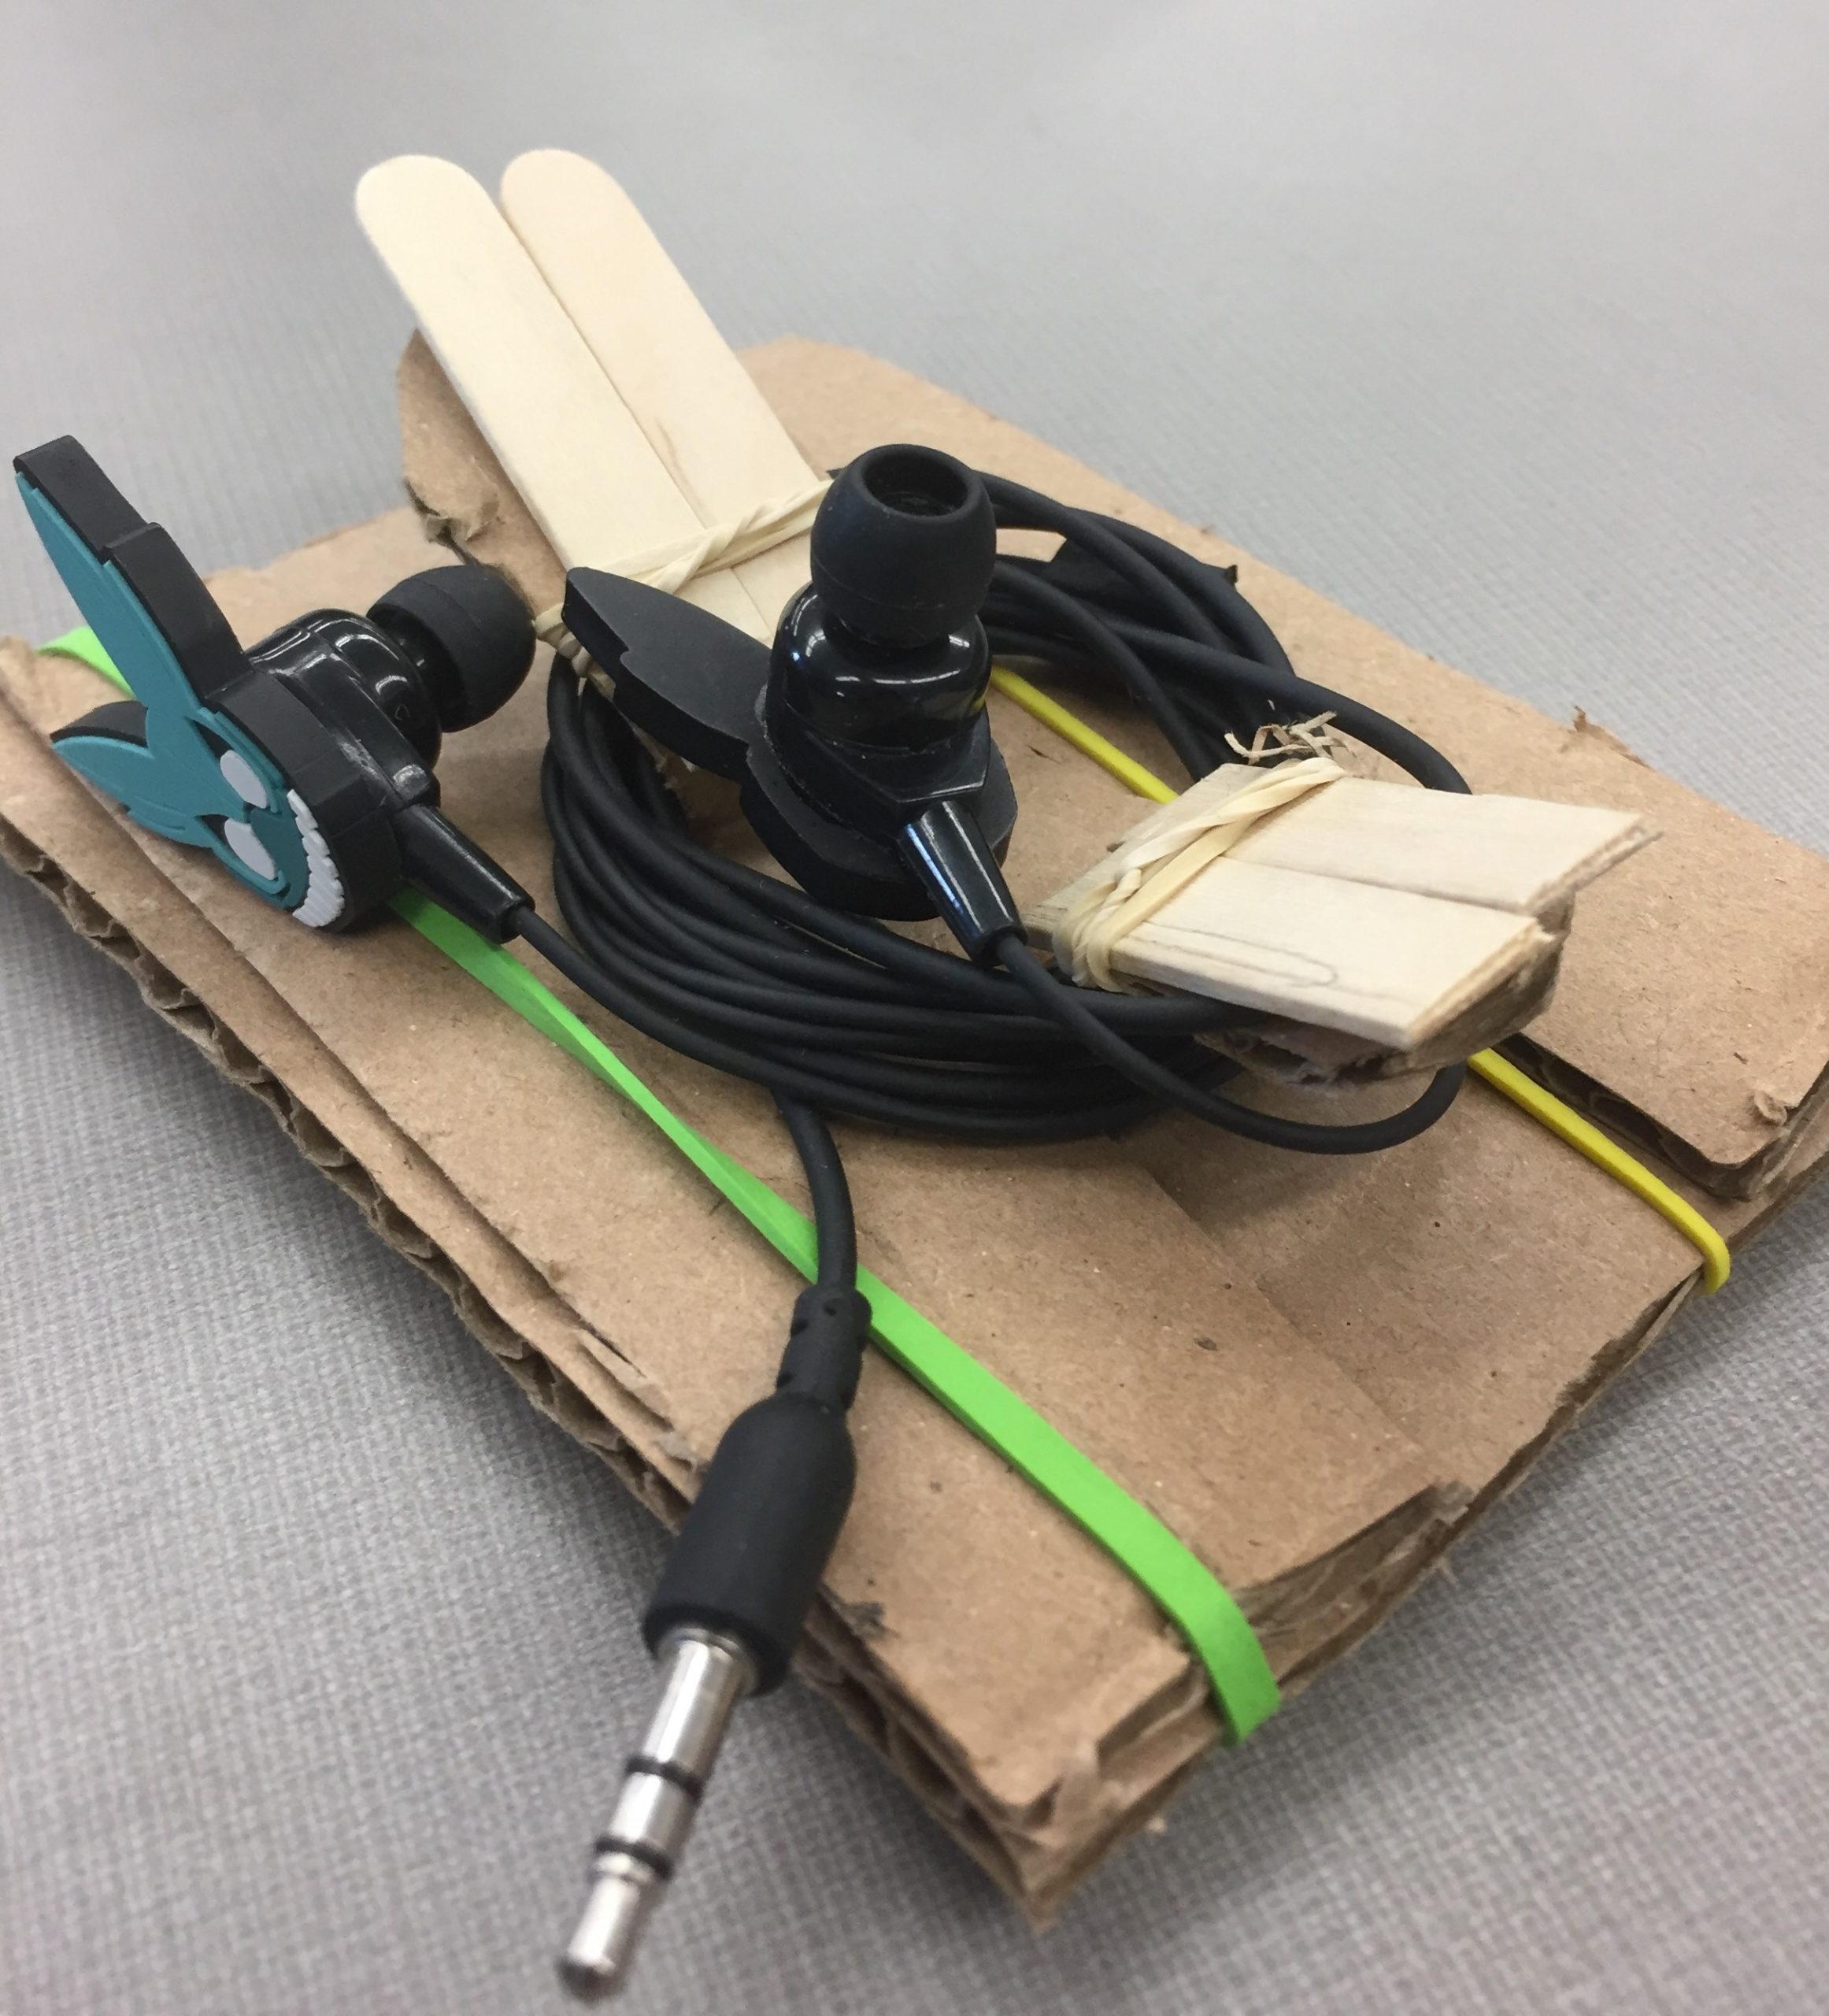
Prototype (10 minutes)
Give students access to the materials at this time.
Materials can be selected once students have shown the instructor a plan or a sketch of their Selected Solution. The instructor will assign a time limit (around 10-15 minutes) for students to construct their containers.
Students will assess their own learning by asking open-ended questions about their prototype devices.
Test (5 minutes)
Direct students to test out the device individually or with a group member to analyze the following:
Additionally
Instructors can come up with additional ways for students to generate data.
Evaluate (5 minutes)
Tell students to find a partner or another group and swap creations.
Find one change that would make your peer’s design better. Have students swap feedback and record the new information about their design on their data sheet.
(Additional questions you may ask if time permits:)
Communicate (5 minutes)
Once their containers have been returned, students should come up with at least two changes they would make to their designs in the future. These changes can include more materials, different materials, or additional time to prototype.
Allow students to individually or in groups share their results to the instructor and the class.
Students will modify their original designs using personal reflections and feedback from their peers.
Redesign (if time permits)
Students have 5-10 minutes to make their containers more effective.
After 5-10 minutes:
Allow students to share their redesigned products!
Incorporate free digital tools to connect this craft lesson to digital fabrication.
Classroom friendly software such as Google Drawings, Inkscape, and Tinkercad allow students to design their prototypes on the computer. Instructors may digitally fabricate student’s prototypes on any number of machines, including a laser cutter, 3D printer, and vinyl cutter (note: properly cutting cardboard on a vinyl cutter may require adjustments to the machine).


Having trouble? Let us know by completing the form below. We'll do our best to get your issues resolved quickly.
"*" indicates required fields