A Makey Makey Integration for a Transdisciplinary Science Research Project – SCOPES-DF

Lesson Details

Age Ranges *
5-8, 8-11,
Fab Tools *

Author

Lauren Kartzman

Summary

This lesson focuses on the use of Makey Makey technology as a culminating integration tool to showcase and assess student learning across a transdisciplinary unit on New York State mammals. Throughout the unit, students engaged in in-depth research in science, narrative writing, and indigenous mythology in English Language Arts, vocabulary acquisition, sentence development, and oral language practice in Spanish, and 3D modeling in art. 


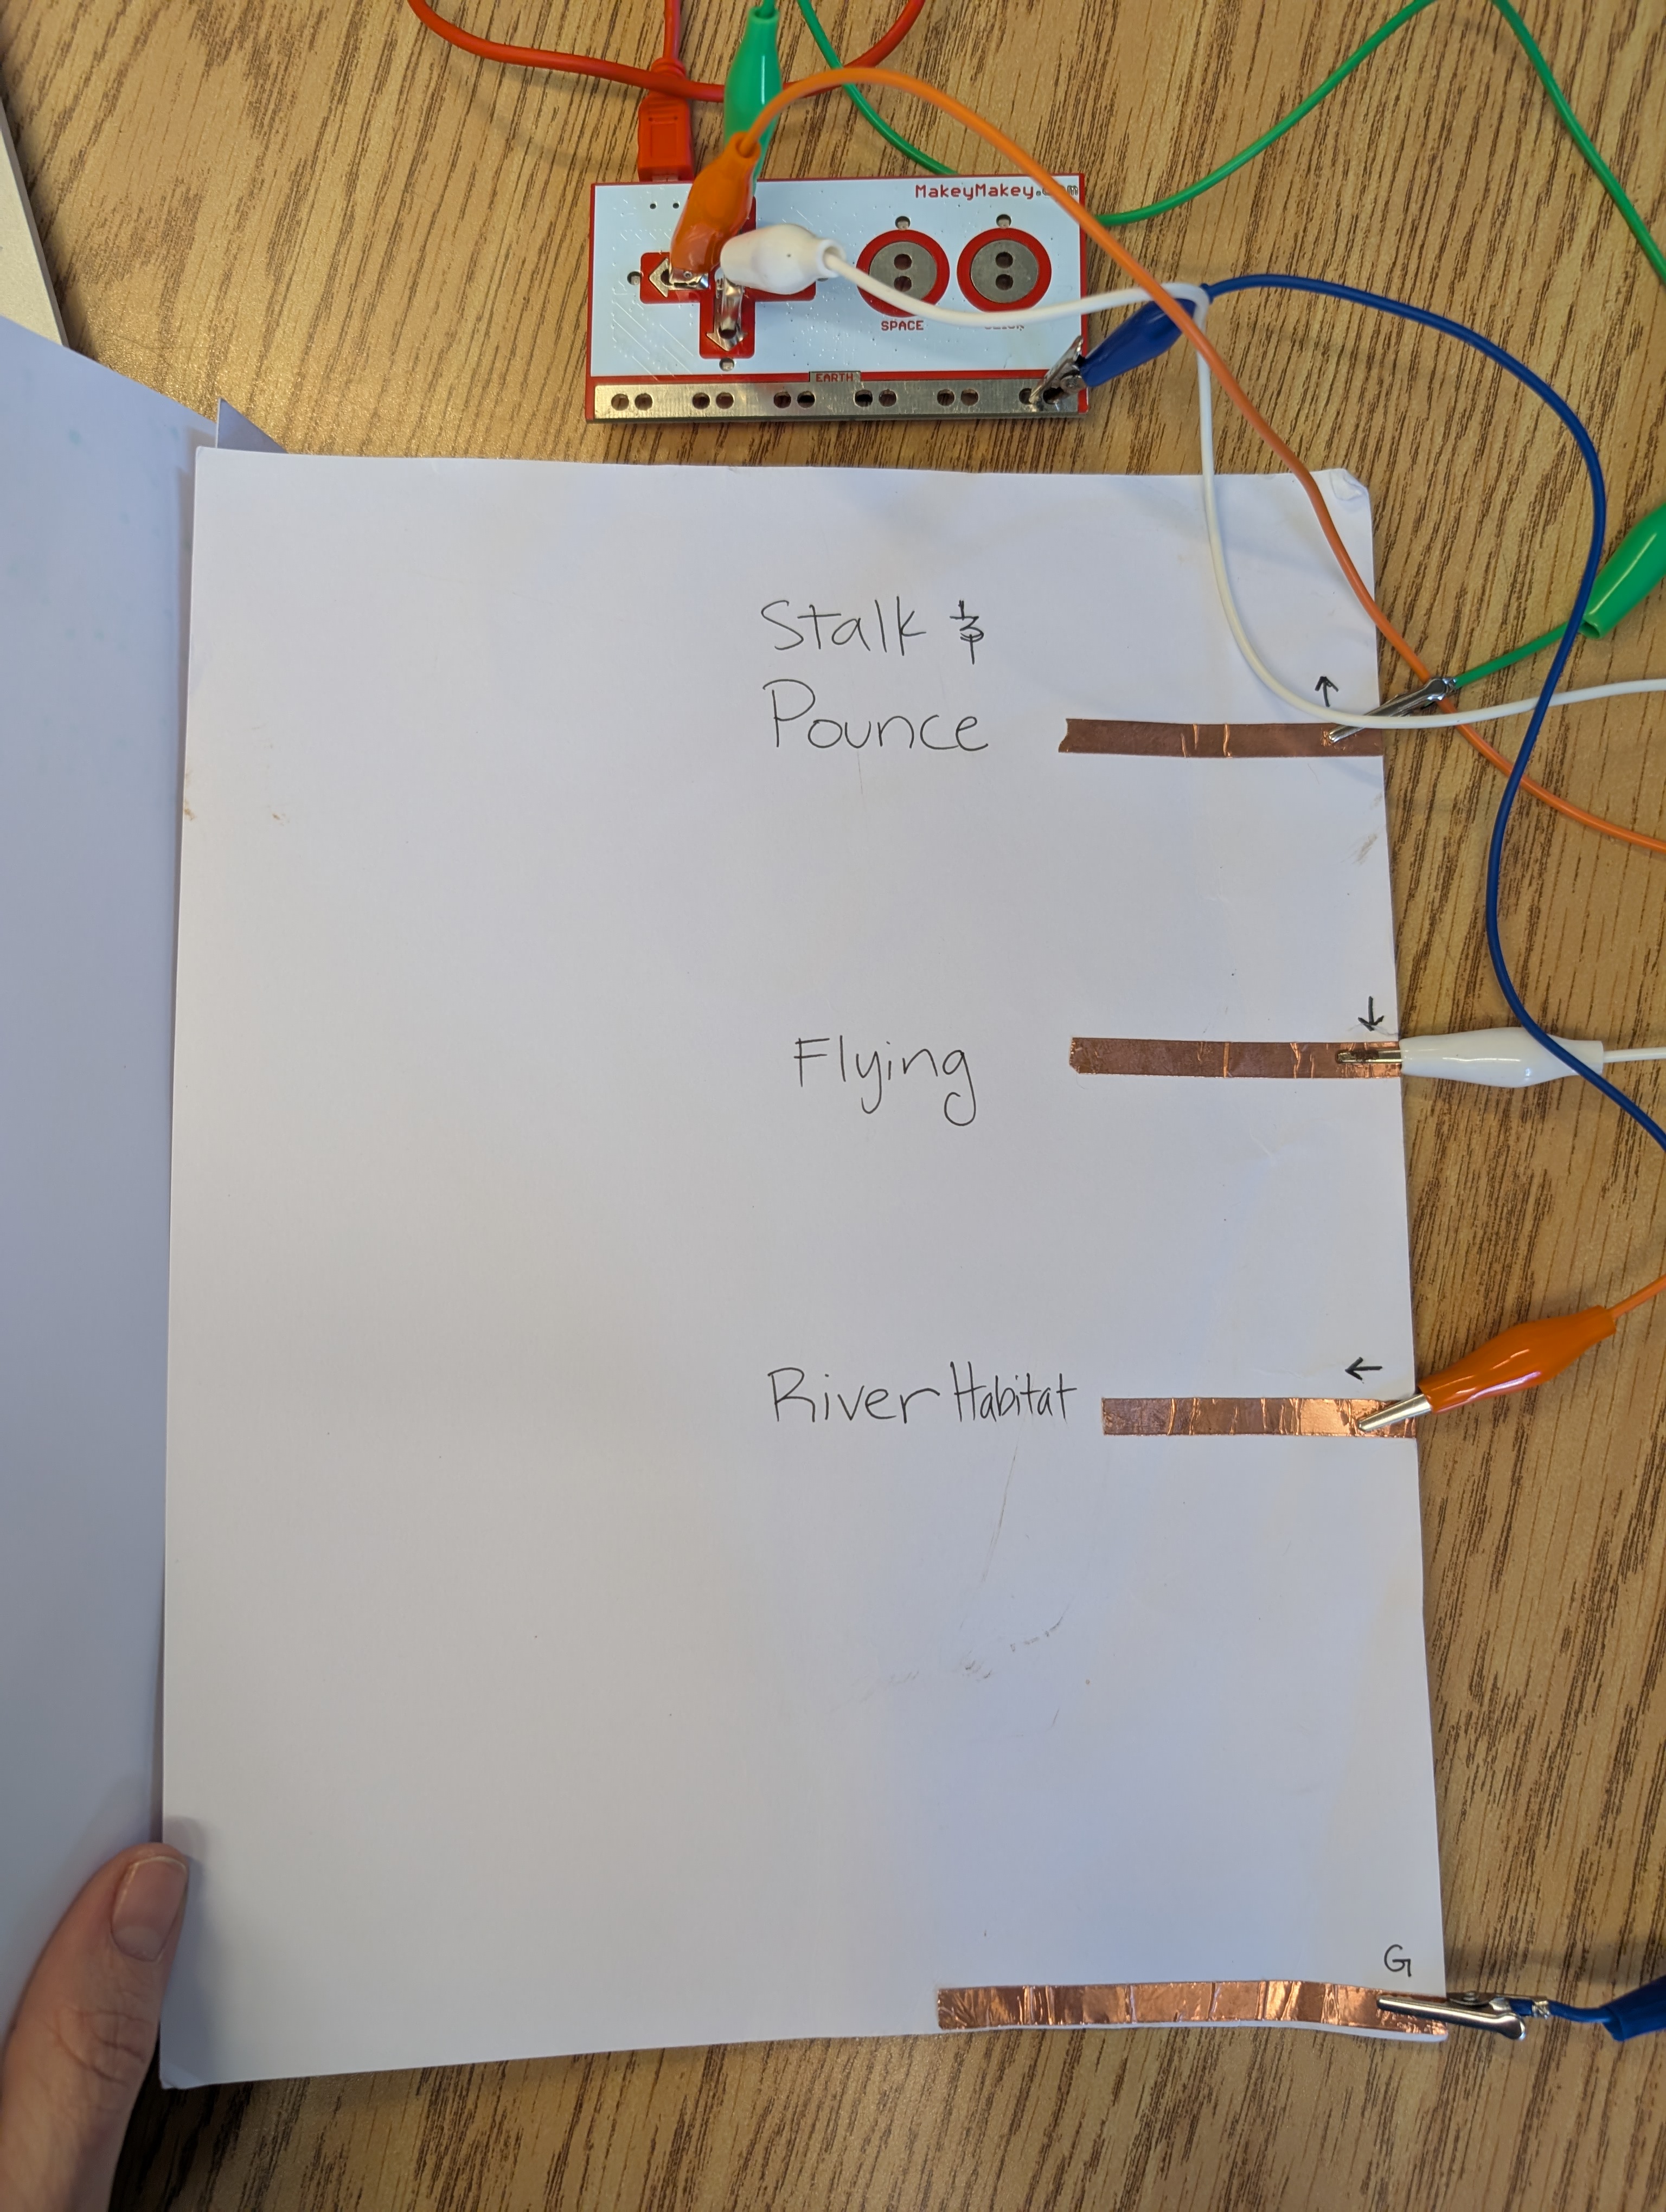
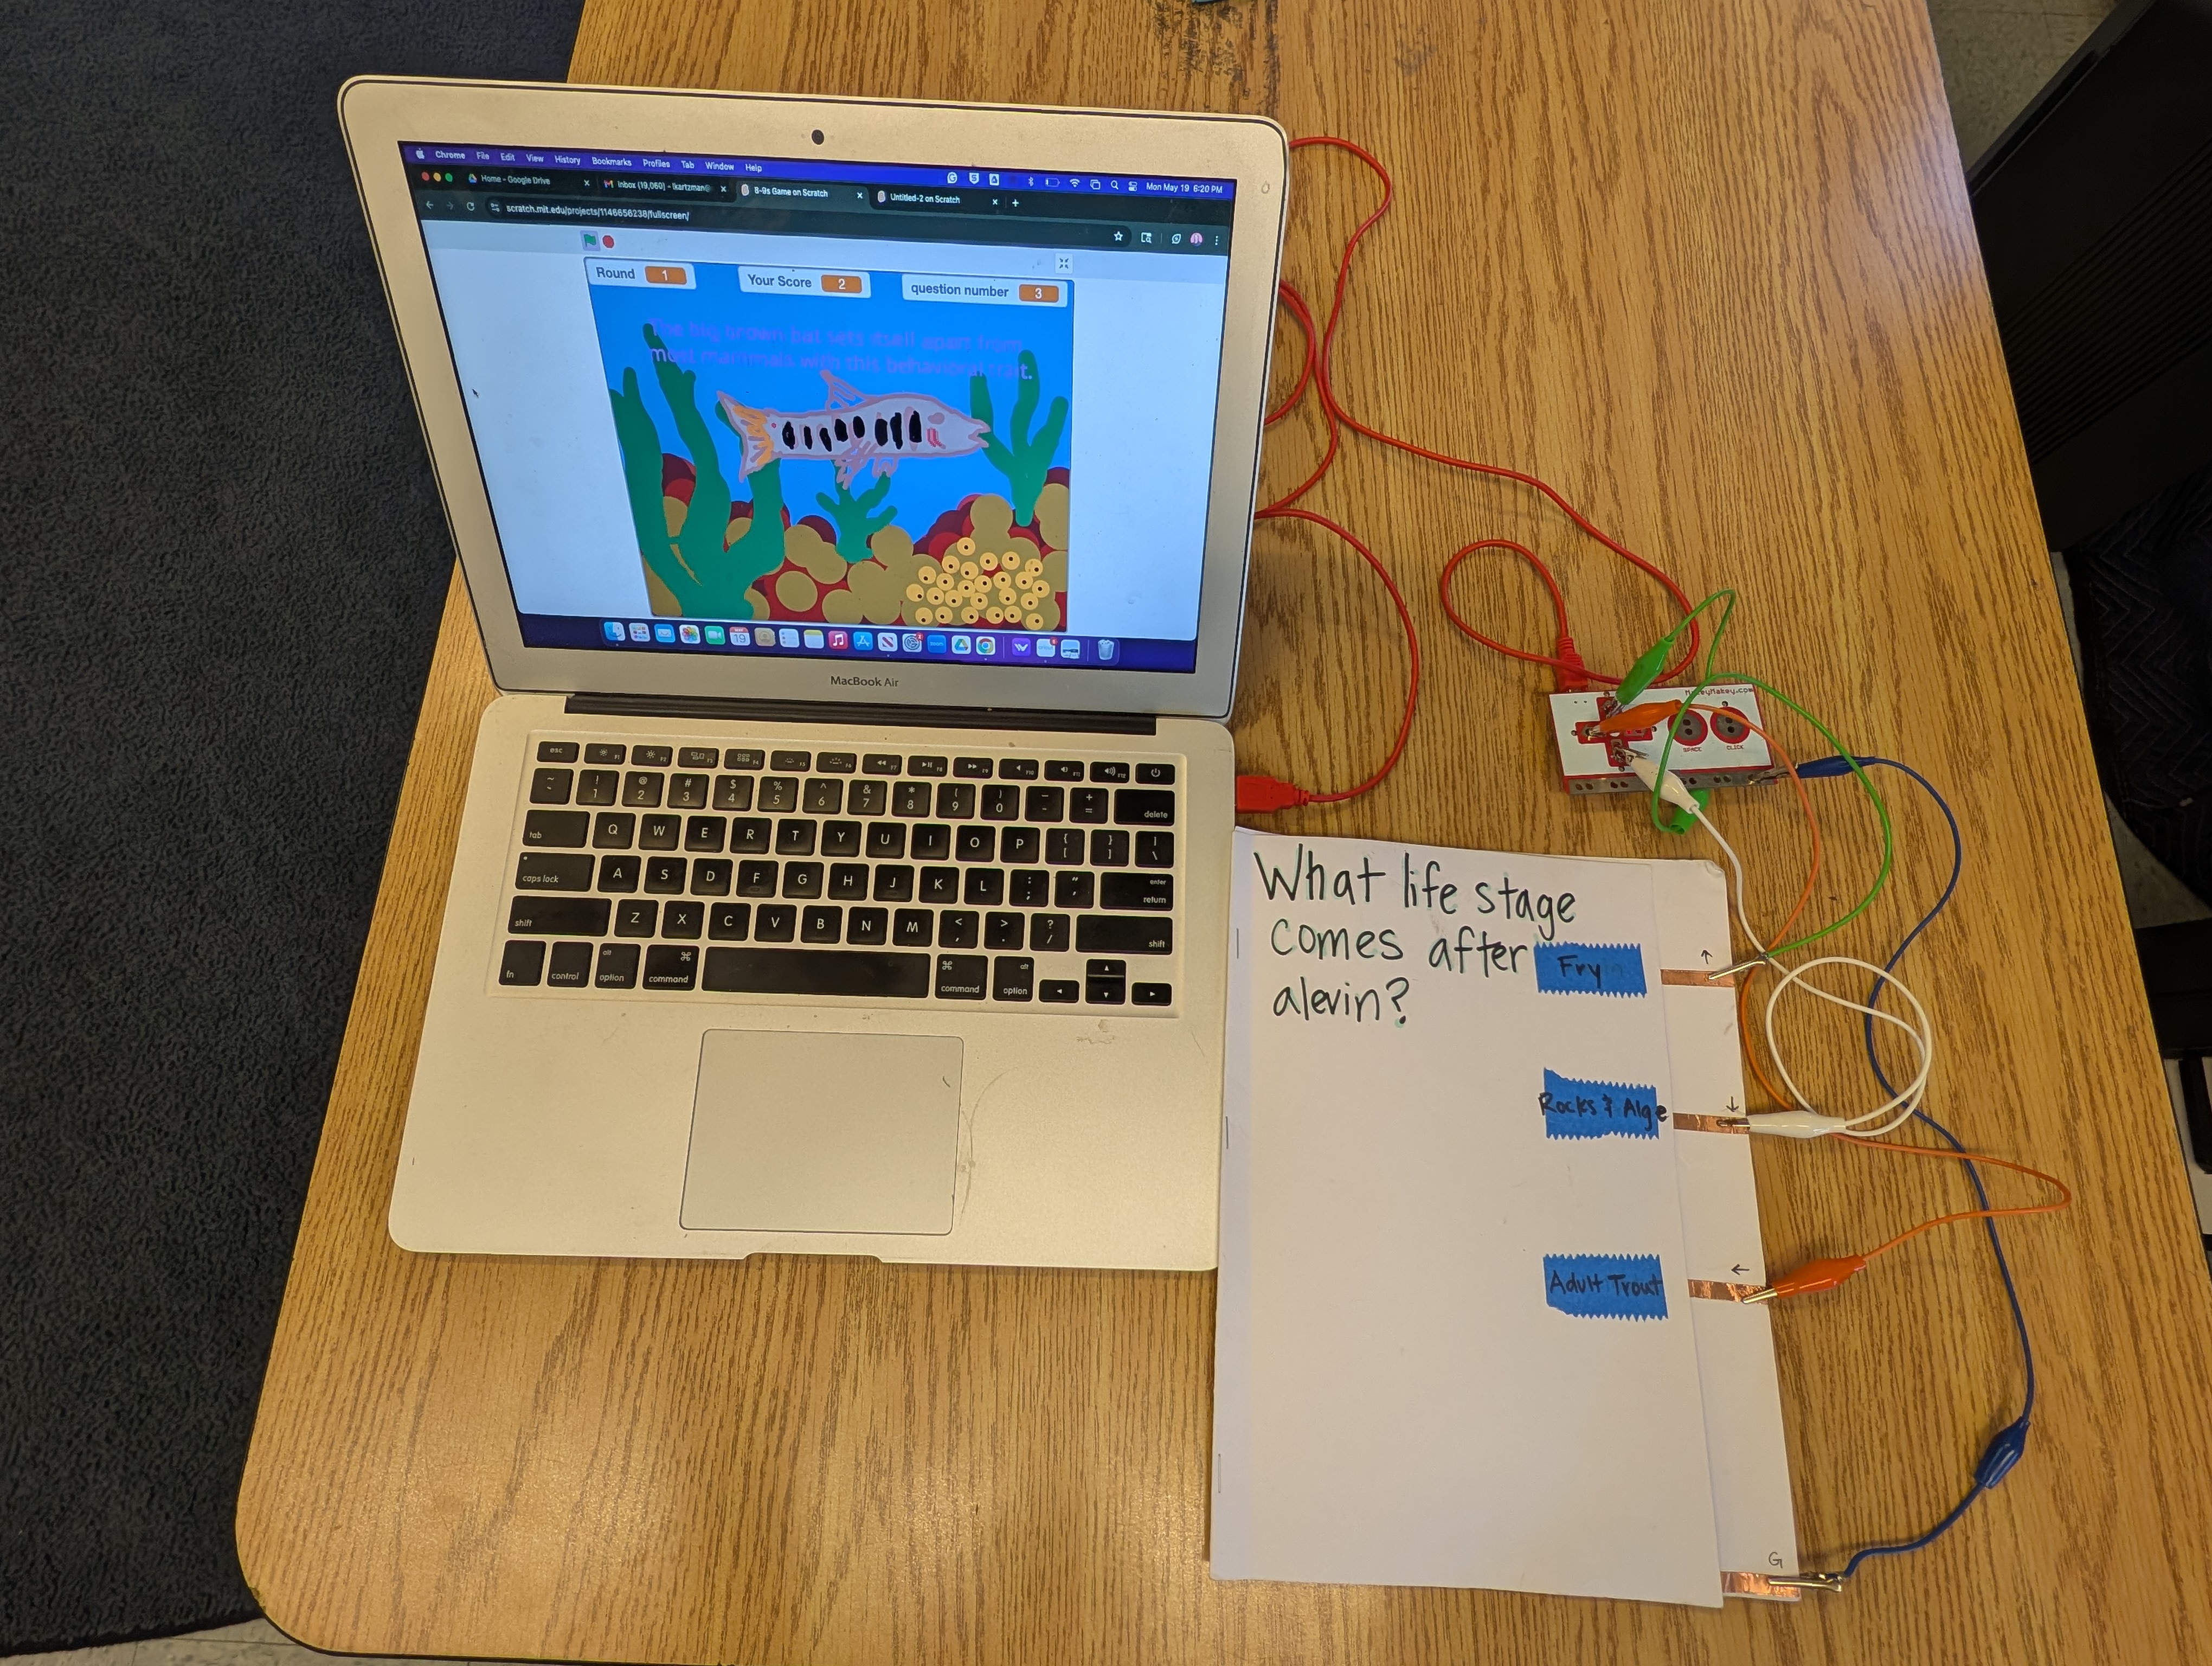
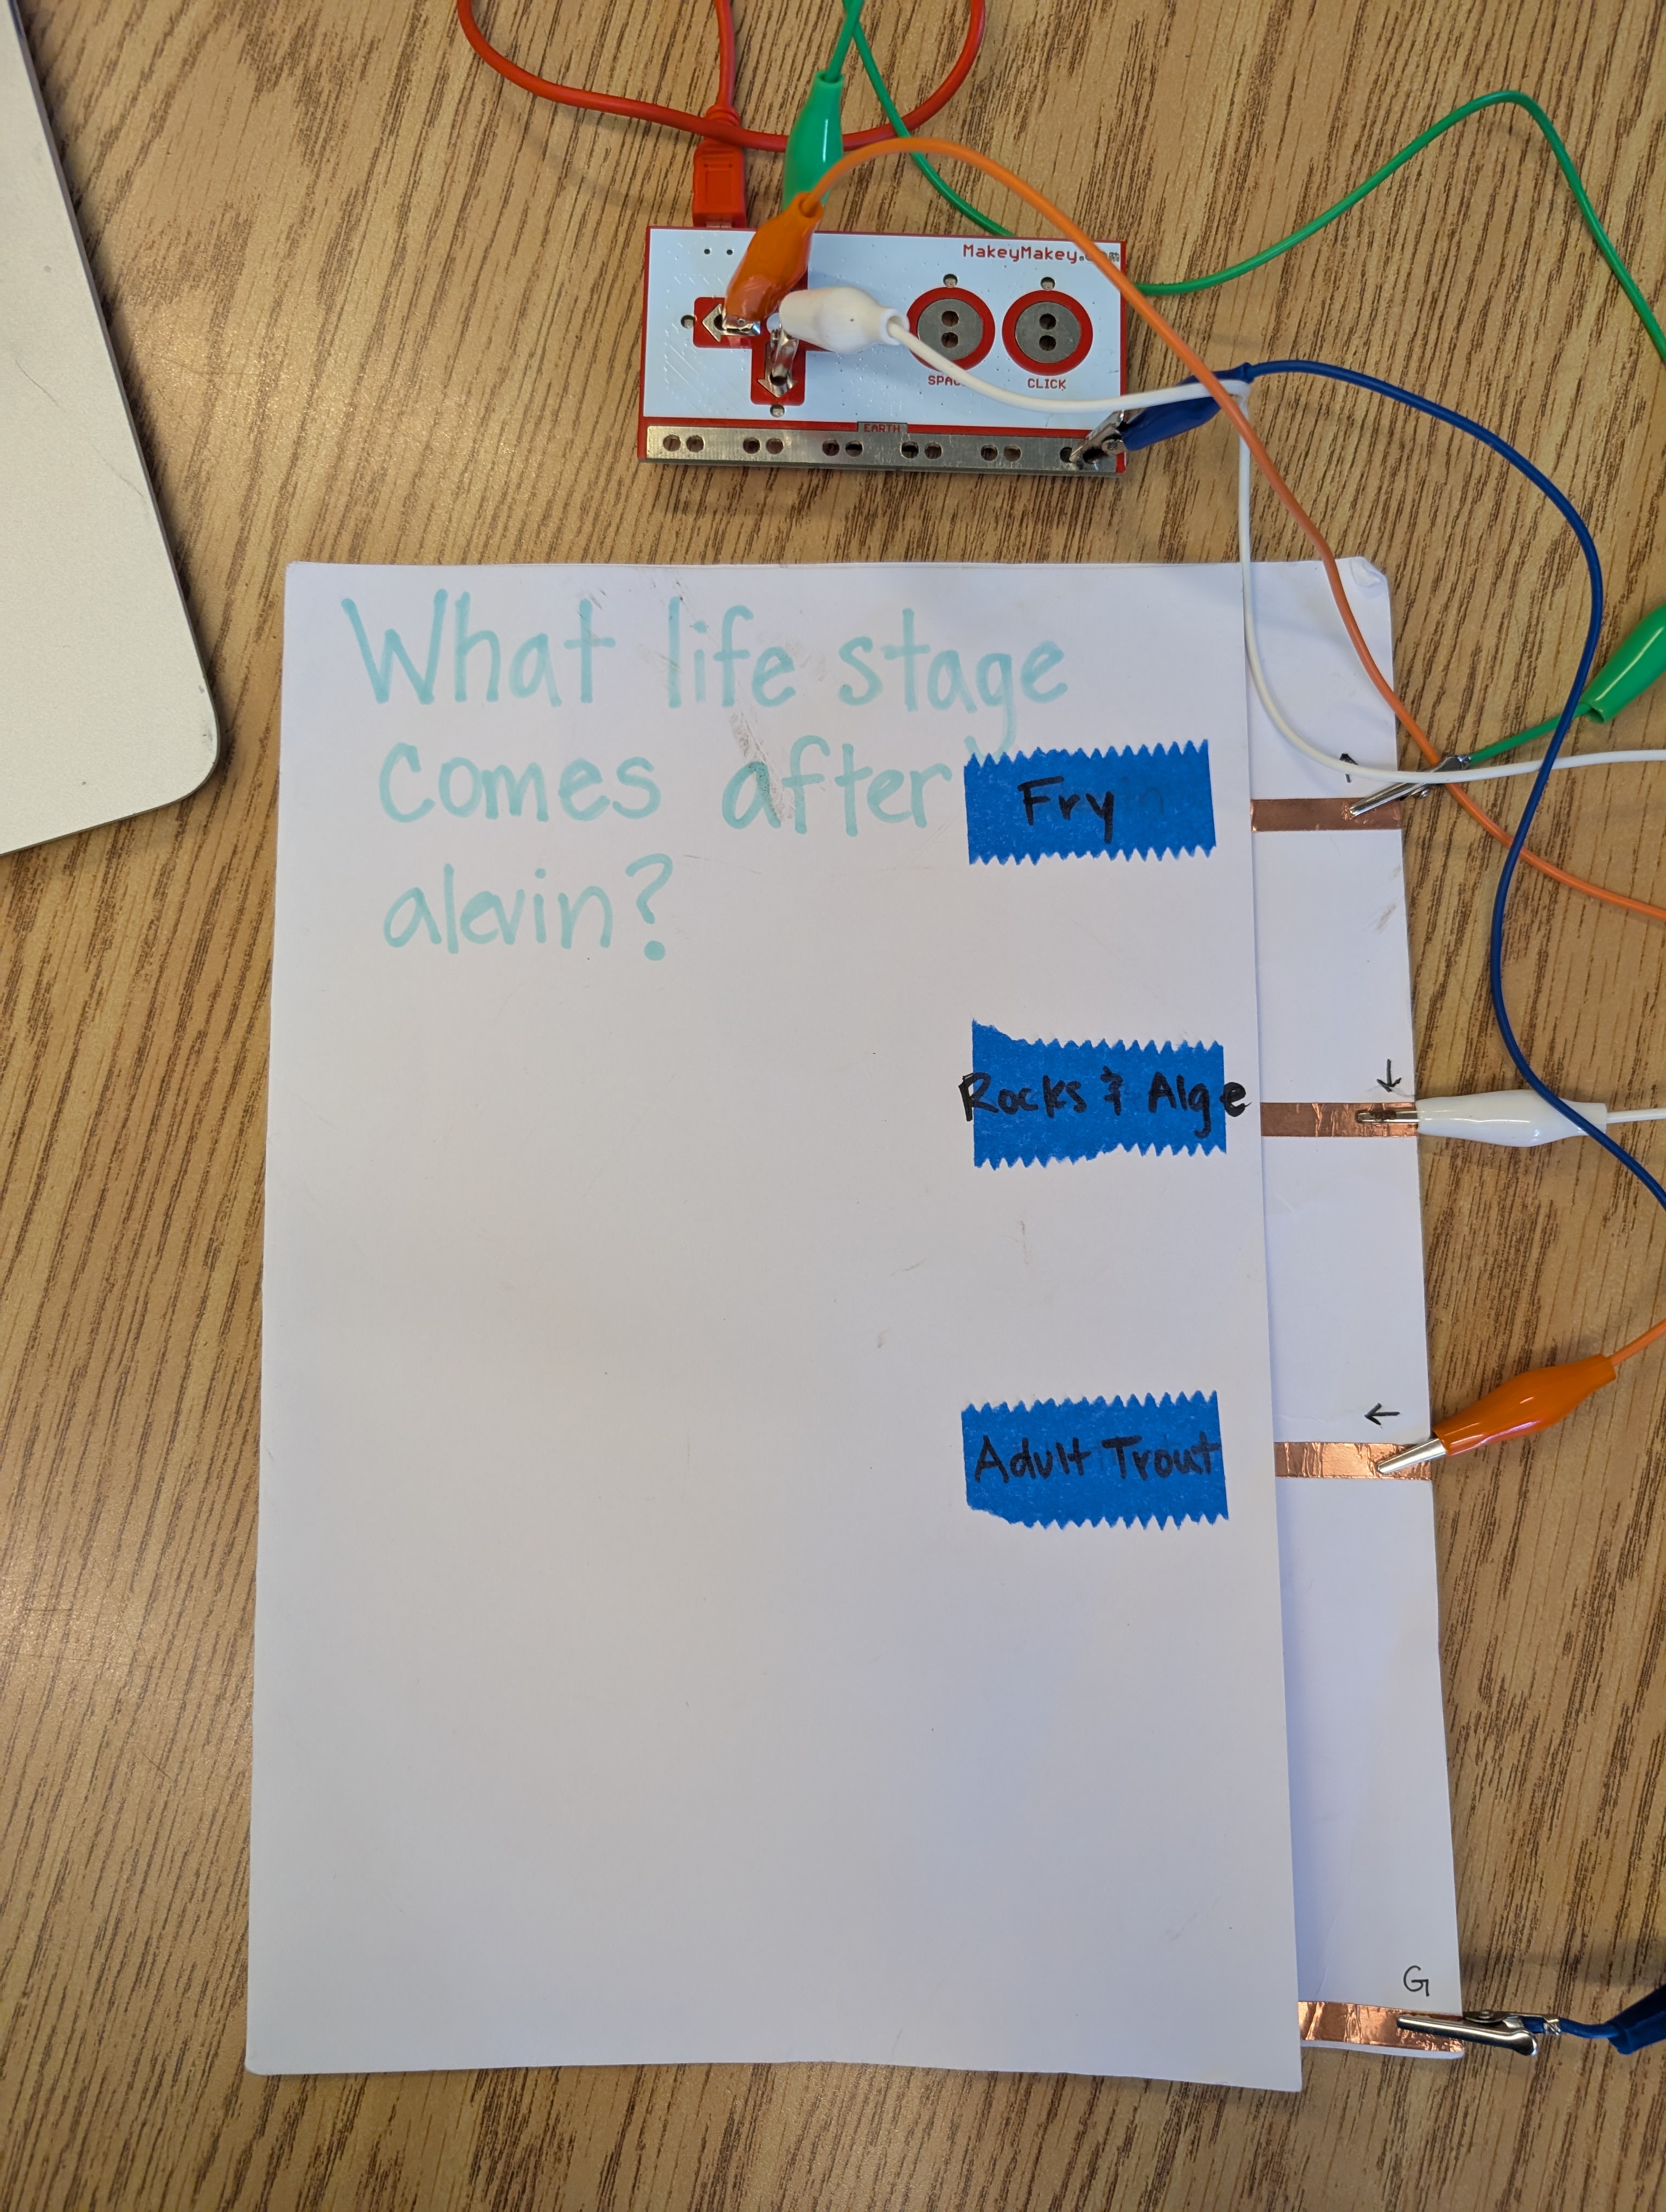
This lesson is the final step in the broader curriculum. Students work in small groups to create interactive posters powered by Makey Makey and programmed using Scratch. These posters serve as both a form of assessment and a presentation tool during a final public expo. The interactive elements include touch-activated audio recordings used to create content-related quizzes. This final integration provides students with the opportunity to share their understanding of the research content with an audience through an interactive, creative process. Also, it allows students to apply basic electronic programming to communicate their knowledge in creative and meaningful ways.


I have intentionally designed this without subject-specific content, because this lesson can be used as a tech integration for any research project, whether single or multi-disciplinary. This approach works especially well for transdisciplinary projects because the technical aspect remains consistent and can be taught to an entire class at once, while the content can be tailored to meet the specific needs of the subjects. It can also support collaboration and group learning in research projects where students work independently for the project.


While the lesson is not subject-specific, I’ve shared the prompts and planning tools we used to complete the mammal study.


Prior to implementing this integration, students had engaged in four weeks of scientific and creative research on mammals native to New York State.


Below are the individual activities and learning goals per subject area achieved during the 4-week research project accompanied with the support offered by the tech integration.


The Tech integration is 2-3 class sessions depending on your students’ tech fluency.


Science

Activity: Research a New York native mammal: habitat, traits, behavior.

Learning Goals:

  • Students will be able to conduct scientific research.
  • Students will understand the relationship between physical and behavioral traits of animals and their habitats. 
  • Students will learn how to communicate scientific research effectively.

Tech Integration Support:

  • Students will be able to communicate key findings from their research, including the relationship between a mammal’s traits and its habitat, through oral, written, or multimedia formats.


Writing

Activity: Research and write a pourquoi story explaining how a trait of the research mammal came to be.

Learning Goals:

  • Students will understand genres in literature. 
  • Students will understand what the moral of a story is and how to develop one in creative writing. 
  • Students will write a pourquoi story that clearly shares how a mammal’s trait came to be. 

 Tech Integration Support:

  • Students will be able to identify and explain the moral or lesson of their pourquoi story, connecting it to the traits or behavior of their chosen mammal.


Spanish

Activity: Learn and use mammal vocabulary to form descriptive sentences. 

Learning Goals:

  • Students will know the Spanish terms for a mammal’s biology. 
  • Students will be able to correctly pronounce mammal vocabulary.
  • Students will be able to write descriptive sentences about a mammal’s biology. 

 Tech Integration Support:

  • Students will be able to correctly pronounce and use vocabulary in context, adjusting word choice and structure depending on whether the sentence is declarative or interrogative.


Art

Activity: Needle felt a 3D sculpture of the mammal, posed to reflect behavior.

Learning Goals:

  • Students will be able to create a 3D sculpture from a 2D image. 
  • Students will know how to needlefelt a 3D sculpture. 
  • Students will be able to communicate scientific research through artistic expression. 

 Tech Integration Support:

  • Students will be able to describe their artistic process, explaining how they translated a two-dimensional image of their mammal into a three-dimensional needle-felted sculpture that reflects physical and behavioral characteristics.


What You'll Need

MATERIALS:

  • Per group (4 students or less):
  • One Makey Makey board + 8 alligator clip cords
  • One computer per group with Demo Scratch Code
  • 4 brass brads 
  • 4 squares of cardboard with small holes poked in the middle (for the brad to fit through)
  • One quiz template per group with copper tape attached
  • One quiz template per student
  • For Demos: 
  • Demo Quiz with Quiz Scratch Code
  • Makey Makey Board 
  • Computer
  • Markers + art supplies
  • Scratch account


Learning Objectives

Spanish:

Students will be able to correctly pronounce and use vocabulary in context, adjusting word choice and structure depending on whether the sentence is declarative or interrogative.


Communication & Collaboration:

Students will be able to demonstrate patience, active listening, and contribute an equal share of the workload when working with peers.


Makey Makey Technology Integration:

Students will be able to use block-based programming in Scratch and correctly wire a Makey Makey device to create an interactive poster that responds to touch with sound.


Science:

Students will be able to communicate key findings from their research, including the relationship between a mammal’s traits and its habitat, through oral, written, or multimedia formats.


Writing:

Students will be able to identify and explain the moral or lesson of their pourquoi story, connecting it to the traits or behavior of their chosen mammal.


Art:

Students will be able to describe their artistic process, explaining how they translated a two-dimensional image of their mammal into a three-dimensional needle-felted sculpture that reflects physical and behavioral characteristics.

Reflection

The integration of Makey Makey as part of our final expo created a new opportunity to think about how subject areas could integrate further together at the end and projects could be linked. In reflection, it would be interesting to use the Makey Makey integration as a way to bridge the disciplines and projects. For example, recording a pourquoi fully in Spanish and creating interactive buttons to narrate each page.


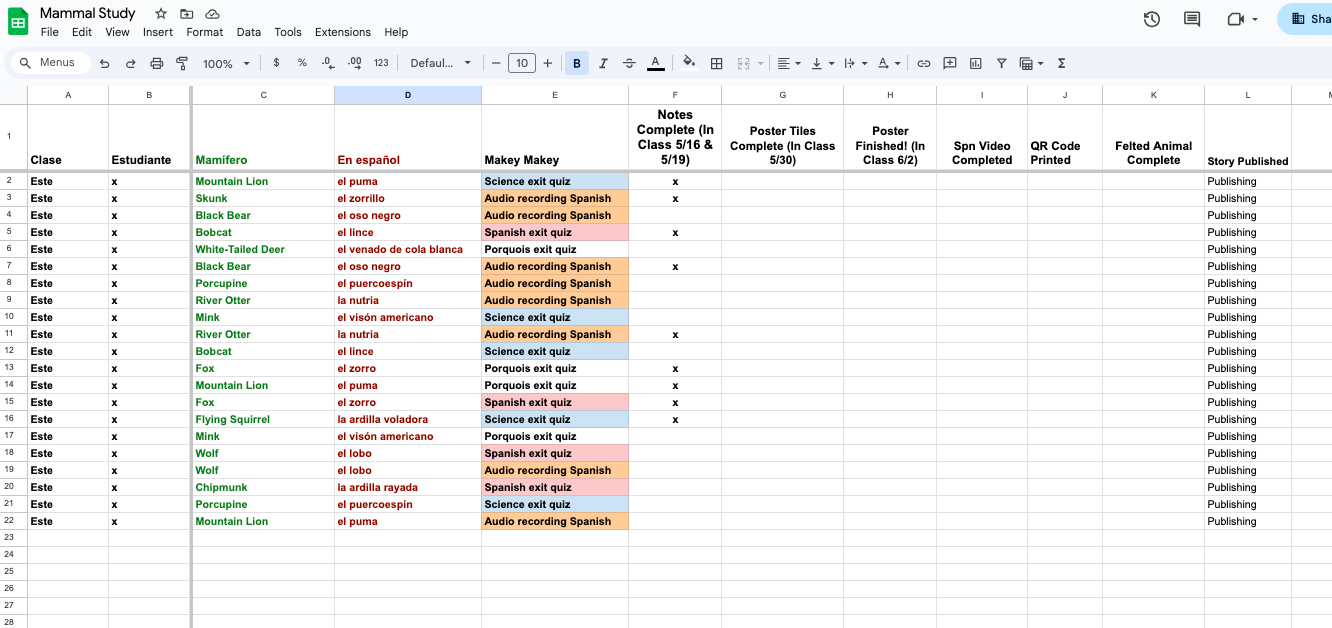
Setting up a clear system of communication and maintaining a record of student progress across disciplines is crucial to success in both the tech integration and the preceding research portion. A screenshot of our planning sheet is linked in the attachments section.

The Instructions

Introduction to Makey Makey and Scratch

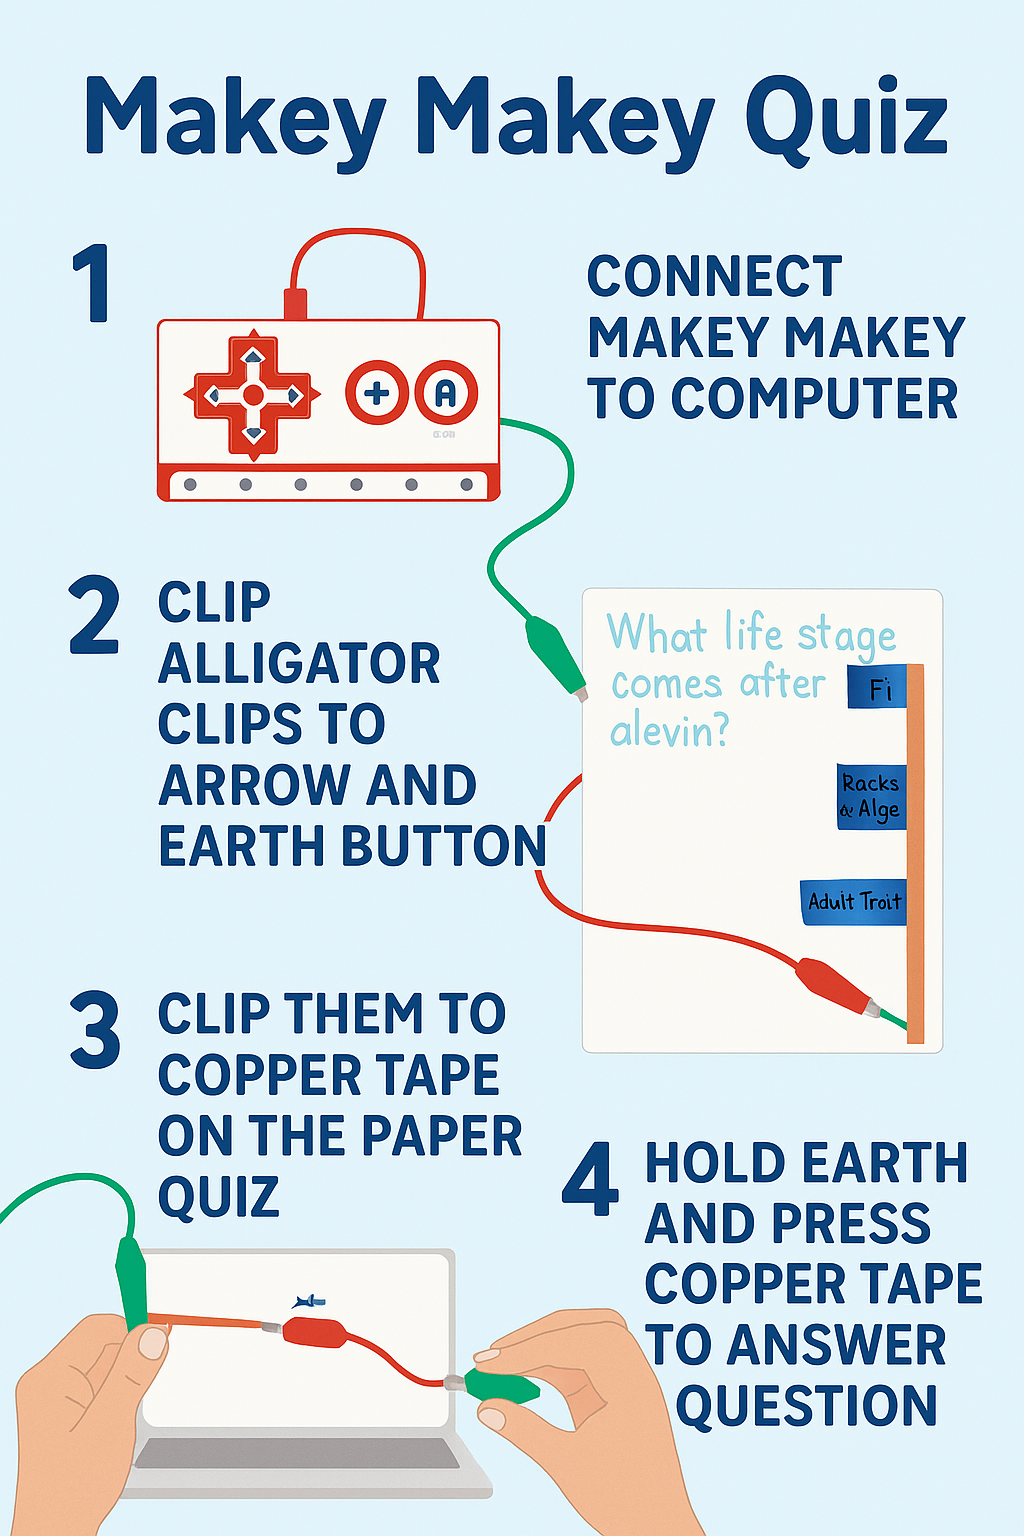
Students will learn how to connect a Makey Makey board to the computer, how to record sounds in Scratch and assign them to a key press, and will have the opportunity to play with the technology.

Materials

  • One Makey Makey board + 8 alligator clip cords per group of 4 students
  • One computer per group
  • 4 brass brads 
  • 4 squares of cardboard with small holes poked in the middle (for the brad to fit through)
  • Markers
  • A Demo 
  • One Question template per student and an extra per group (printed on cardstock is best)
  • Copper Tape


PREP: 

  • Load the sample code onto the students’ computers and project it onto the board for instruction.
  • Prep a cardboard square button and Makey Makey board one alligator clip should be clipped between the down button on the board and the legs of the brad on the button board. The second alligator clip should be clipped to a ground slot at the bottom of the Makey Makey board.
  • Develop a clean-up routine for equipment and projects.


PROCEDURE: 

  1. Introduce the Scratch program and the Makey Makey board. (10 min)
  2. Show students the code explaining how the two blocks work together. 
  3. Demo how to record a sound by pressing the Meow sound for the down button input and choosing “record.”
  4. Record a sound.
  5. Show students how to connect the board to the computer. 
  6. Demo holding the ground alligator clip and pressing the brad on the button board to make a sound. 
  7. Instruct students in groups of 4 (or less) to take turns recording a sound into one of each of the arrow button inputs in their scratch program. (5 min)
  8. Once sounds are recorded: Pass out a cardboard square, brass brad, and alligator clip to each student. (5 min)
  9. Instruct them to place the brad through the cardboard and secure the legs on the bag by opening and pressing them against the cardboard. 
  10. Instruct students to clip one alligator clip to the legs of the brad. 
  11. Pass out a Makey Makey board to each group that has four cords clipped to the ground and the usb cord attached. (10 min)
  12. Demo how to clip the alligator clip to the board and then instruct each student to clip the other end to the arrow that corresponds with their recording. 
  13. Once plugged into the computer with the usb cord, students can play with buttons while each holding a ground clip to create music or sound/word mashups. (20 min)
  14. CLEAN-UP (5 min)


Write Quiz Questions and Choose Sounds in scratch

Students will work as a group to create a quiz that shows their understanding of the subject or theme prompt. Each student will contribute a question sheet to the group quiz.

MATERIALS:

  • One Makey Makey board + 5 alligator clip cords per group of 4 students
  • One computer with Scratch quiz code loaded
  • One Question template per student plus an extra template per group
  • Copper tape
  • Markers
  • Relevant Research or projects to reference for the questions
  • Teaching template of quiz to use as demo 


PREP: 

  • Prep one quiz template per group by adding copper tape over the dotted lines extending all the way to the end of the page
  • Print one quiz template per student and cut out the blank area to the right of the answers. When stacked on top of the group template, the copper tape on the group template should be exposed.
  • Login to scratch for each of the computers and open a new project titled with the names of the group. 
  • Clip the demo quiz to a Makey Makey board and connect to your computer with the Scratch Demo code opened
  • Check that the Demo quiz works
  • Write out the prompts that students will use to guide their quiz design. Your prompt should be aligned with the learning goals for the tech integration. A list of prompts used in our lesson is available in the attachment section. 
  • How will you give students the prompt(s)? 
  • Organize materials for each group (At this point I would have a folder or large envelope to keep groups’ materials together.)


PROCEDURE: 

  1. DEMO: (10 min)
  2. Show students the quiz and practice answering the questions by holding the ground copper strip and the strip for the answer being chosen. 
  3. WORK TIME: (30 min)
  4. INSTRUCTIONS: Use the prompt to develop your own quiz to show your understanding of the __________. A good quiz should cause someone to have to think critically about the choices. First come up with a quiz individually.
  5. Next, share your quizzes with each other and collaborate and bounce ideas off of each other to make them stronger. 
  6. Write your question and answers on the templates and bring your completed quiz packet to me for review. 
  7. Once reviewed and edited, you may open the quiz code and change the sound for correct and incorrect responses.


TEACHER NOTE: When students bring up packets and you have reviewed them, stack all of the student quizzes on top of a group template with copper tape. Line them up along the left side and staple them together like a booklet.


You will need to check in with groups to update the code to reflect correct and incorrect answers per question.


  1. CLEAN-UP (5 min)


Test Makey Makey, Complete Reflection, and Decorate Quizzes

Students will finish recording and test that their quizzes work. After troubleshooting any issues, they may decorate their quizzes in preparation for the project expo. TEACHER NOTE: You can also include a reflection at this point.

MATERIALS:

  • Groups’ materials 
  • Computer per group
  • Art materials to decorate quiz


OVERVIEW: Students will continue to work in groups to finish their quiz recordings. They will wire their Makey Makey board to the quiz template and test it. 


PREP: 

  • Log in to Scratch and go to the projects menu so that groups can easily access their project. The quiz code should be imported into their projects
  • Set up art materials
  • Create and print reflection sheets (optional)


PROCEDURE: (30 min)


  • INSTRUCTIONS:
  • Finish recording your questions and answers.
  • Hook up the Makey Makey to your quiz booklet
  • Troubleshoot any issues
  • Do your question numbers line up with the right keys for correct answers?
  • Work together first, then ask a teacher. 
  • When your quiz works, you may decorate your question page
  • Decorate your question sheet with imagery that supports the question. Your imagery might give clues if your question is tricky.

CLEAN-UP.(10 Min)

Lesson Feedback

Contact us

Having trouble? Let us know by completing the form below. We'll do our best to get your issues resolved quickly.

"*" indicates required fields

Name*
Email*
This field is for validation purposes and should be left unchanged.
?