- Loading…
In this lesson, 3rd grade students will observe and study characteristics and patterns found in nature that can be imitated to solve real-world problems. This approach is called biomimicry. As a final outcome, students will design a prototype that presents an invention or innovation inspired by their observations of rolly pollies, animals with interesting features that can inspire design solutions.
During the process, students may design either a part of their invention or a complete prototype using Tinkercad, which can later be printed using a 3D printer. This lesson primarily integrates Science and Engineering, while also addressing sustainability, specifically Sustainable Development Goal (SDG) #12: Responsible Consumption and Production.
In this unit, students explored biomimicry, the practice of mimicking nature’s patterns to solve human challenges. By observing the unique biological characteristics of roly-polies (isopods), students identified key structural features to inspire their own prototypes.
The challenge was to design a sustainable invention that addresses a specific problem while adhering to SDG #12 (Responsible Consumption and Production). As part of their project criteria and budget management, students were required to prioritize eco-friendly materials for both production and packaging. To further minimize their environmental footprint, they utilized upcycled and reusable materials to build their physical models.
Final prototypes were developed through three possible pathways:
Students will be able to:
With this lesson, I observe that my learning was more detailed by considering the alignment between objectives and evaluation through pedagogical, technical, and sustainable lenses, as well as technological fluency among other aspects. It has also been interesting to have planned many details and to receive feedback from the AI—in my case, because it was my choice. Something that really caught my attention is that I did this project for a long time in an analog way; however, for the first time and because I recently acquired 3D printers in class, I incorporated the option that allowed students to choose if they wanted to expand their proposal by designing and printing a part or the complete prototype for their presentation. I liked the result very much upon seeing the satisfaction of the students who participated, while on the other hand, I noticed how it sparked a curiosity to learn about 3D and Tinkercad to design and apply biomimicry learning in the generated models. I observed that not everyone has that skill well-established, yet the sustainability component was more conscious and practical since the students knew they would be copying something from nature in exchange for taking care of it. Also it was part of the criteria to demonstrate that the design was respectful with the environment considering that if they would replicate the prototype, what would they use. The experience with AI was also interesting as I was able to apply other personal learnings.
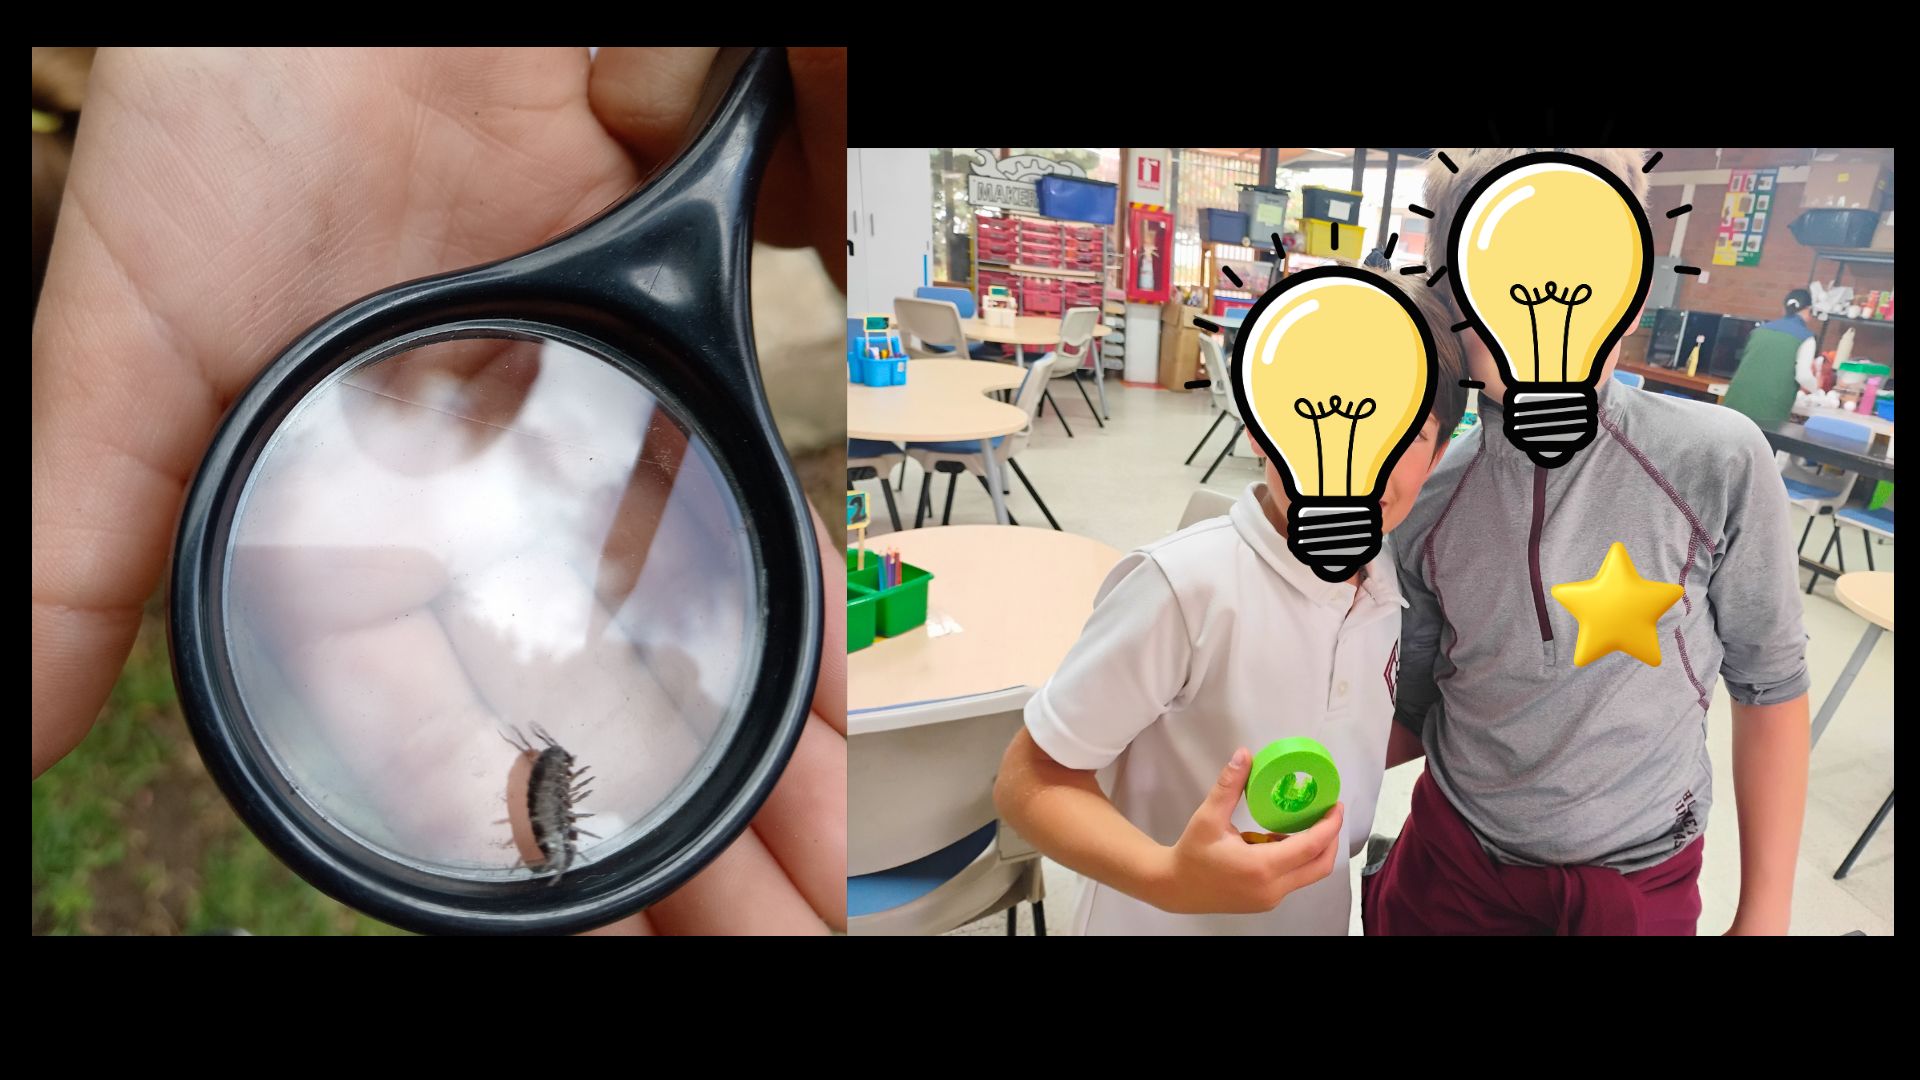
Students explore the world of rolly pollies by observing them in nature, examining a classroom terrarium, or watching educational videos. As they explore, students will actively document their observations to track what they learn.
Students begin the unit by observing “rolly pollies” in their natural habitat. Utilizing magnifying glasses, they will conduct a detailed examination of the organisms, illustrating their findings and recording observations regarding physical patterns and behaviors.
(35 minutes)
Following the field observation, students will view a short video on biomimicry to establish a foundational understanding of the concept through real-world examples. The session concludes with a collaborative discussion where students analyze these examples and share prior knowledge of biomimetic designs.
(15 minutes)
Explanation of the criteria and sustainability
The teacher will present the Biomimicry project. Students must design a prototype for a new innovation that fulfills three criteria: it must be inspired by a rolly pollie, solve a real-world problem, and reflect sustainable design principles.
(10 minutes)
The class will examine SDG #12 (Responsible Consumption and Production) through a Guatemalan lens. The teacher will lead a discussion on the importance of this goal in the building process, sustainable practices within Guatemala, and the intersection of biomimicry and environmental stewardship.
(15 minutes)
Students will individually draft a sketch of their idea. These drawings serve as the blueprint for the design ideas they will soon pitch to their teammates.
(25 minutes)
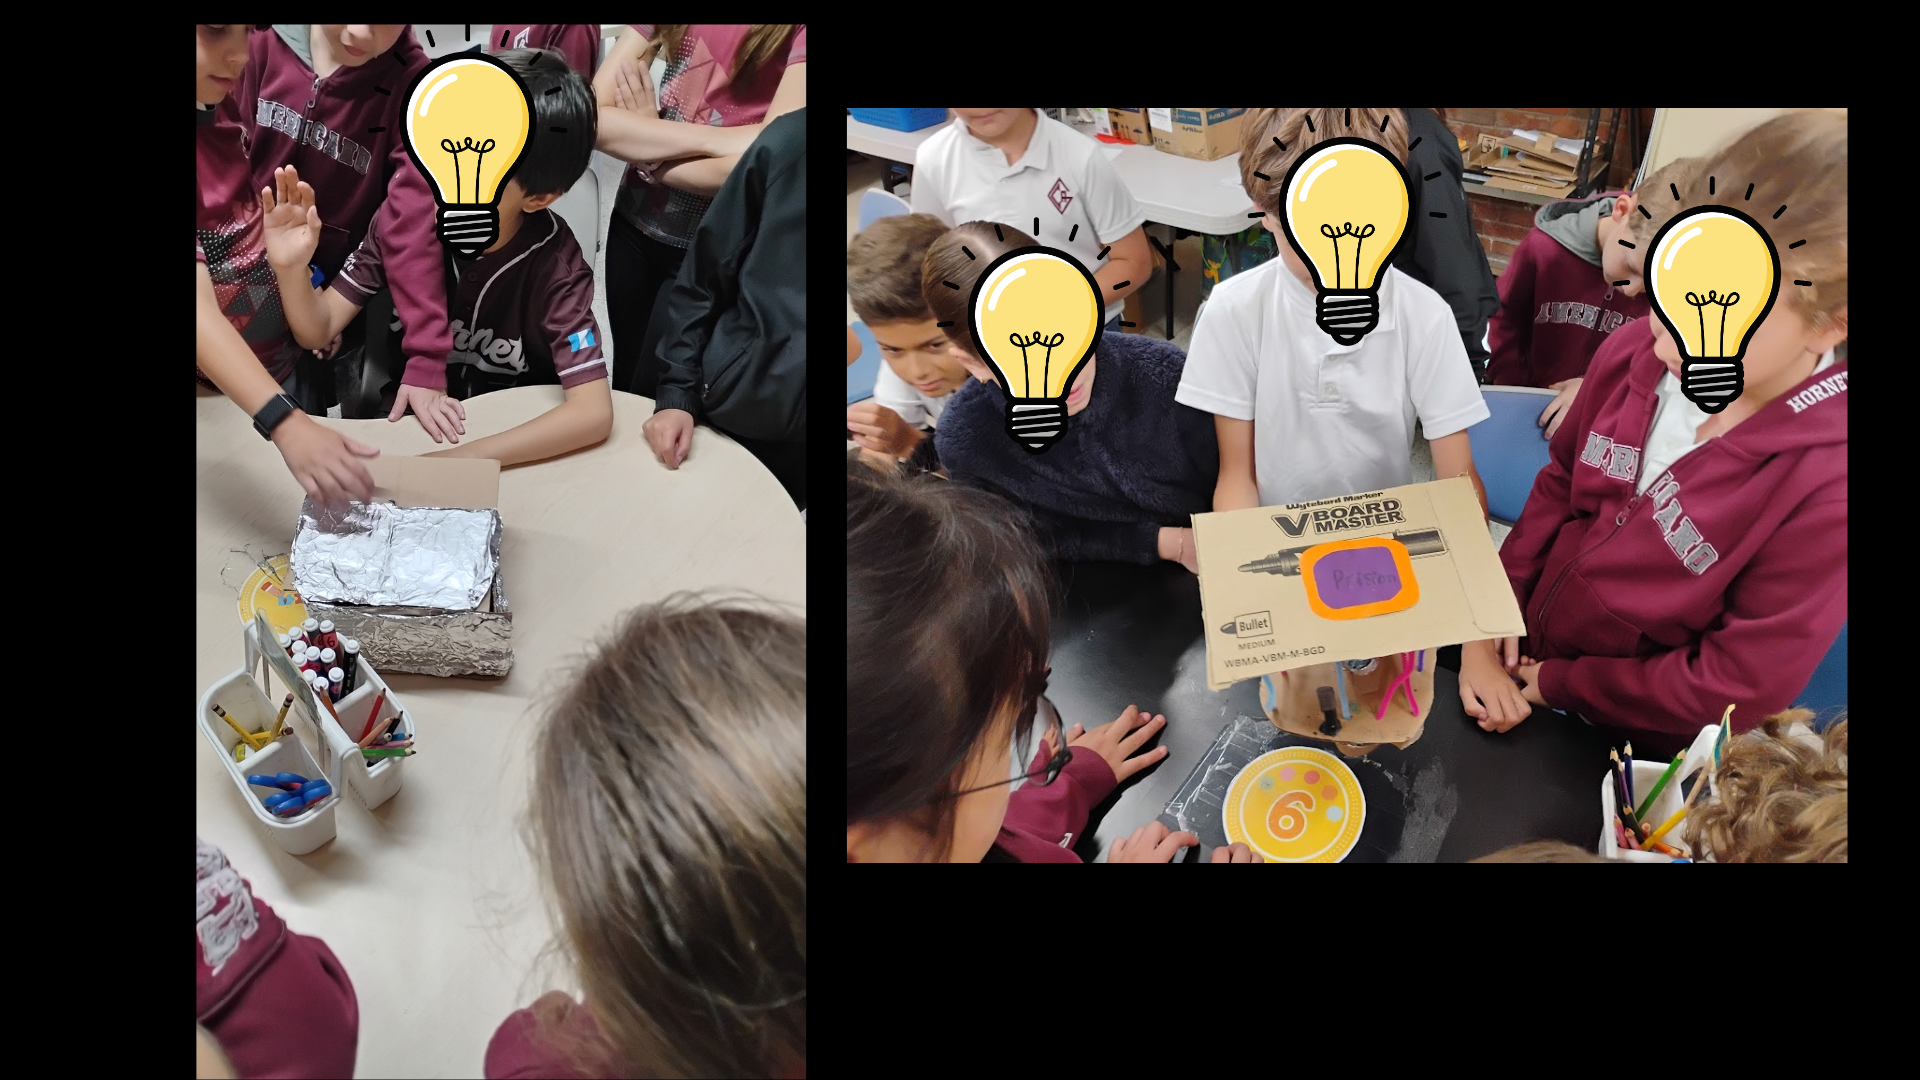
Students will work in a group planning (I recommend three maximum) and have a short interview with the teacher.
Collaborative Design: The teacher will organize students into groups of three. Each student will present their individual concepts, after which the group must decide on a final direction by choosing to:
(15 minutes)
Final Sketch & Teacher interview: Once the group reaches a consensus, they will produce a final sketch on the provided worksheet to be submitted for teacher feedback. The teacher will then conduct a brief interview with each group to evaluate the project’s viability using the following guiding questions:
Groups whose ideas meet all criteria will receive a green sticker, authorizing them to begin their builds.
(35 minutes or more)
Prototyping Phase: Groups may choose their preferred medium for construction:
Students will continue designing and building their prototypes either digitally or using physical materials:
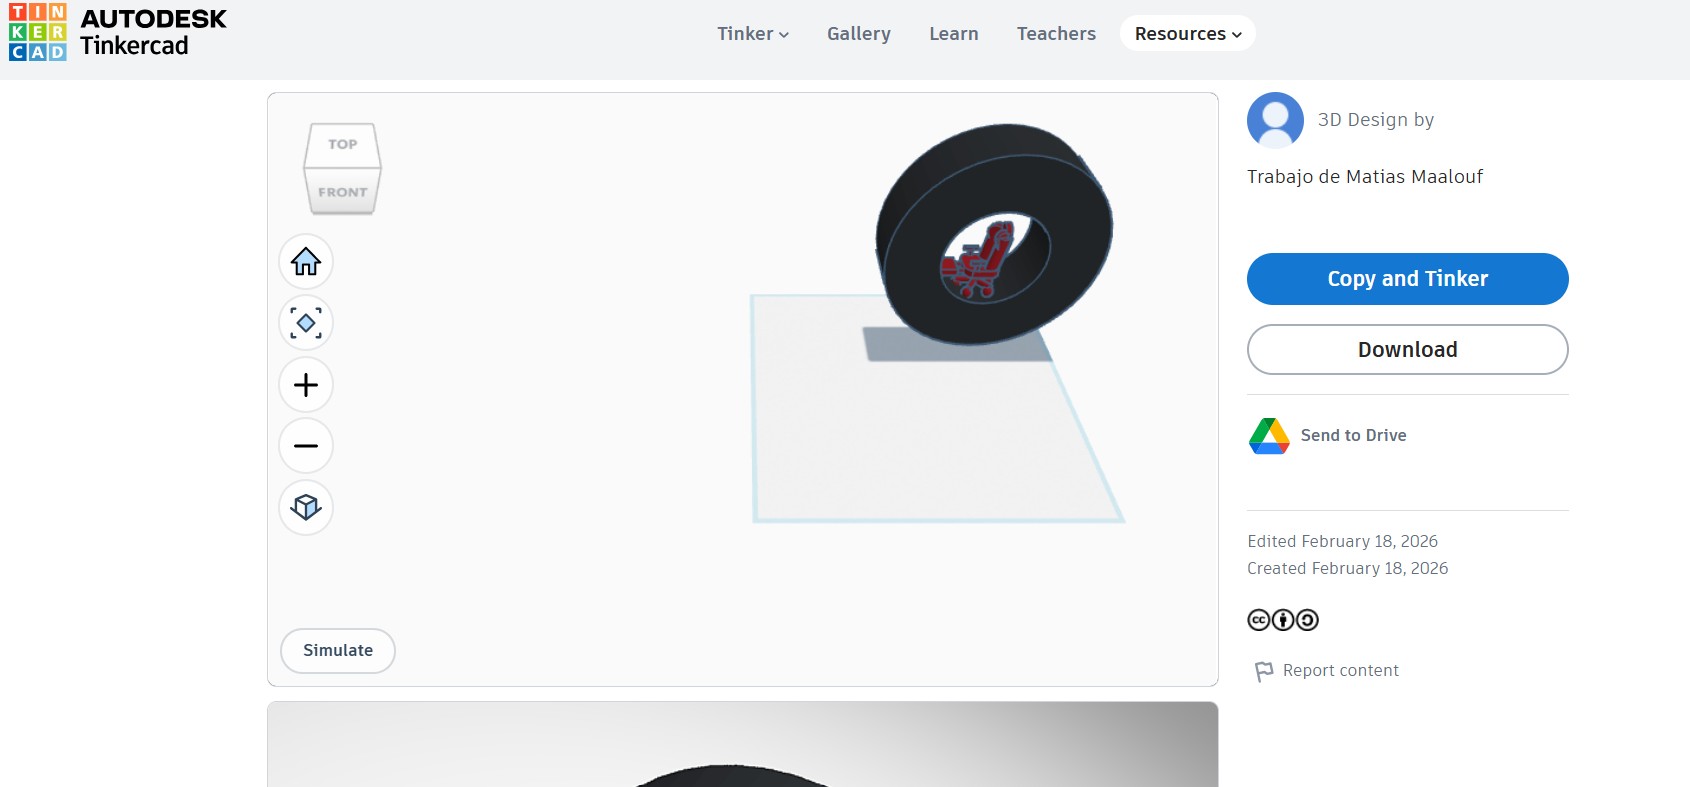
Digital Prototype: Designing in Tinkercad for potential 3D printing.
Analog Prototype: Utilizing physical materials (ideal for those less familiar with digital design tools).
(1 hour each class)
Between Days Five and Six, the teacher may 3D print selected designs created in Tinkercad. Some students may prefer to present their digital prototype directly from the computer, while others may choose to present a 3D printed model.
Presentation time and evaluation. Teacher will make a gallery walk and will evaluate the project with the rubric. At the end students will have an exit ticket.
Students will present their prototypes through a presentation and gallery walk format. Each group will have 5 minutes to present their idea and explain:
Presentations are open and flexible within the time limit. However, key aspects of the project will be evaluated using a rubric.
(50 minutes)
Exit Ticket: Nature’s Design Lab
Name: ____________________ Date: ____________
1. The Nature Detective
In your own words, what is Biomimicry?
A) Studying how to grow more plants.
B) Copying nature’s designs to solve human problems.
C) Taking pictures of animals in the woods.
2. The Roly-Poly Secret
What is one specific feature of the roly-poly that helped you design your prototype? (Example: its shell, how it rolls, or its layers).
3. Responsible Making (SDG #12)
To help our planet and Guatemala, what is one “green” material you used (or could use) for your project instead of new plastic?
4. Problem Solver
How does your design help a human? (Example: Does it protect something? Does it move easily?)
5. The “What’s Next?”
If you could study any other animal to invent something new, which animal would you pick and why?
Having trouble? Let us know by completing the form below. We'll do our best to get your issues resolved quickly.
"*" indicates required fields