- Loading…

Online Unplugged lesson aims to orient kids about the sport technology and how it play a role in athletes practice.
We will also introduce participant to coding and how to use block coding as a first step to be professional in writing codes, in order to introduce participant to Arcade consoles and how to code them.
In this section, we will ice break with the participant by asking them a question to attract their attention, and introduce them to sport and the type of sports.
1- We will start by asking the student about the sport if It’s going to be virtual?

2- Then we will ask the participant about the sport in general.
“As a physical activities can be performed to express and improve physical fitness and mental well-being “

3- Then we will ask the participant about the types of sport they have previously practised, and also the types of sports that existing.

In this section we will introduce the participant to the technology and how its being merged with sport.
1- We will start here by explaining the definition of technology to the participant also we will try to let them briefly define the technology meaning, “As tools been invented by humans to make their life easier”, “Also here we can clarify that any kind of tool built considered as a technology so the hummer and the nails once was a breaking technology at that era”

2- Then we will try to express the linkage between the technology and the sport and how does it play a role in the realm of sport by trying to enhance the experience of the user and also trying to rise the performance of the training the athlete is practising.

3- Then we will ask the participant about if they are considering computer games as a kind of sport.

In this section we will introduce the participant to programing and the technique used in coding also we will try to clarify the types of available types in coding and the languages we can use.
1- We will start by introducing the participant to programming in general and clarify the concept behind the need to code also we will try to clarify the types for them and introduce them to the block coding type that they are going to use.

2- Then we will present a video to the participant to introduce them to coding in general and also mention the available languages they can use.

In this section we will clarify the needed steps to build the game in the Arcade platform. We will try to step-by-step clarify the points needed.
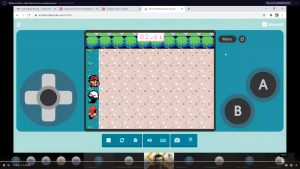
1- We will describe the game that we are going to build on Arcade platform.
“As a racing game that we will code using the Platform within the game we will be building a winning scenario and a loosing scenario also we will try to add some kind of effects to the game and counters”

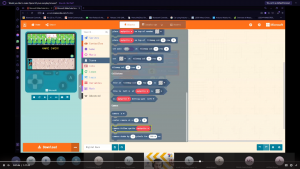
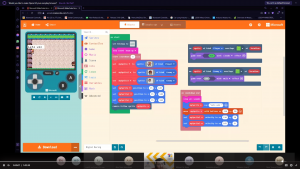
2- Then we will show the participant the codes that we need.,
As we need to clarify the loops for them.
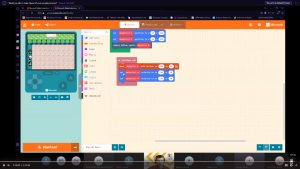
“On start loop” : A loop the computer going to execute once the play button is pressed.
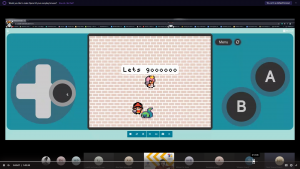
And within this loop, we will be adding the needed animation when the game starts.
Also, we will build the tile-map for the racing field and also the characters we have to have in our race.
Finally, we need to add the position for each character and not forgetting to set the type for each character.


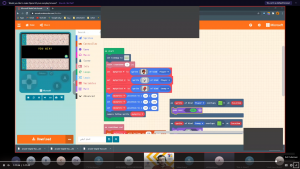
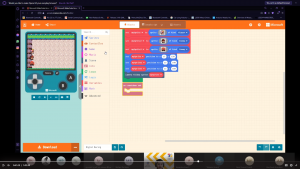
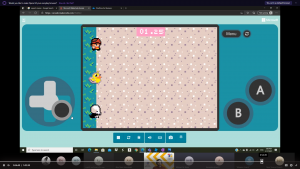
3- Then we will show the participant the code needed for building the after the count-down counter finish.
In this part of the code we will stop all the sounds, Also we will make the saying instructions.
Finally, we will create the moving instructions for the characters.

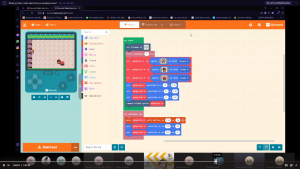
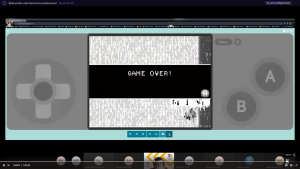
4- Then we will manage to build the winning and losing scenario of the game.
We have here to encounter the overlap instruction to clarify for the participant the use of this sentence.

In this section we will show the participant the steps they have to follow to make the game on the platform.
1- We will start by giving a rush tour to the participant in the platform to orient the new participant about how to use it.

2- Then we will give them the instructions of to create a new project.
3- Then we will show them the instructions within the platform and the available option of creating the game.

4- We will also try to briefly talk about the instructions within each category.

5- Then we will start making the game, we will start by showing them the game.

6- Then we will create the characters and the Tile-Map under the ON-Start Loop.

7- We will also give each character the type so later on we can build the winning and loosing scenario.
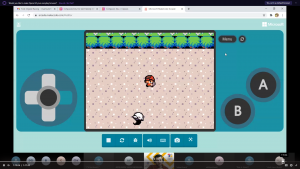
8- Then we will add the position instructions for each character, and we need also to add an instruction for the camera to follow the player we are controlling.

9- Then we will add the instruction of after the count-down timer is finished to add the controlling instructions for each character and also make our character controllable through the keyboard.

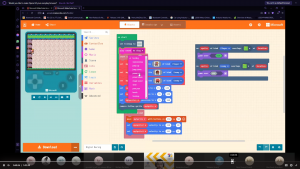
10- Then we will build the winning and loosing scenario for the game through overlapping instruction, which they have to understand as it is intersecting with the object.

11- At this point the game is ready, and it can be modified through adding sounds and animation to it as a starting animation, winning animation, and loosing animation; also the game can be made more complex if you want to add level to the game.
Having trouble? Let us know by completing the form below. We'll do our best to get your issues resolved quickly.
"*" indicates required fields