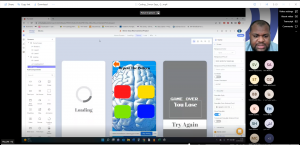
- Loading…

During the 5 days of the workshop the participants are going to learn the process of mobile app development using Thunkable, the participants are going to create an app that will help train the memory of the brain. Through the process of creating the app they are going to learn the main elements of mobile app development from creating an interface all the way to have a fully functioning interactive app.
Participants are going to be introduced to the meaning of neuroscience and how digital fabrication can be used in neuroscience. They will also be introduced to thunkable platform that is used in mobile app development.
Presentation:
1- Who are we and what we do in Studio 56.
2- Which zone we will be in today.
3- Introduce the Client letter of the workshop.

3- Open Question: What is Neuroscience?

4- What are the different parts of the brain?
•Explain the different parts.
•Explain the memory part of the brain.

5- Show a video of Neuroscience in action.
•Discuss with the participants the video.

7- Open Question: Can you think of ways to use Neuroscience?

10- Explain Thunkable platform and what it is used for.

8- What is mobile app development?.
•Show a video about mobile app development.
9- What are we going to develop?.
•Explain Simon Say’s game idea.

•Thunkable:
1.Ask students to create accounts in the platform.
2.Explain thunkable platform features.
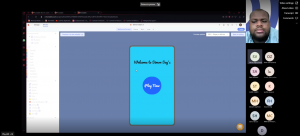
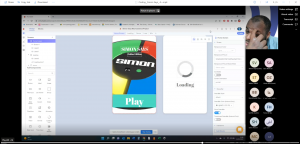
3.Design the Welcome screen.
4.Add welcome text in the welcome label.
5.Add a button that will start the game.

Participants are going to be design the interface of the app, they will add multiple screens, buttons, labels and customize the background.
Presentation:
1.Overview of what was done in day 1.
2.Brainstorm on how should the design of the game be.
3.What we will do today.
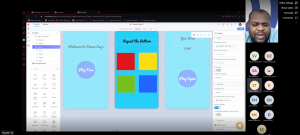
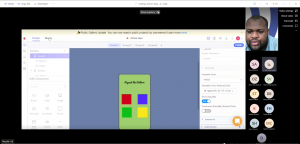
1. Design the game screen:
•Add the instructions label and change its text.
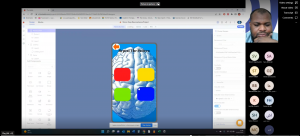
•Add the 4 buttons used in the game.
•Change the size and color of the buttons to have 4 different colors.
•Change the background of the screen to make it more appealing.

2. Design the won screen.
•Add a label that will contain the winning text.
•Add a label that will contain the score of the player.
•Add a button that will take us to the welcome screen.

3. Design the lost screen.
•Add a label that will contain the losing text.
•Add a label that will contain the score of the player.
•Add a button that will take us to the welcome screen.

Participants are going to learn about block coding and the features of block coding in thunkable in more details, they are going to initialize variables and start coding the on-start handler.
Presentation:
1.Overview of what was done in day 2.
2.The difference between block-based and text-based coding.
3.Show all the types of blocks available in Thunkable.
4.What we will do today.
1. Code the welcome screen:
•Code the play now button to navigate the player to the game screen.

2. Initialize variables in the game screen:.
•Explain the different types of variables.
•Explain the difference between a variable and a list.
•Initialize the variables that are going to be used in the app.

3. Code the on-start handler.
•Set button’s texts.
•Re-initialize the variables so the game can restart once it is finished.
•Create a function that will fill the color list.
•Create 4 function that will flash each button.
•Create a loop that will flash for the player all the colors that the player need to repeat.

Participants are going to program the app to flash a series of colors and the player should remember this series of colors.
Presentation:
1.Overview of what was done in day 3.
2.What we will do today.
1. Finish coding the on-start handler:
•Finalize the on-start handler by adding counters and wait time.
2. Code the fill color list:.
•Create a loop that will fill the target list.

3. Code flash red function.
•Make the red button invisible.
•Make the red button visible.
•Add wait time.
4. Code flash blue function.
•Make the blue button invisible.
•Make the blue button visible.
•Add wait time.
5. Code flash green function.
•Make the green button invisible.
•Make the green button visible.
•Add wait time.
6. Code flash yellow function.
•Make the yellow button invisible.
•Make the yellow button visible.
•Add wait time.
7. Test the flashing functionality to make sure it is working properly.

Participants are going to program the any button click handler and code the won and lost screen.
Presentation:
1.Overview of what was done in day 4.
2.What we will do today.
1. Code the any button handler:
•Create an if statement that handles player clicking the button while the pattern did not finish.
•Insert player choice in a player choice list.
•Add if statement that starts checking the pattern entered by the player once the player makes all the choices.
•Create a loop that will compare between the player choice list and the target list.
•Create an if statement that navigates to the won screen or the lost screen depending on player score.

2. Code won screen:
•Add texts to the score label that will display the player score.
•Code the play again button to navigate player to the welcome screen.

3. Code lost screen:
•Add texts to the score label that will display the player score.
•Code the play again button to navigate player to the welcome screen.

4. Question and problem solving.
Having trouble? Let us know by completing the form below. We'll do our best to get your issues resolved quickly.
"*" indicates required fields