Traffic Light System - SCOPES Digital Fabrication

Lesson Details

Age Ranges
5-8
Standards
Fab-Safety.2, Fab-Programming.2, Fab-Electronics.2, Fab-Design.2
Author
Additional Contributors

You need to login or register to bookmark/favorite this content.

Author

Studio 5
Studio 5
Informal educator
In line with the Ministry of Communications and Information Technology’s Digital Youth Strategy, STUDIO 5 is mainly aimed at nurturing youth as digital learners by sharpening their 21st century learning skills, as they develop in an all-pervasive digital environment. In… Read More

Summary

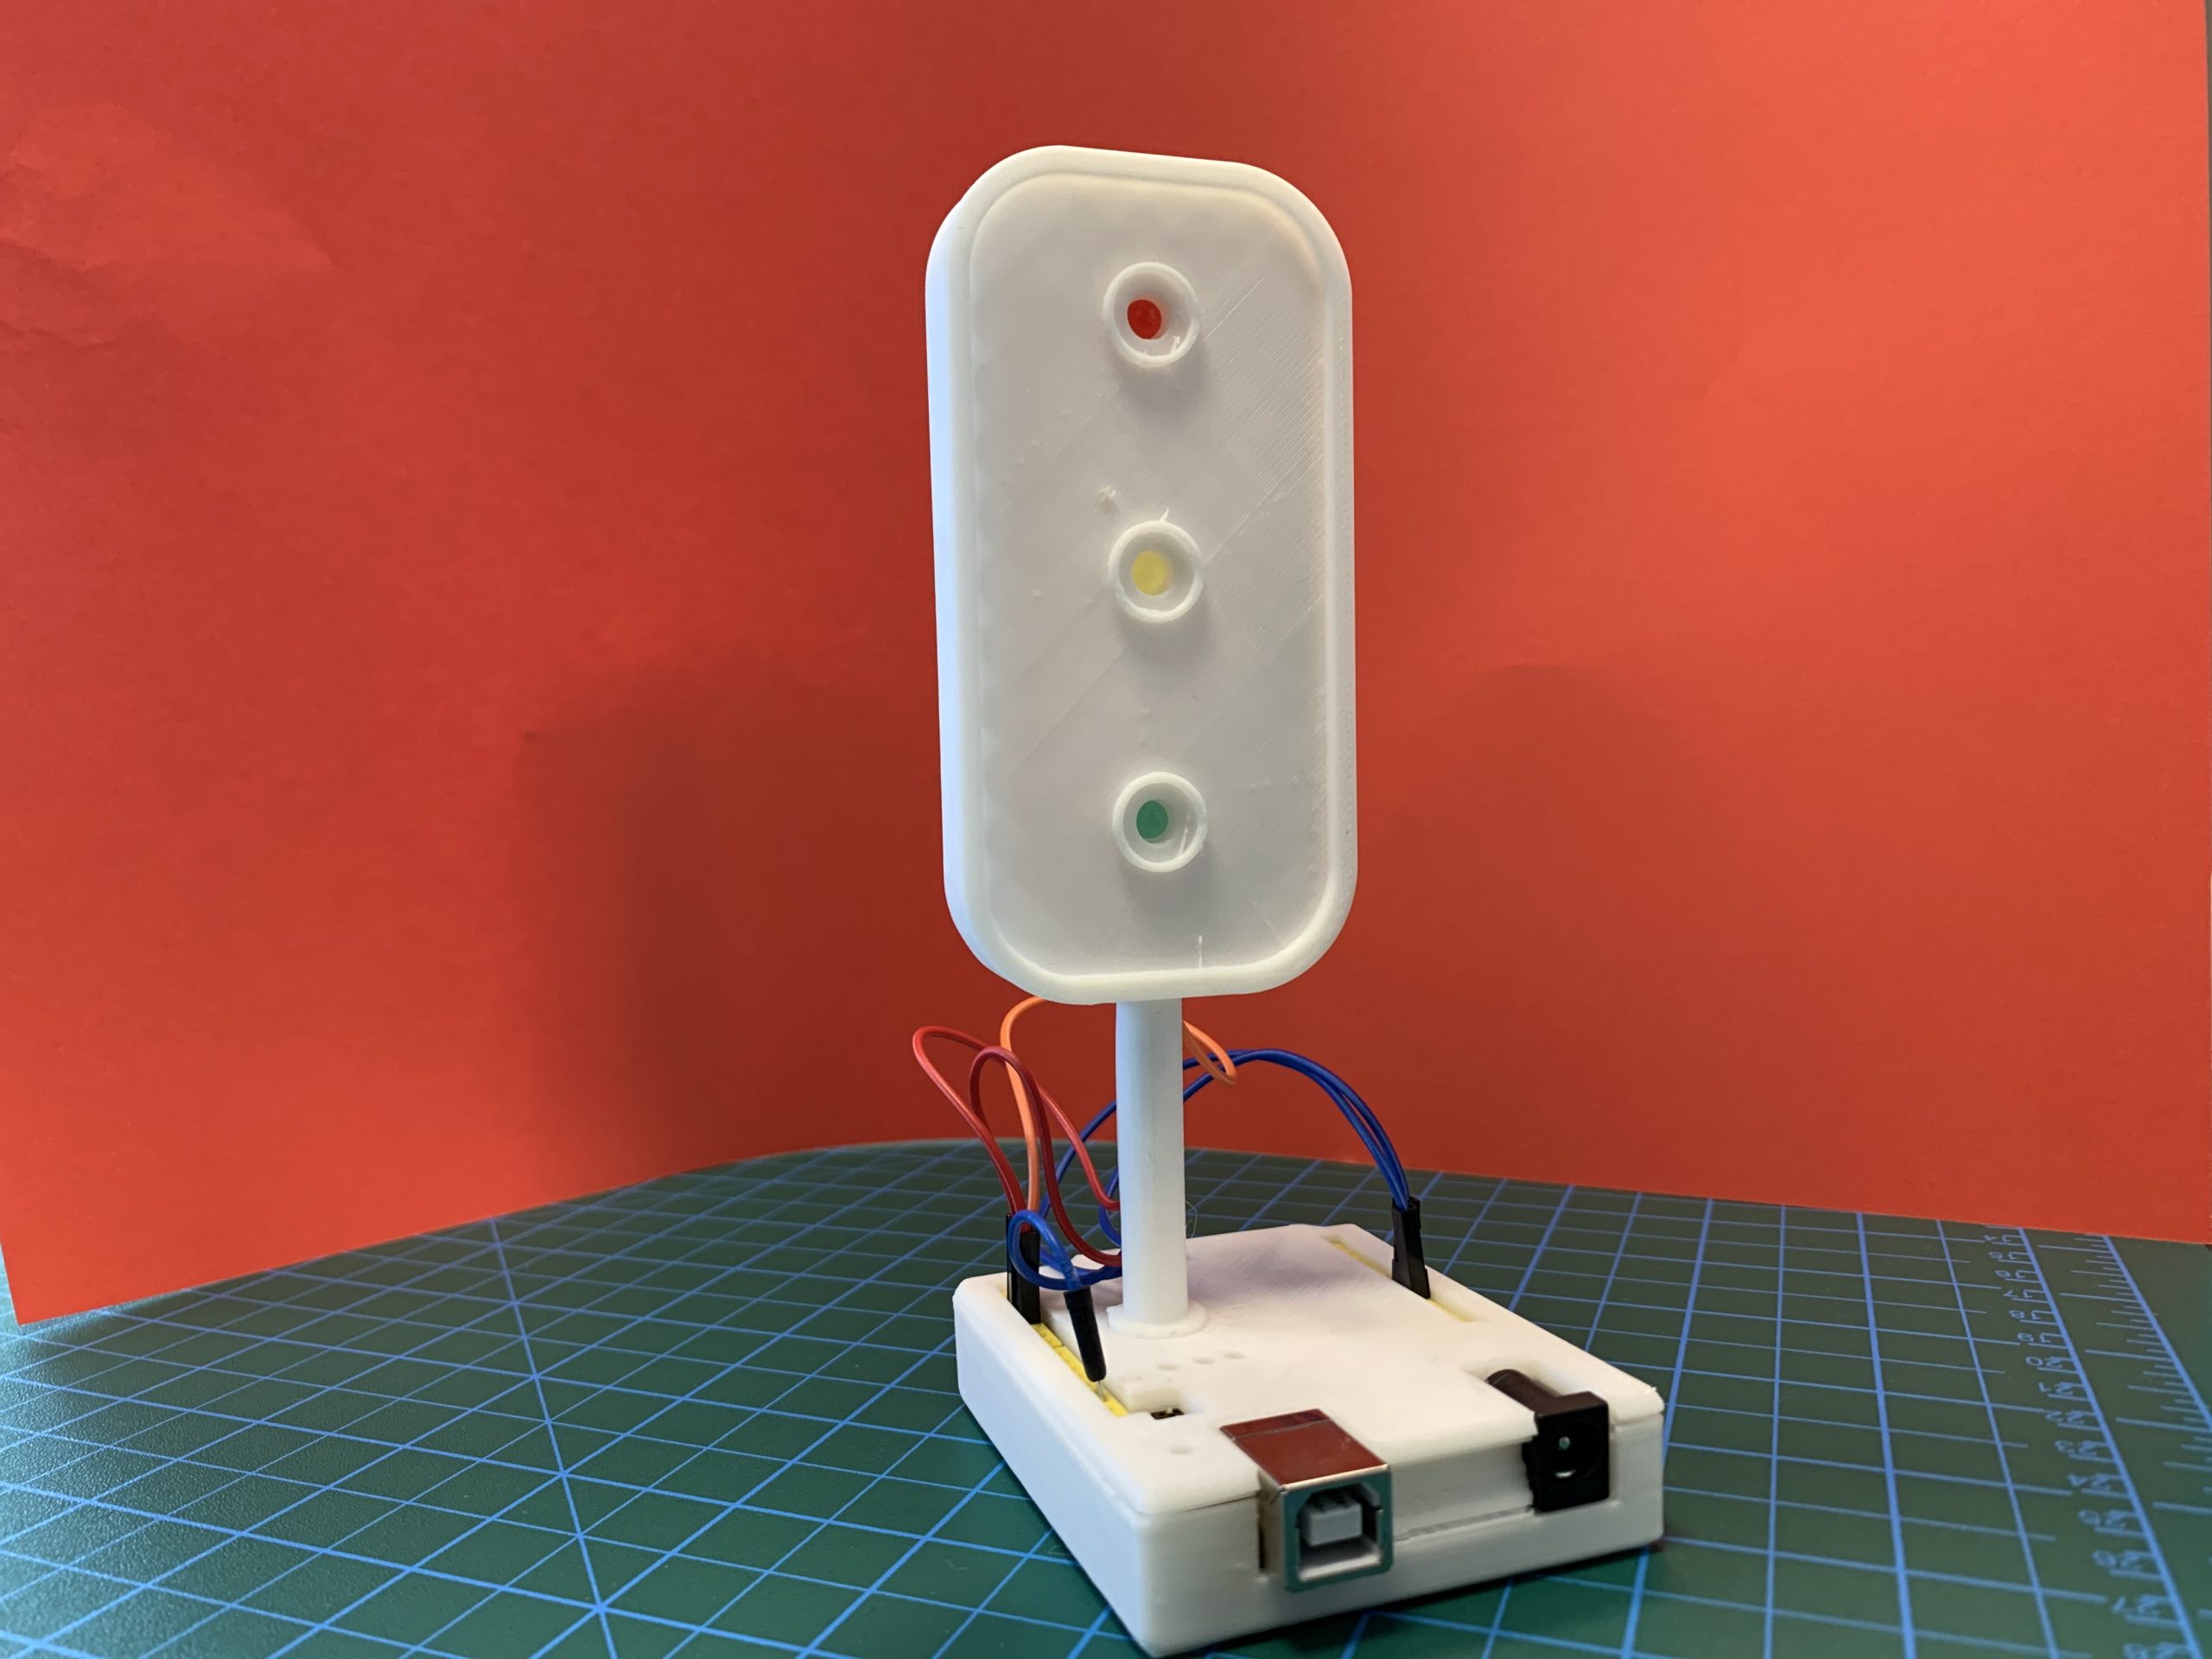
In this workshop participant will build a simulation for the traffic light system. They will apply the knowledge they have gained during the workshop to Build their Prototypes using Tinkercad Circuits software. This workshop can be done on person too. where kids can use the real Arduino and LEDs to build the prototype( Hardware 3D model and Arduino Code will be attached)

What You'll Need

  1. Laptop
  2. Internet Connection
  3. TinkerCAD Software Account


The Instructions

Presentation

Instructor will present a general ideas about electronics and Circuits.

  1. What is Circuit and Electricity.
  2. Electrical circuit main components.
  3. Traffic Light system components.
  4. What is Micro-controller, and how it works.
  5. What is the LED and how to connect and control them.


TinkerCAD Software

Presenting the TinkerCAD software and it's Interface.

  1. Explain Digital Electronics to participants.
  2. Introduce TinkerCad Software and it’s main Interface.


Building Electronics

Participants will follow the instructor to assemble all electronics.

  1. Drag and drop Arduino Uno from electronics menu.


2- Add first LED to the prototype.

3- Change color of the LED


4- Add all three LED’s


Connecting Electronics

Instructor will start to connect LED's with Arduino.

  1. Connect Negative leg of three LED’s to GND Pin of Arduino.


2- Connect positive legs of LED’s to the Pins ( Red to 4, Yellow to 3 and Green to 2).

Block Coding

Introducing what is block Coding and the color coding behind it.

Instructor will introduce to participants what is block coding and how to build a functional code inside the software. Also, the color coding for each blocks.

Programming Arduino

Instructor will build the code for the Arduino to control 3 LEDs

  1. Red Light Code


2- Build the code for other 2 LEDs


3- Repeat code


Simulation and presenting projects

Instructor will guide participant for projects simulations.

  1. Use Start Simulation to run the code.


Participants will start to share their prototypes with others and explain their codes.

Standards

  • (Fab-Safety.2): I can operate equipment in a Fab Lab following safety protocols.
  • (Fab-Programming.2): I can create a program with more than one instruction.
  • (Fab-Electronics.2): I can follow a schematic diagram and create a circuit including a microcontroller with electronic components.
  • (Fab-Design.2): I can participate in design reviews with prepared presentation materials as well as give and receive feedback from peers.

Lesson Feedback