- Loading…

This three-day workshop is designed to explore pressing climate-related challenges and collaboratively develop practical solutions. Participants will delve into the potential of artificial intelligence as a powerful tool in combating climate change and driving sustainable innovation. Using the (PictoBlox) platform, they will code and demonstrate their proposed solutions through interactive prototypes. The workshop also features hands-on sessions where attendees can showcase hardware tools for data collection, presentation, and visualization—fostering a dynamic, tech-driven, and solution-oriented learning environment.
After attending this session, participants will be able to:
● What is the pictoblox platform and how to use it.
● Distinguish the difference between AI and ML.
● Know how to use hardware with the Pictoblox platform.
The concept of the session is simple; however, the coding part requires greater attention to detail particularly when it comes to training the AI model. This stage demands a solid understanding from participants of how the training process works.
In this step I will fully introduce who we are and what we do and what are gonna be doing during these three days and what are the potential output expected from the participant.

Now lets start curving bit by bit to the session topic through asking questions and they answers.

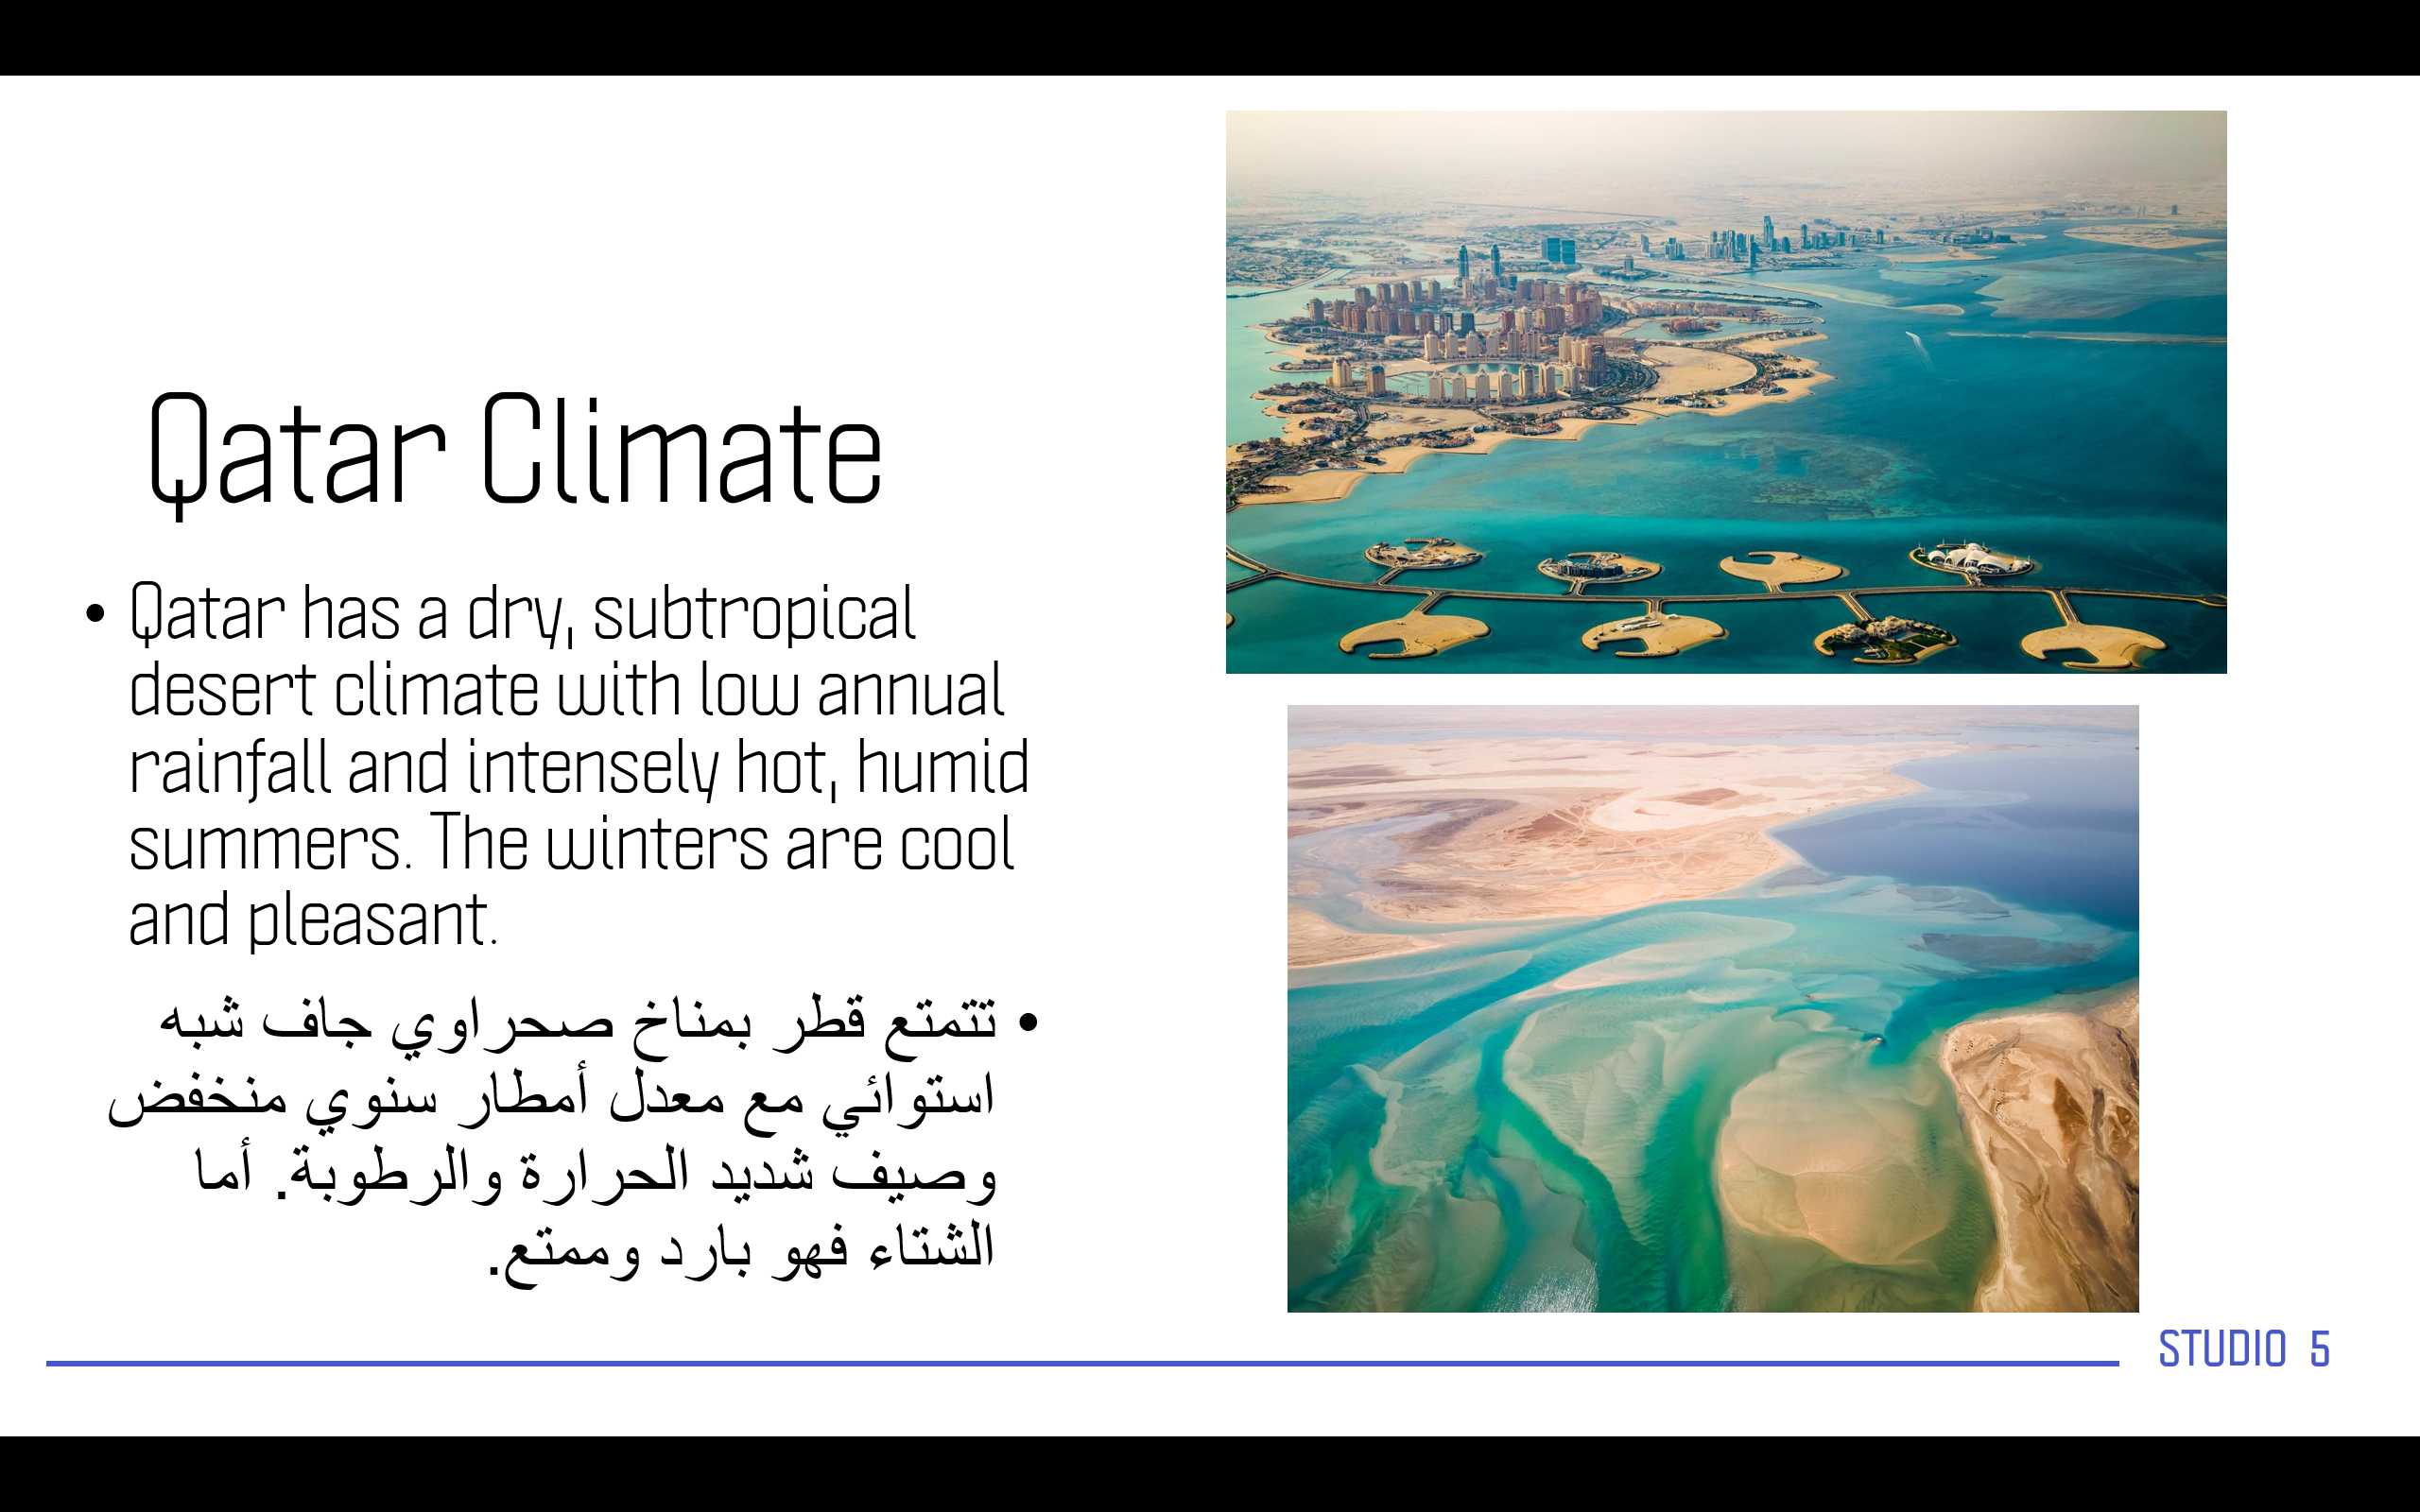
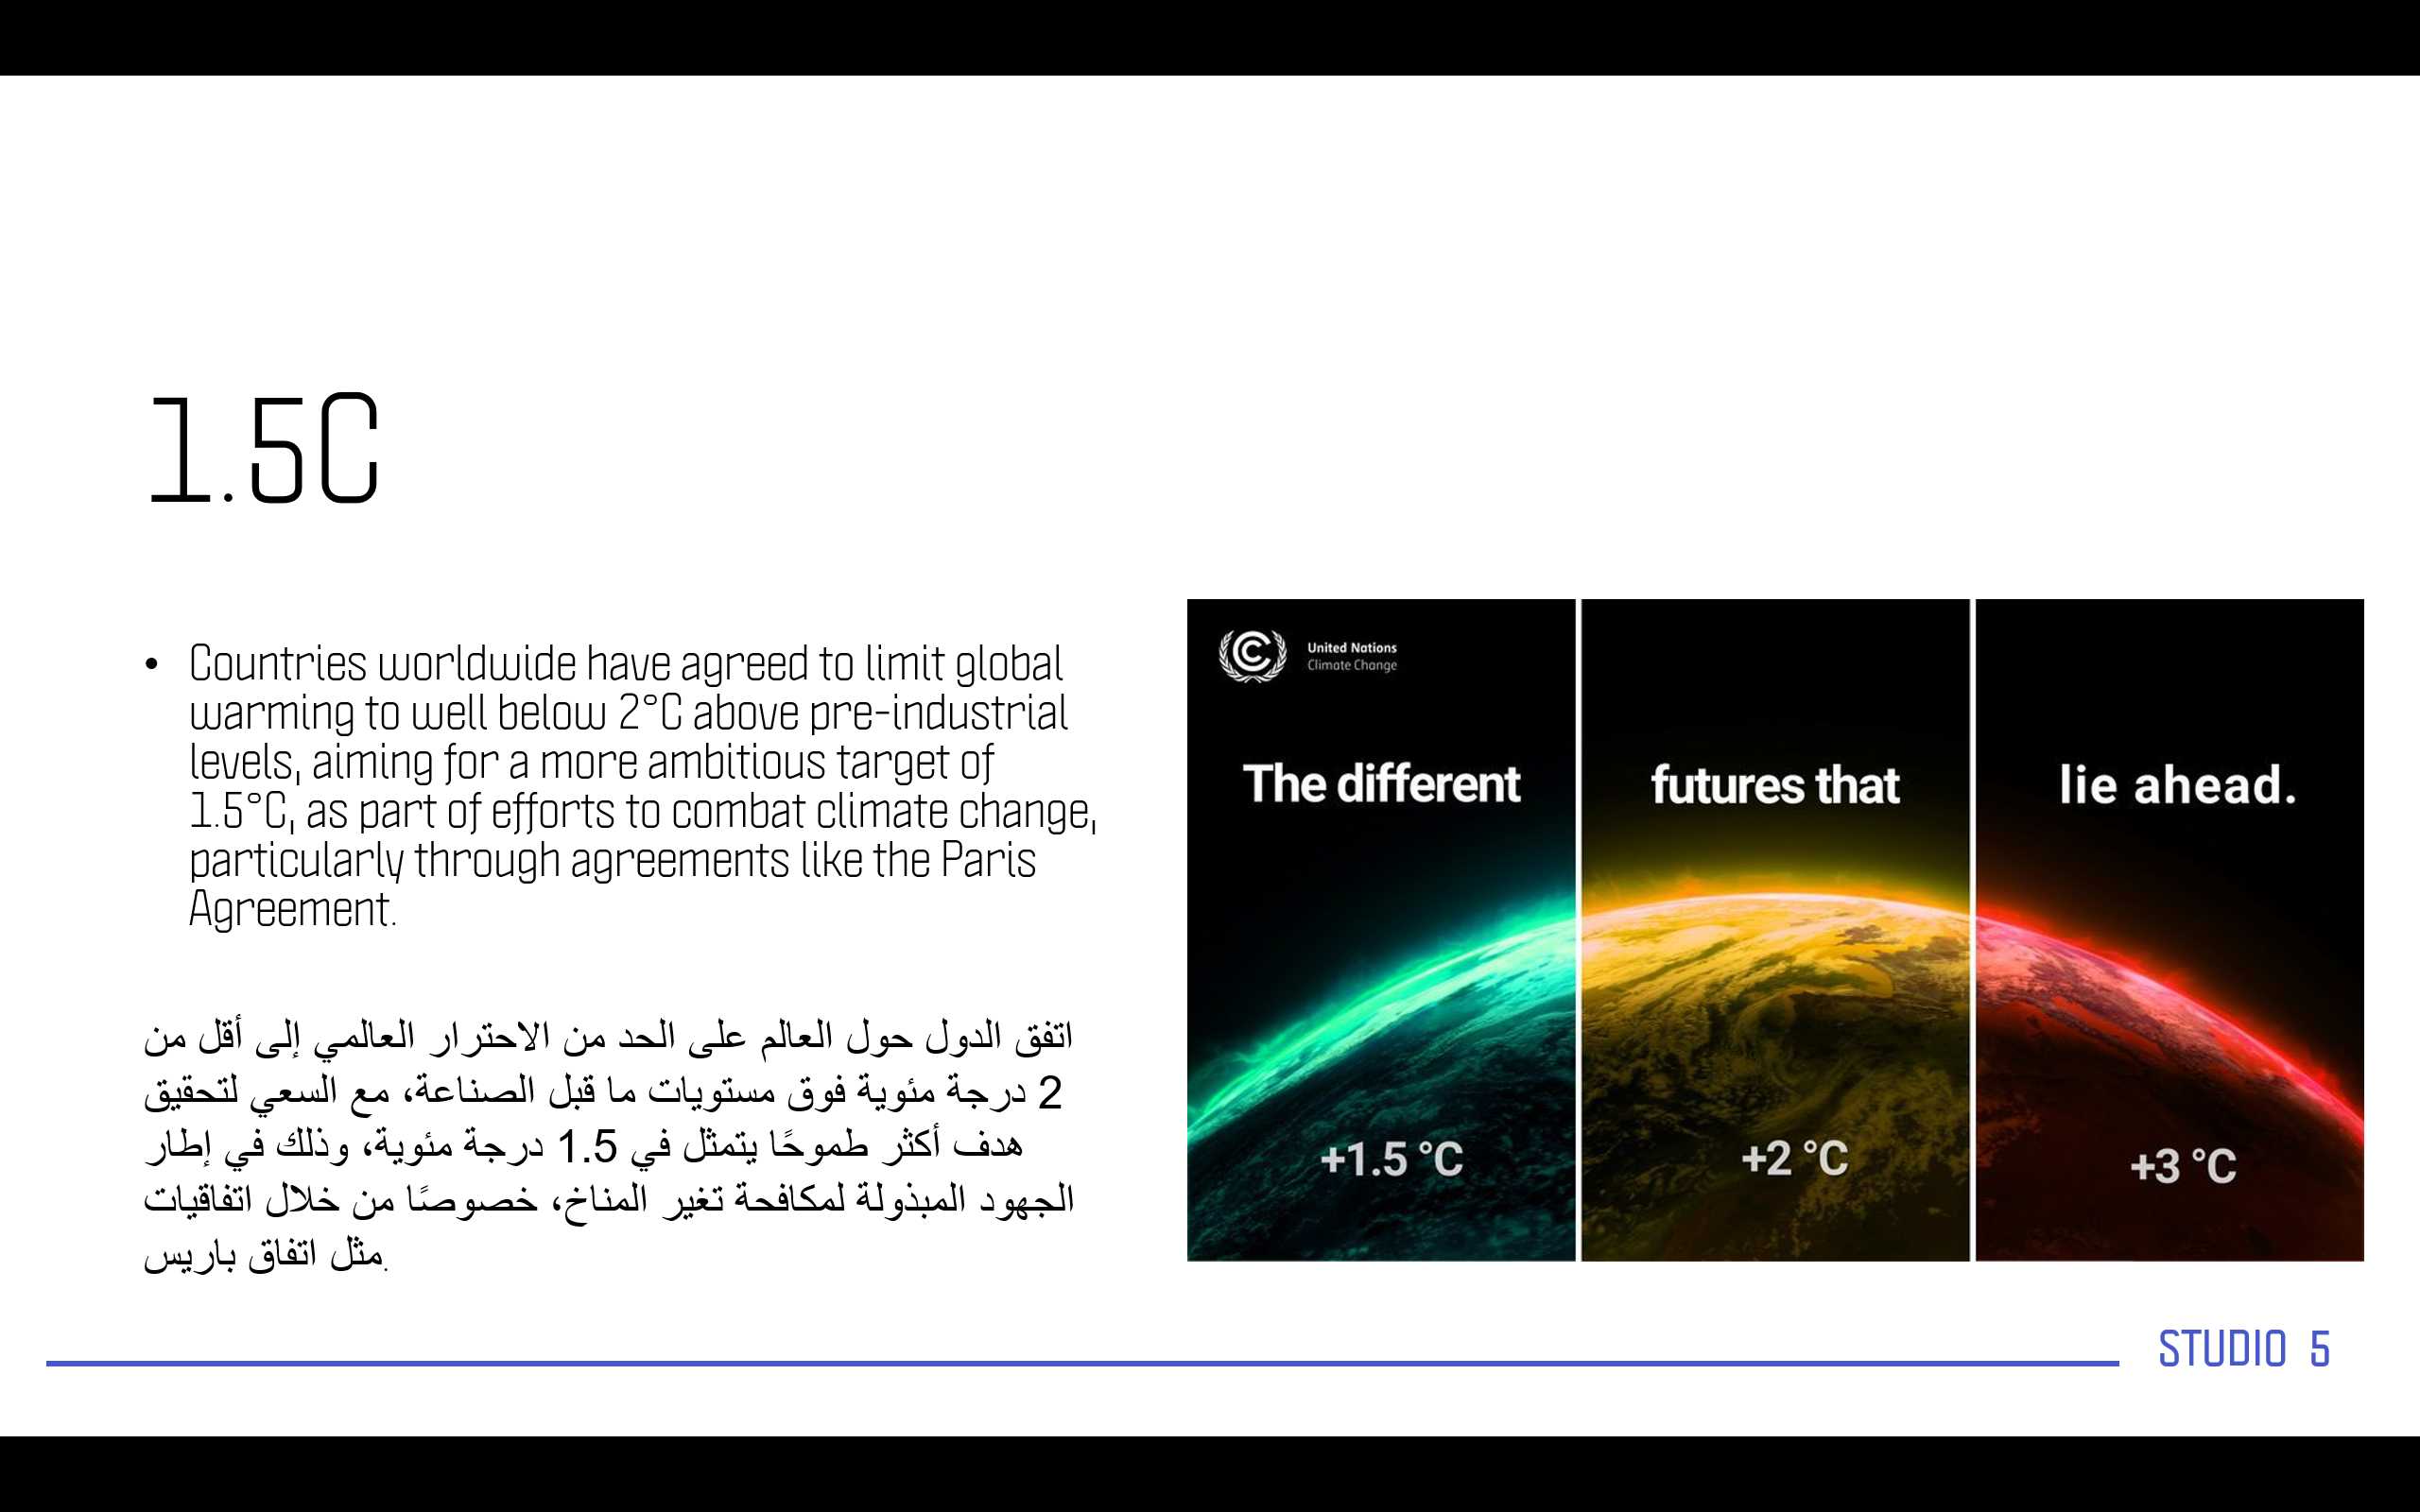
Qatar has one of the most dry climate its very rare to rain and the heat is very very very high in summer reach’s 50 easily.
We will start now with the theoretical part for the first day, In this day we will talk about the climate change and what are the issues being faced and some of the solutions.
As previously we have curved to the topic and now we need to dig deeper a bit in the topic.
lets keep the participant attracted to us through another question.

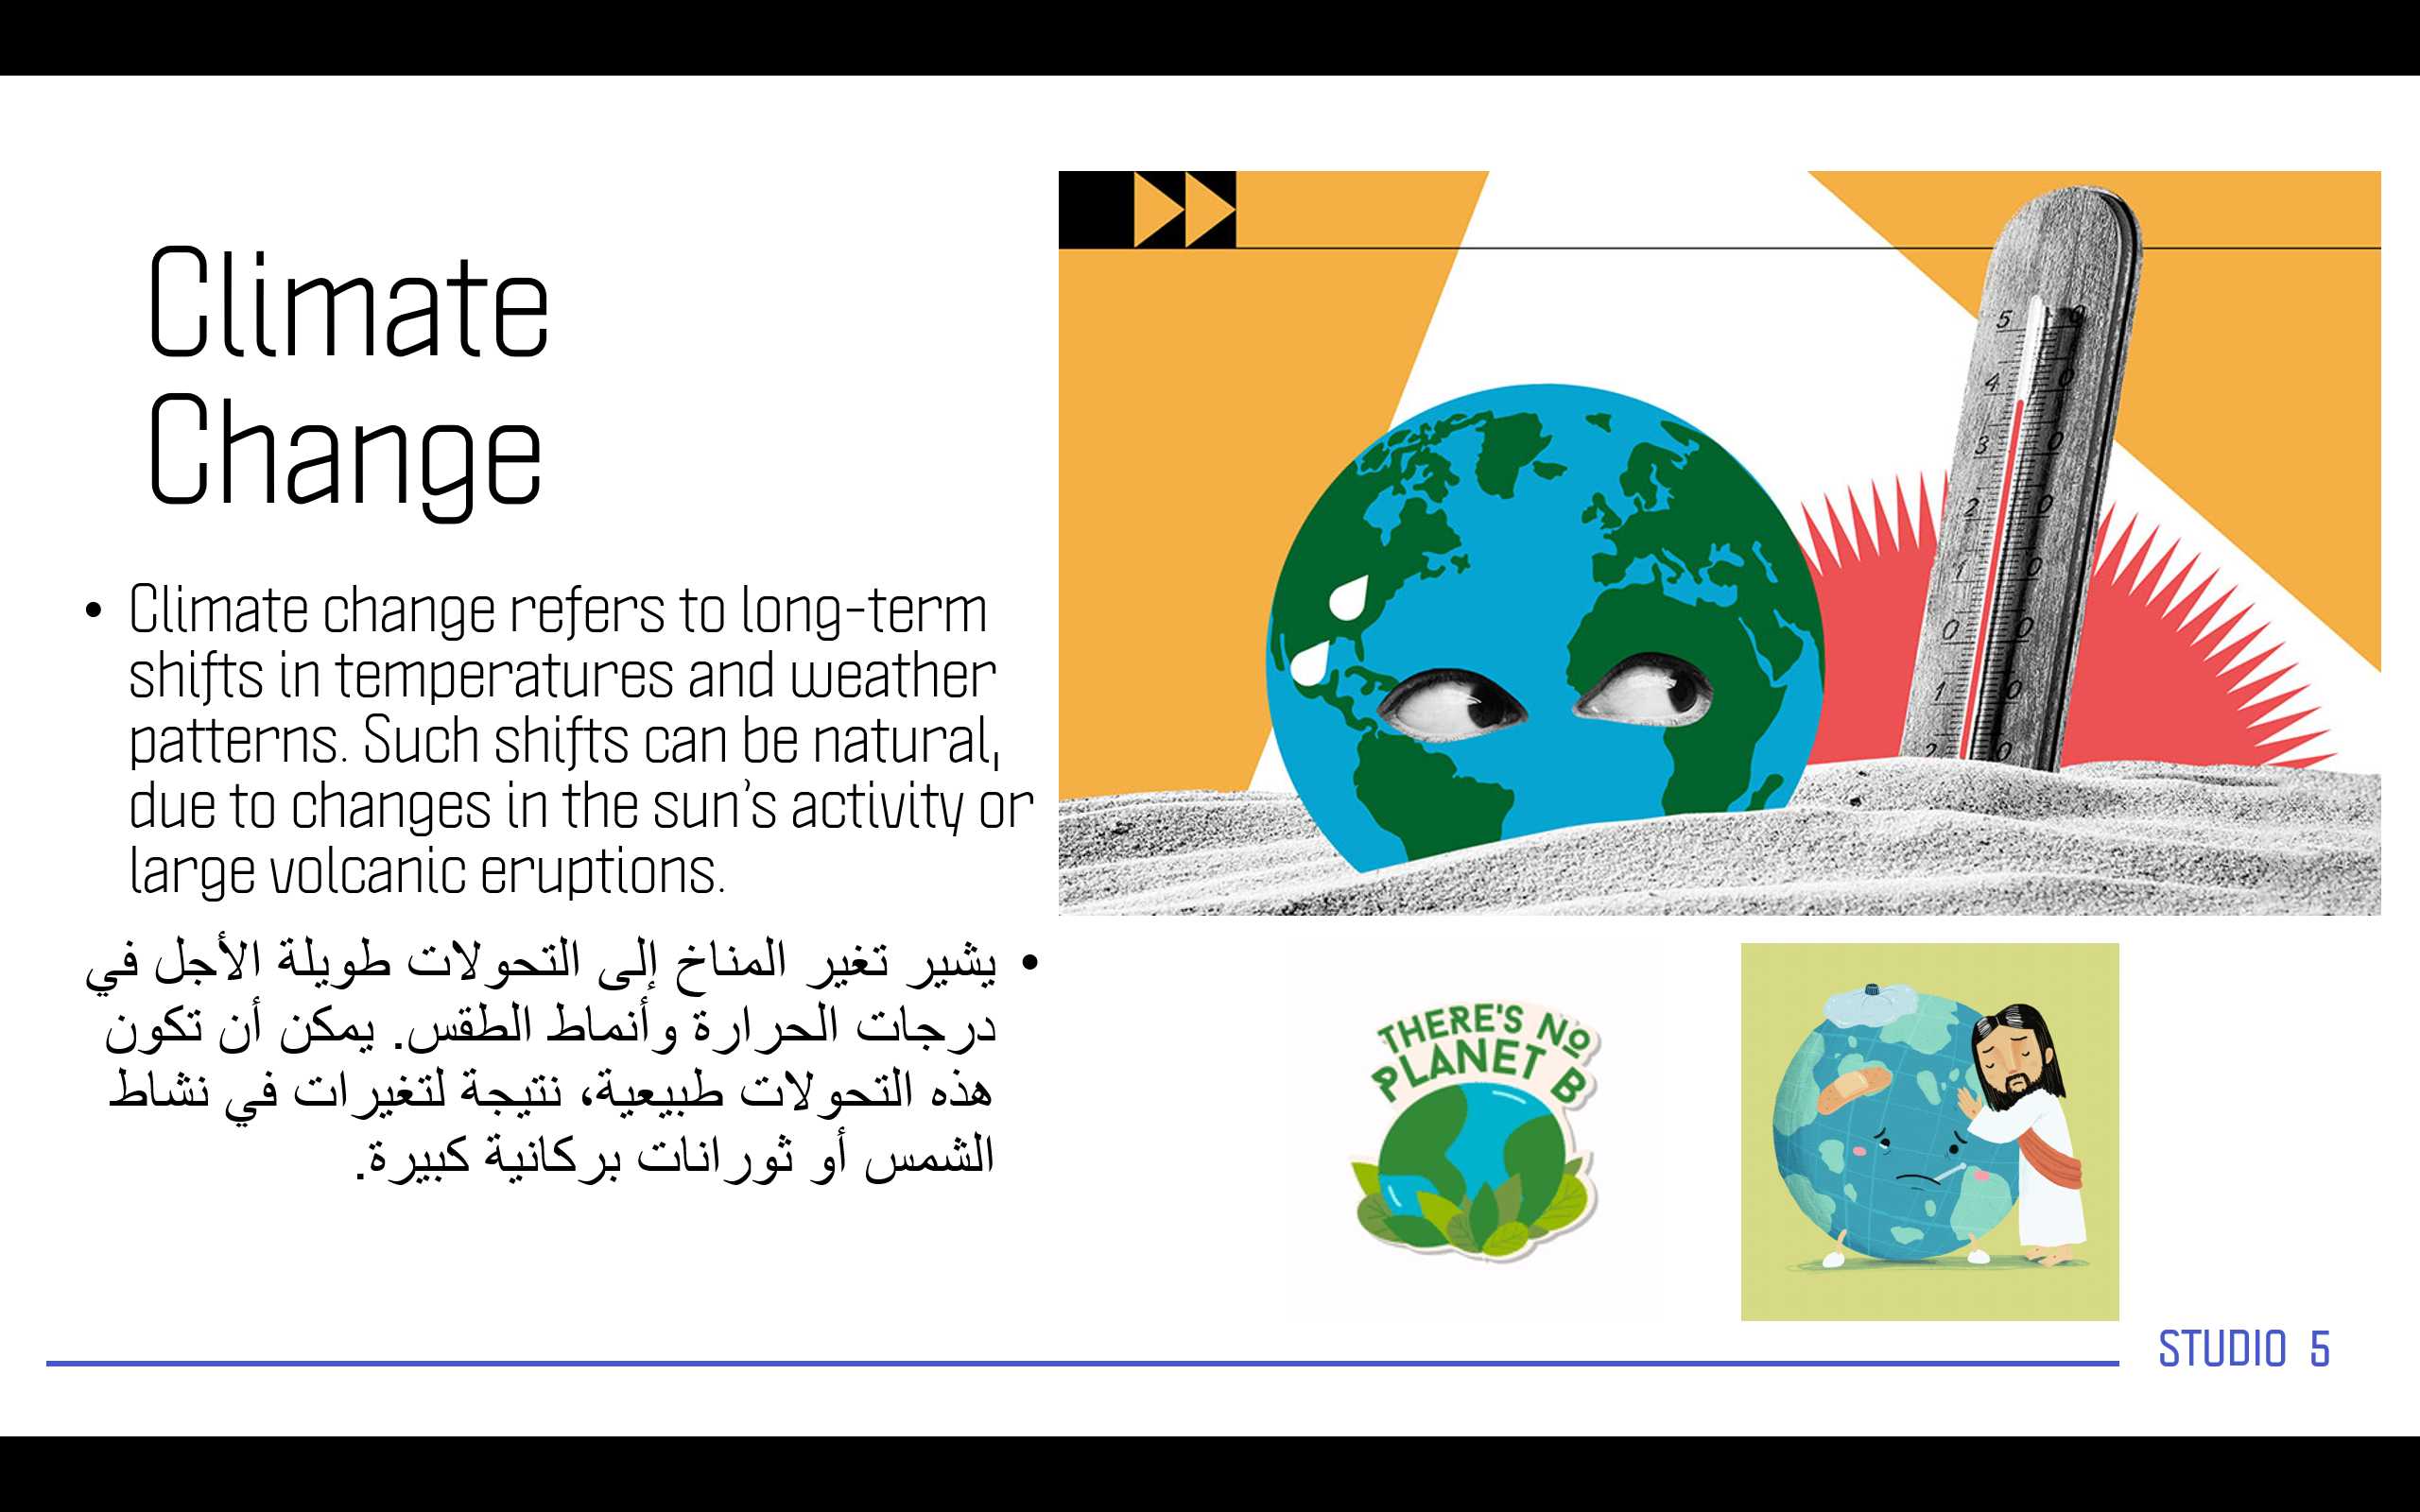
The earth temperature 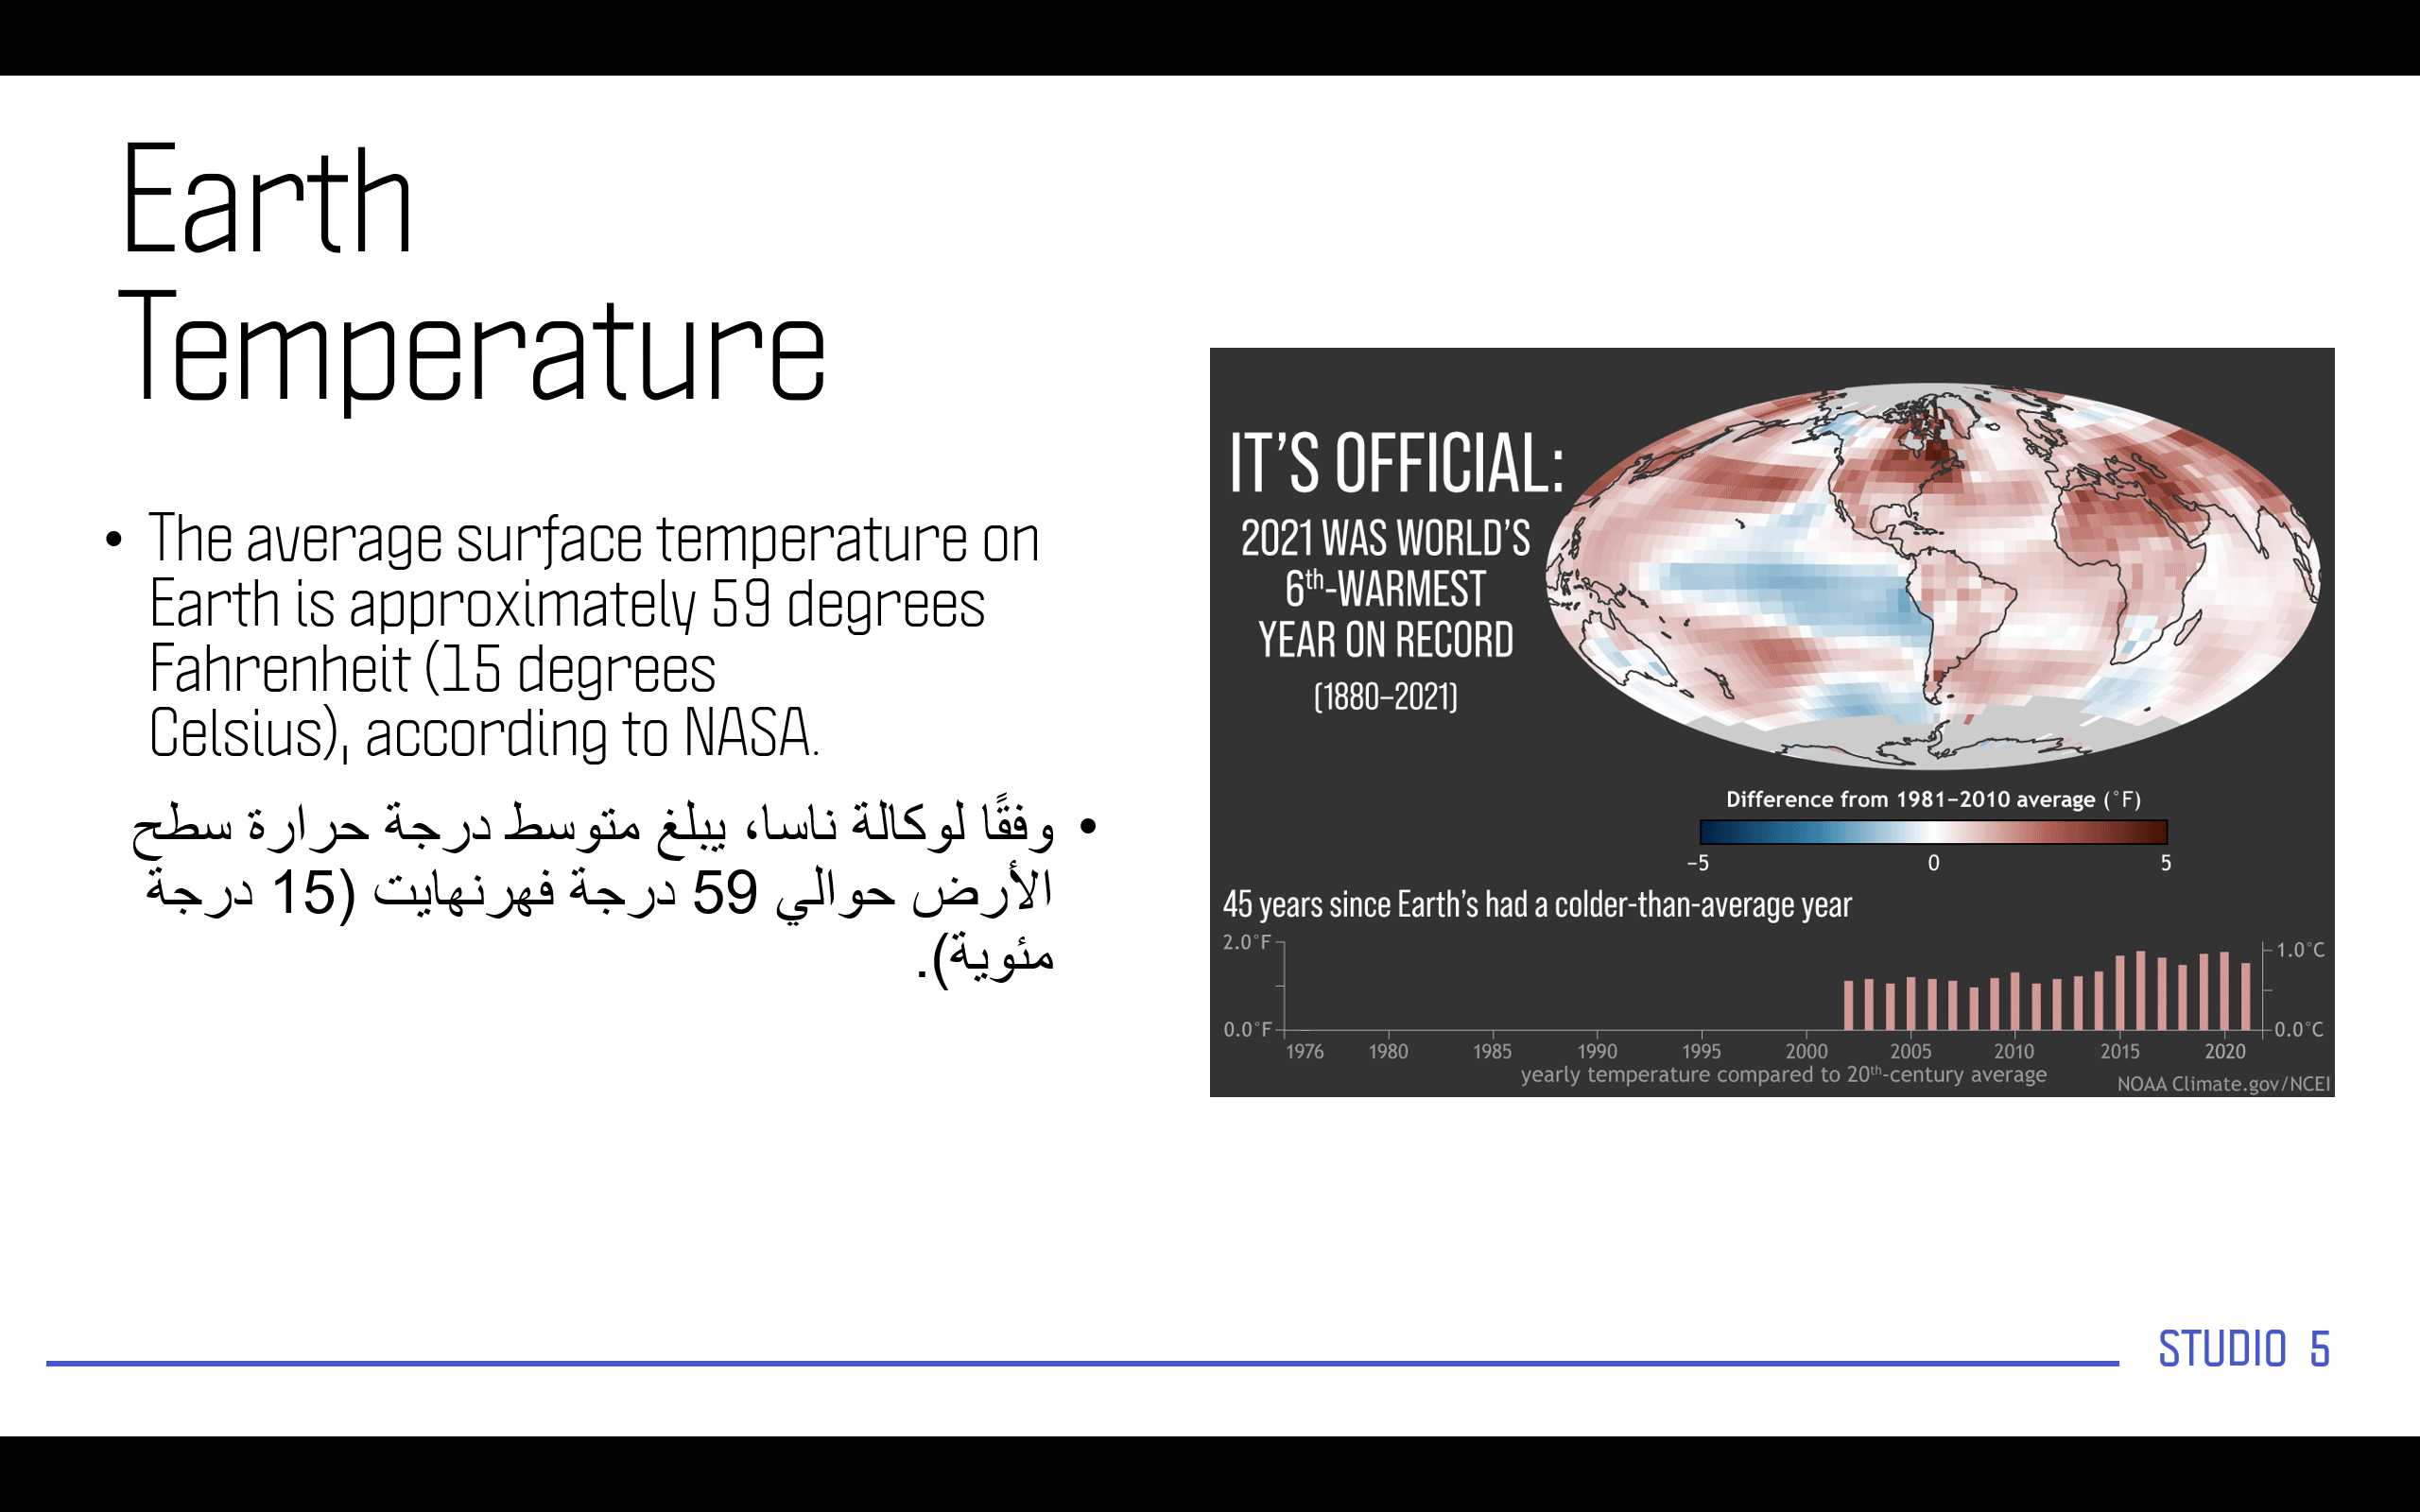
The average temperature of the earth is 15 degree Celsius

Now I will talk about the entire Project and what we will talk in int.
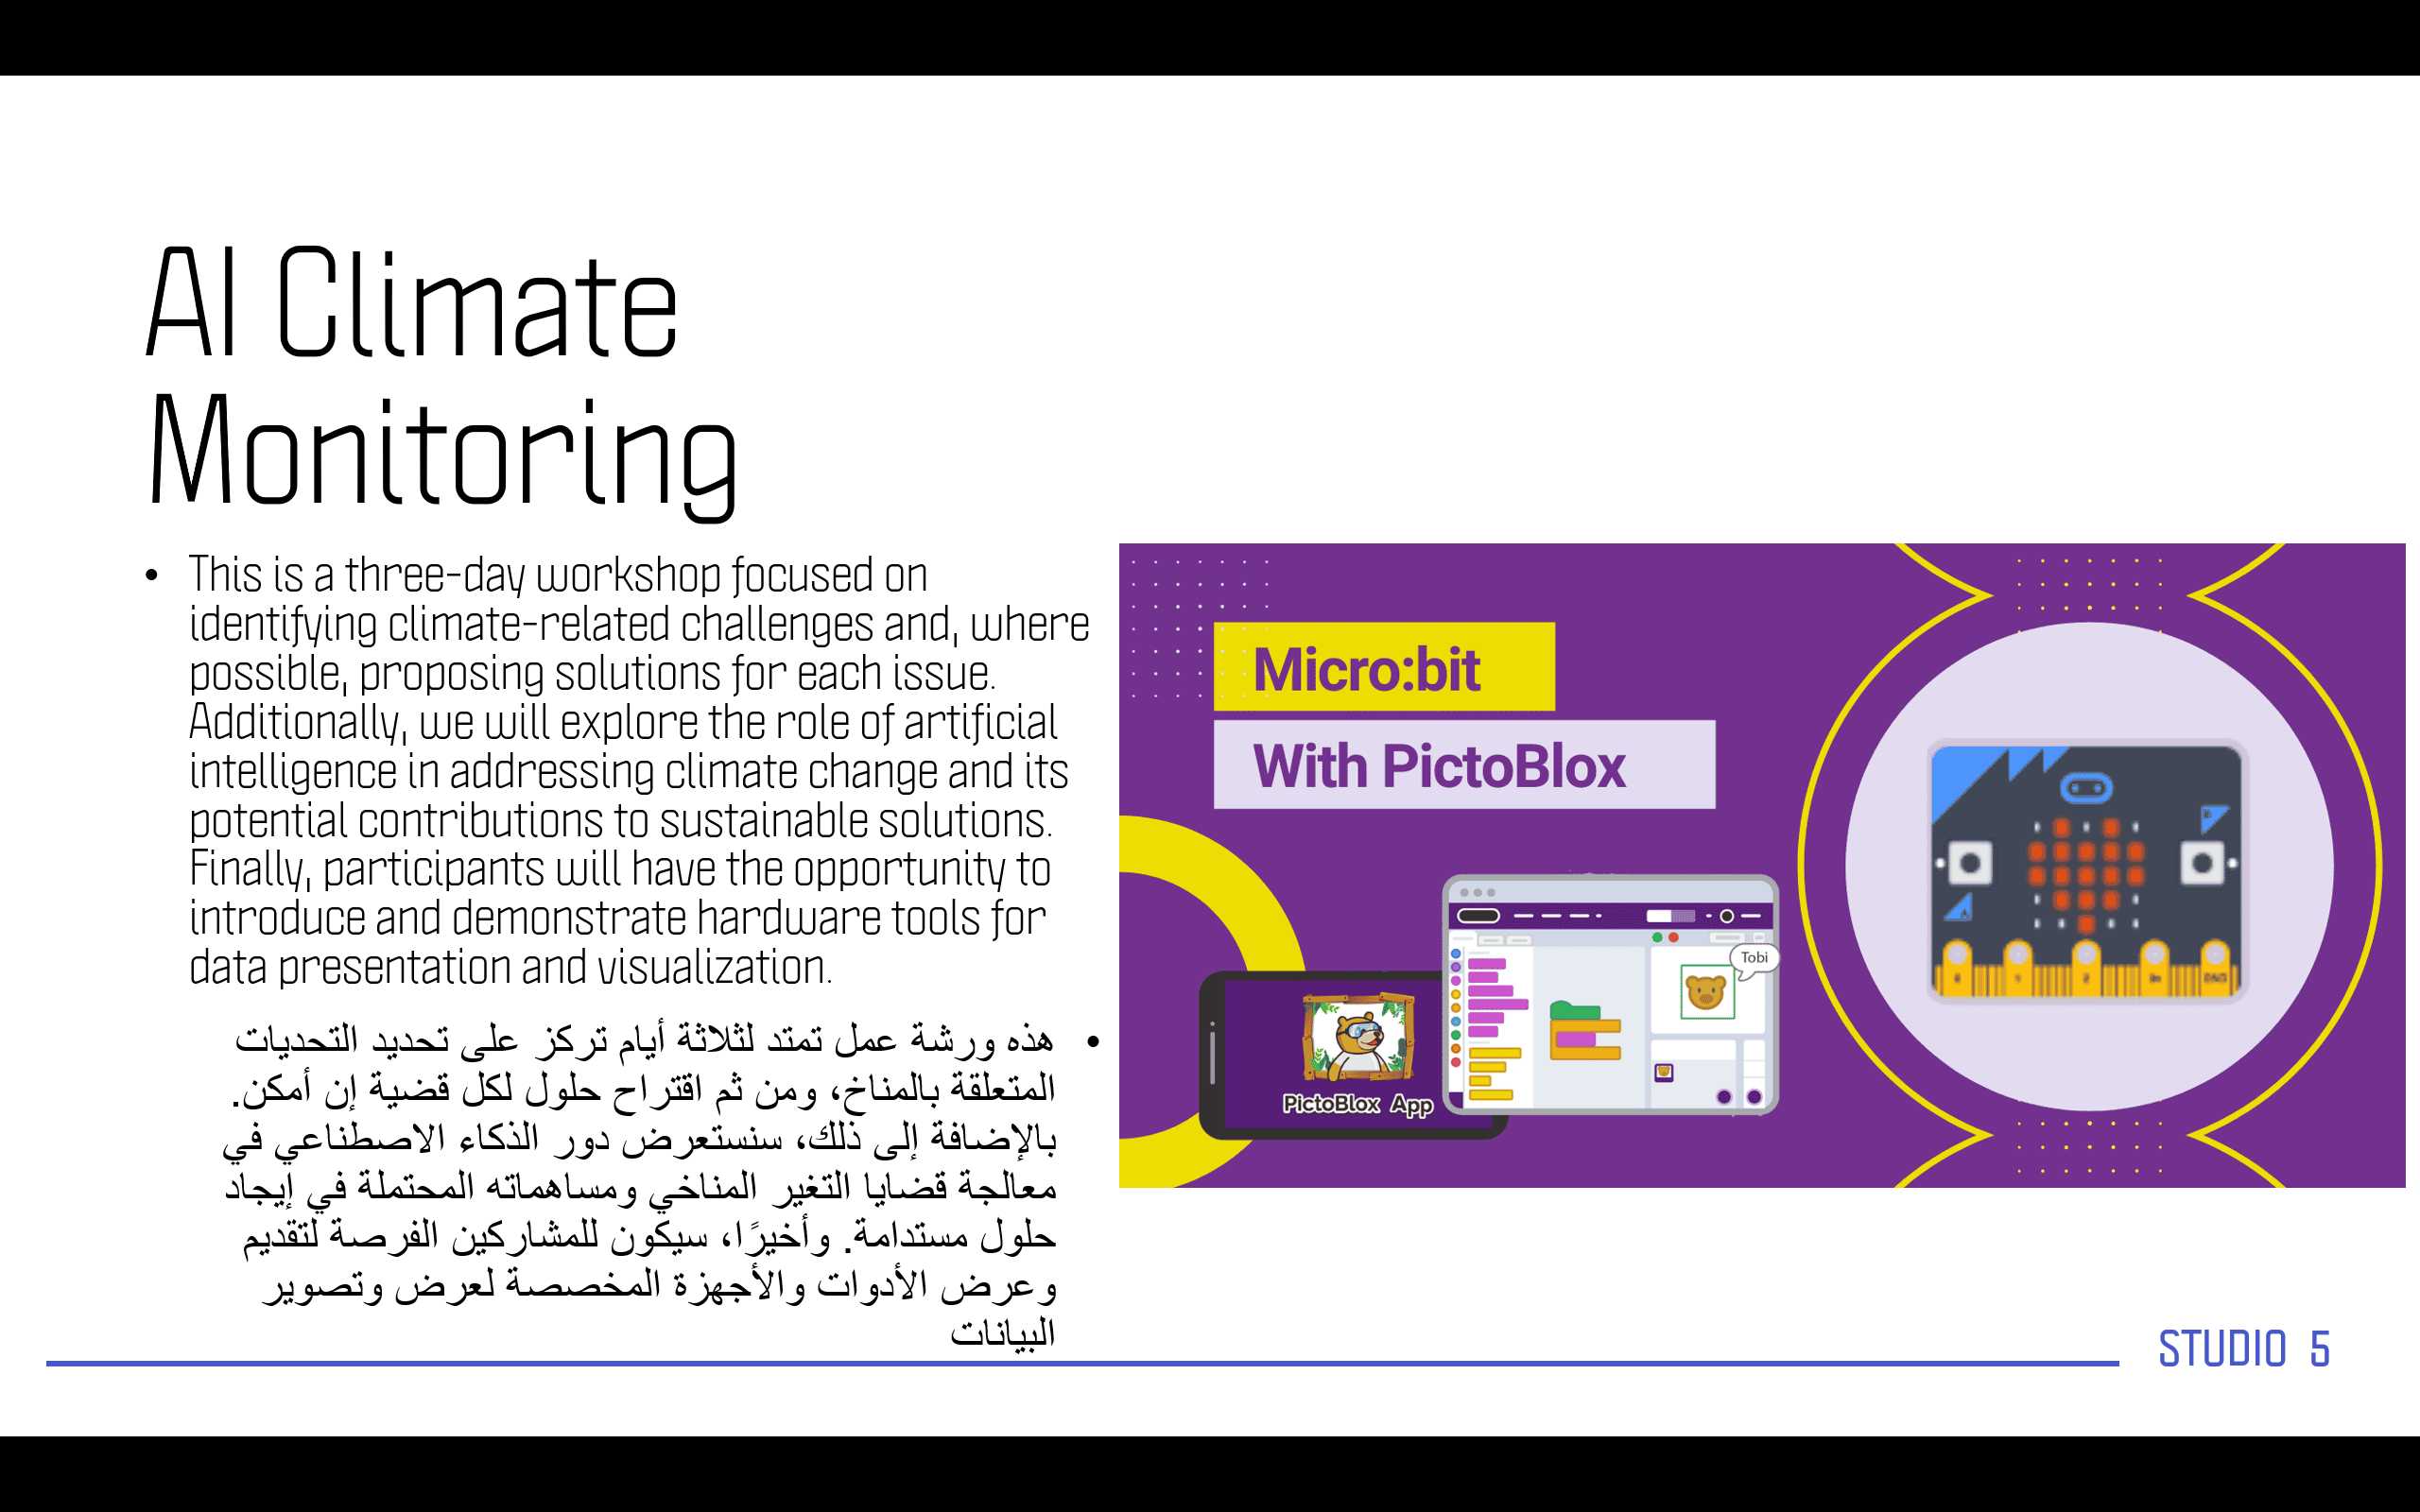
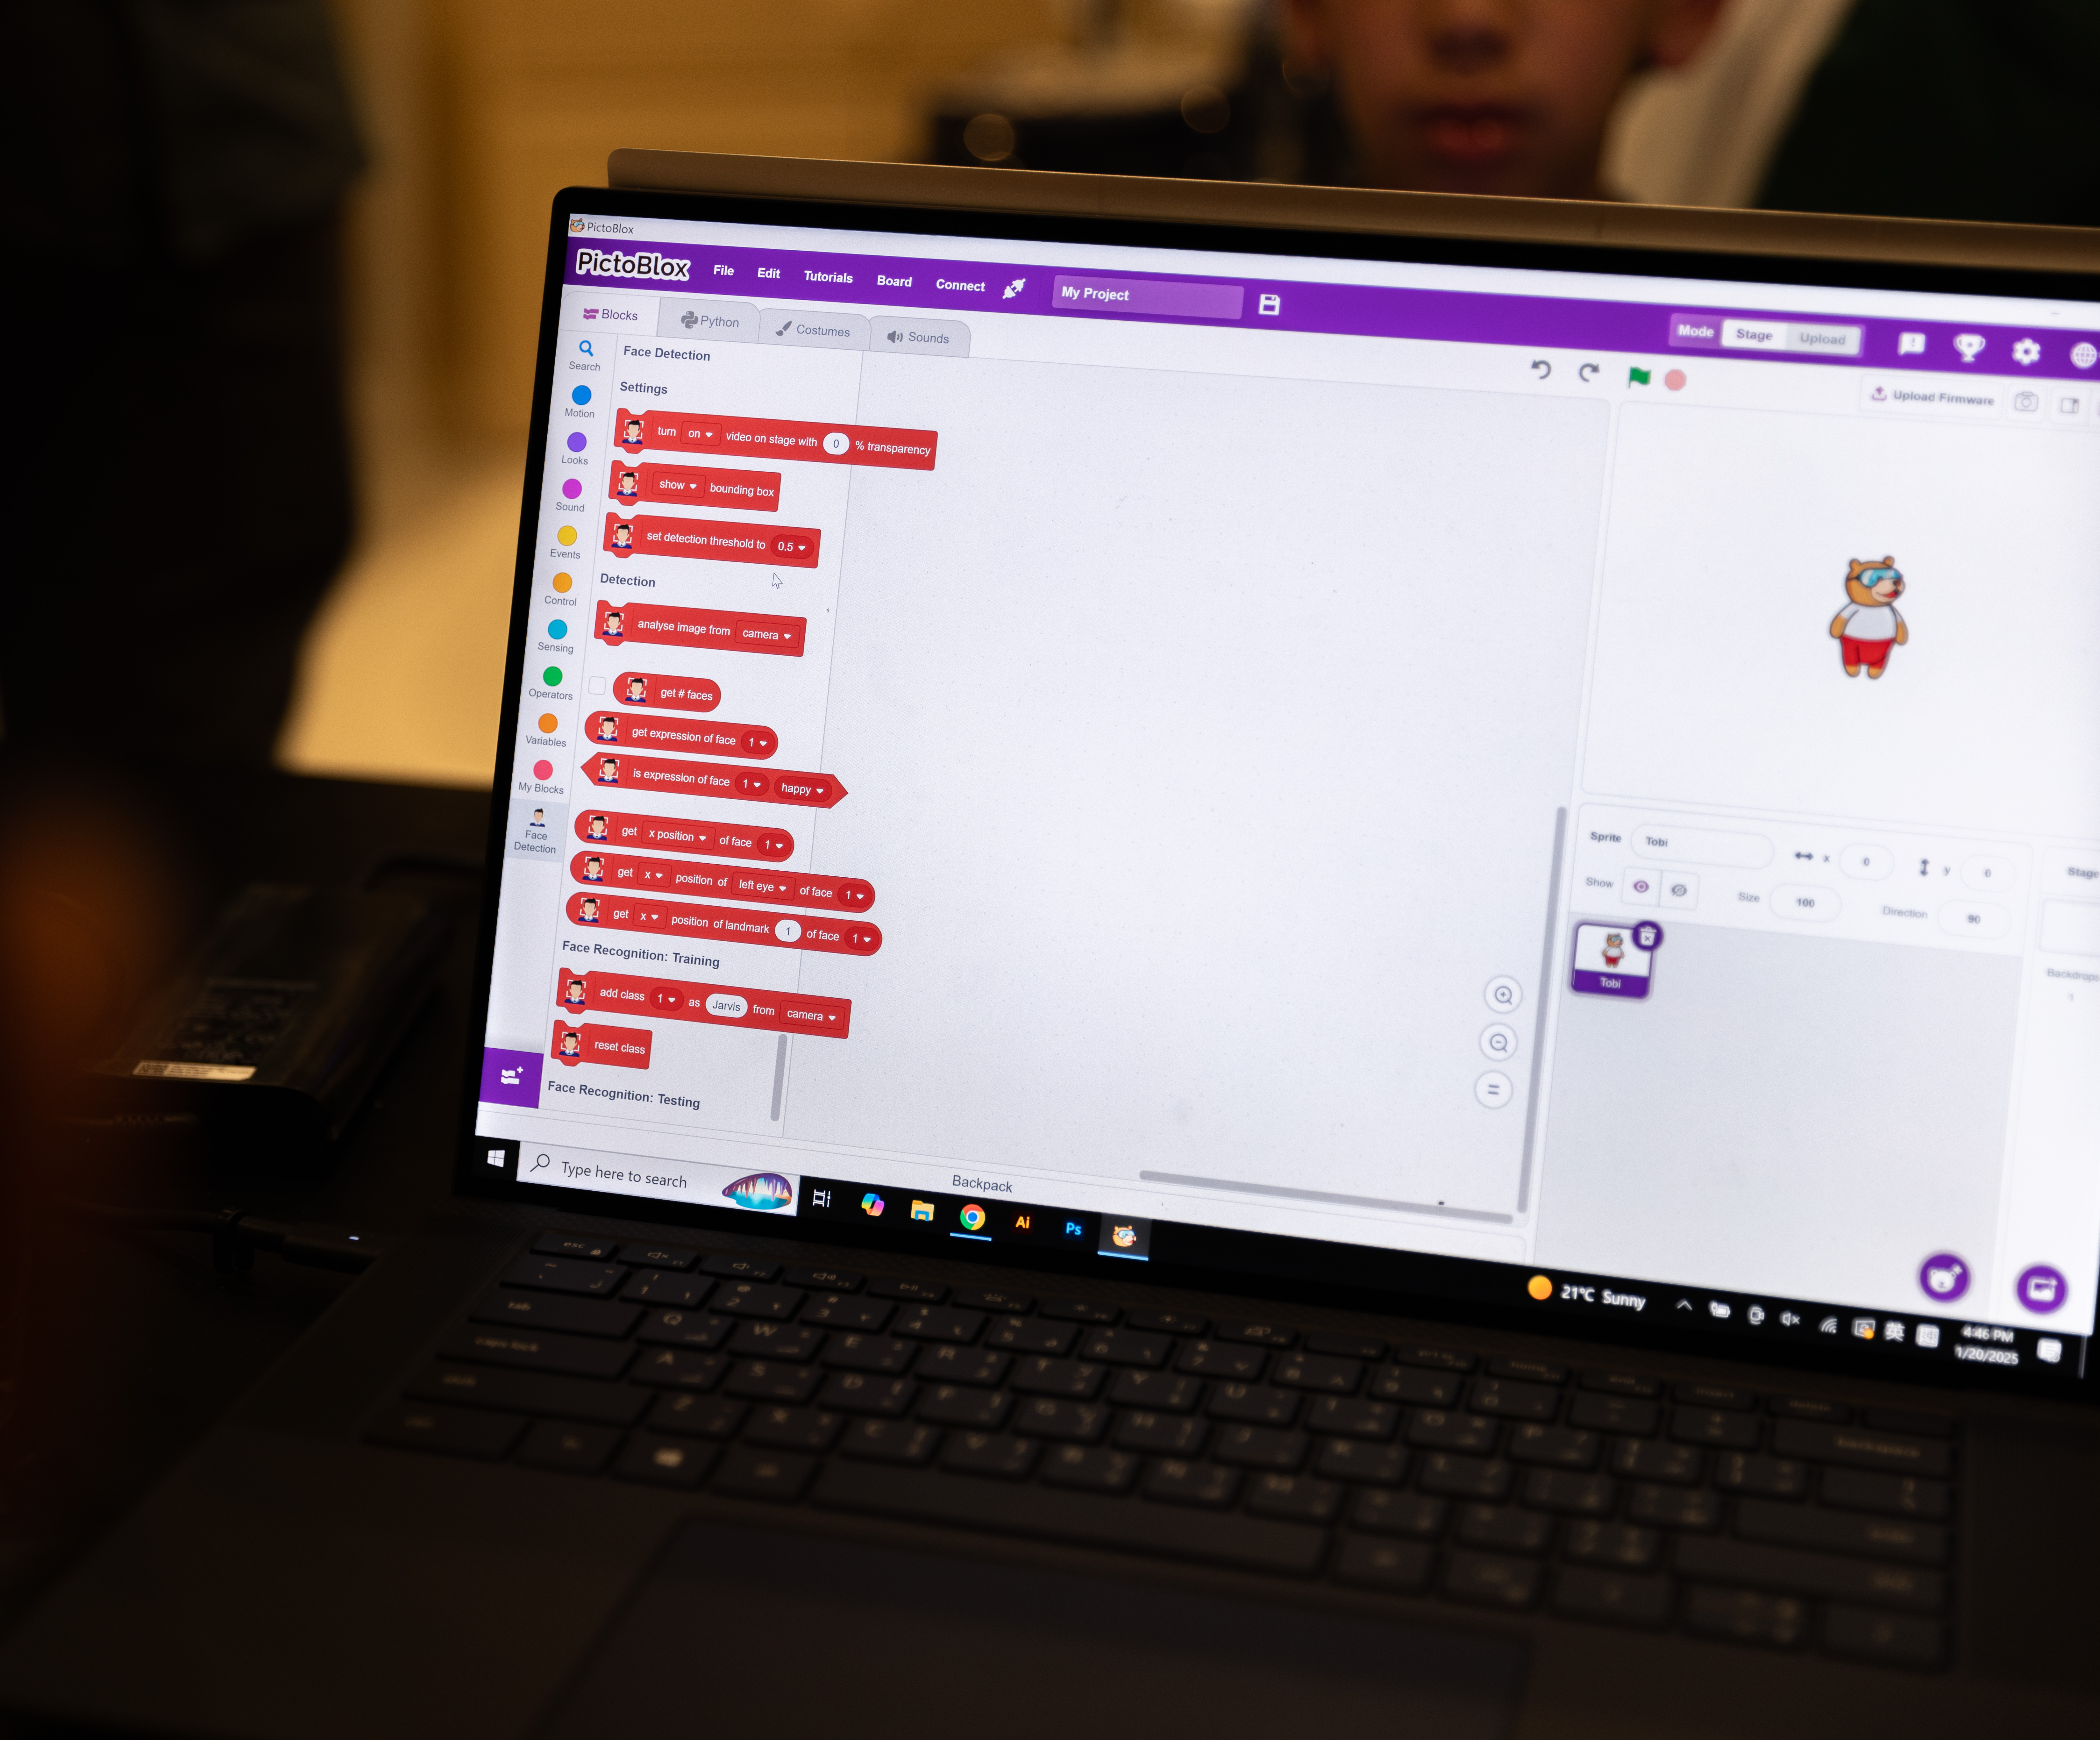
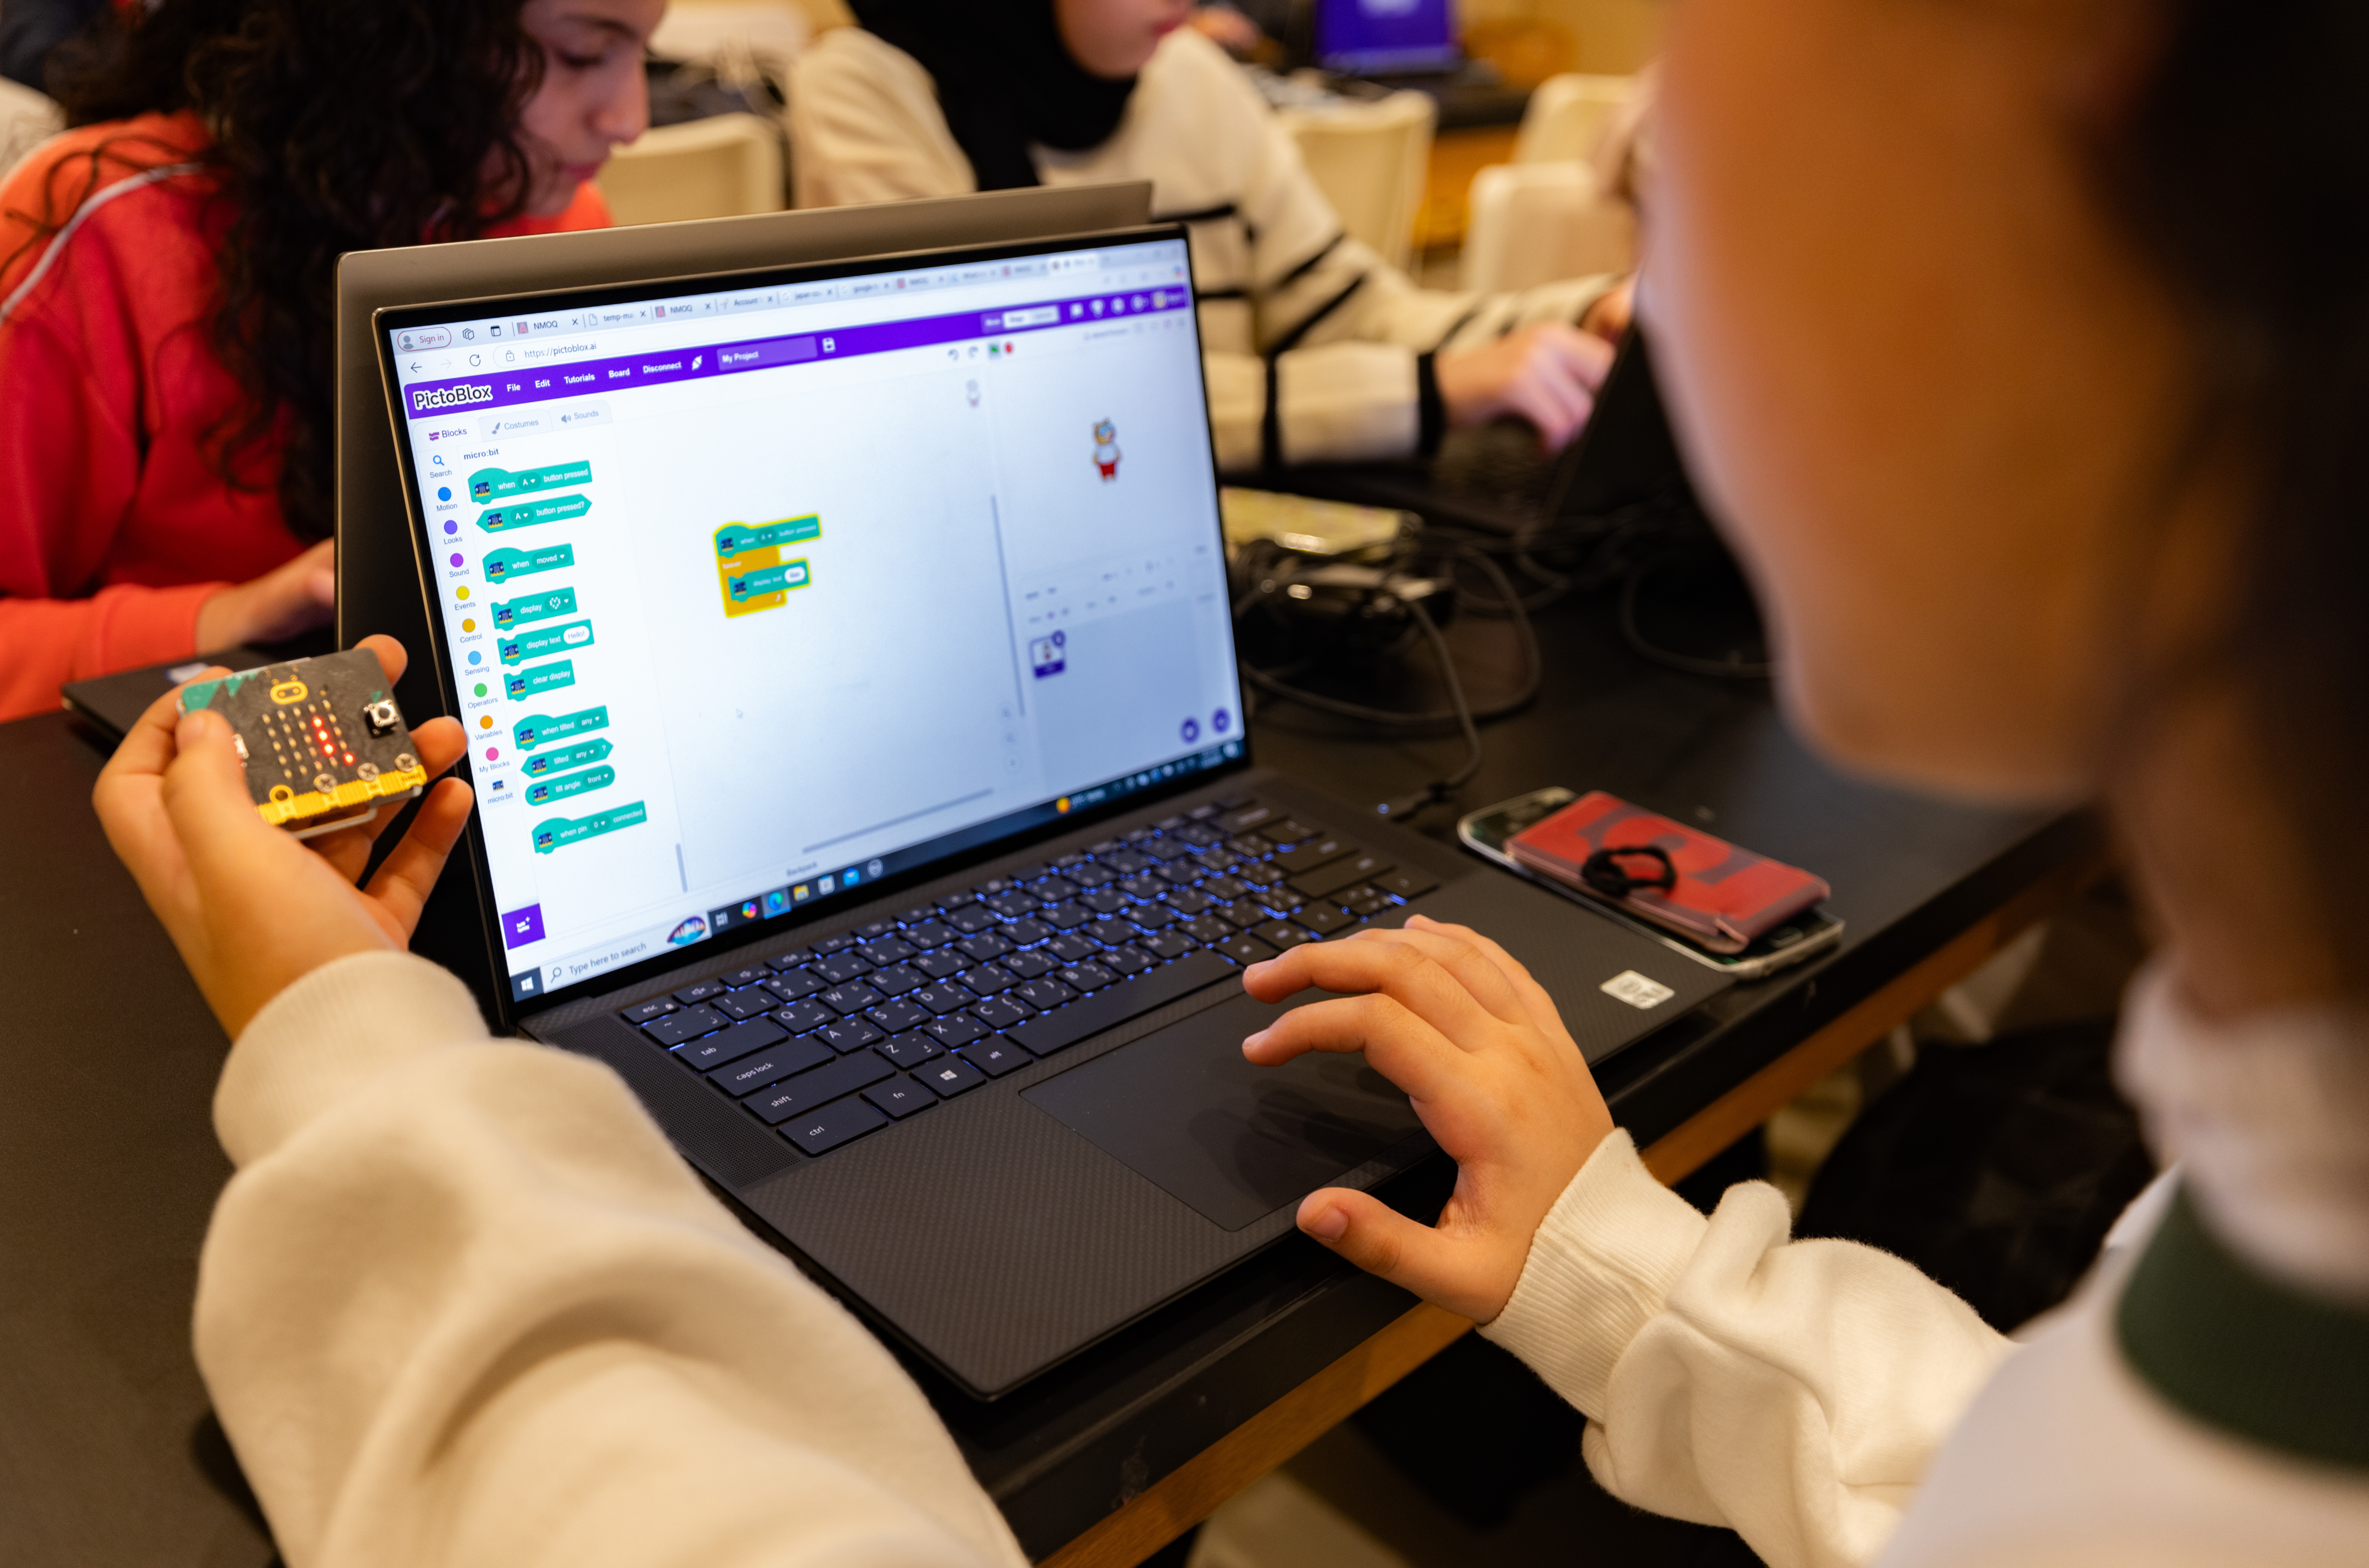
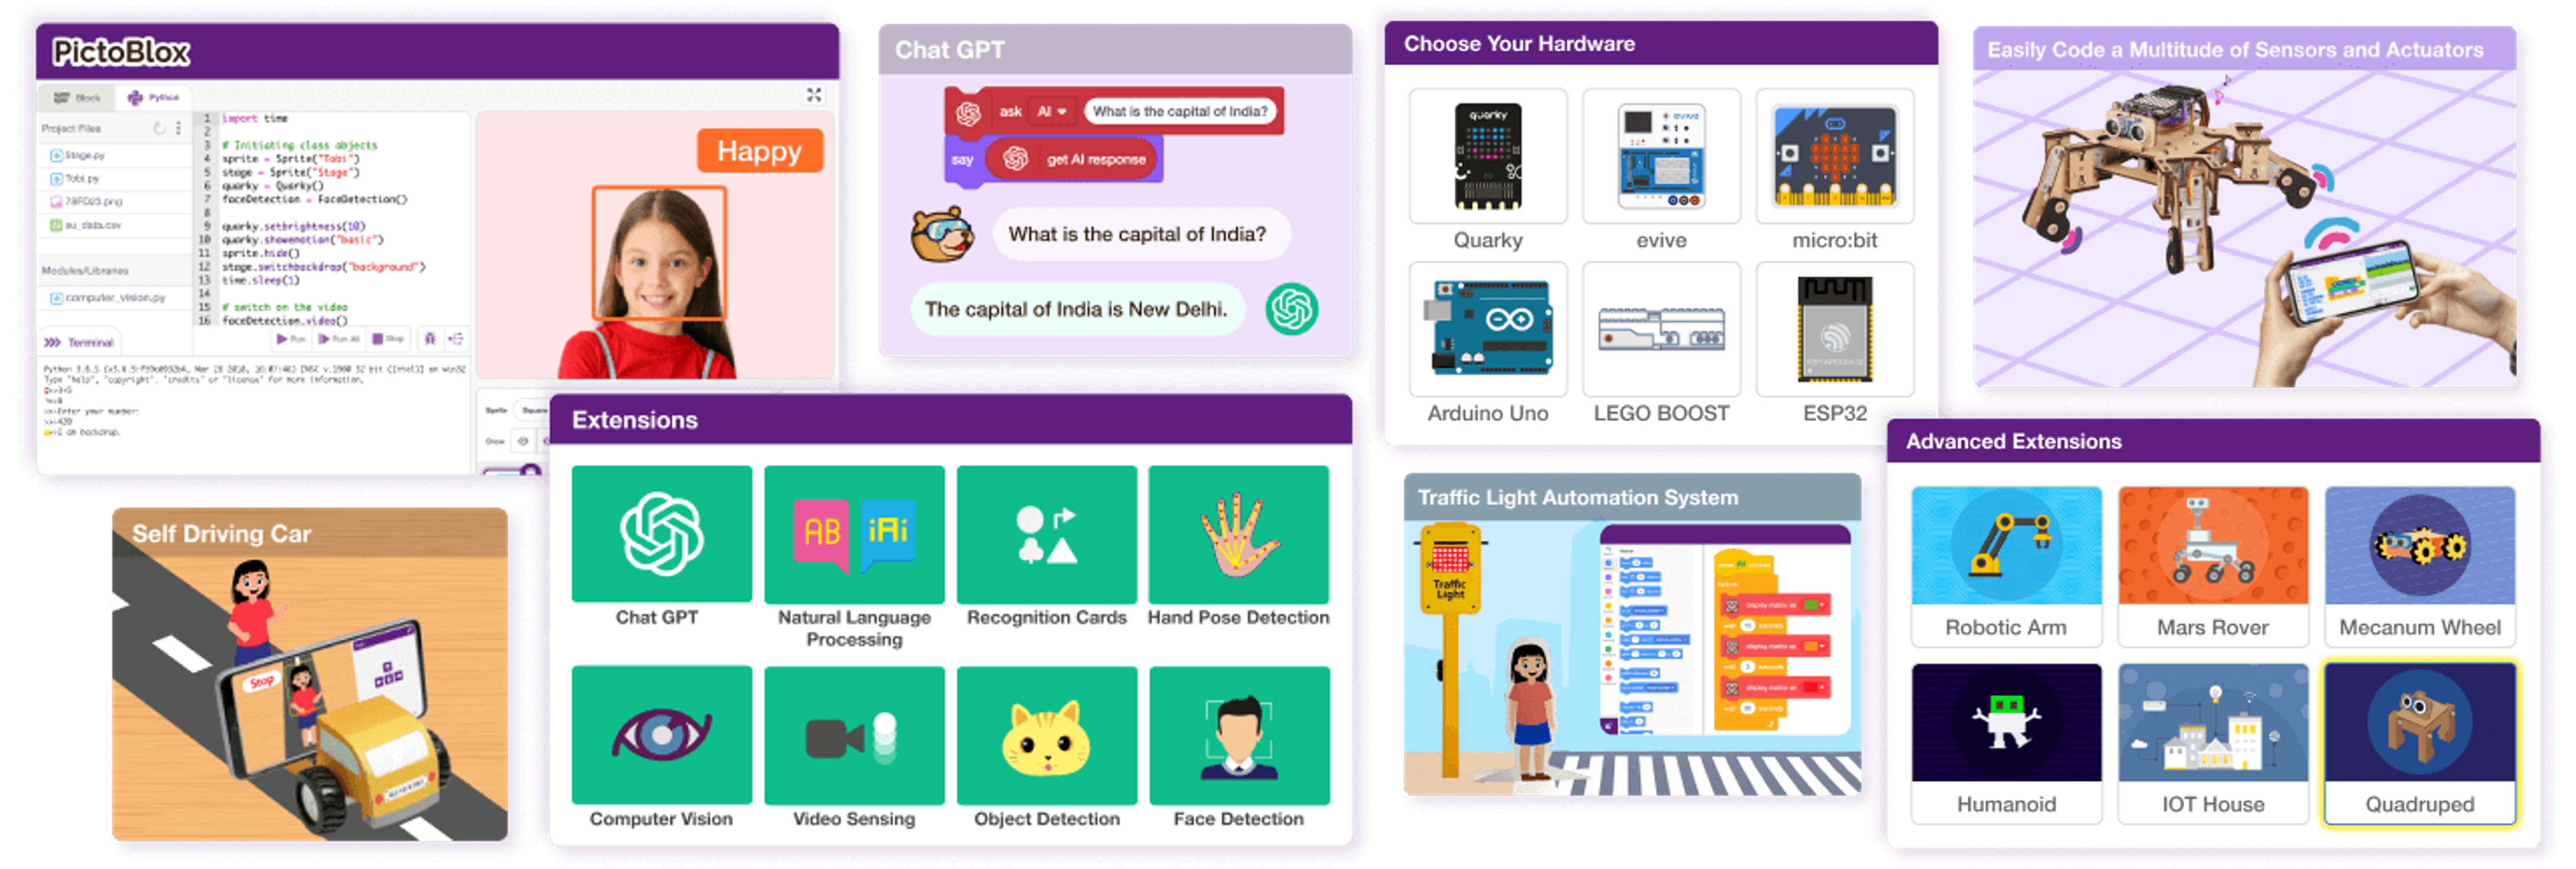
In this section I will explain what is pictoblox and why we are using it.
Pictoblox is a programing platform based on Scratch platform.
The main difference between Scratch and Pictoblox

So in general what makes Scratch strong is it an open source platform and any one can build his software upon it exactly like Pictoblox.
Now In simple words
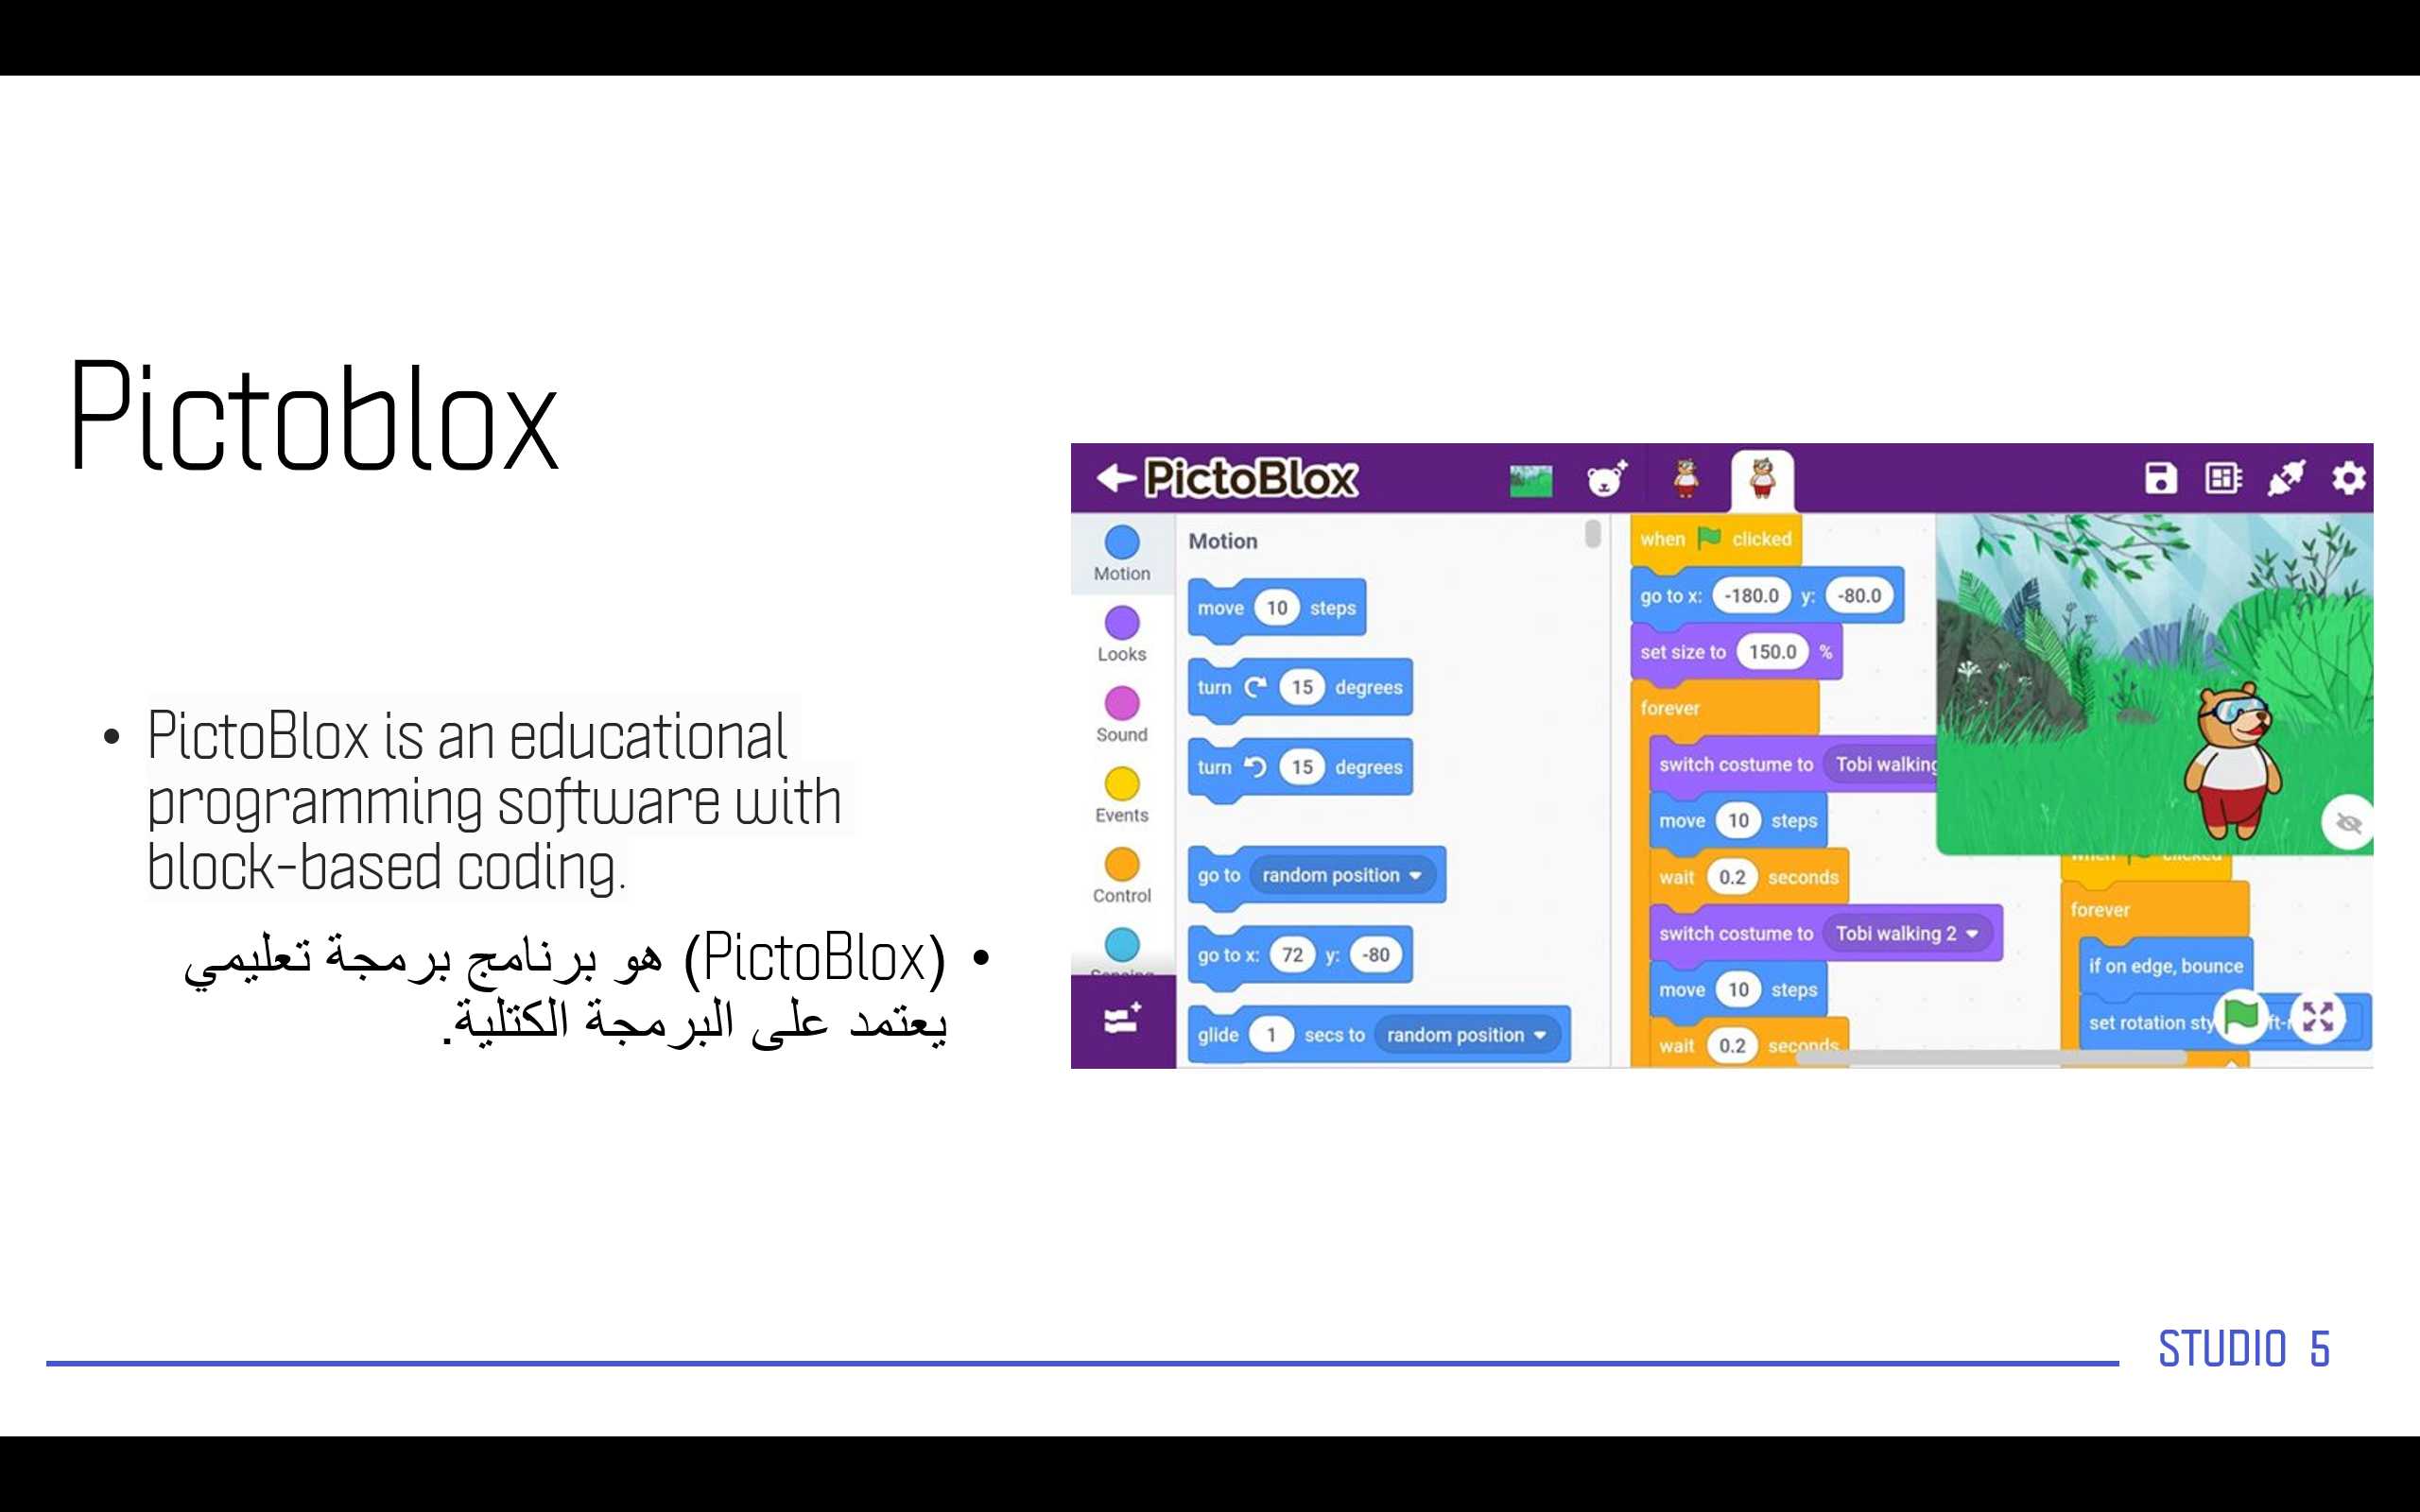
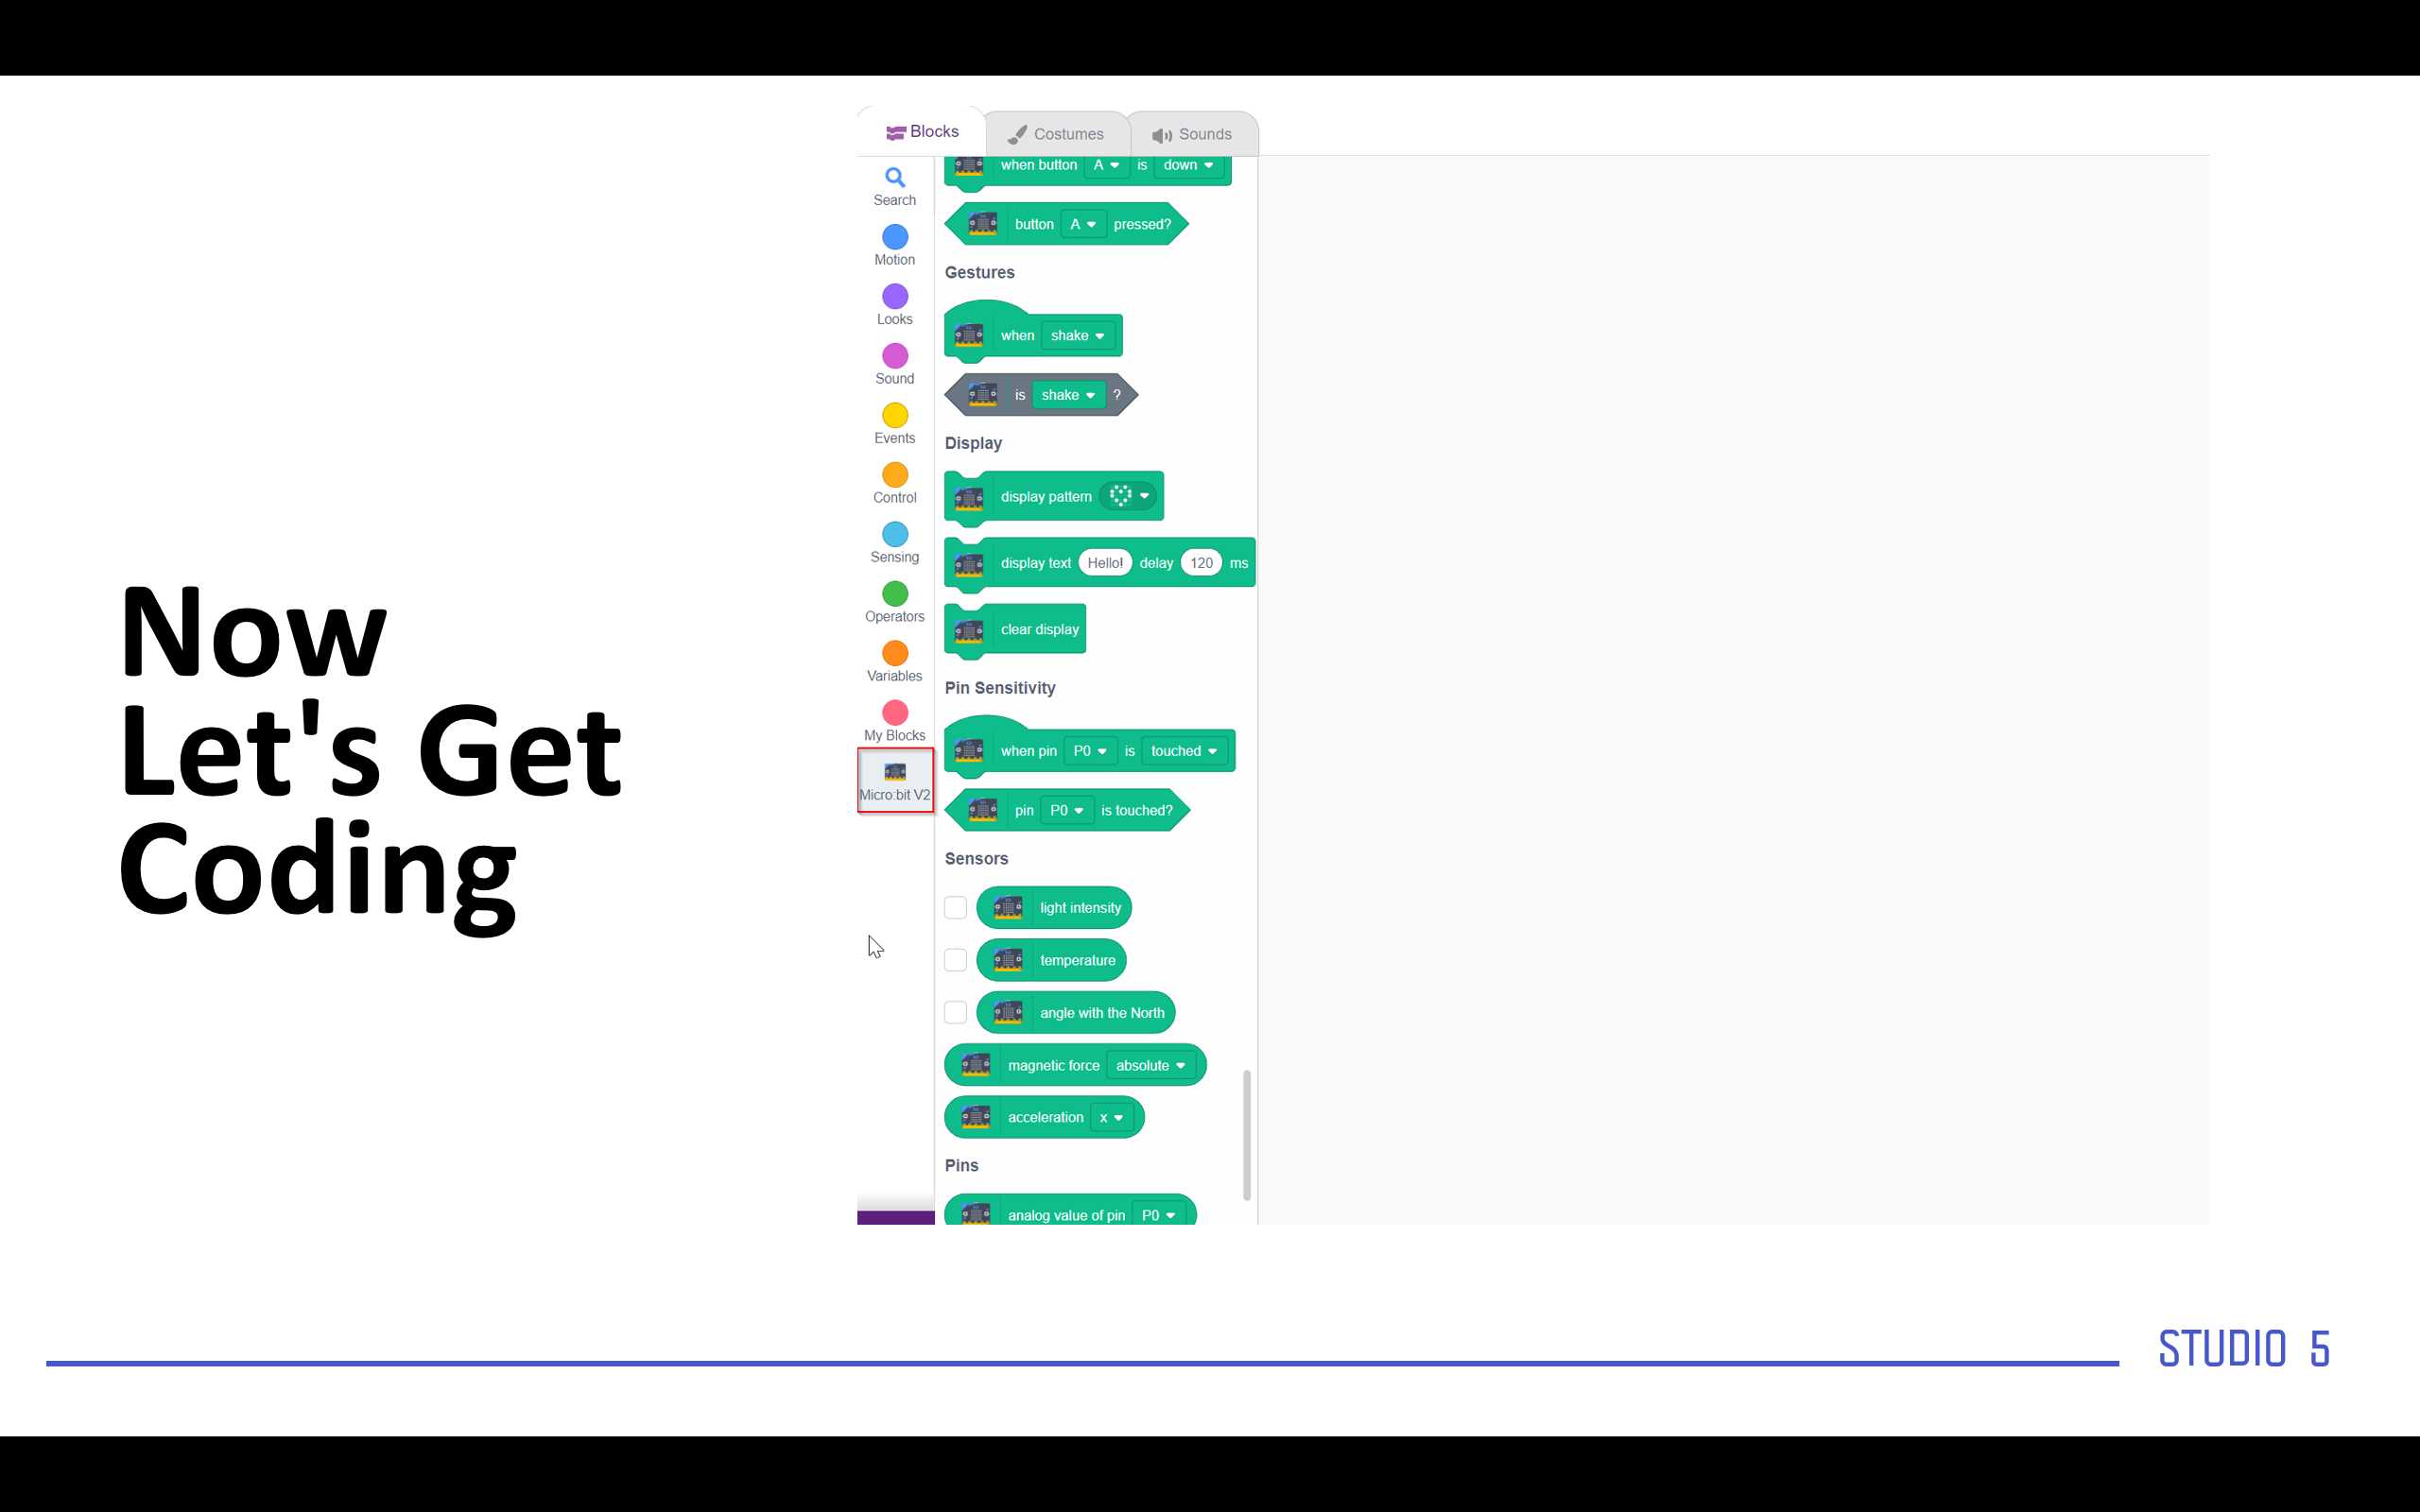
This is the layout of PICTOBLOX
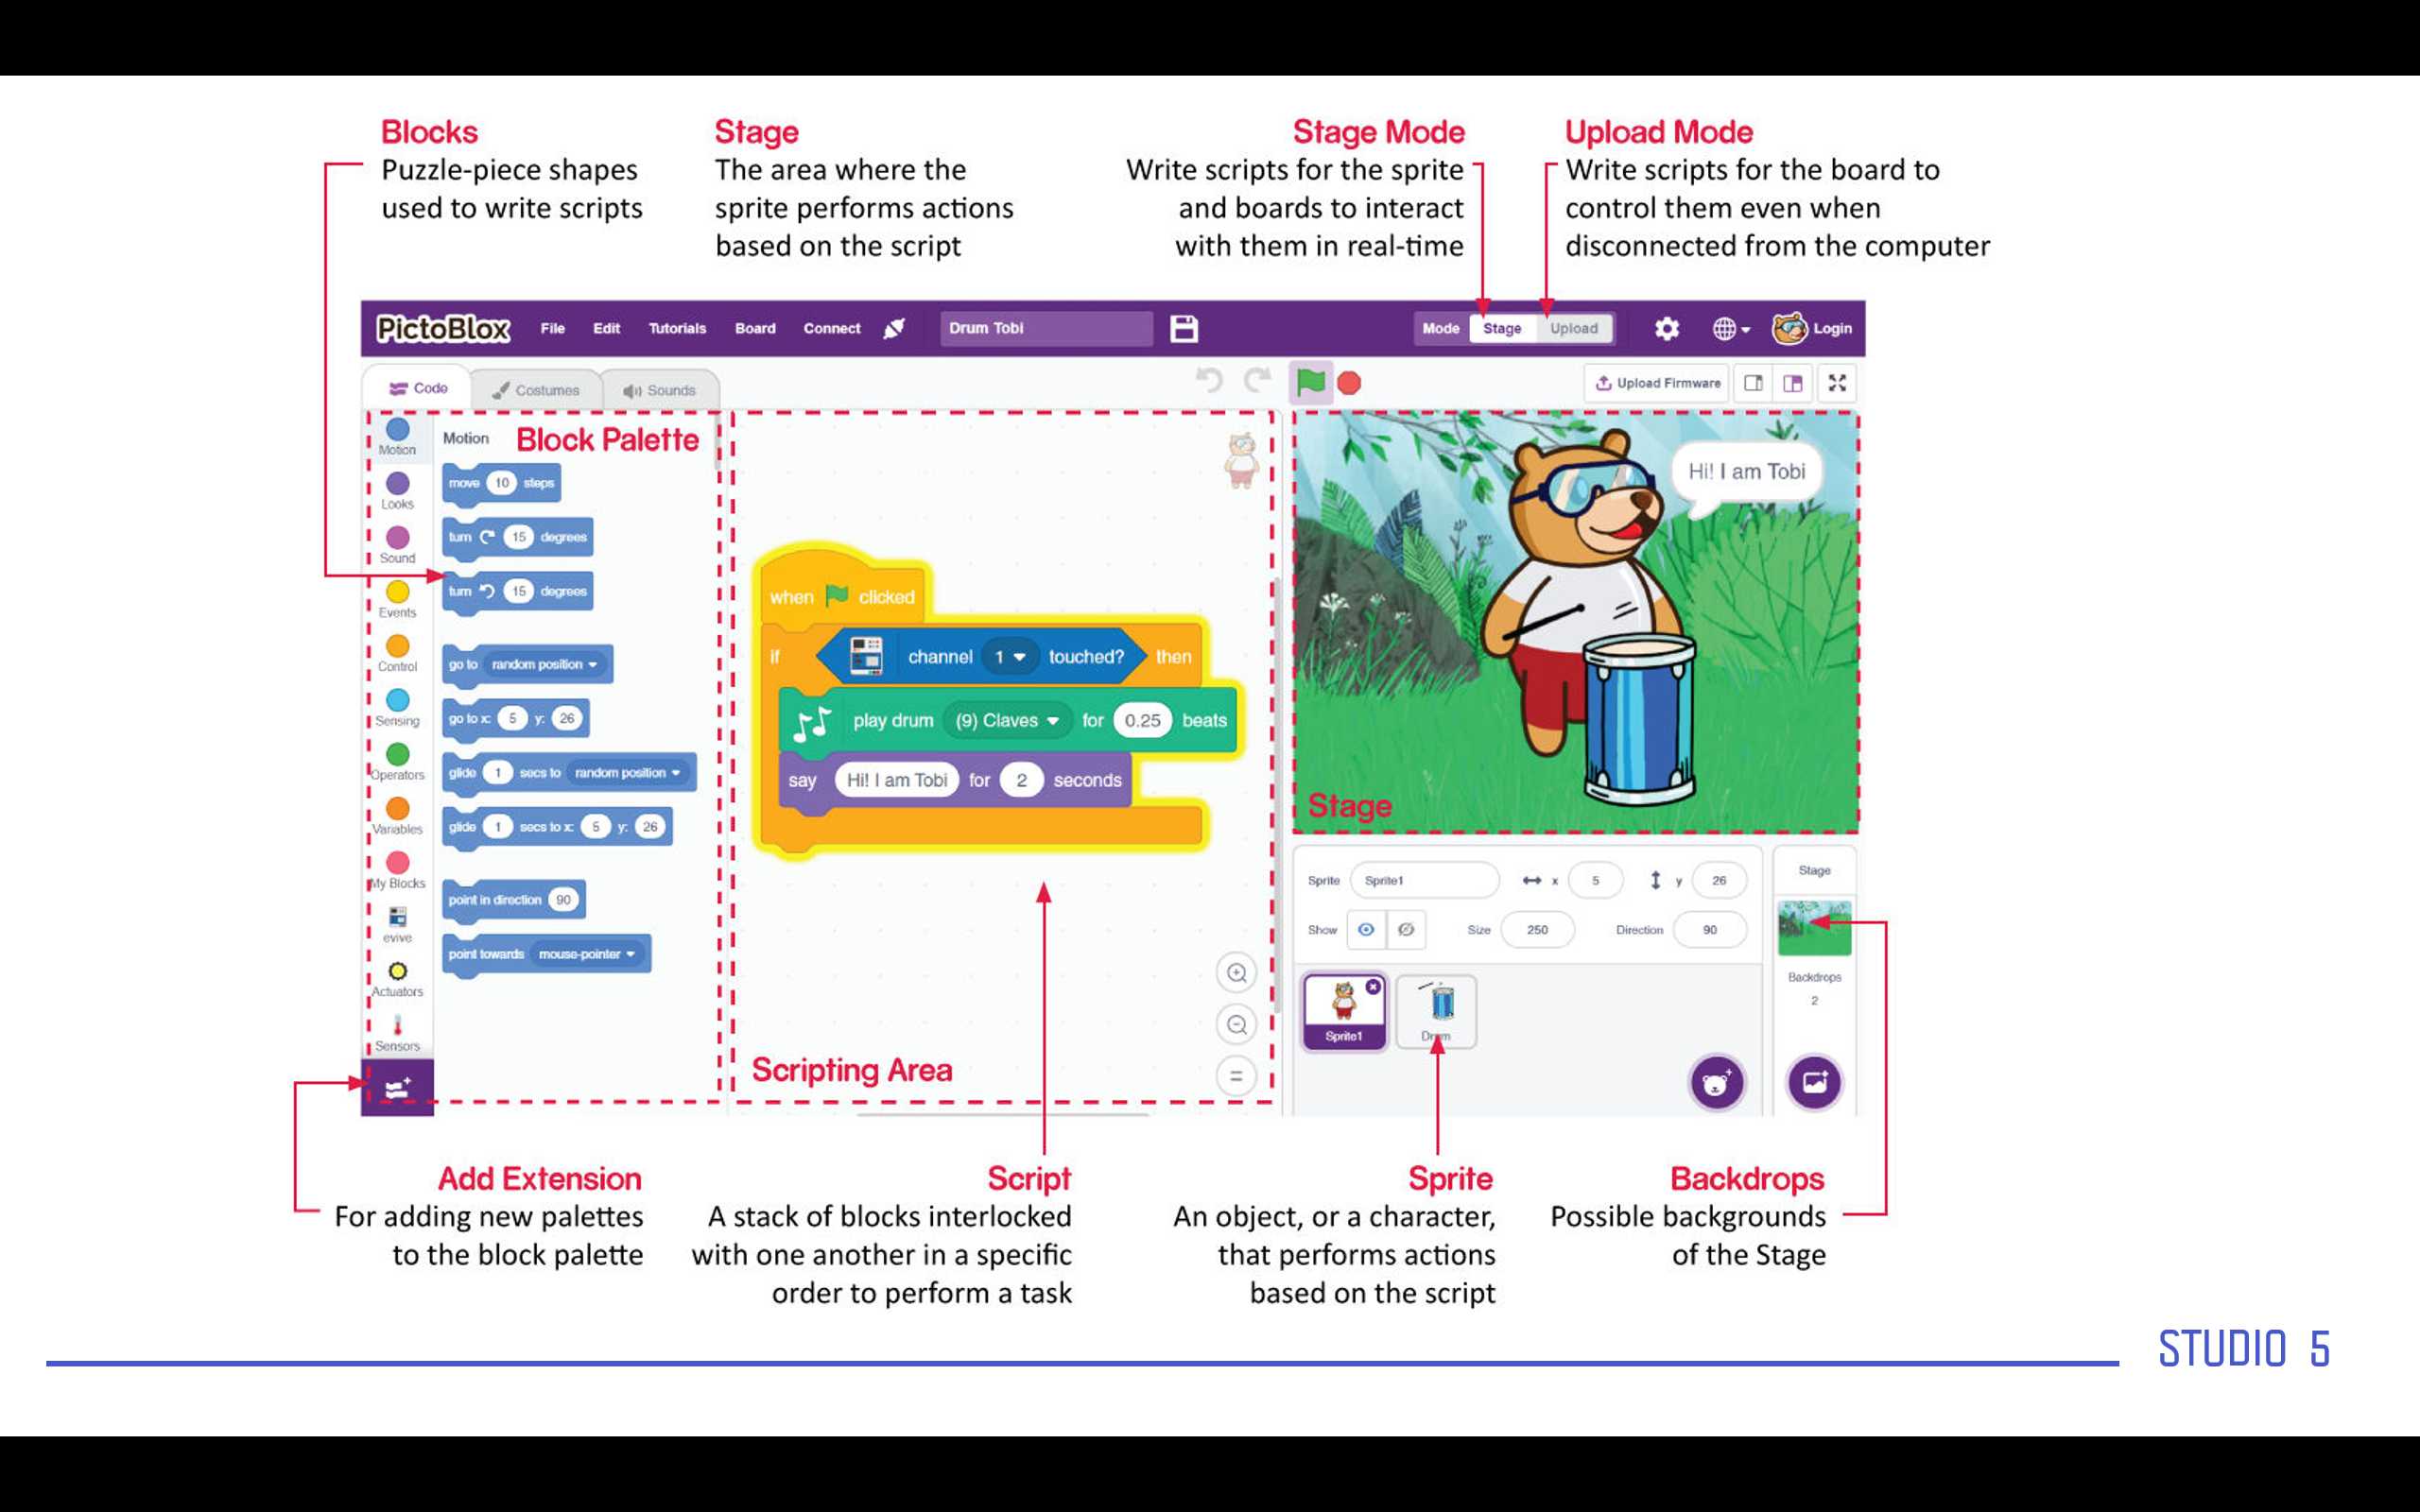
Note : Im not going to explain and discuss how to code on pictoblox but I will leave a video Link below which is gonna explain how to use it in the very simple form.
I will briefly explain what we are going to code in the first day and what we will need and the outcomes.
After getting to know how to code and how to add libraries in Pictoblox.
This day we are going to use the following extensions.
1- Weather Data
2- Text to speech

In the weather data library we will have all the needed functions to get the weather information of a specific area through knowing the Latitude and longitude
Below a link to a full documentation of the Library

The Text to Speech library contains 3 functions to read aloud the text and change the tone of the voice and the language spoken.
Below a link to the full documentation of this library.
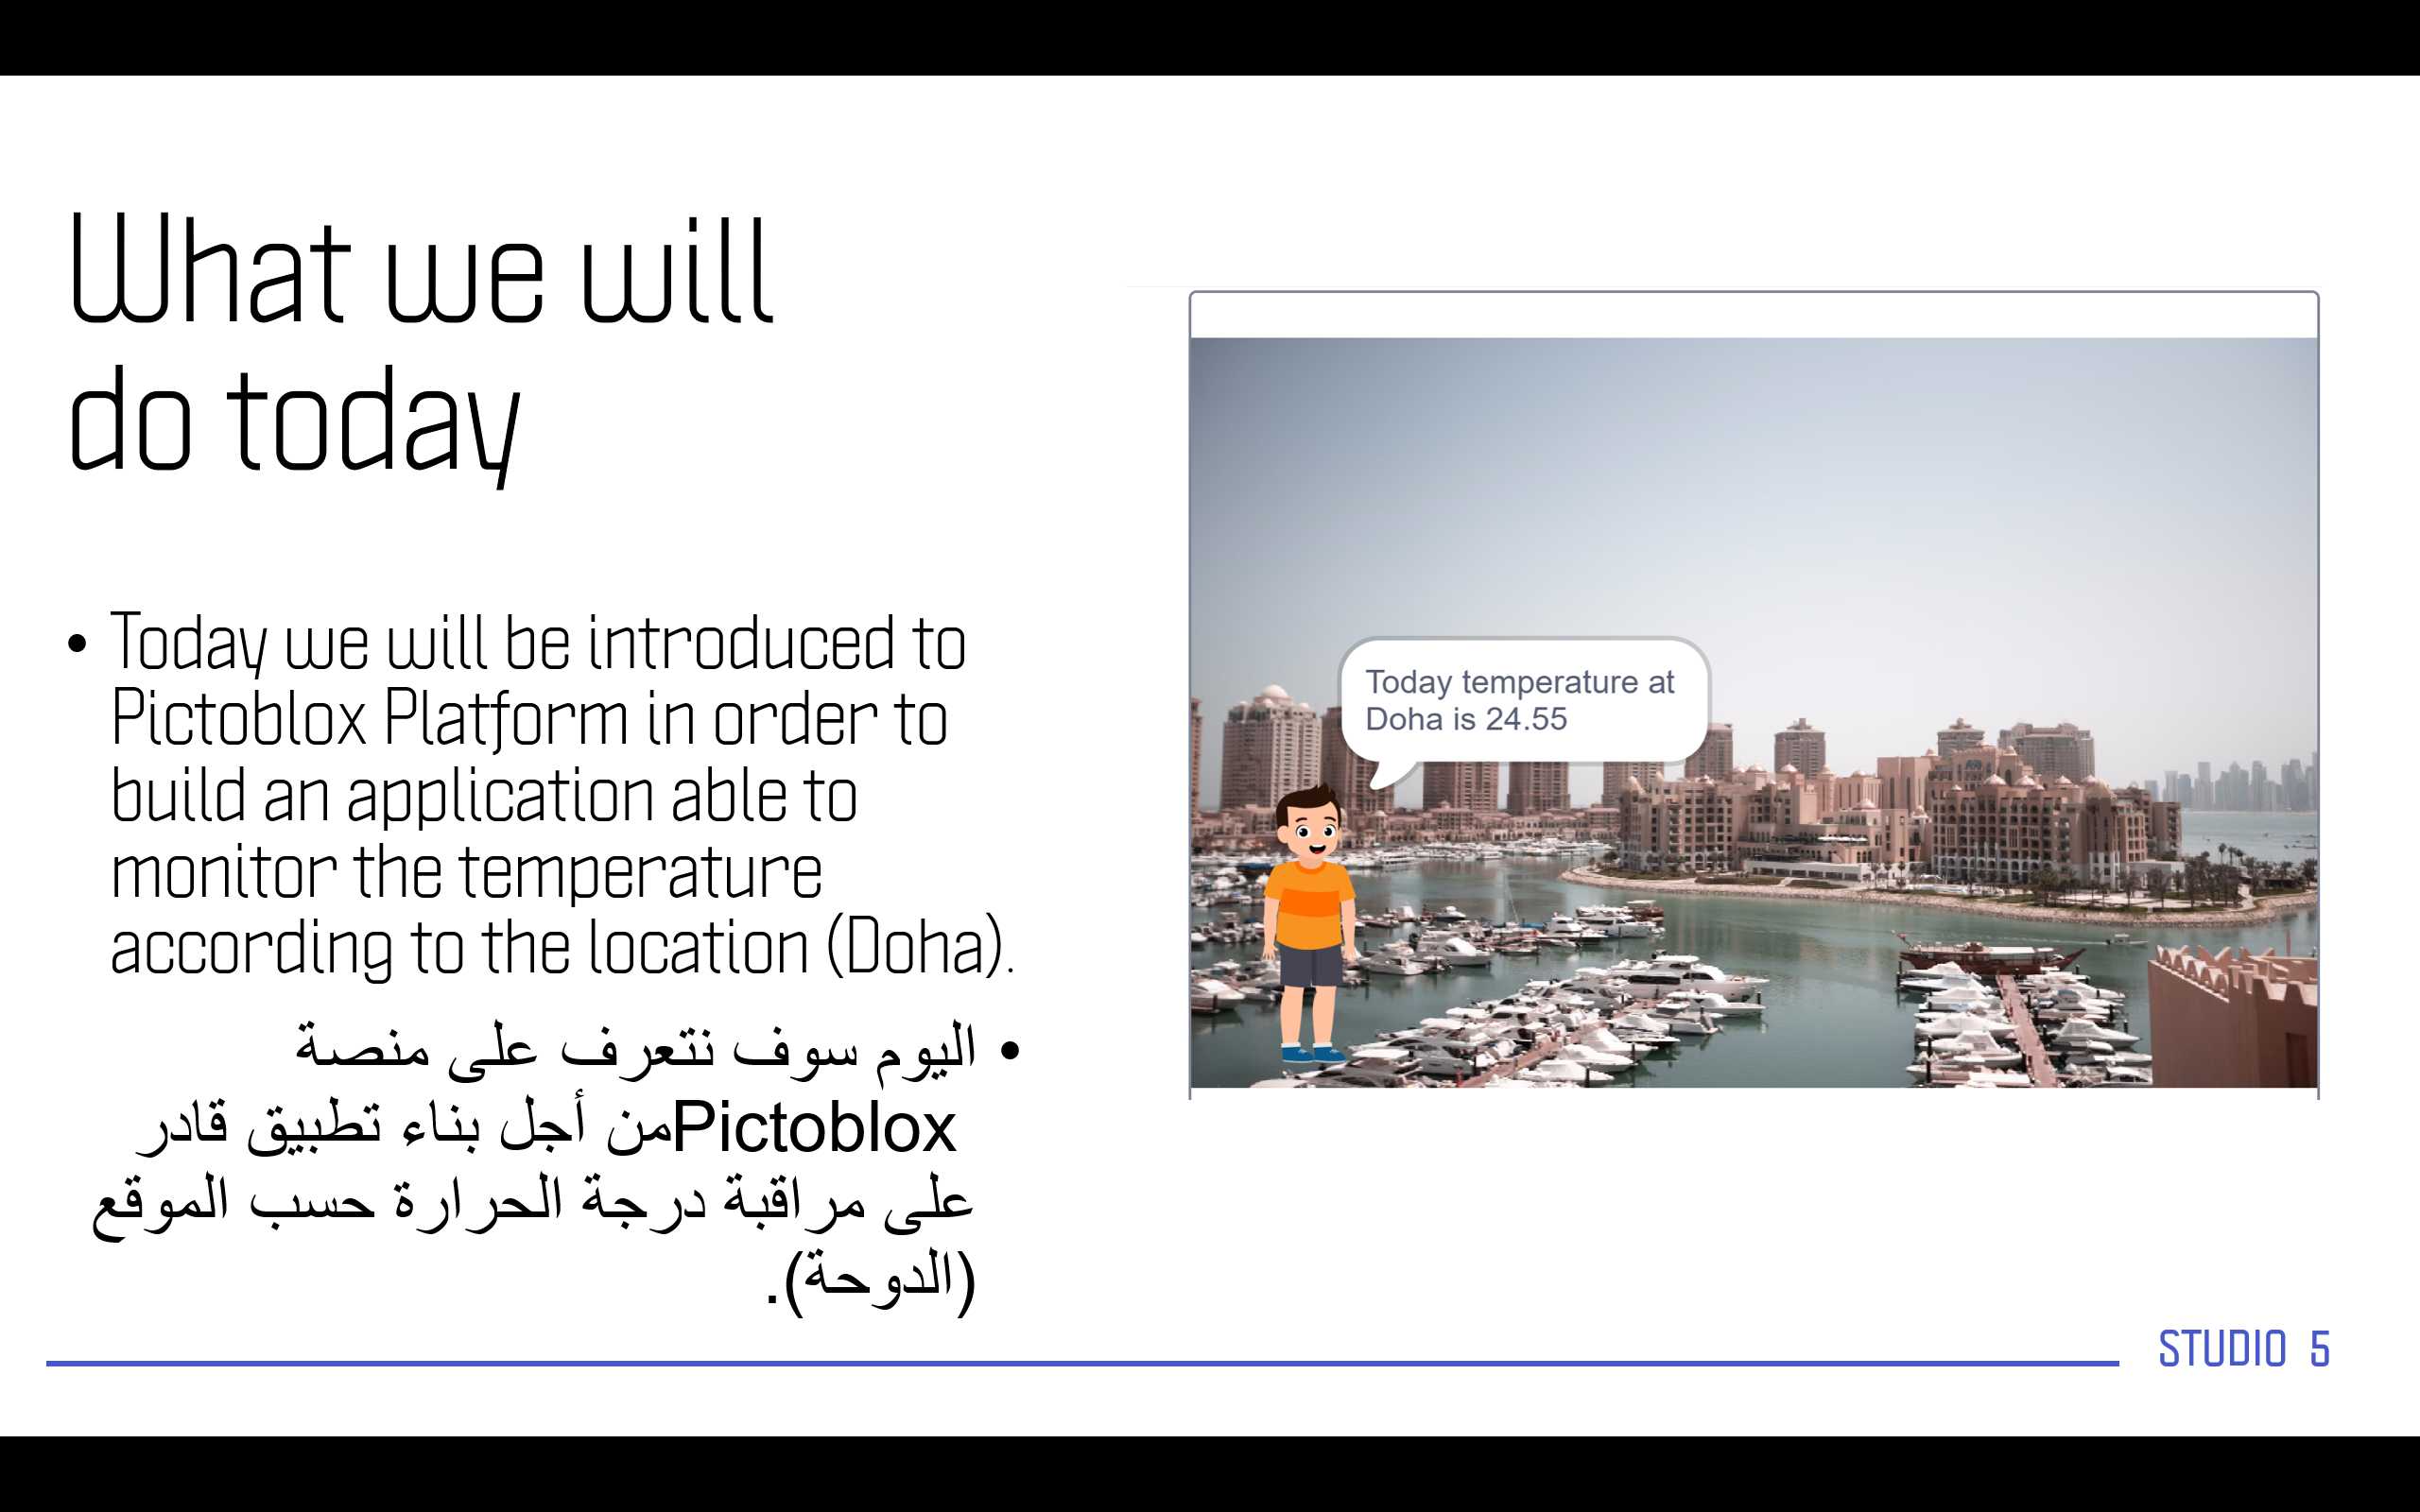
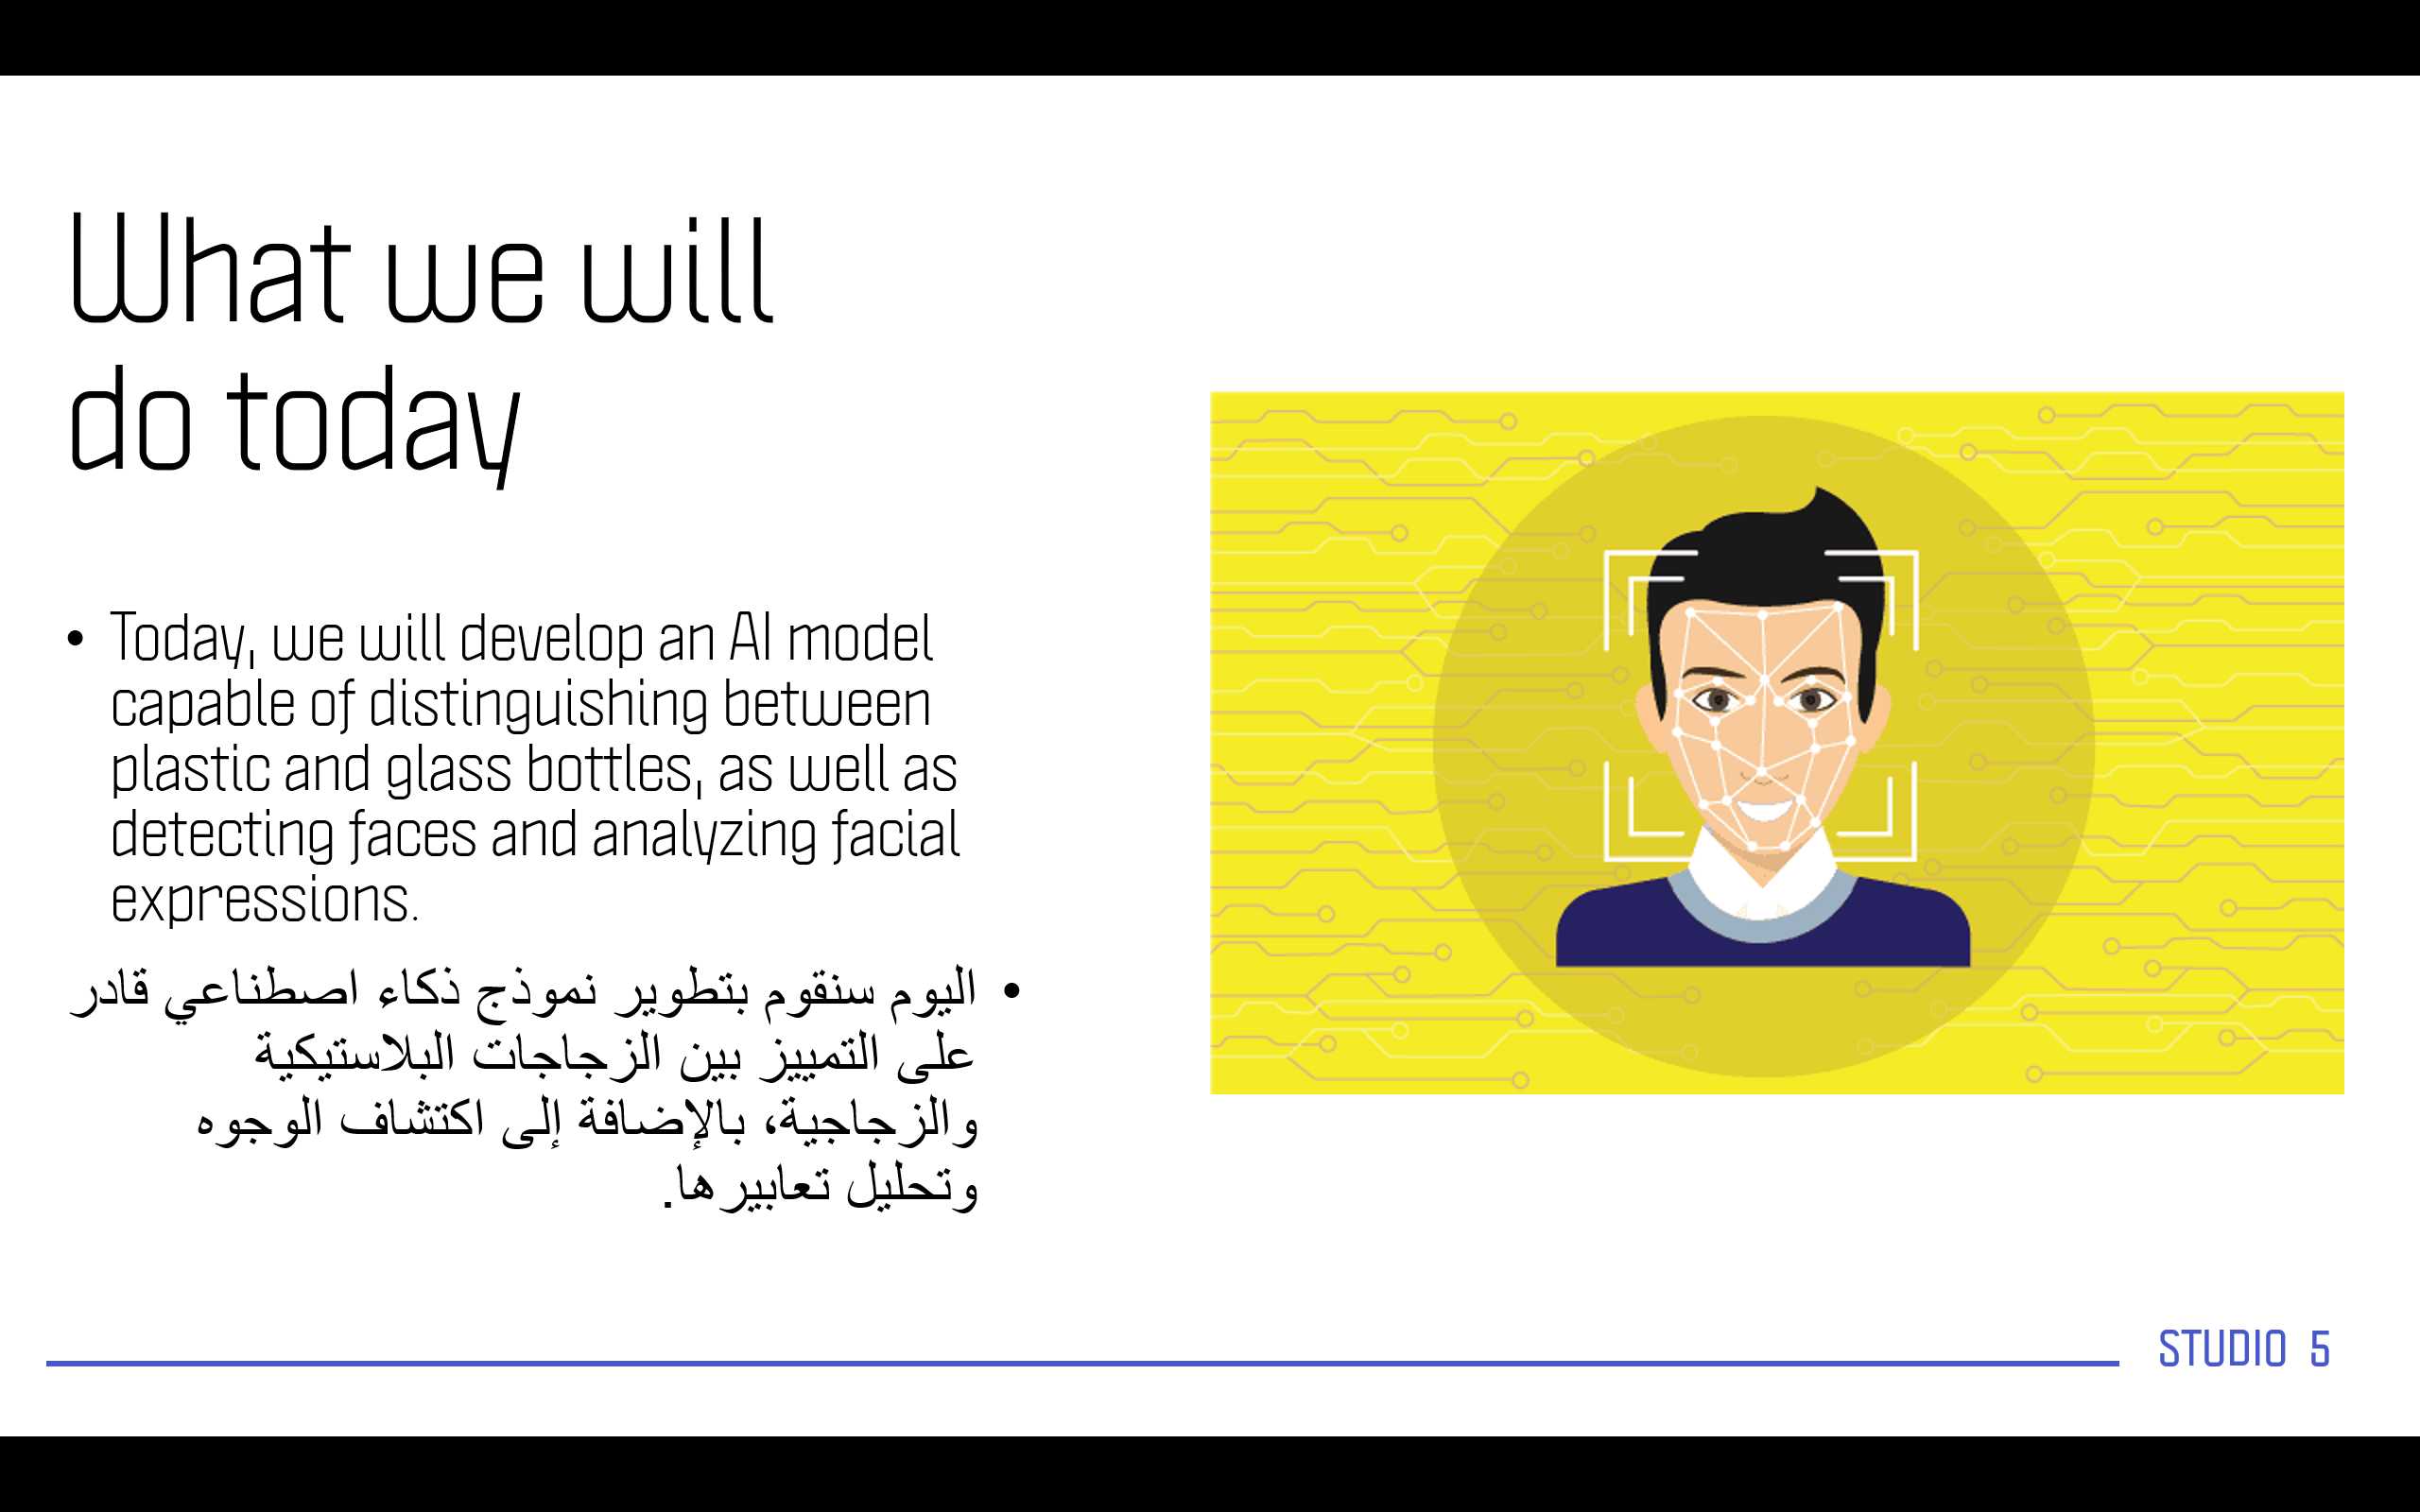
As for what we are going to do today:
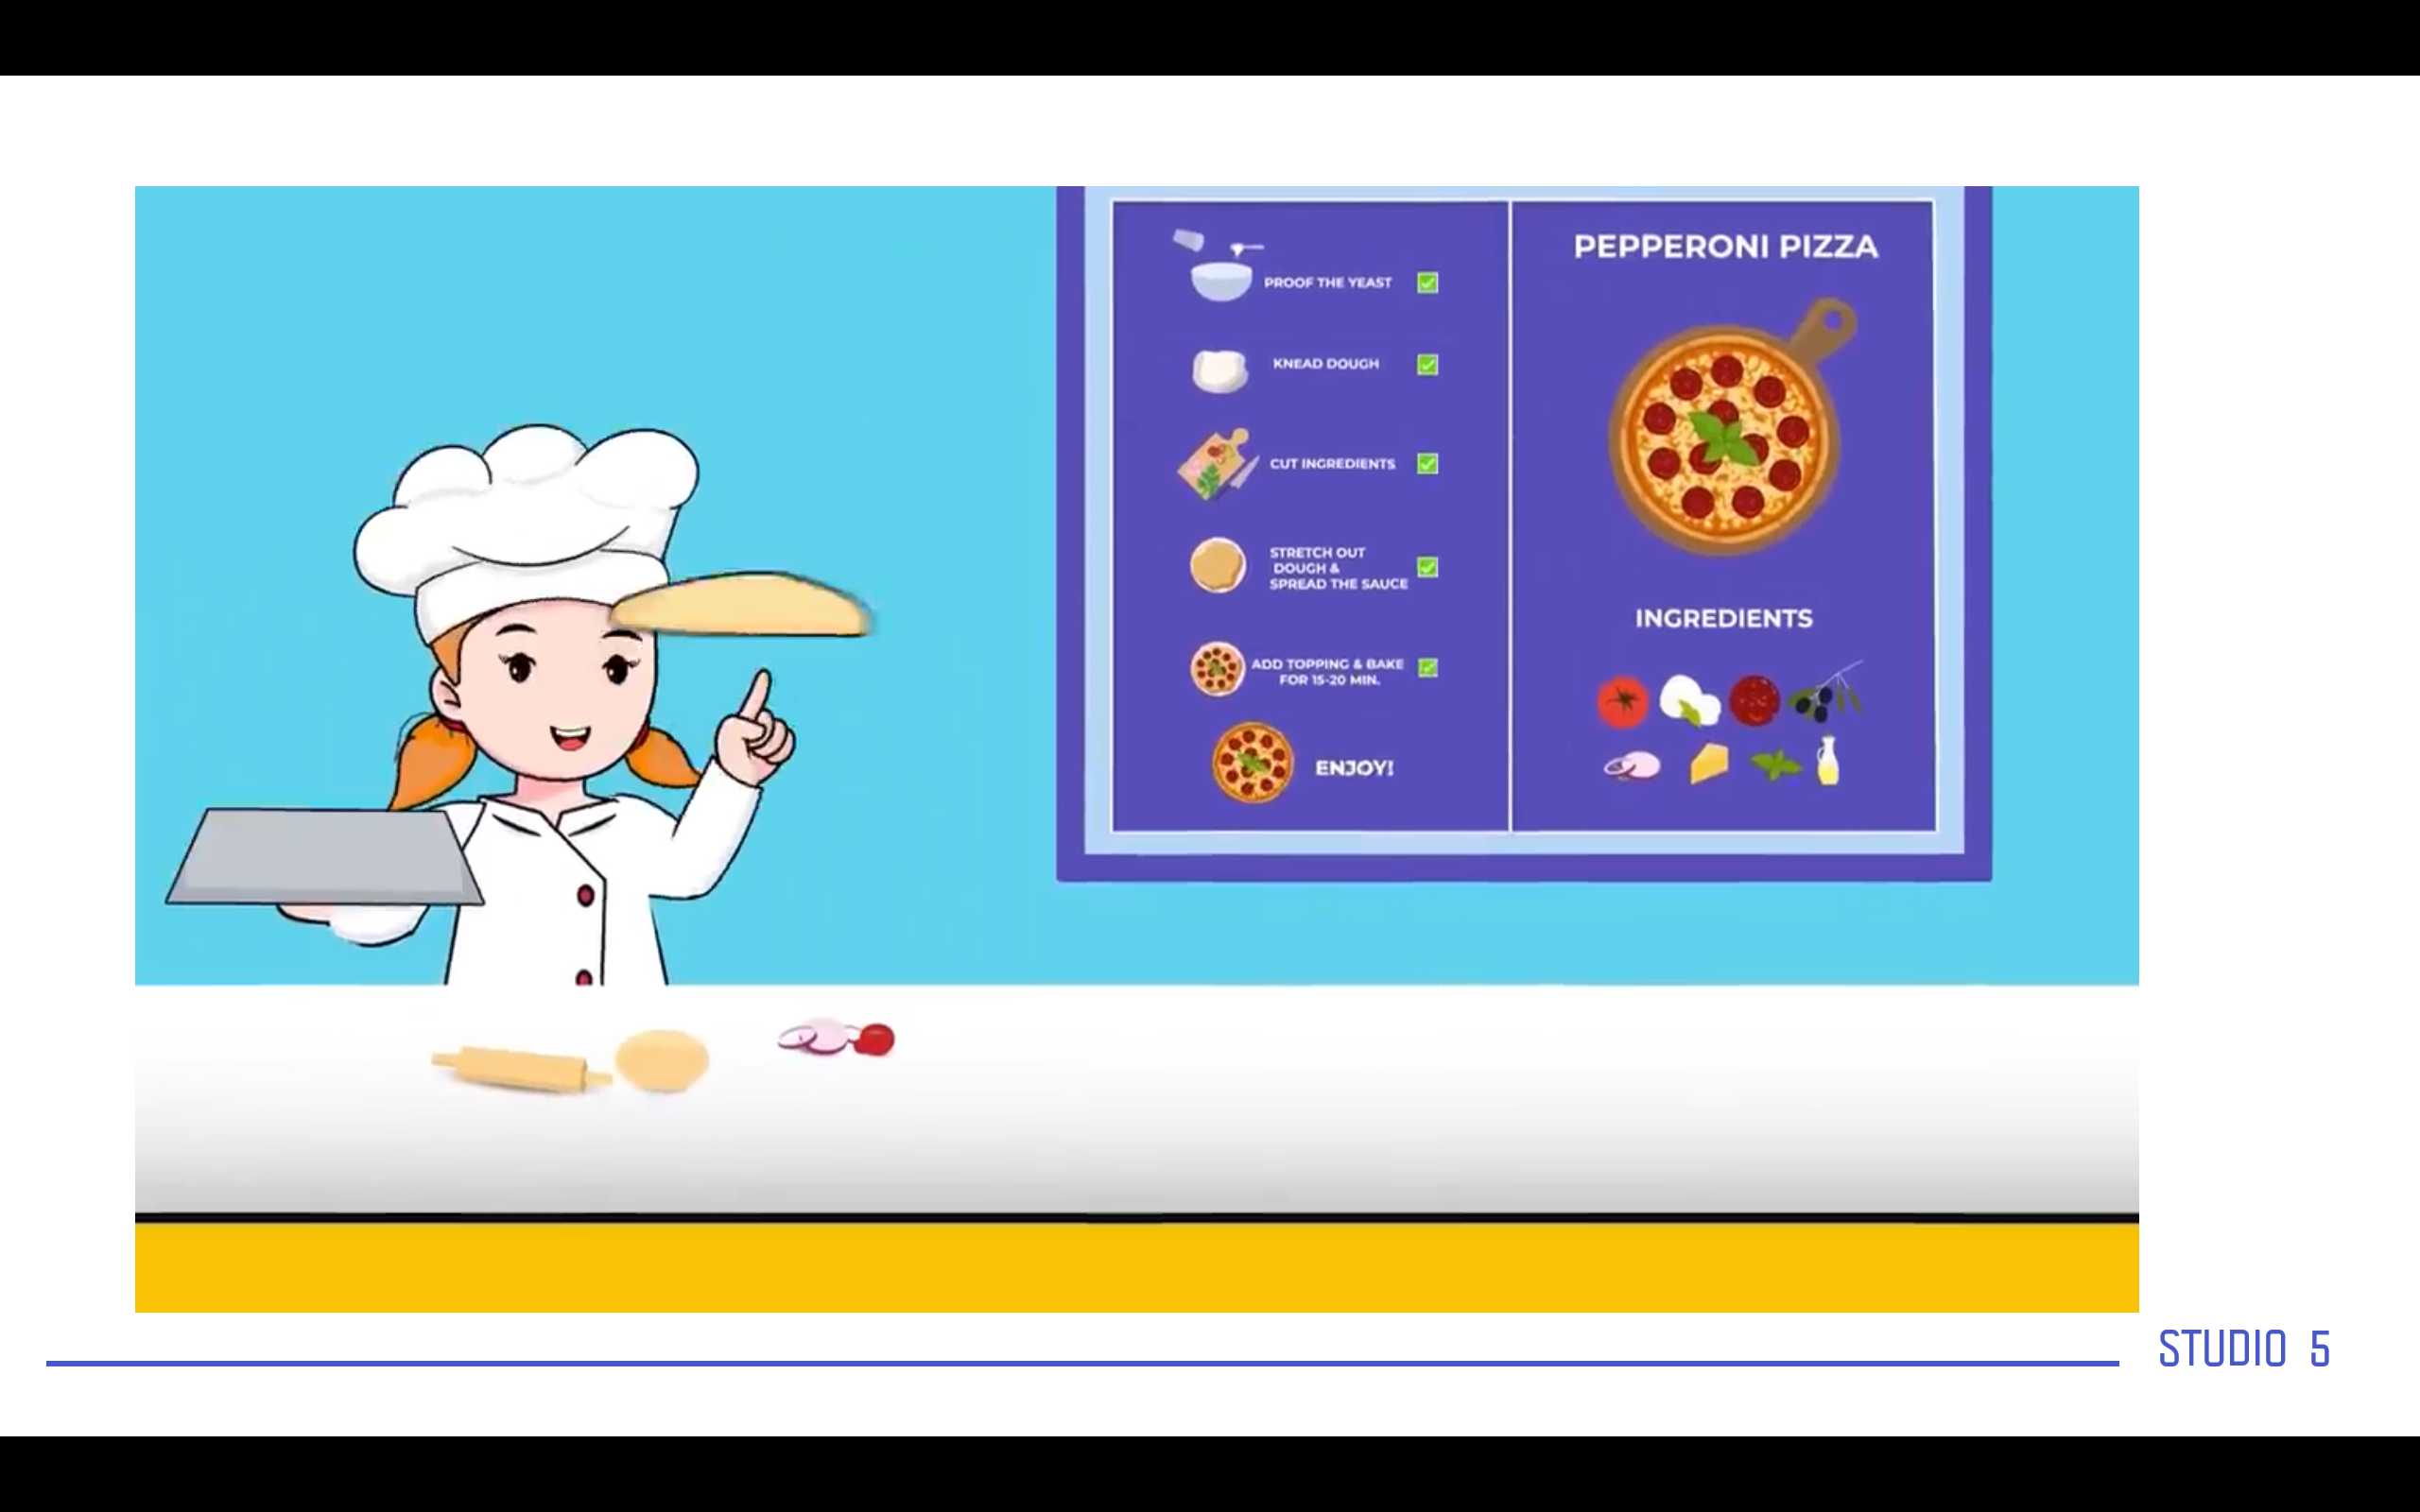
We will build a conversation to give the weather information about DOHA capital of QATAR.
DOHA : 25.2854° N latitude and 51.5310° E longitude
for each student (he/she can enter the city they want, they need to search google for the long. and lat.).
I will provide the entire code in the attachment section above.
In this day we will explain the (AI) concept and (ML) methods in addition to the coding requirement needed for building the prototype.
I will start by recapping what we already have delivered during the past day.

Lets start our session with a question.
we will explain this to them in words then we will combine the phrase together for the new meaning.

Then lets explain the other part of the phrase.

Then the two words together makes the phrase Artificial Intelligent.

Then we will ask them about the ML which is the way of making these computers Intelligent.

Machine learning is the process of teaching the machine how to be intelligent.

Then we need to explain the process of building a model in machine learning
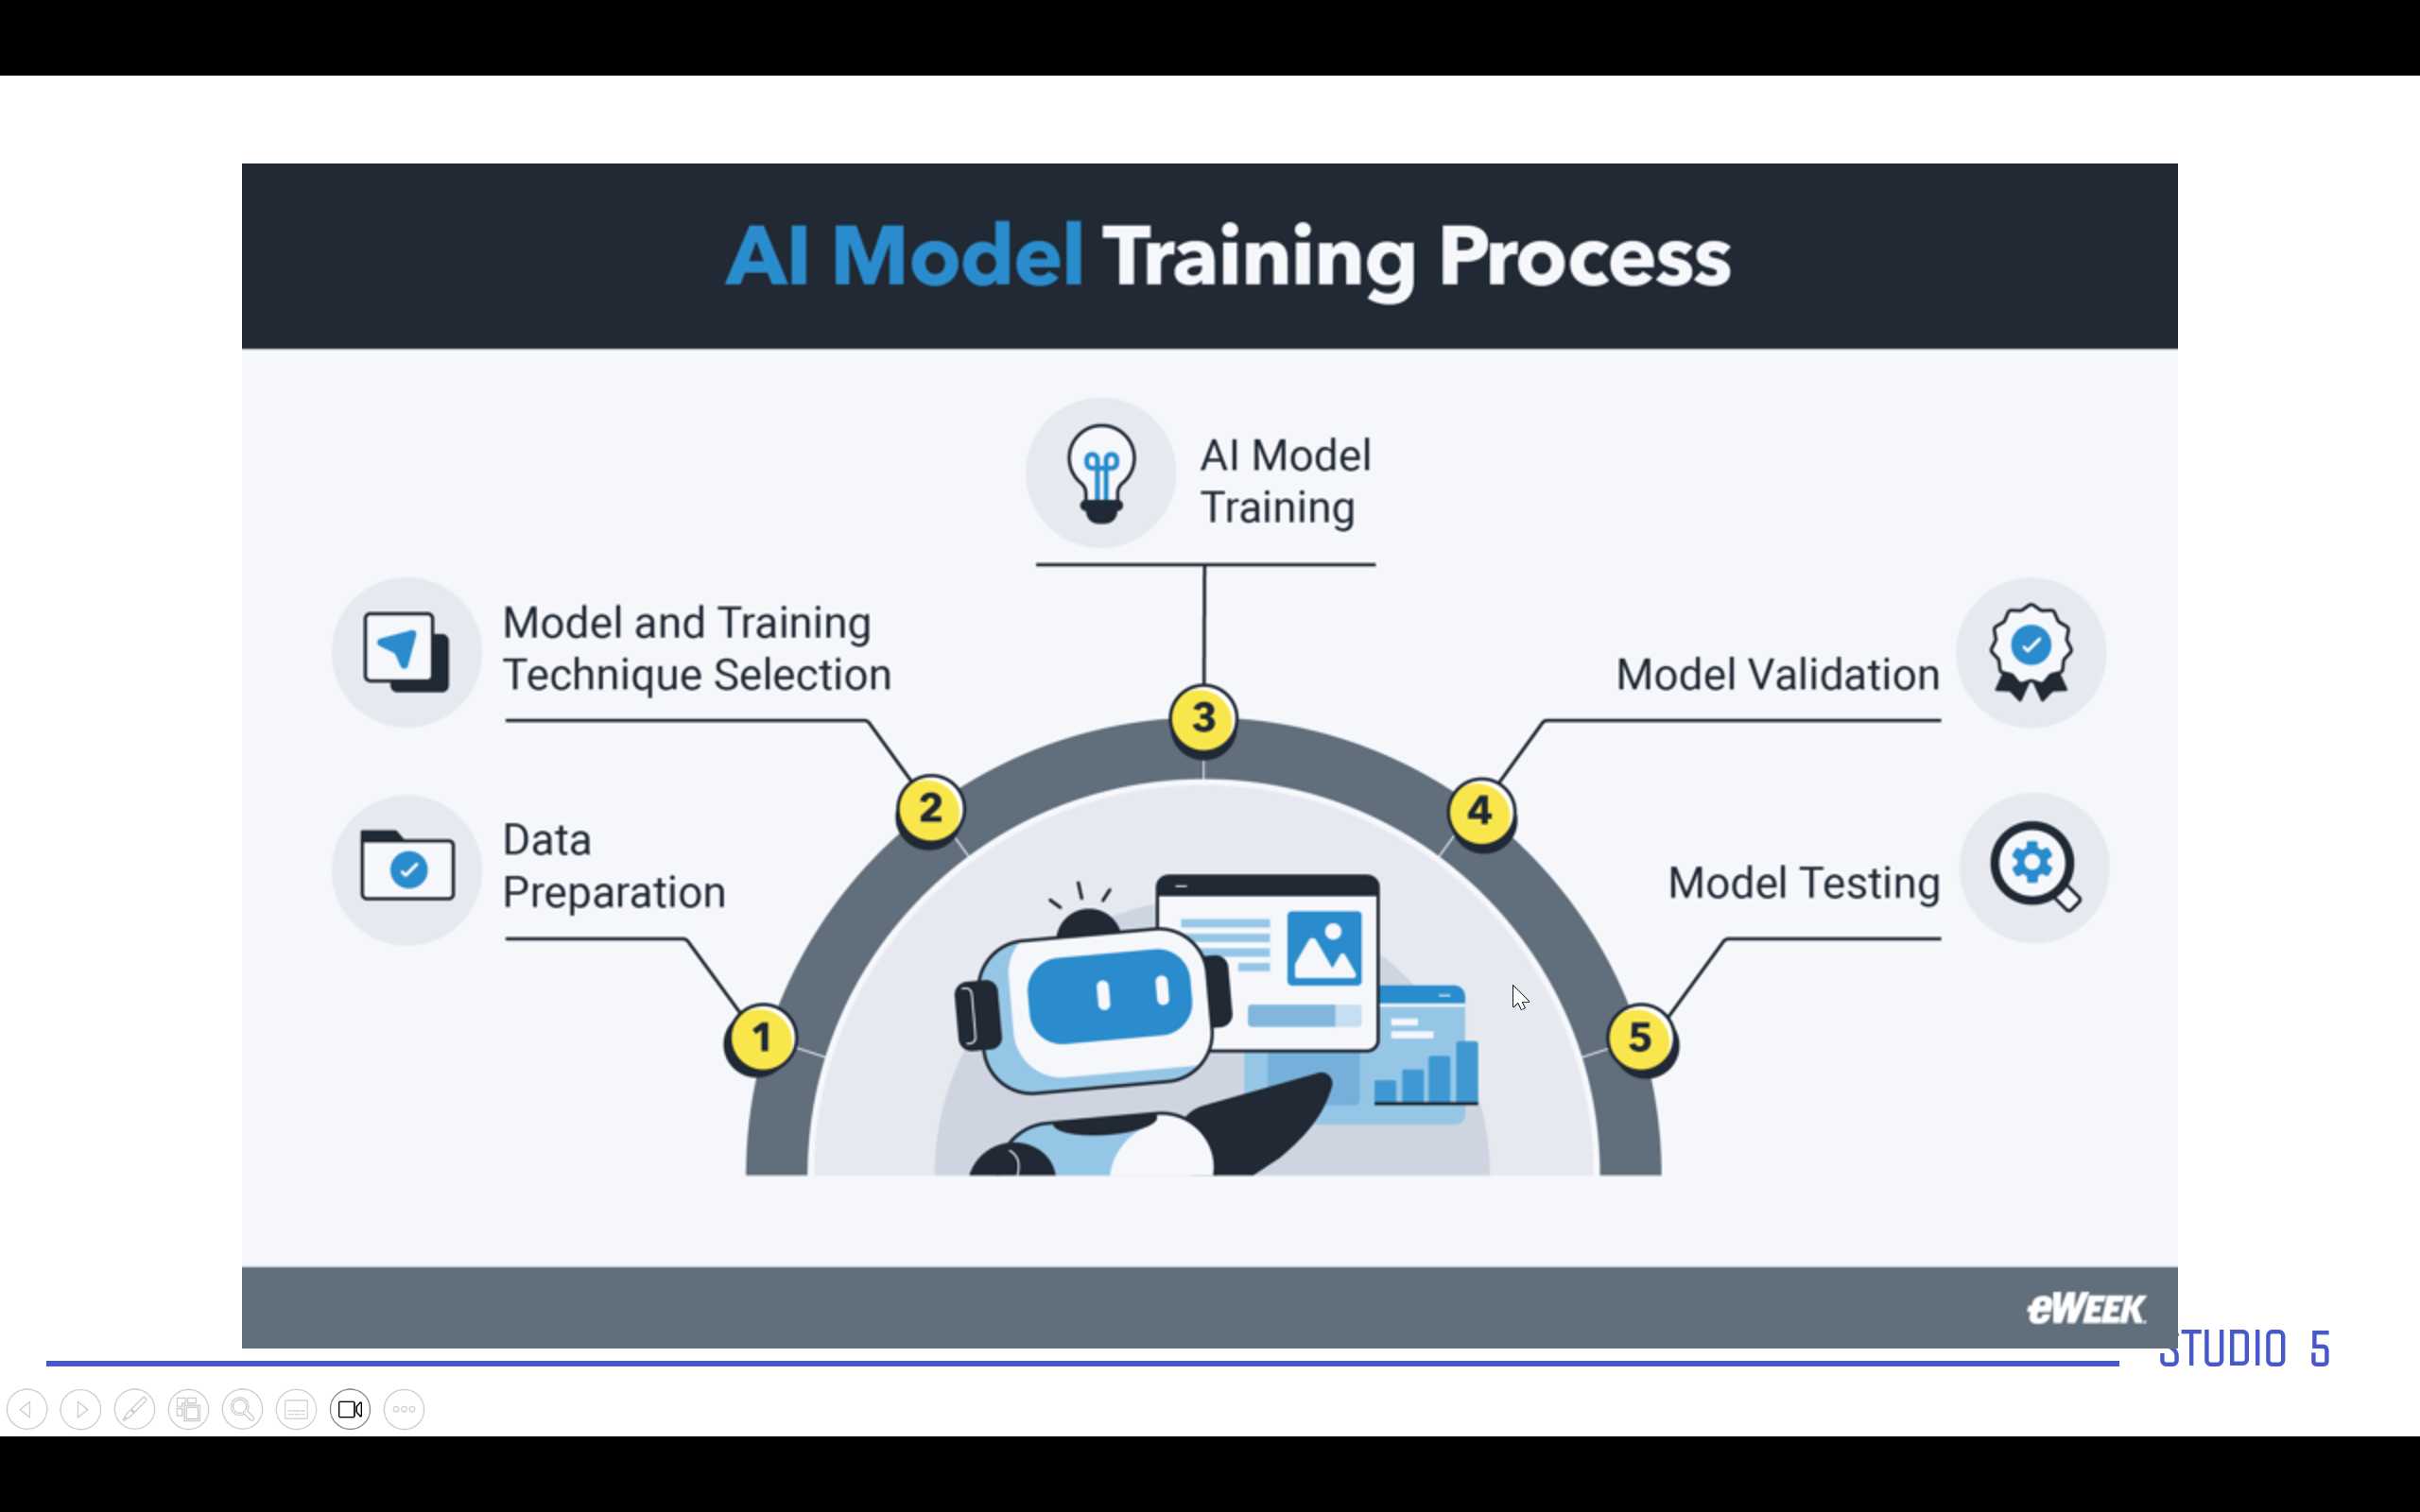
Then we need to explain the technique of building models.
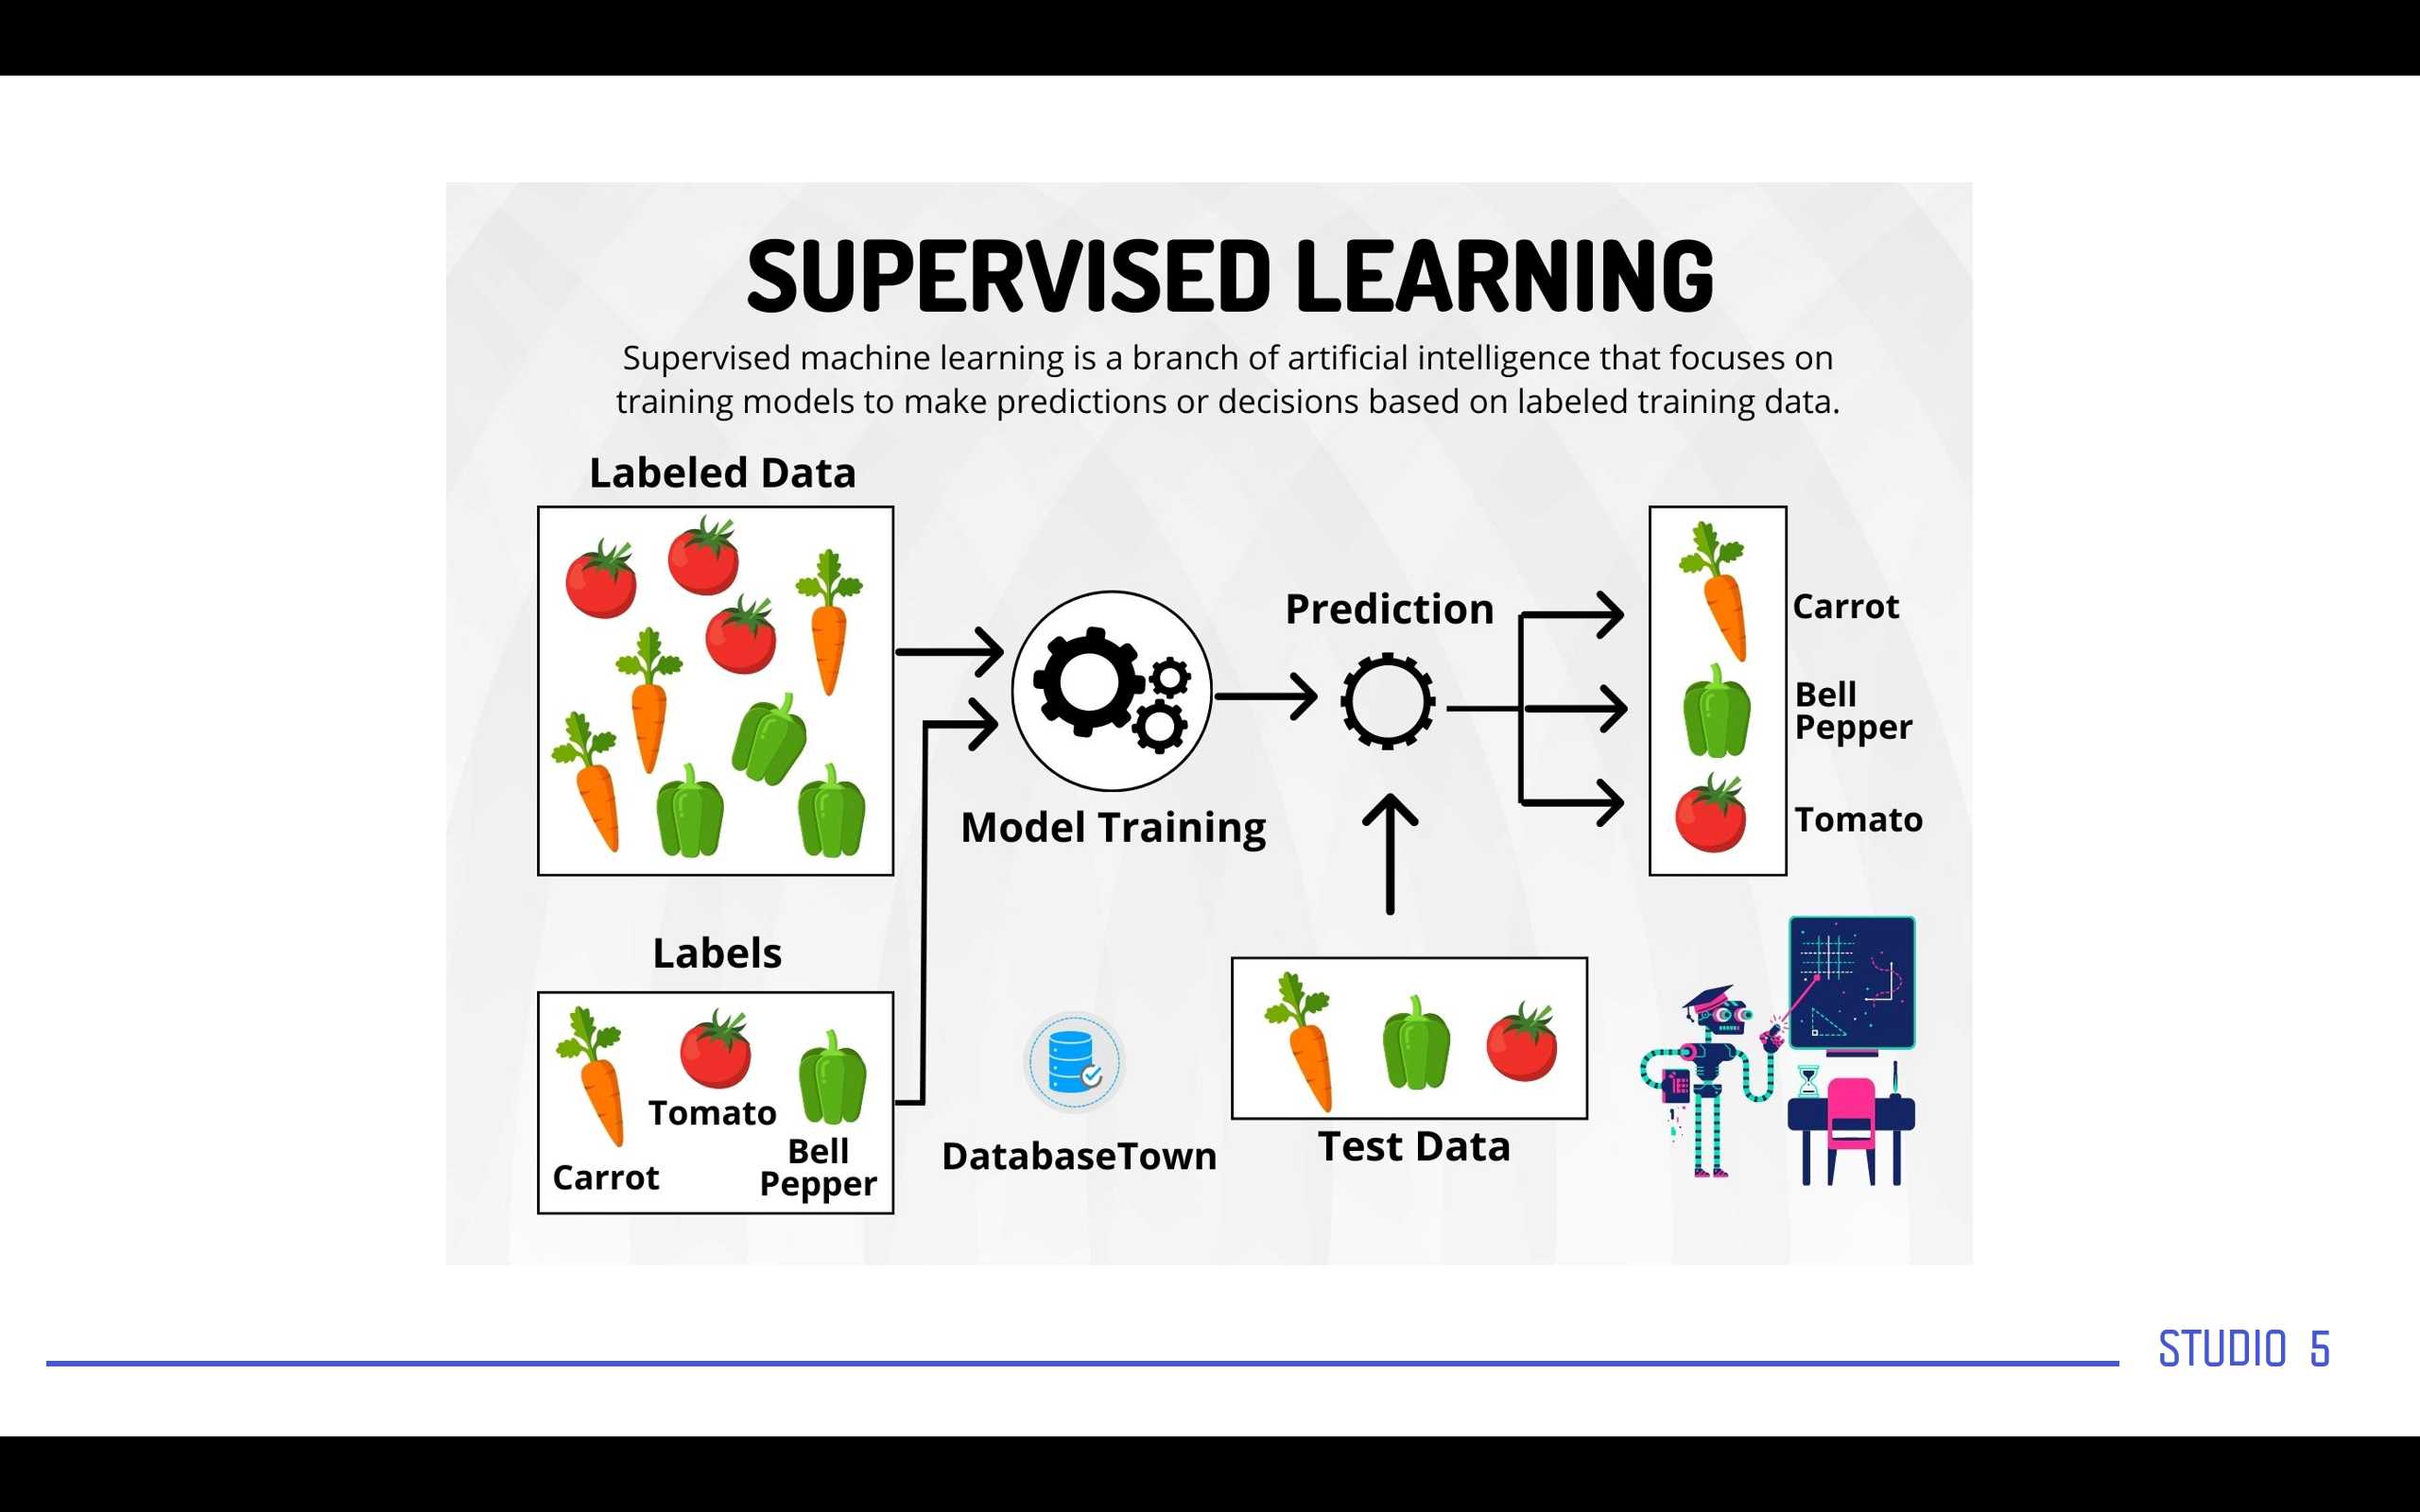
1- The supervised learning
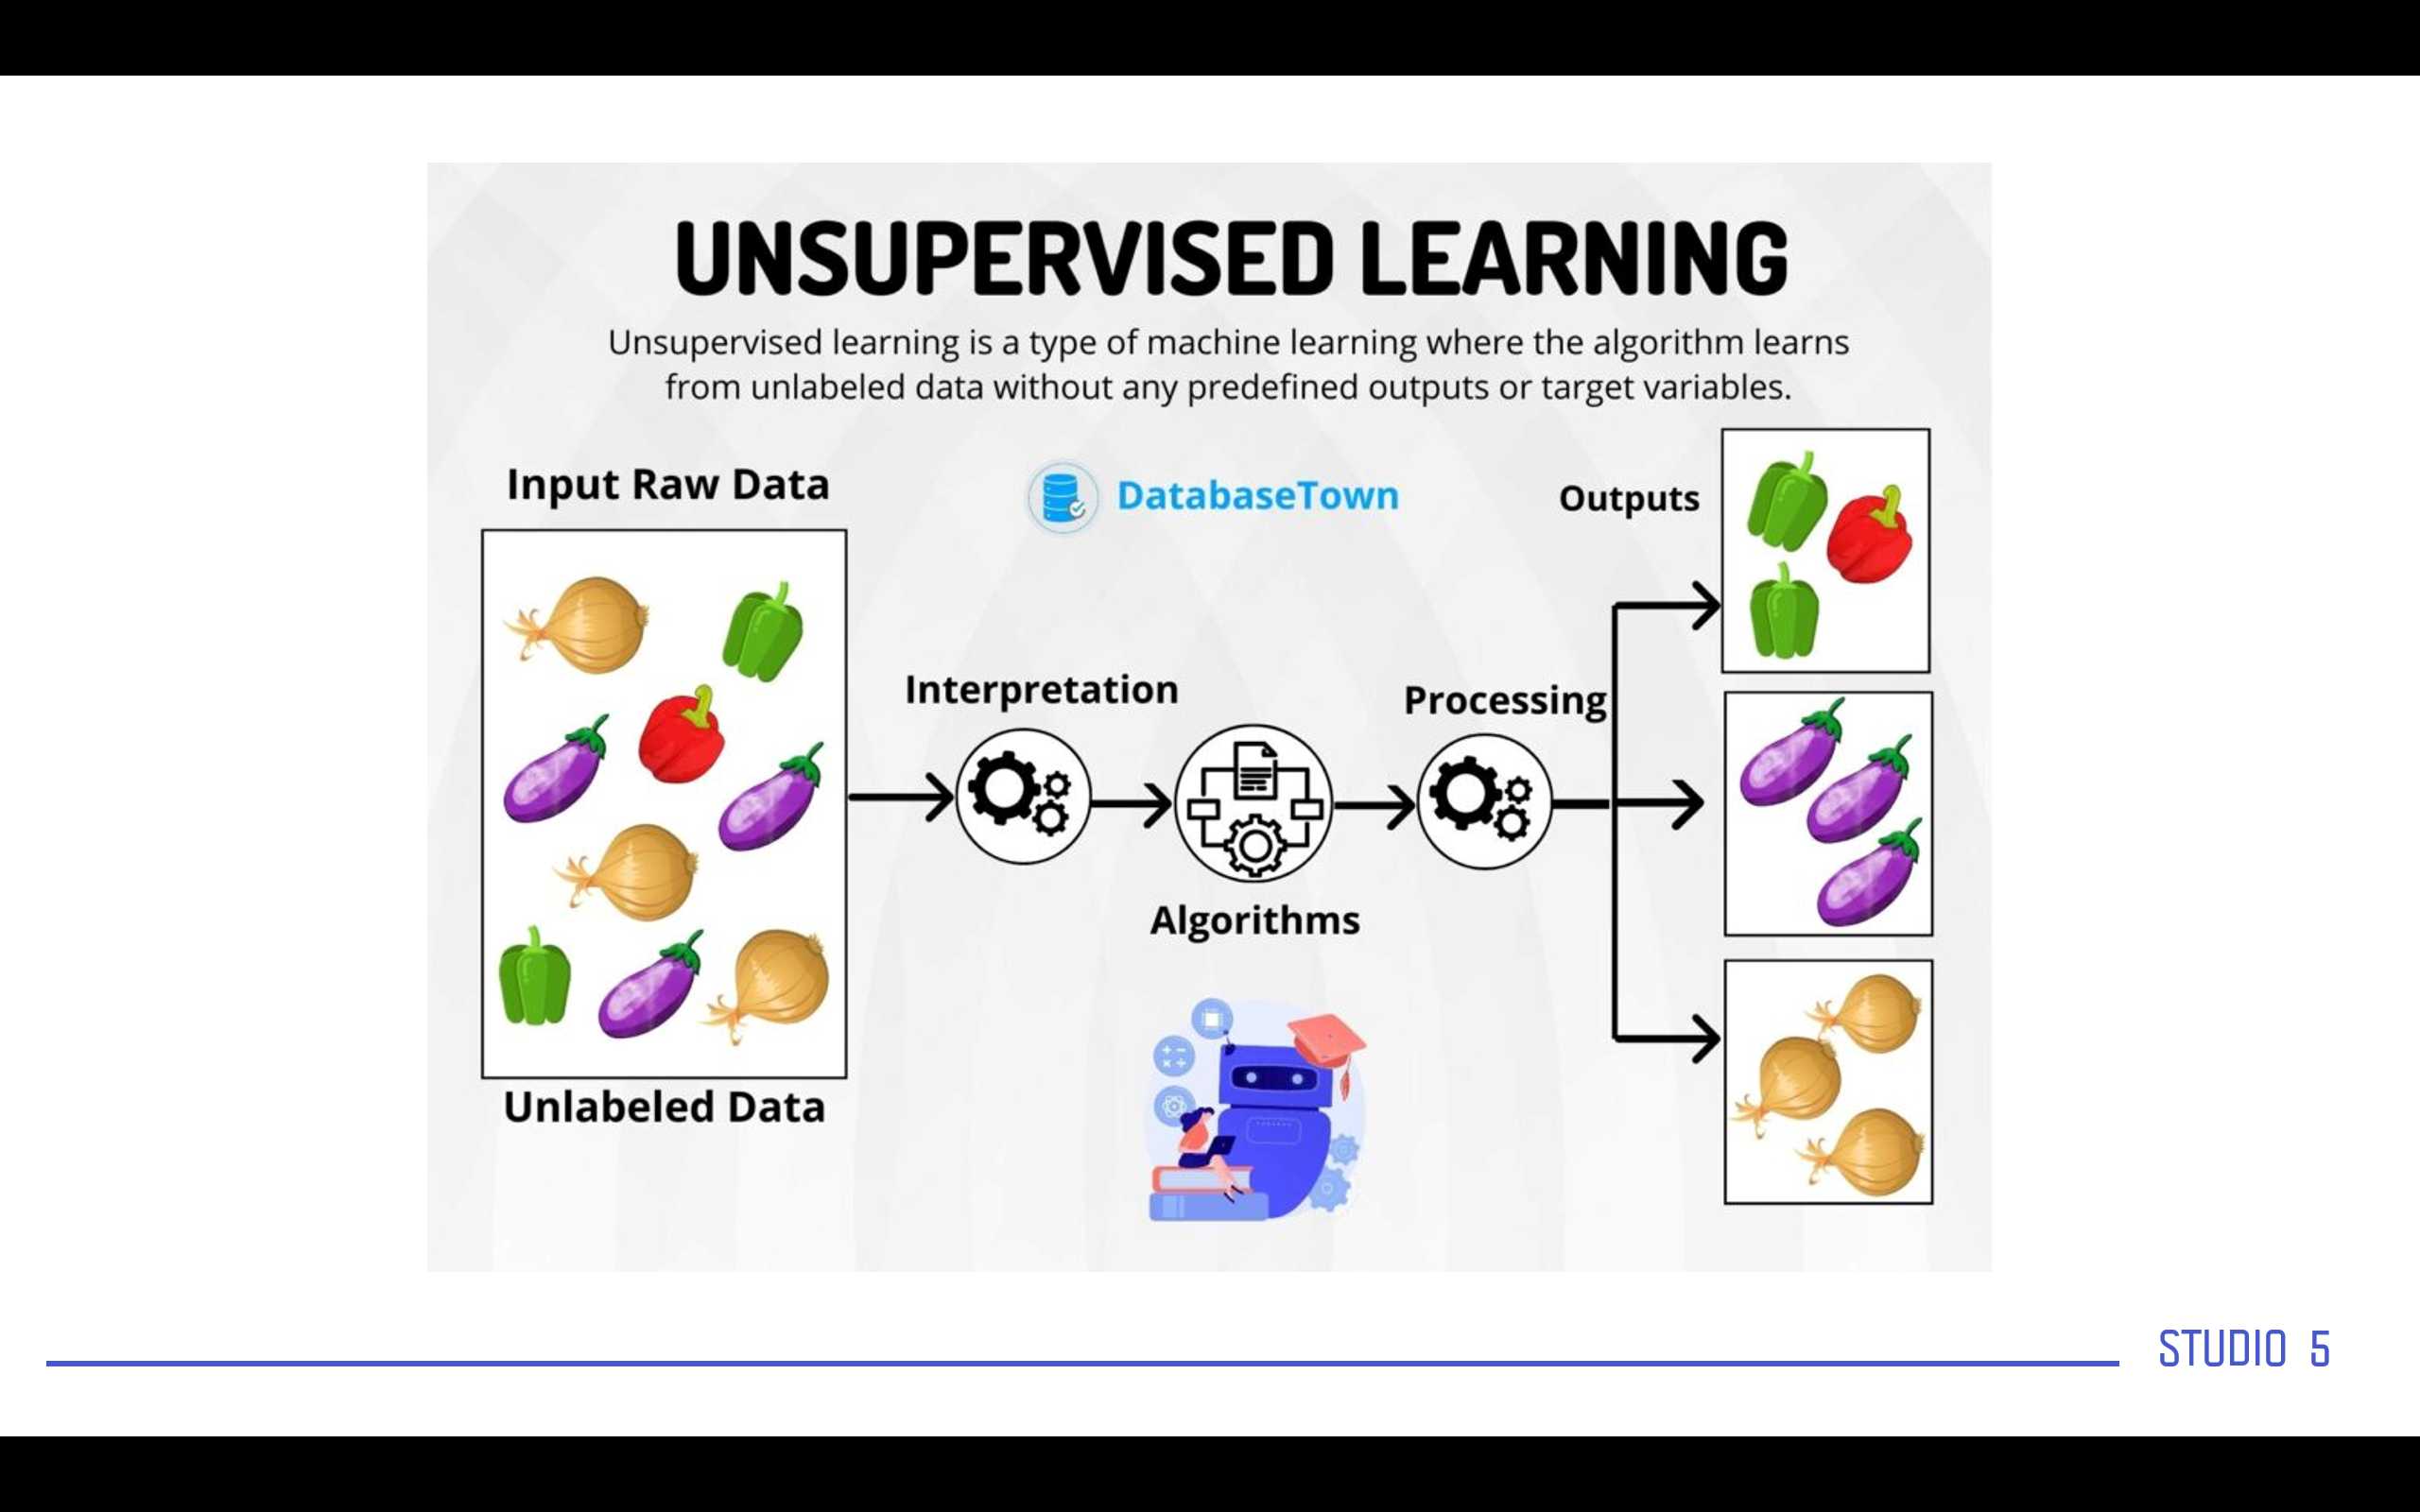
2- The unsupervised Learning
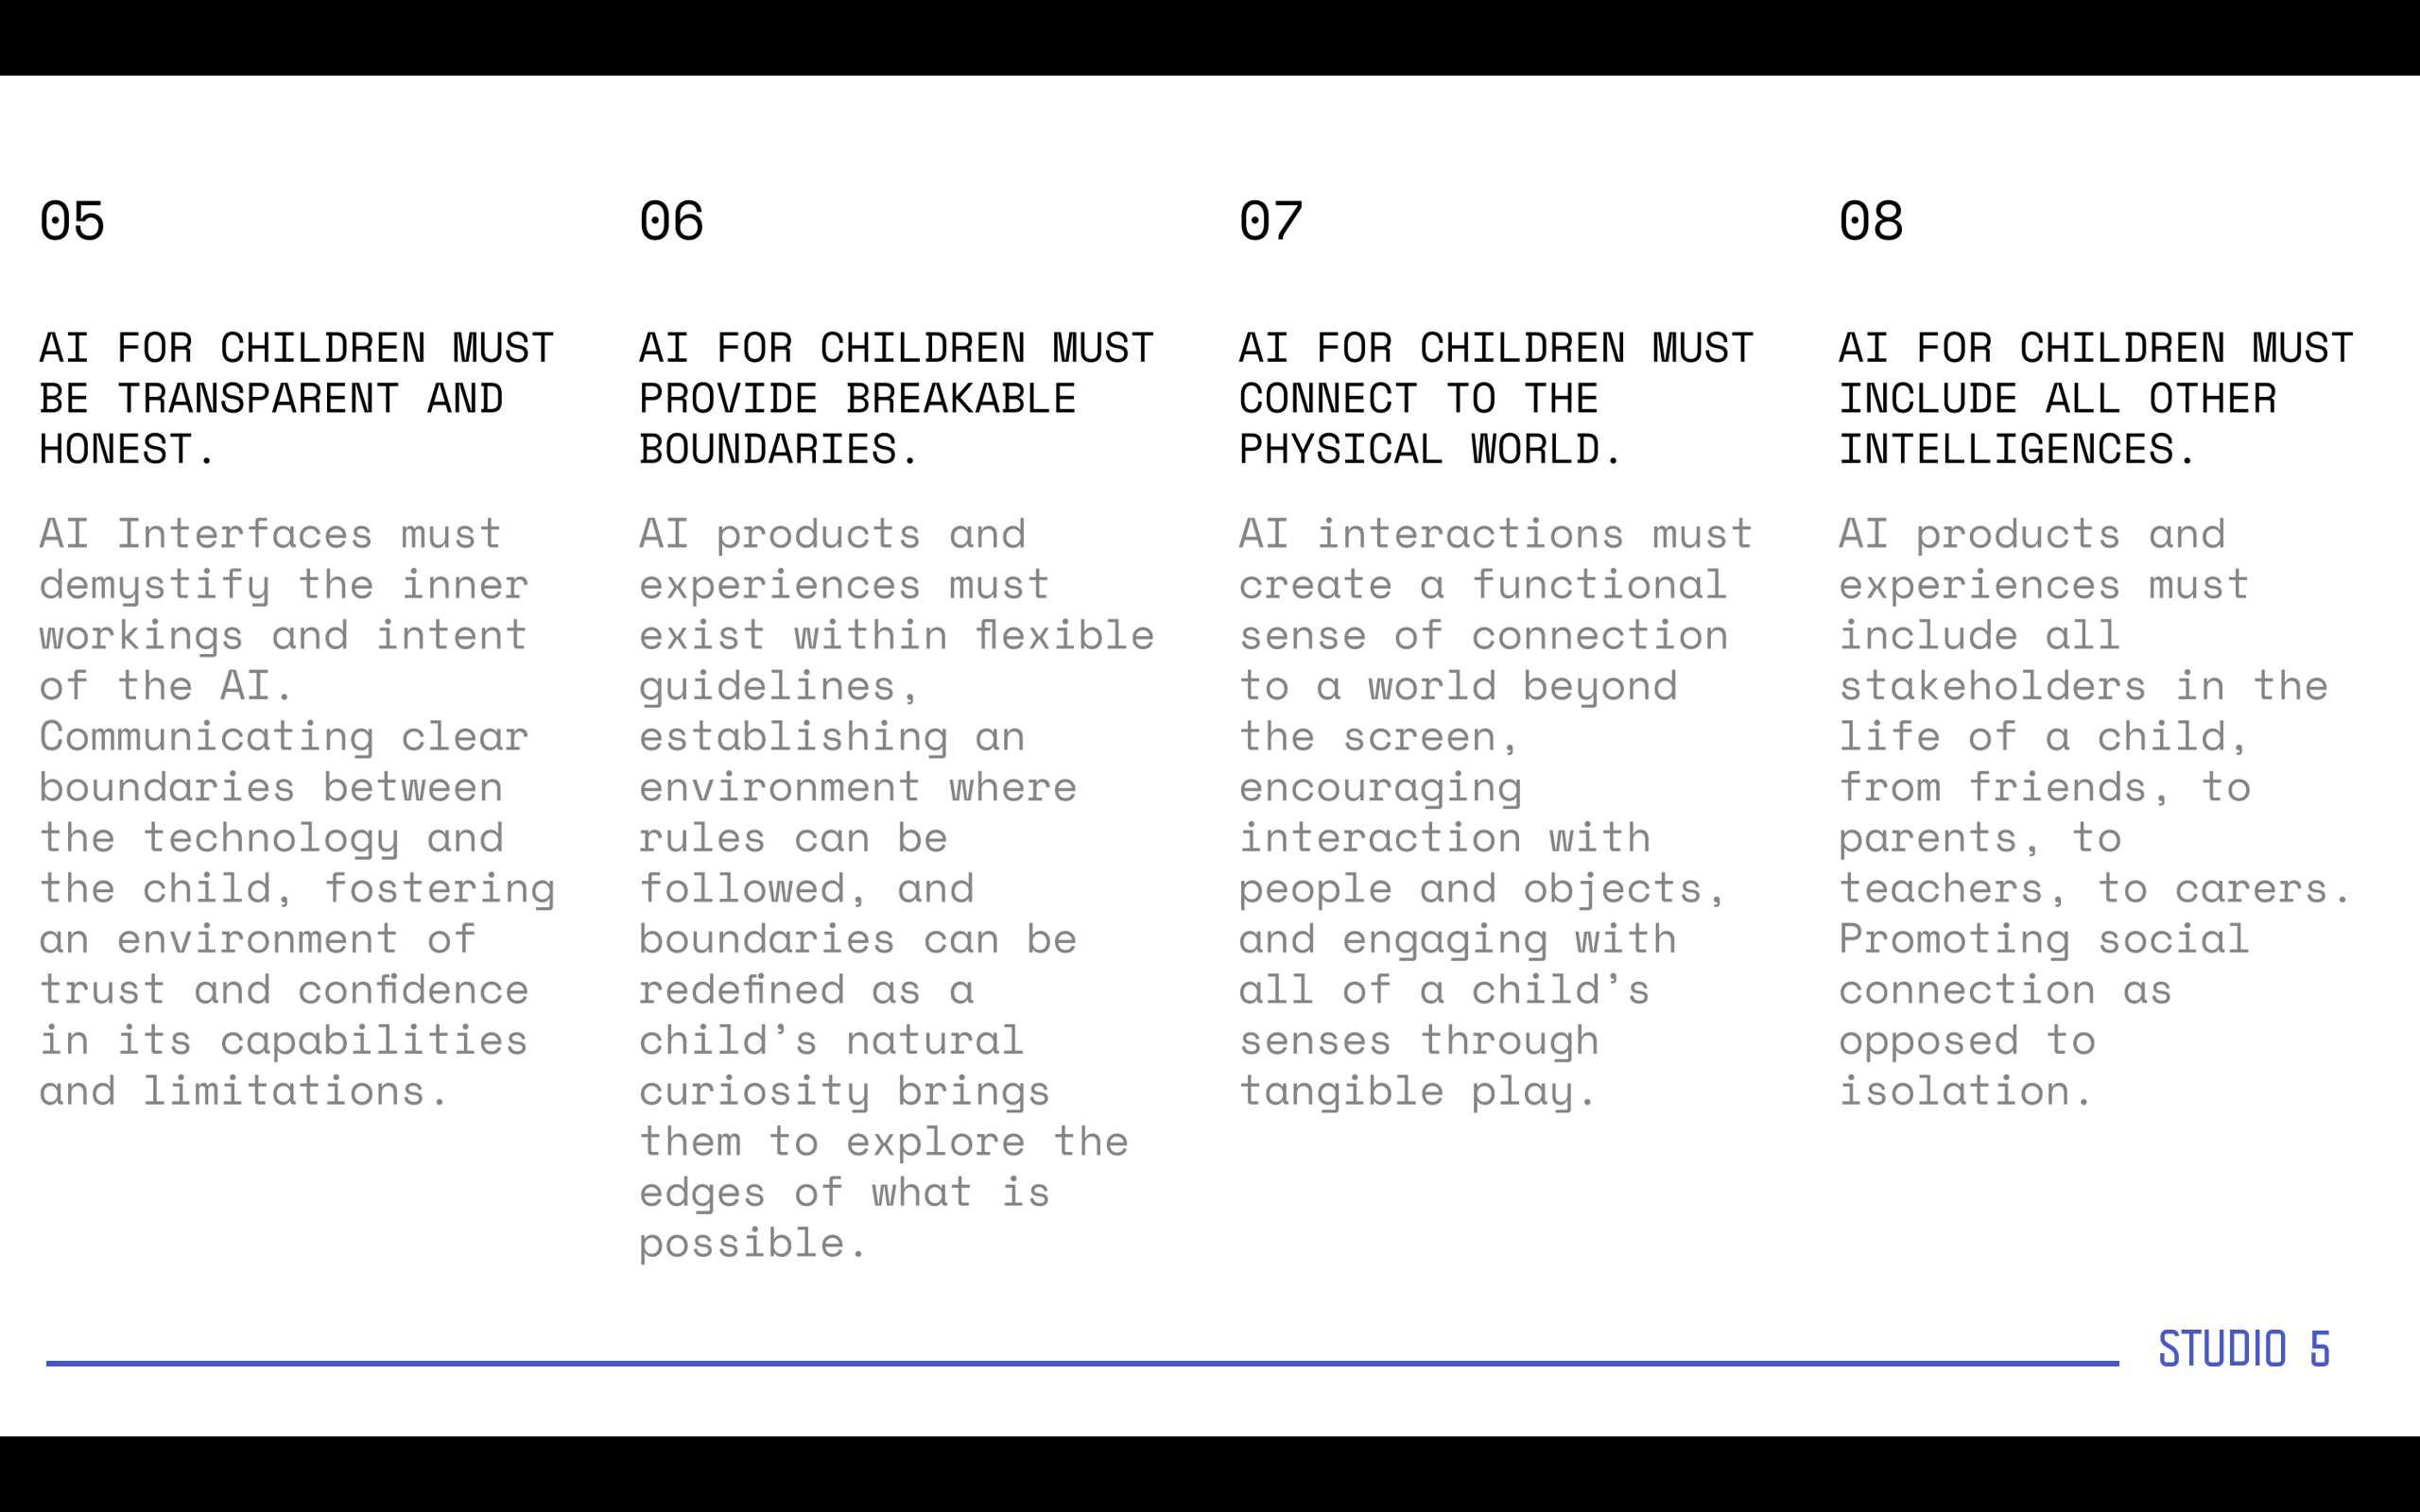
Then I will list some rules to be followed by AI when being trained.
Then I will show a video talks about the machine learning time line and how its being used since then.
Now I will show what we are gonna be doing today.
I will discuss with the participant what is coding.
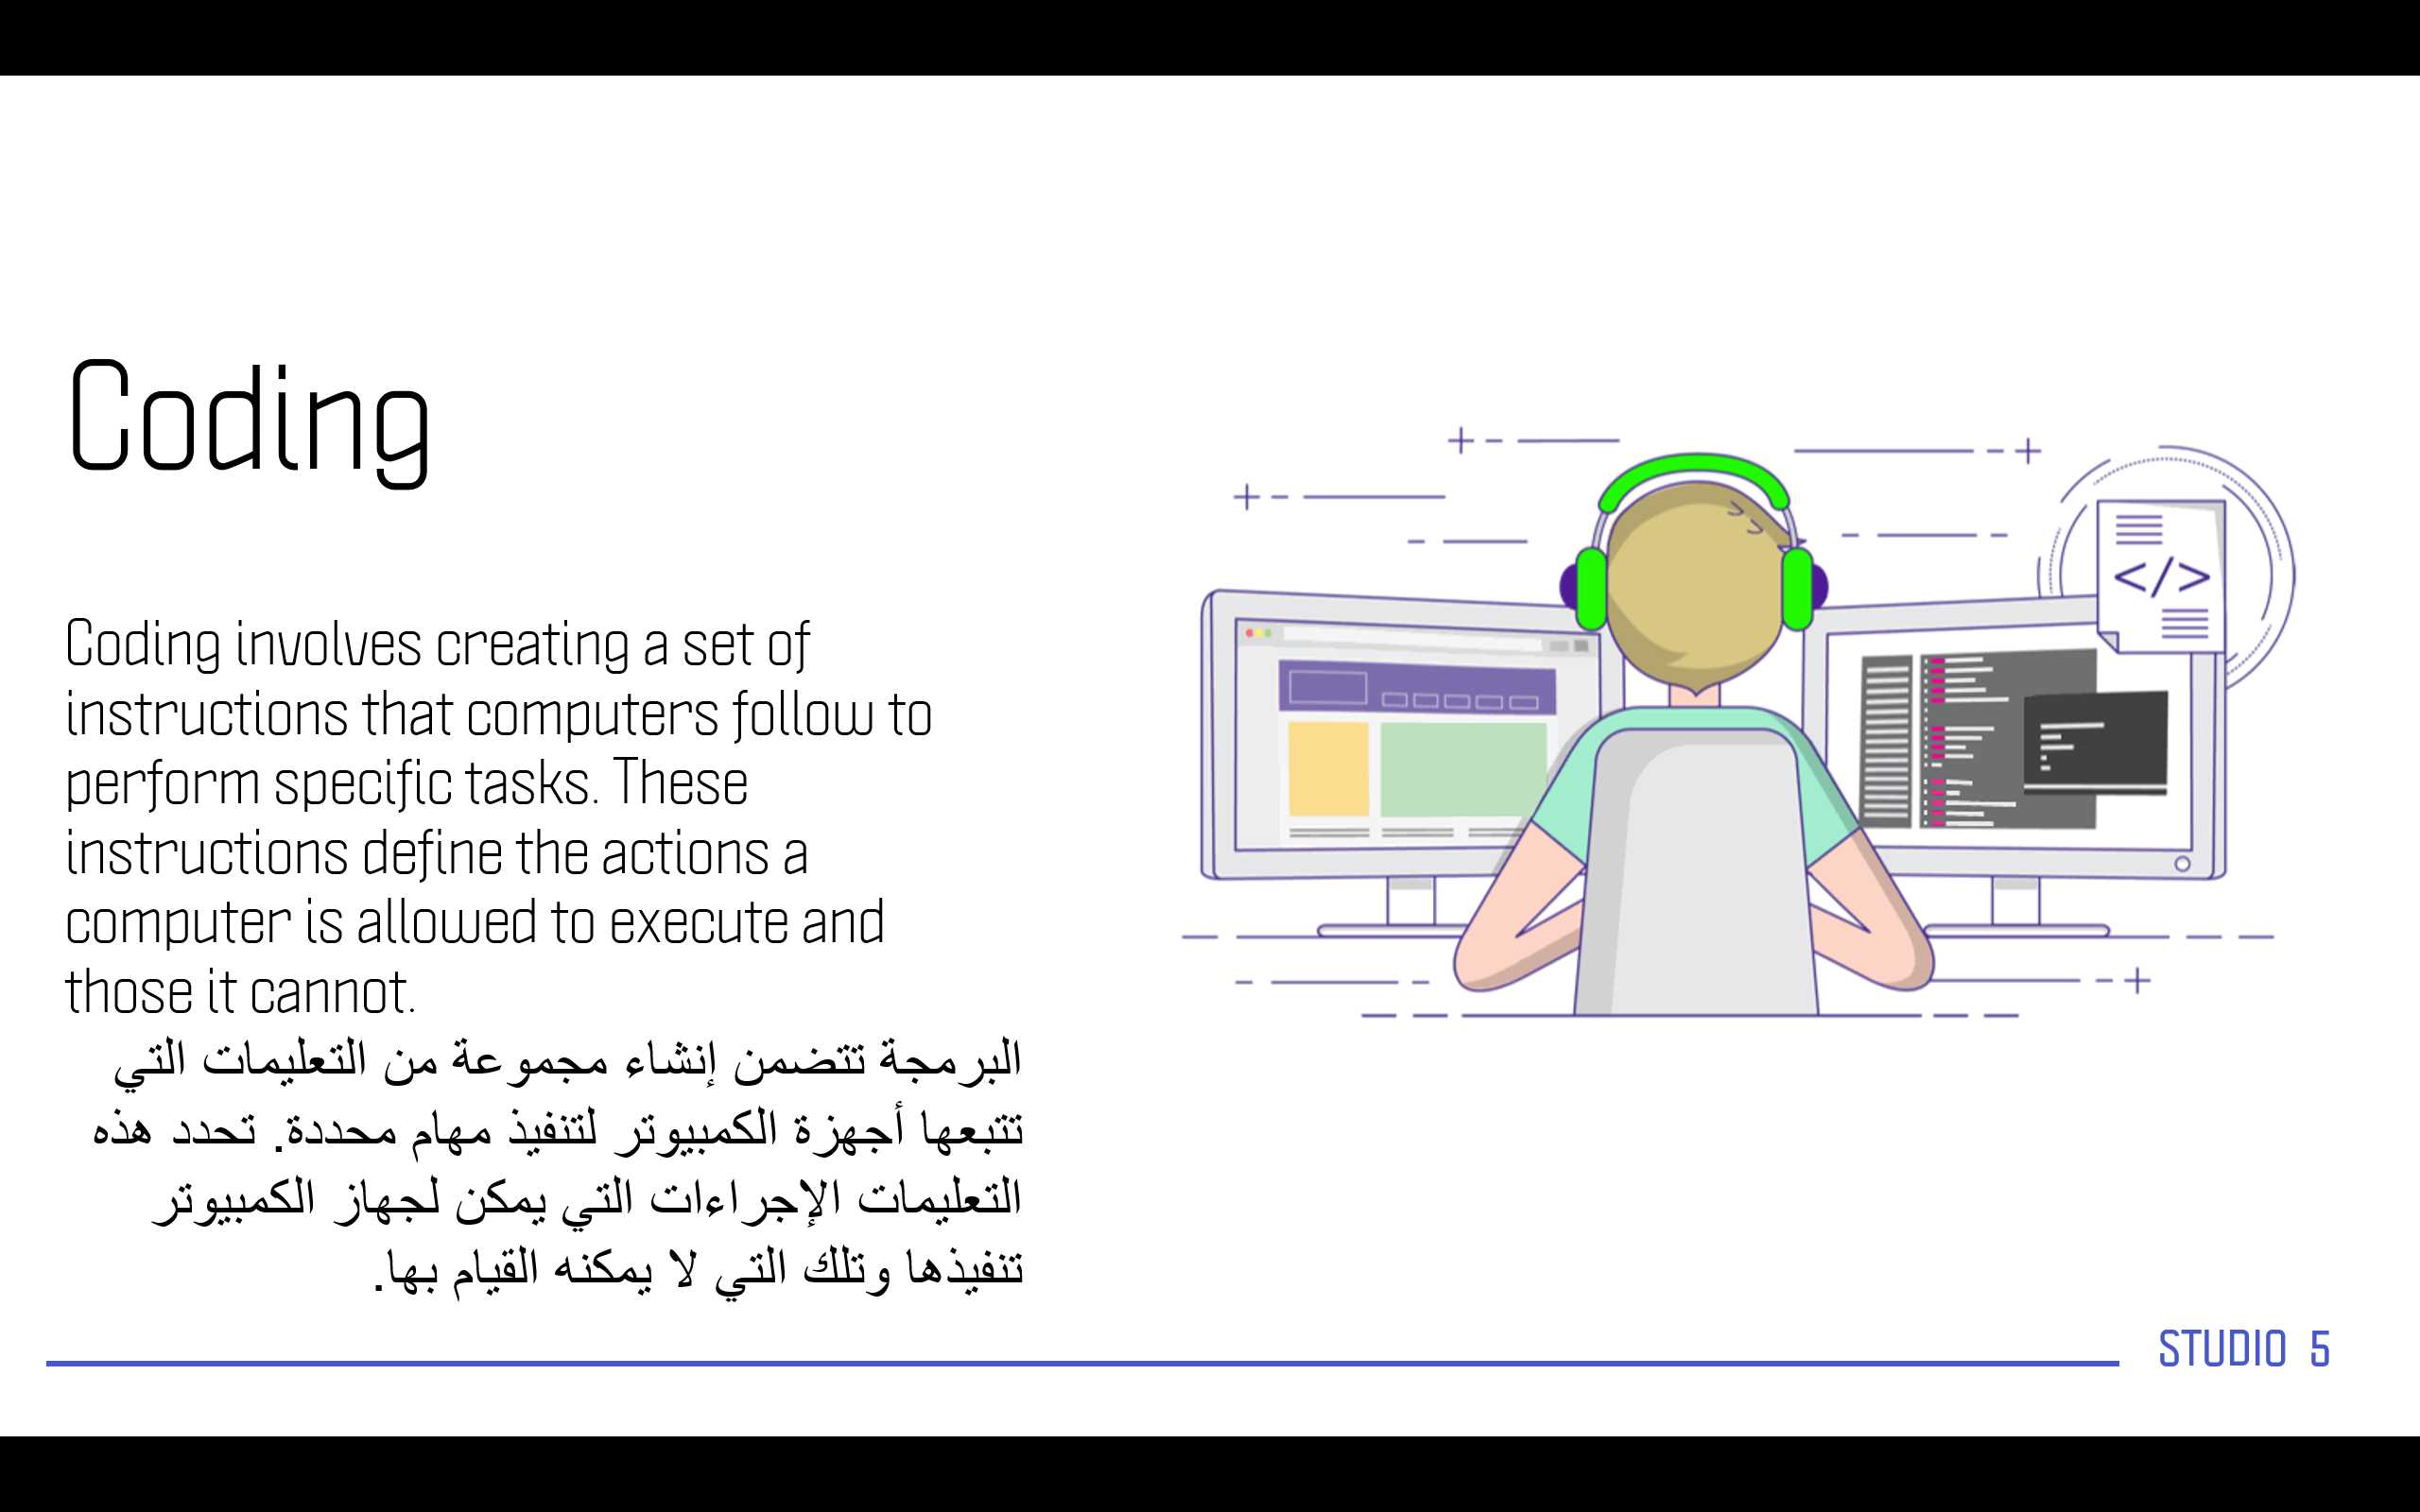
Then I will show a video about coding and how it shapes the AI.
Now we are ready to go step by step to build this day application.
I will explain the basics in order to create the prototype from adding the library and dealing with it but for the way of training please find the following link that shows how to create custom model using Pictoblox. [LINK]
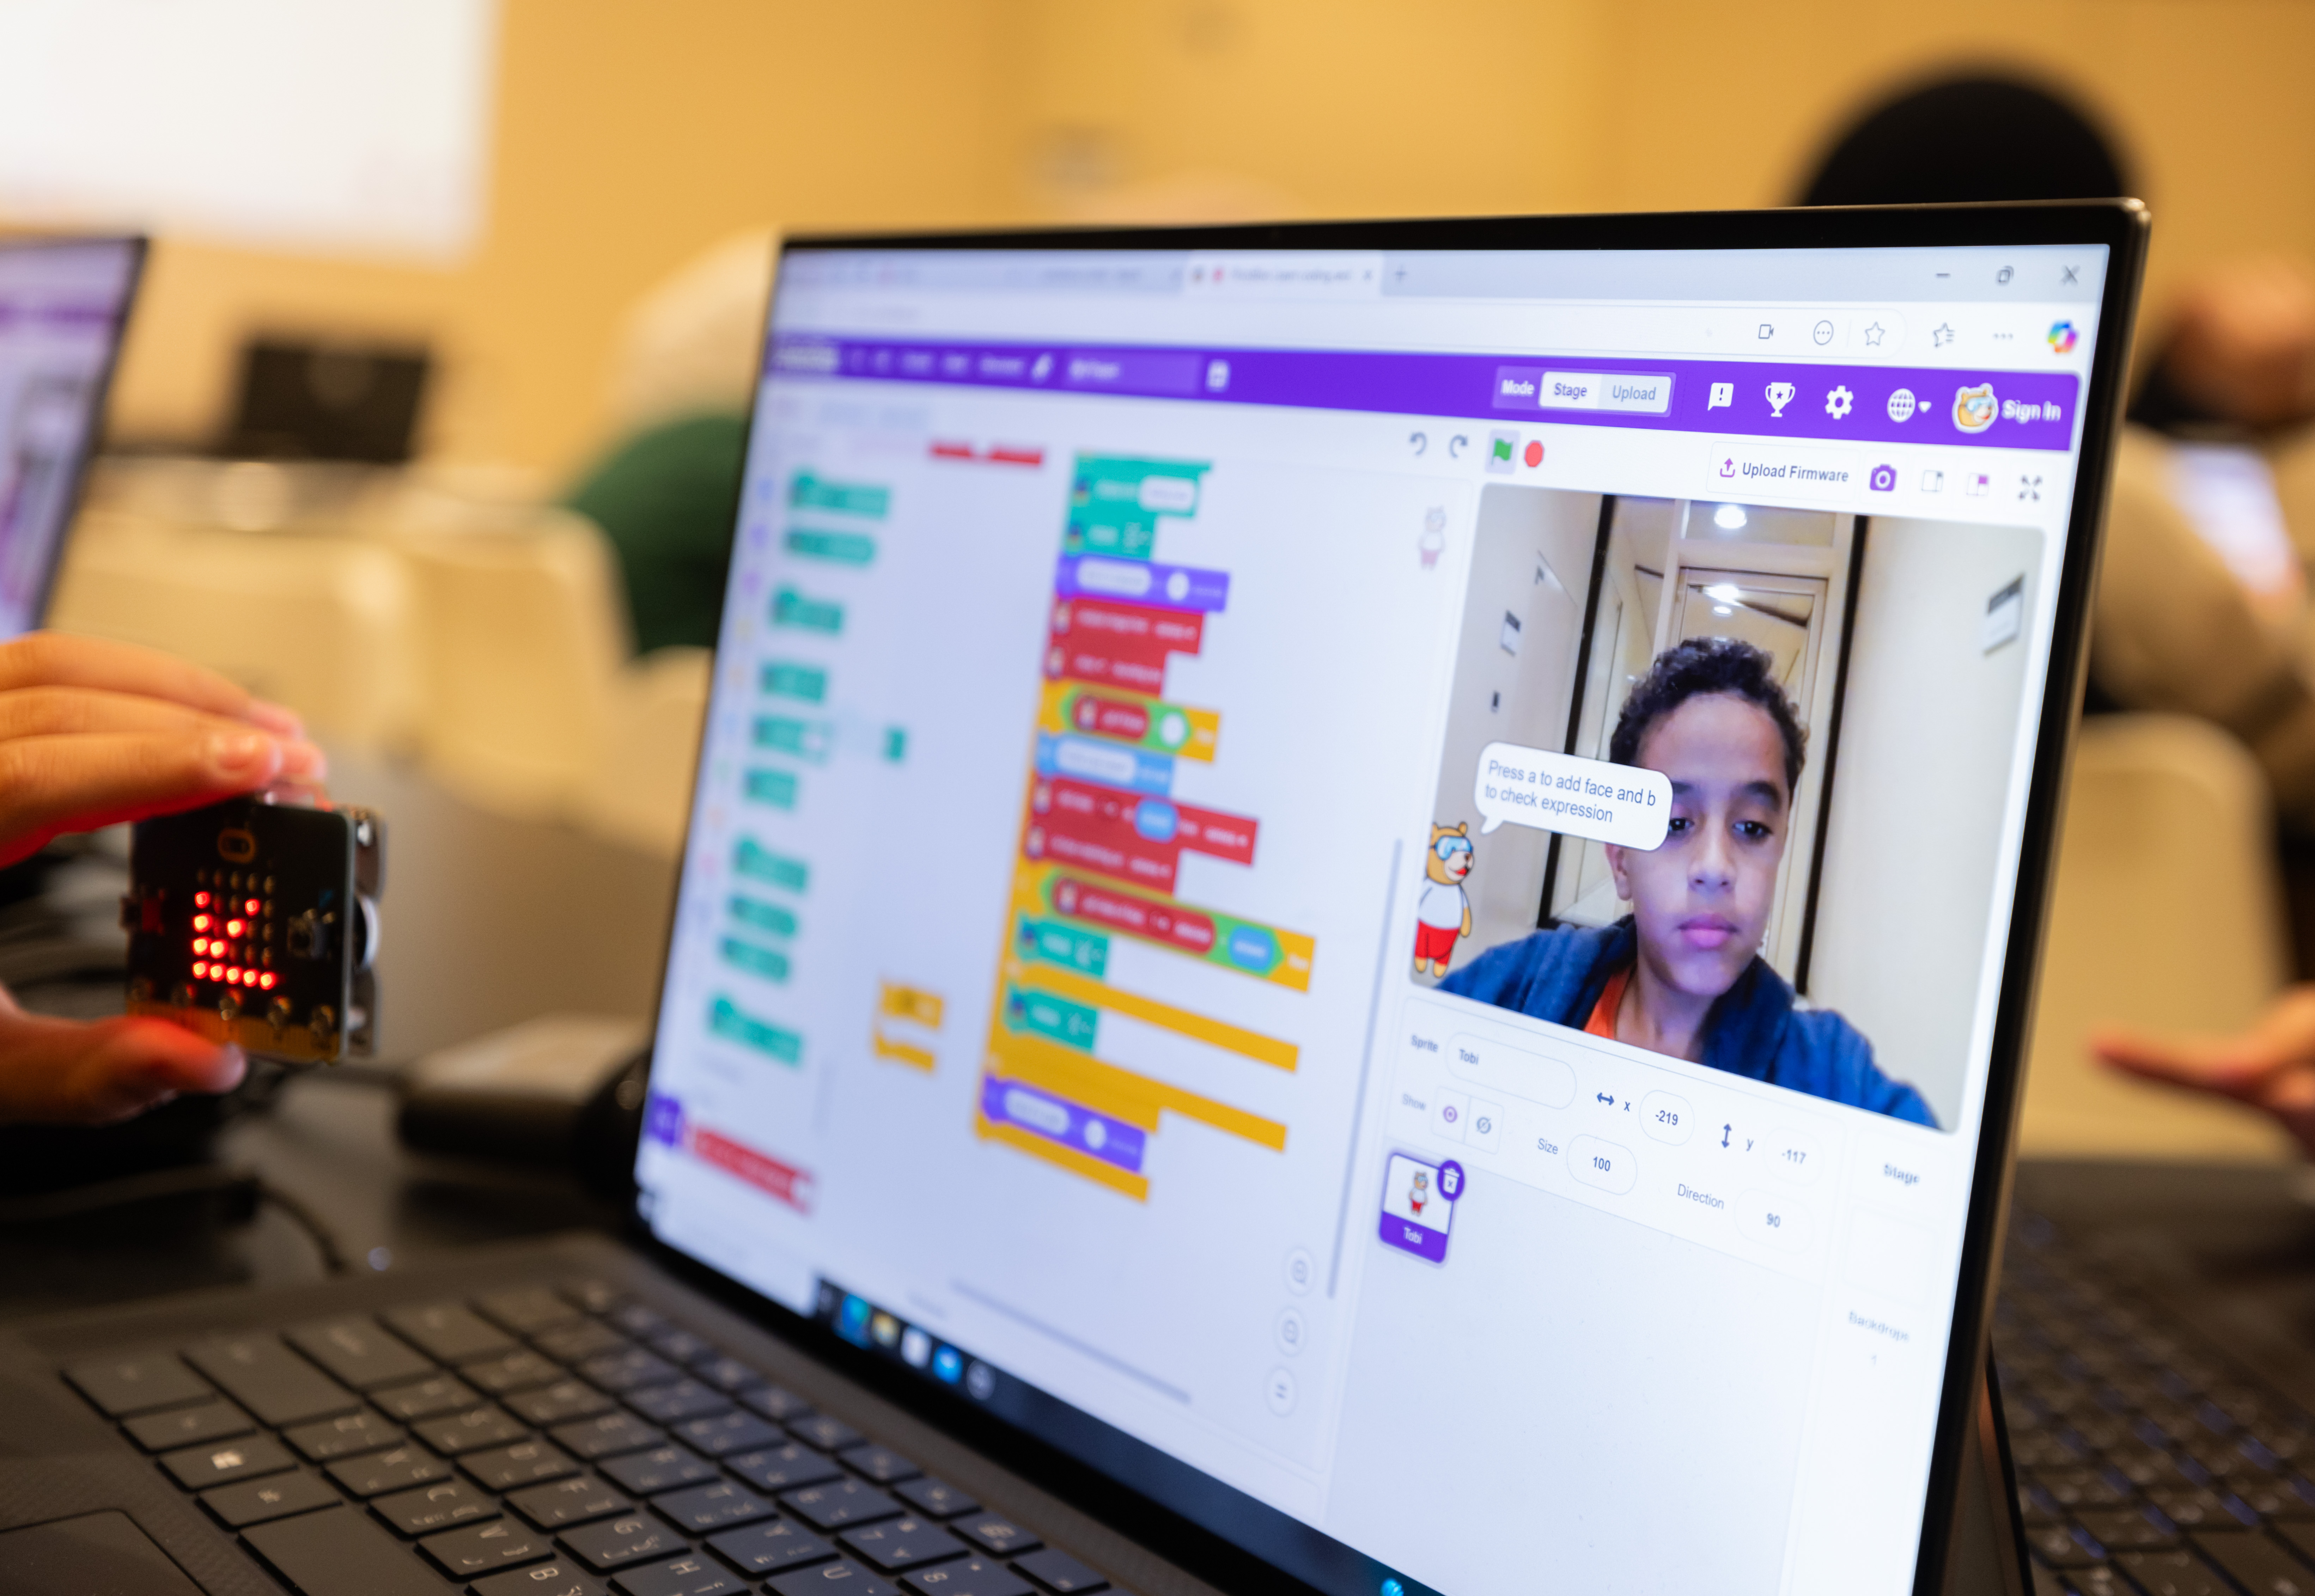
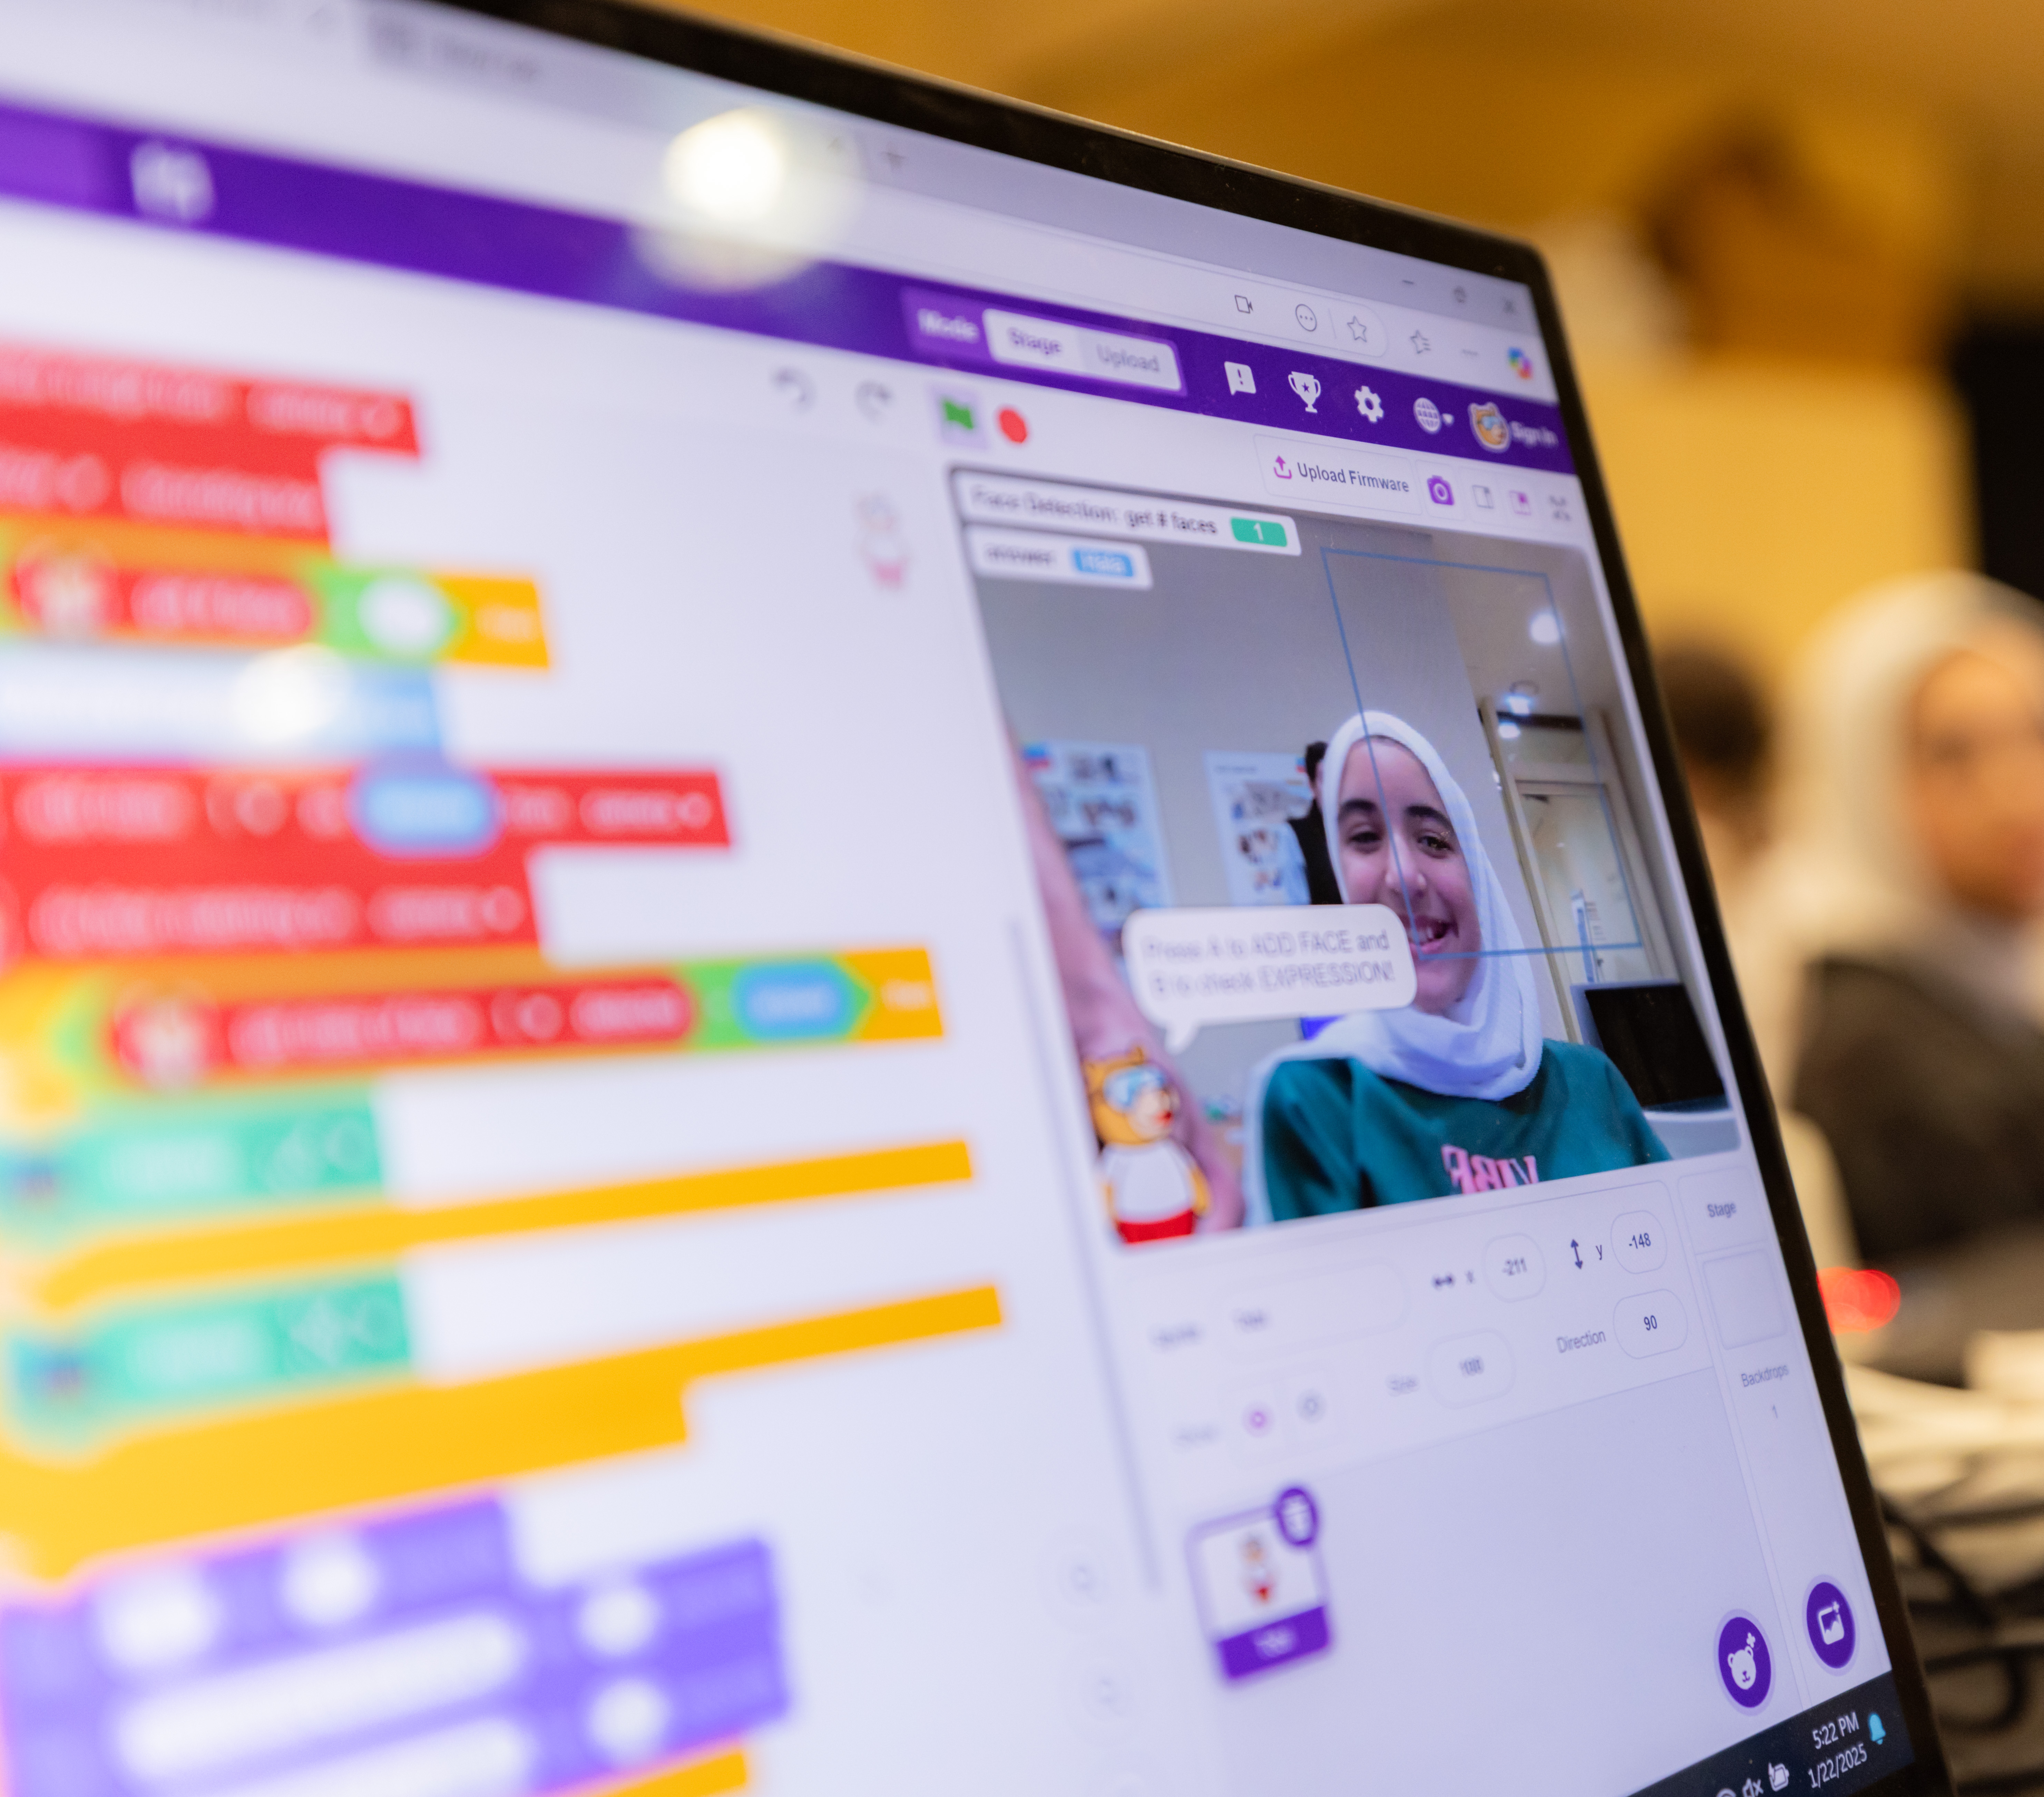
The First step is to add the Face detection library.
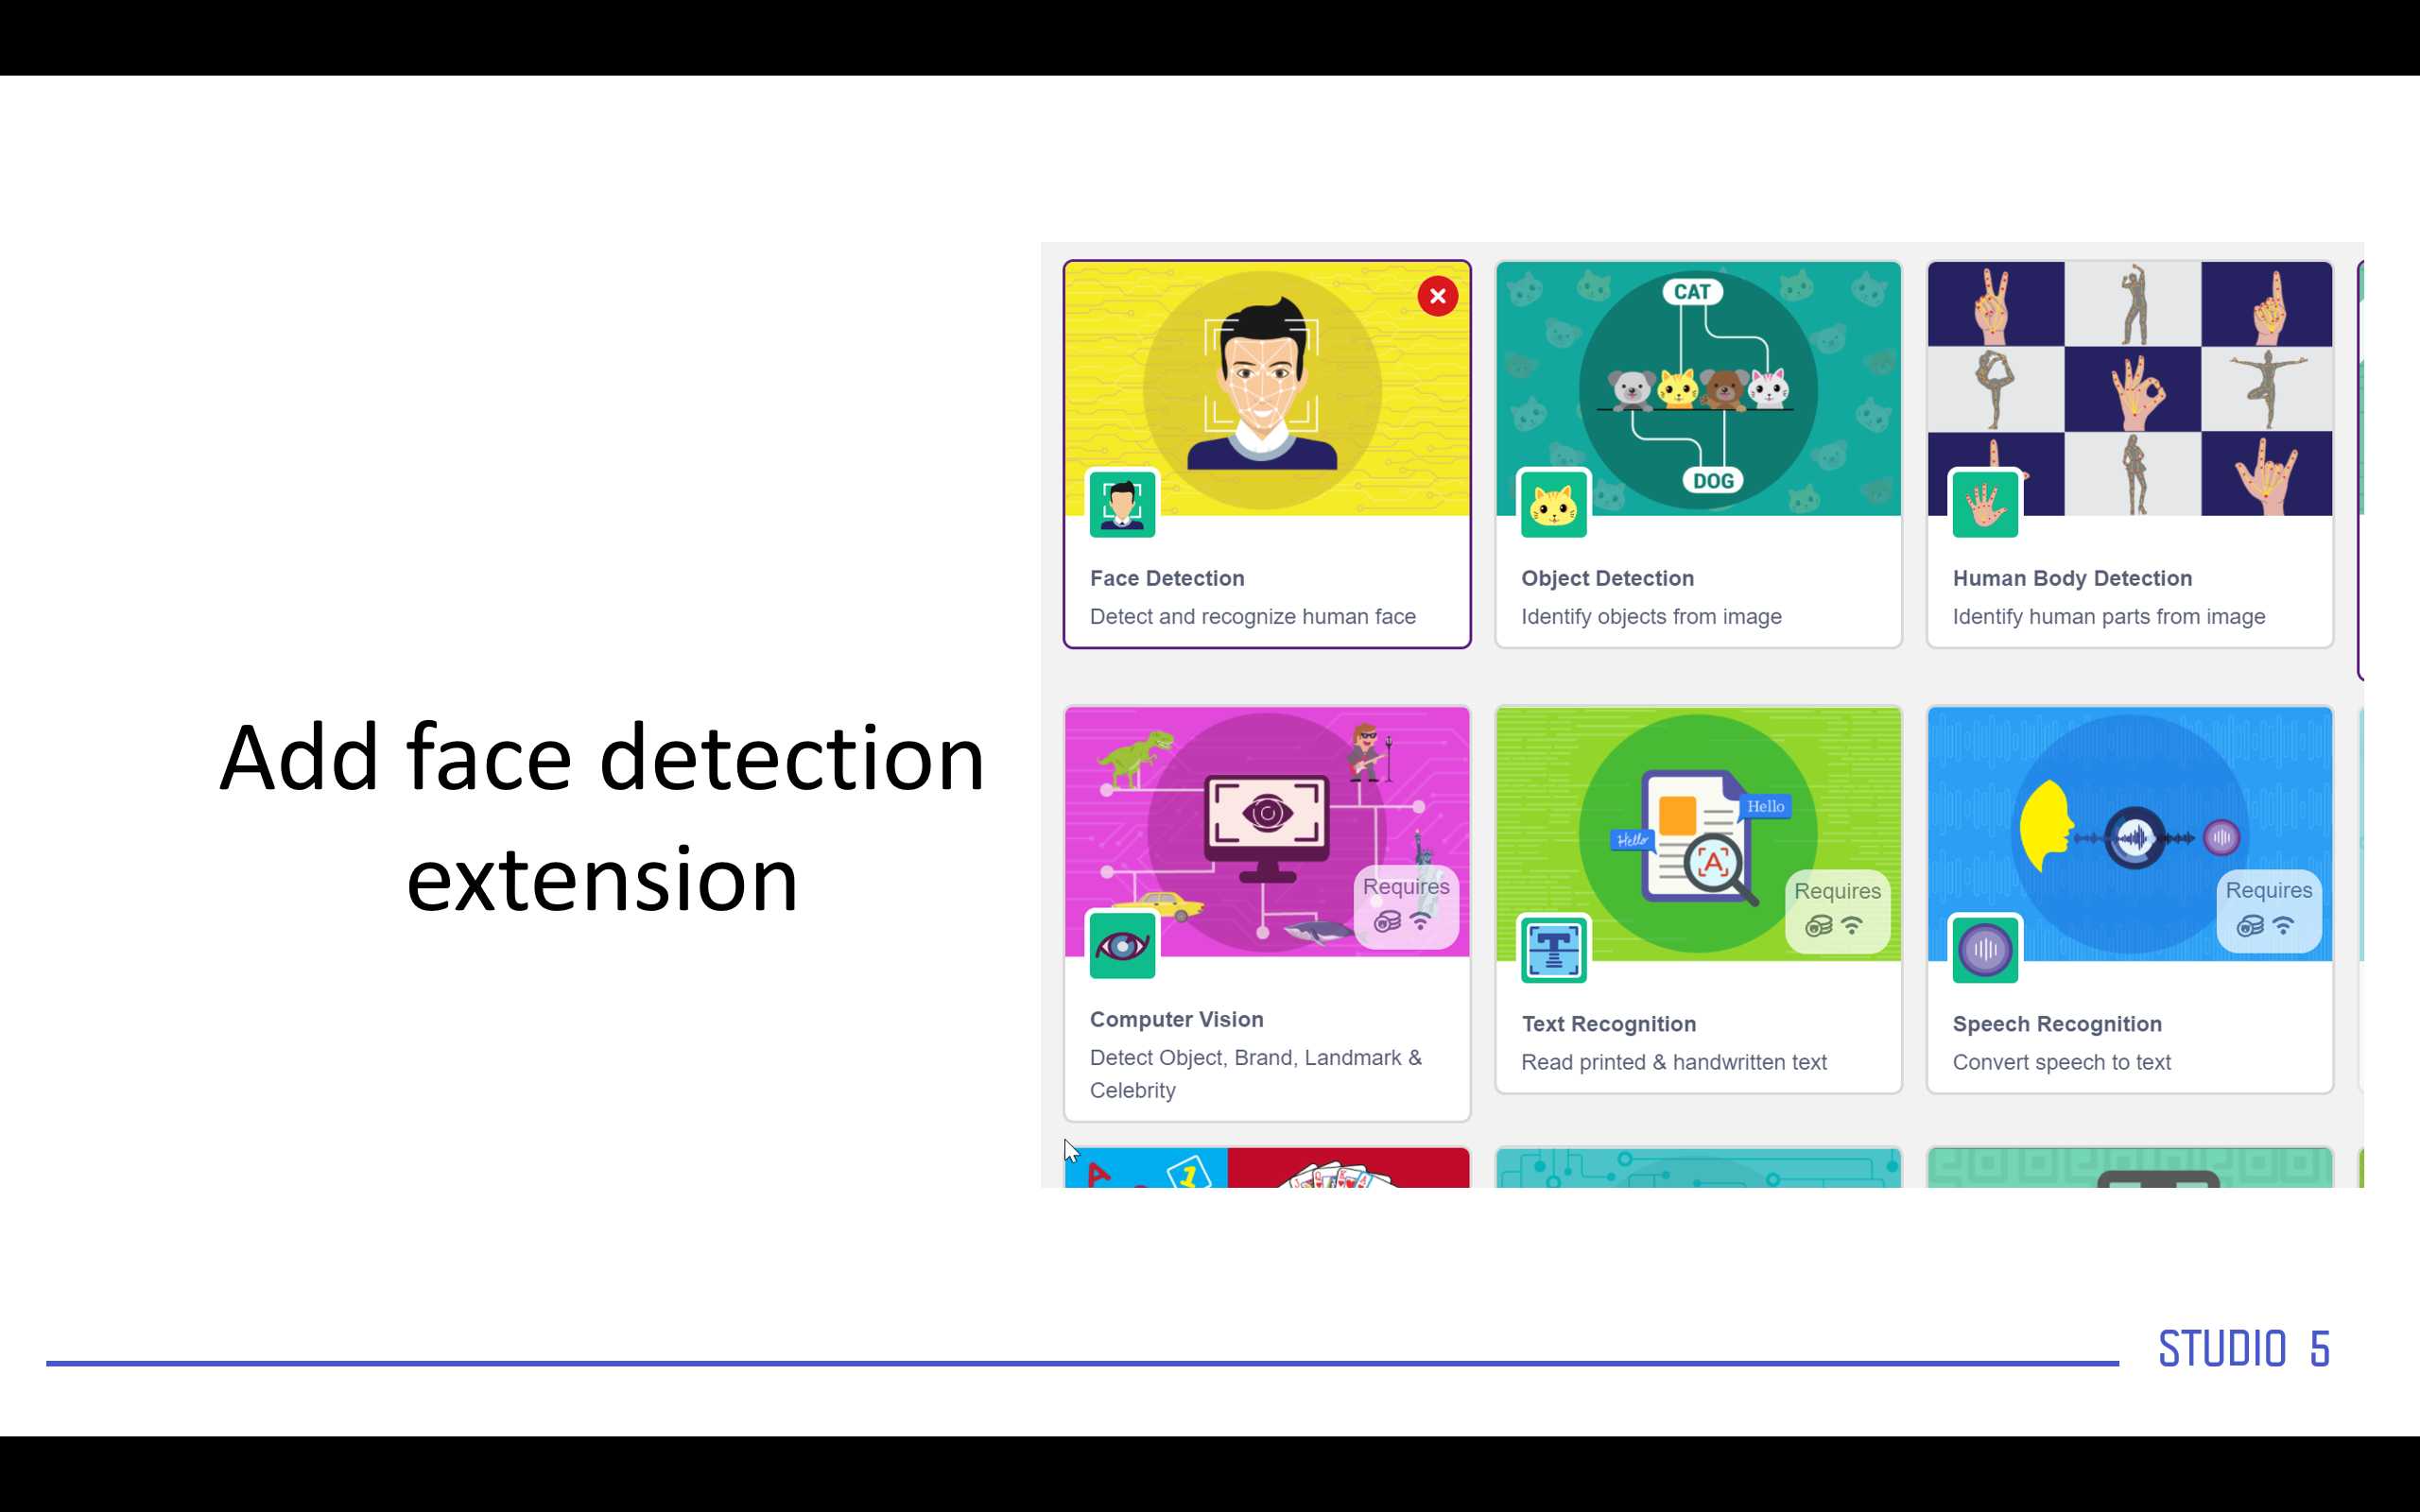
Library documentation : [LINK]
Then We need to add the Machine learning library
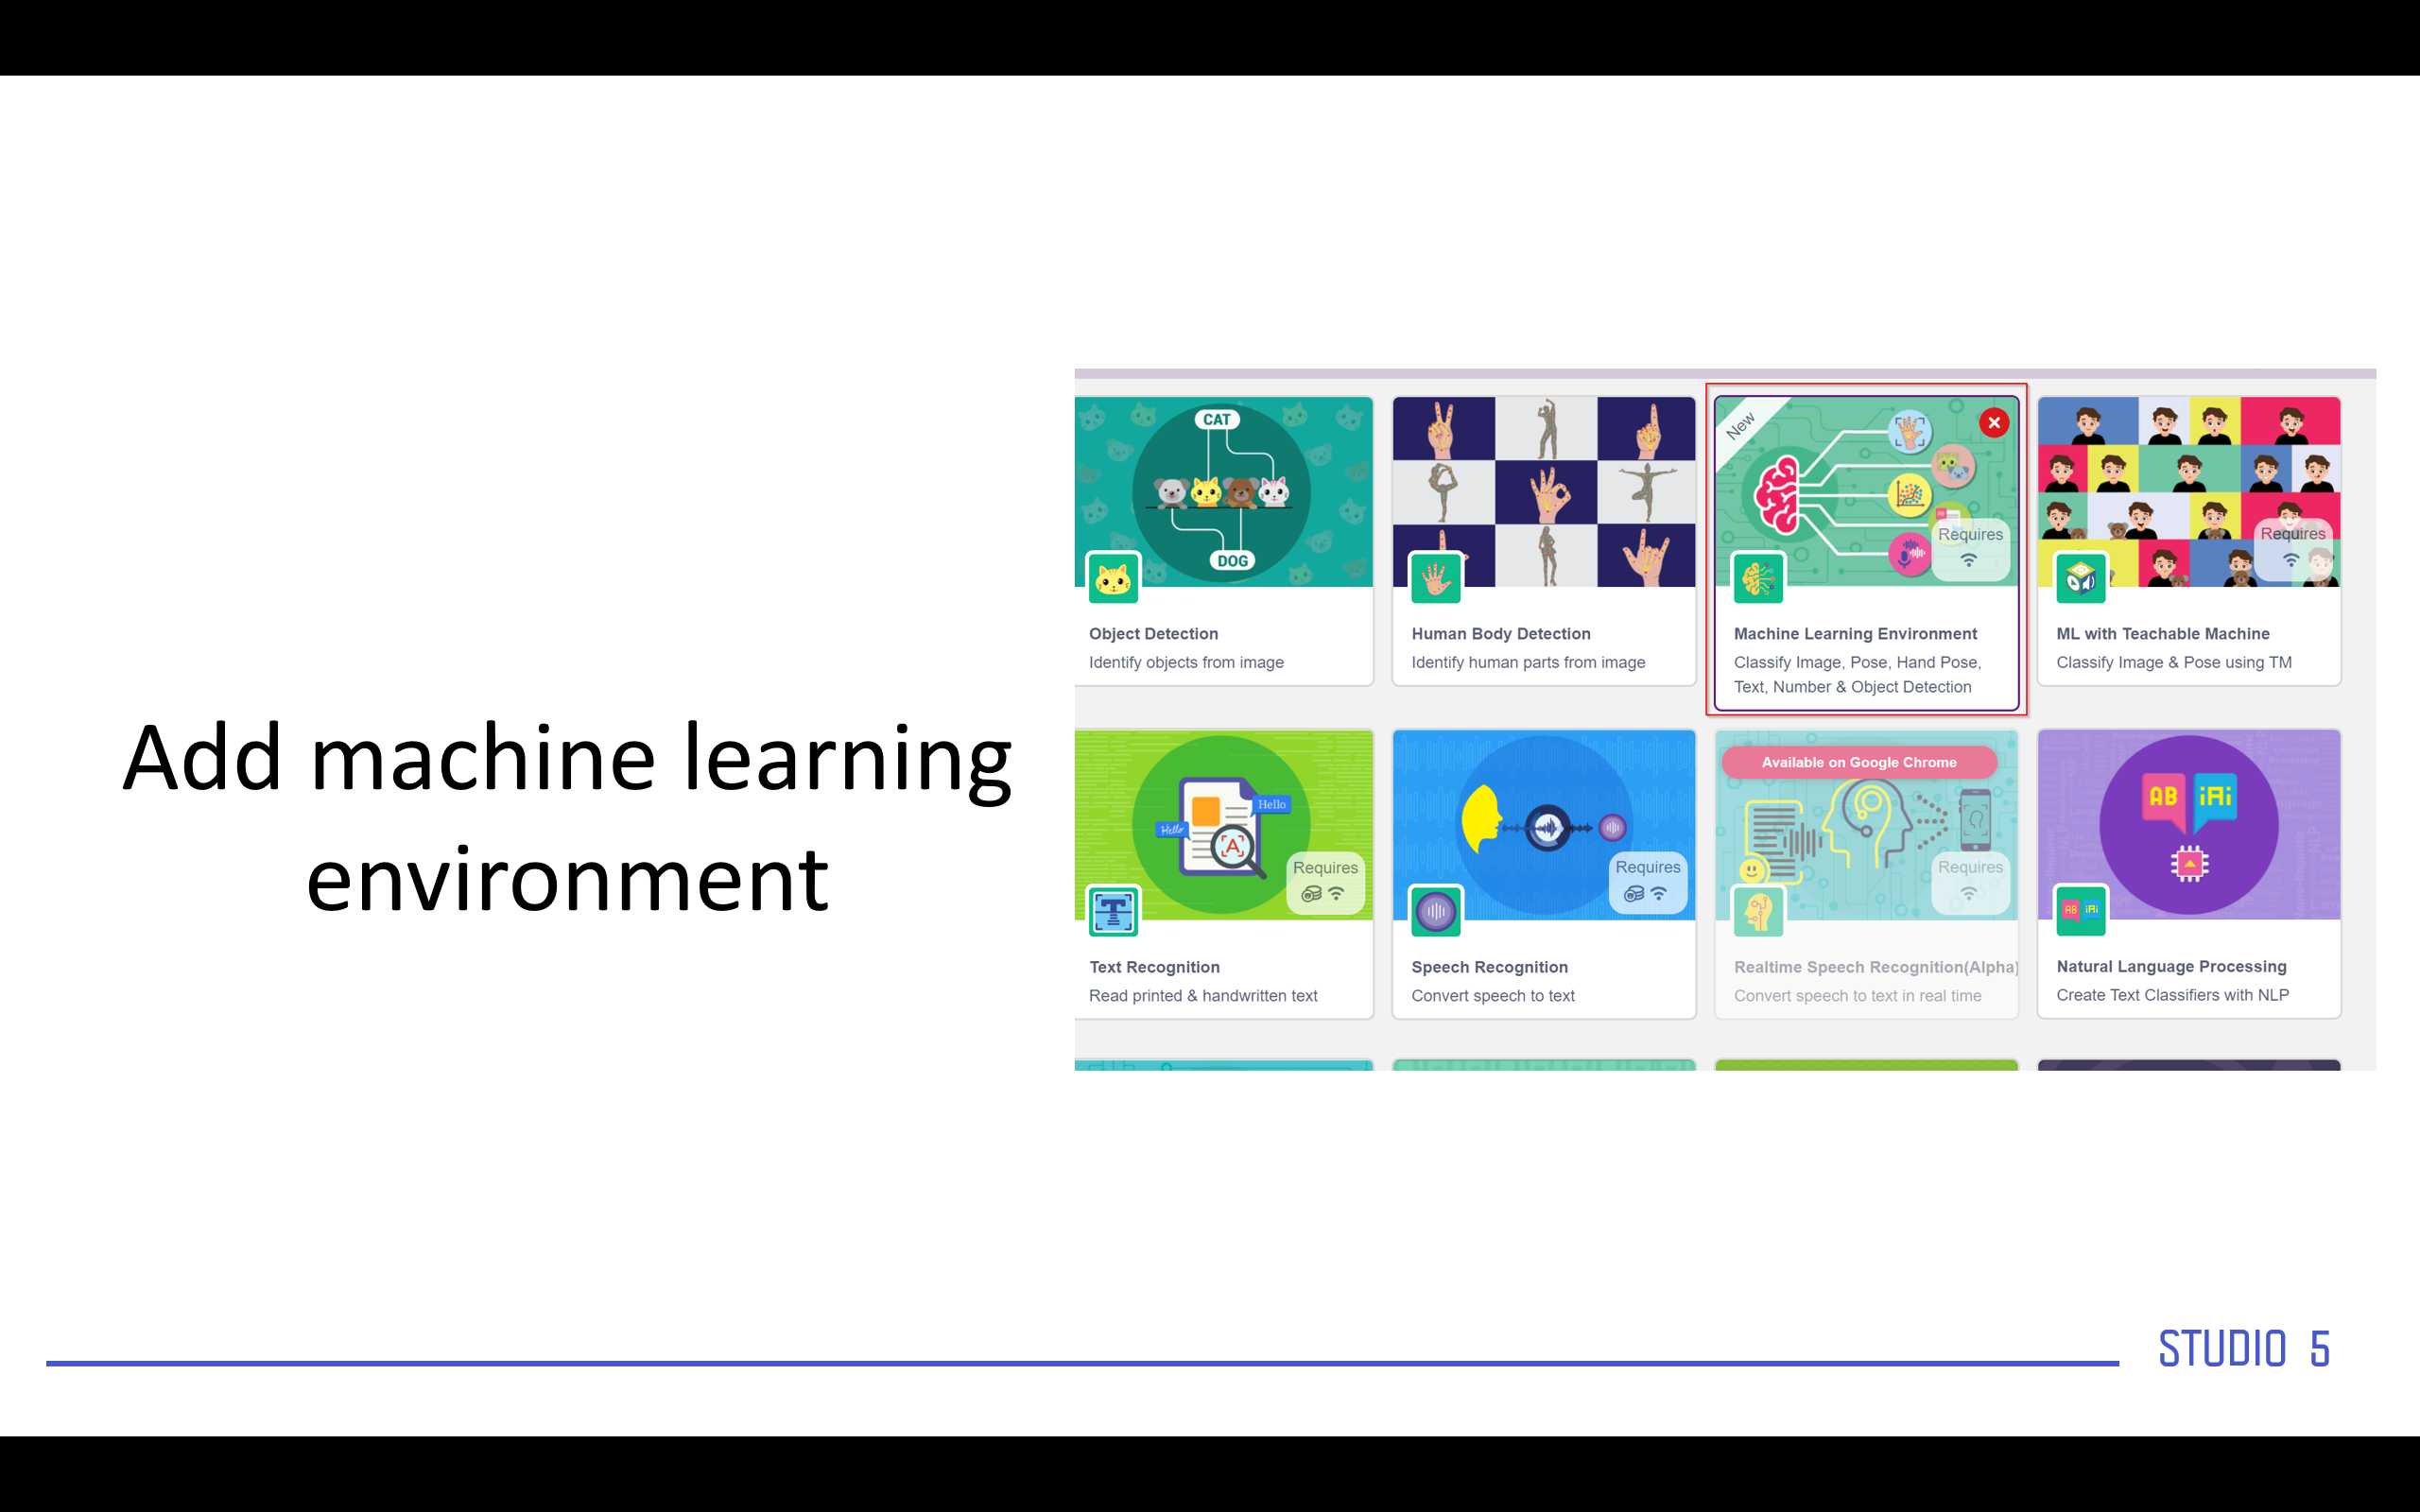
Library documentation [LINK]
Then follow the steps in the video to how to use the object detection. Adding the objects, labeling the object, then training the object, and finally testing the model.
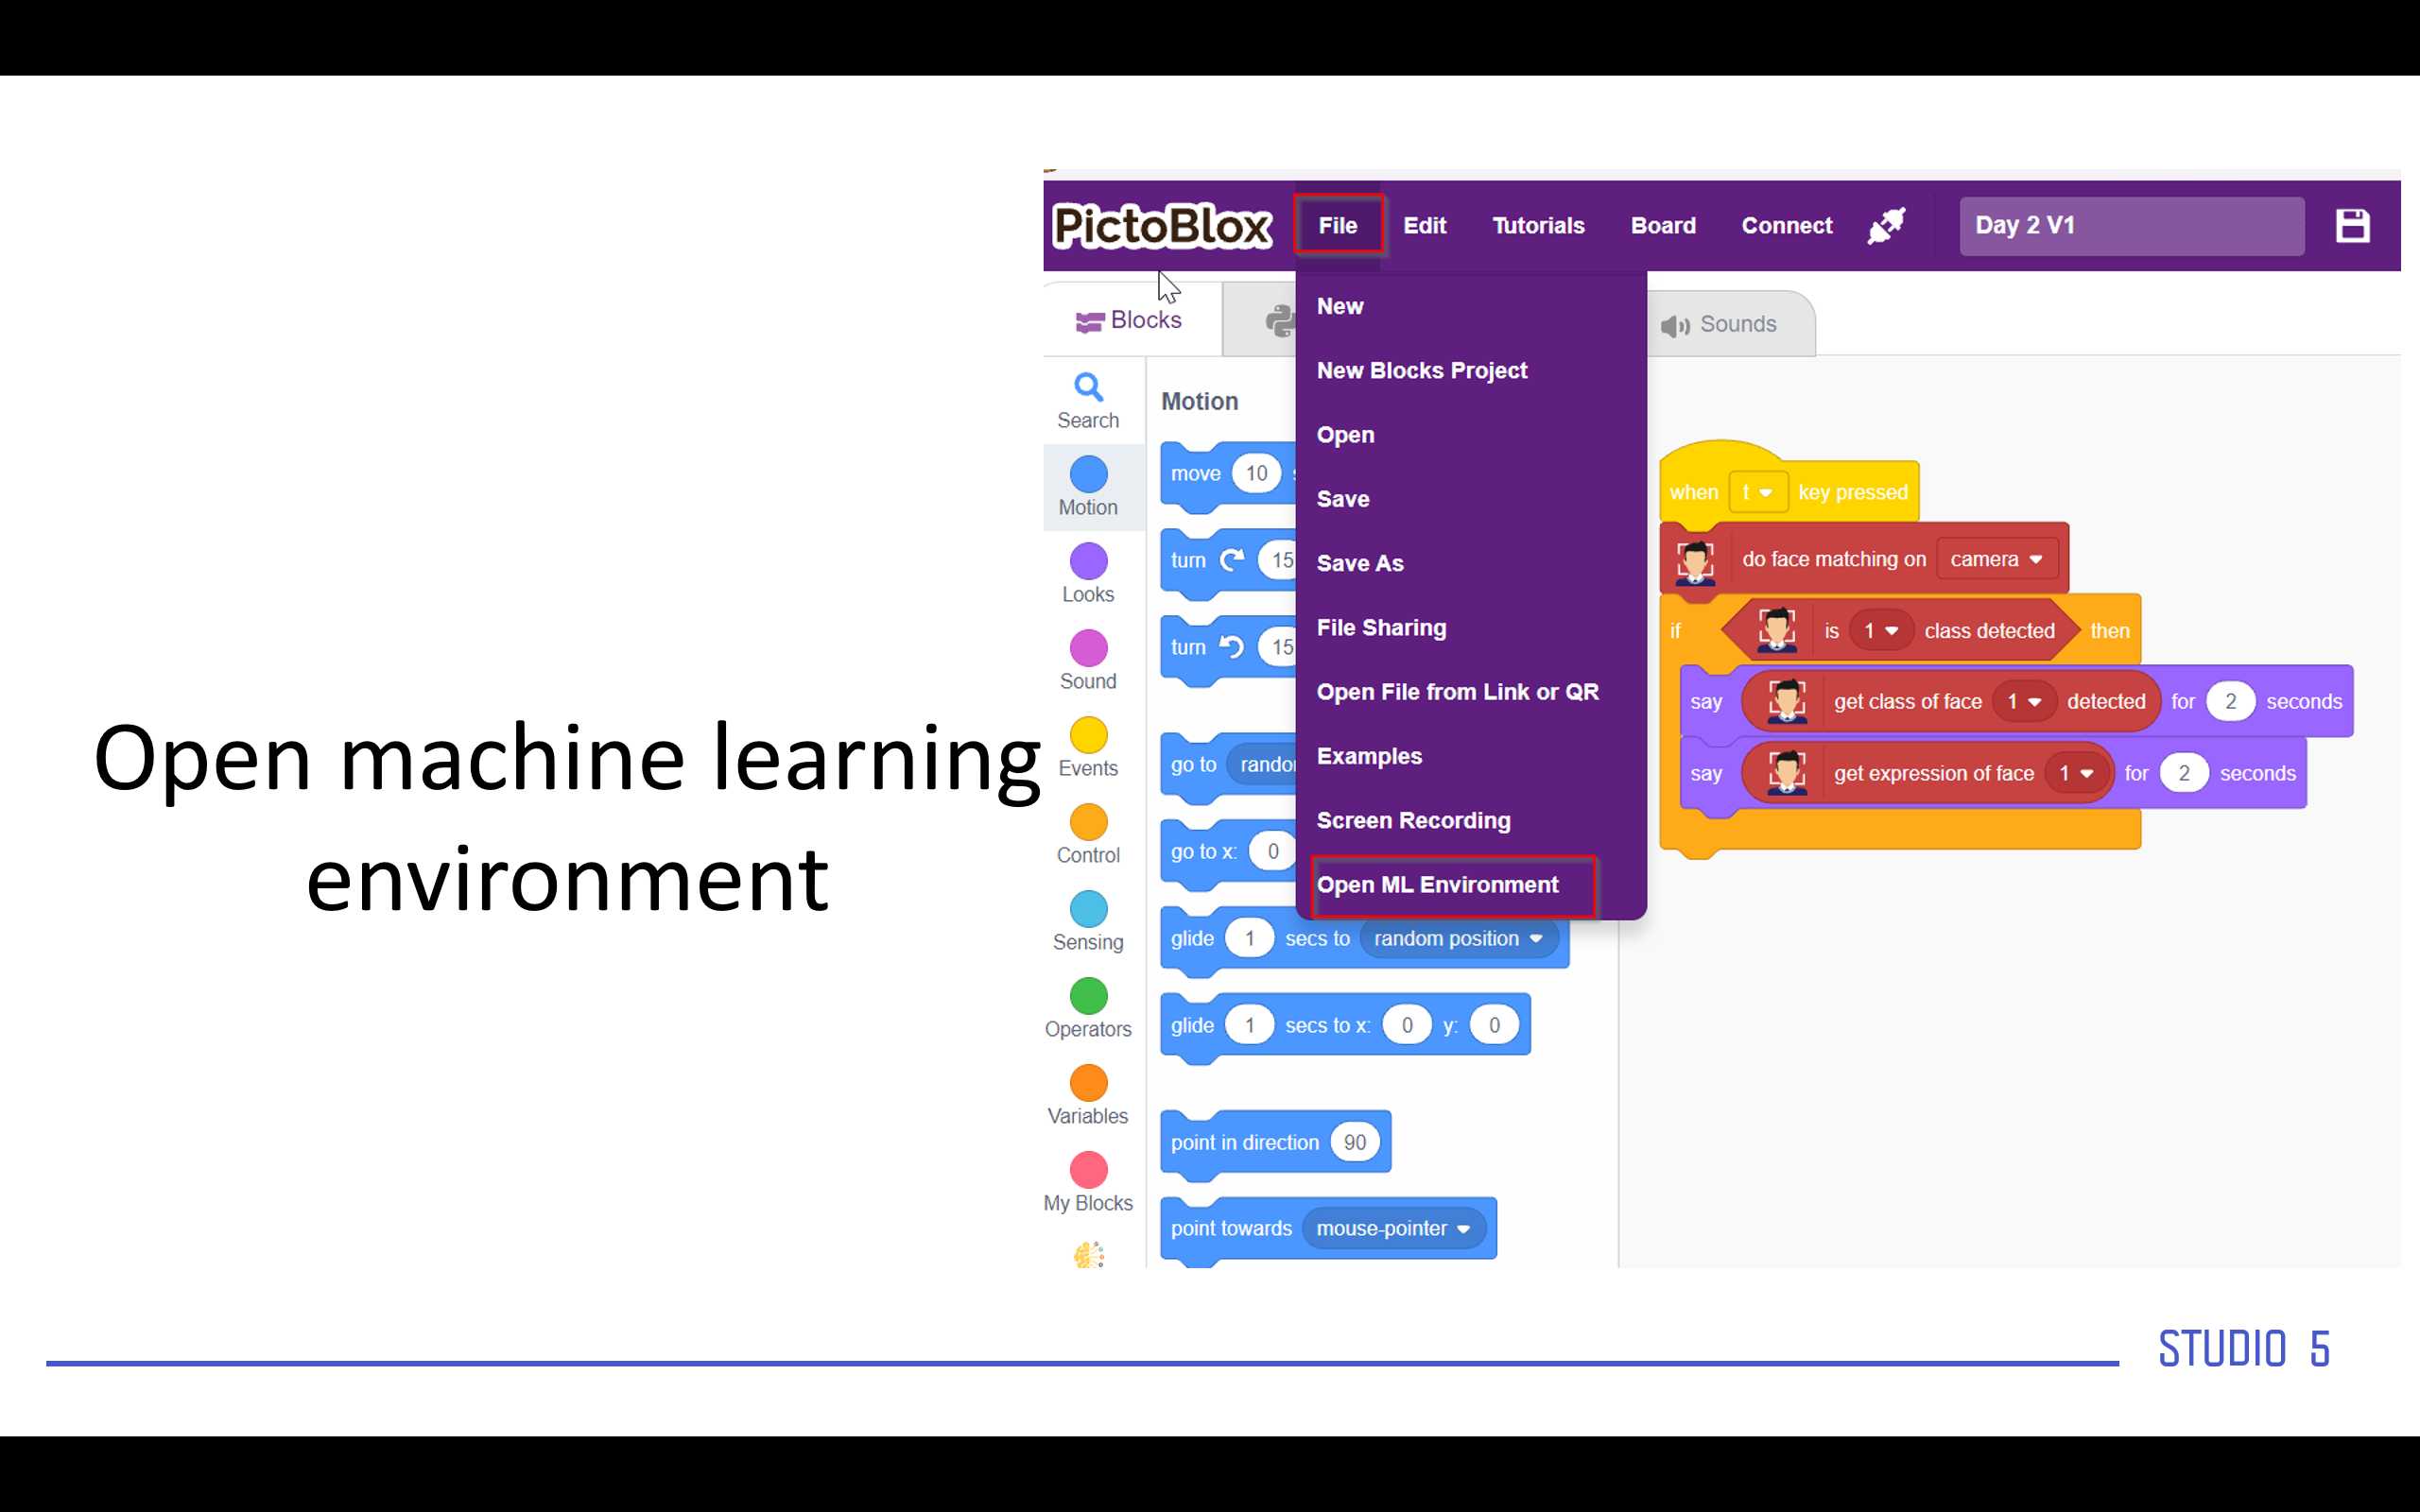
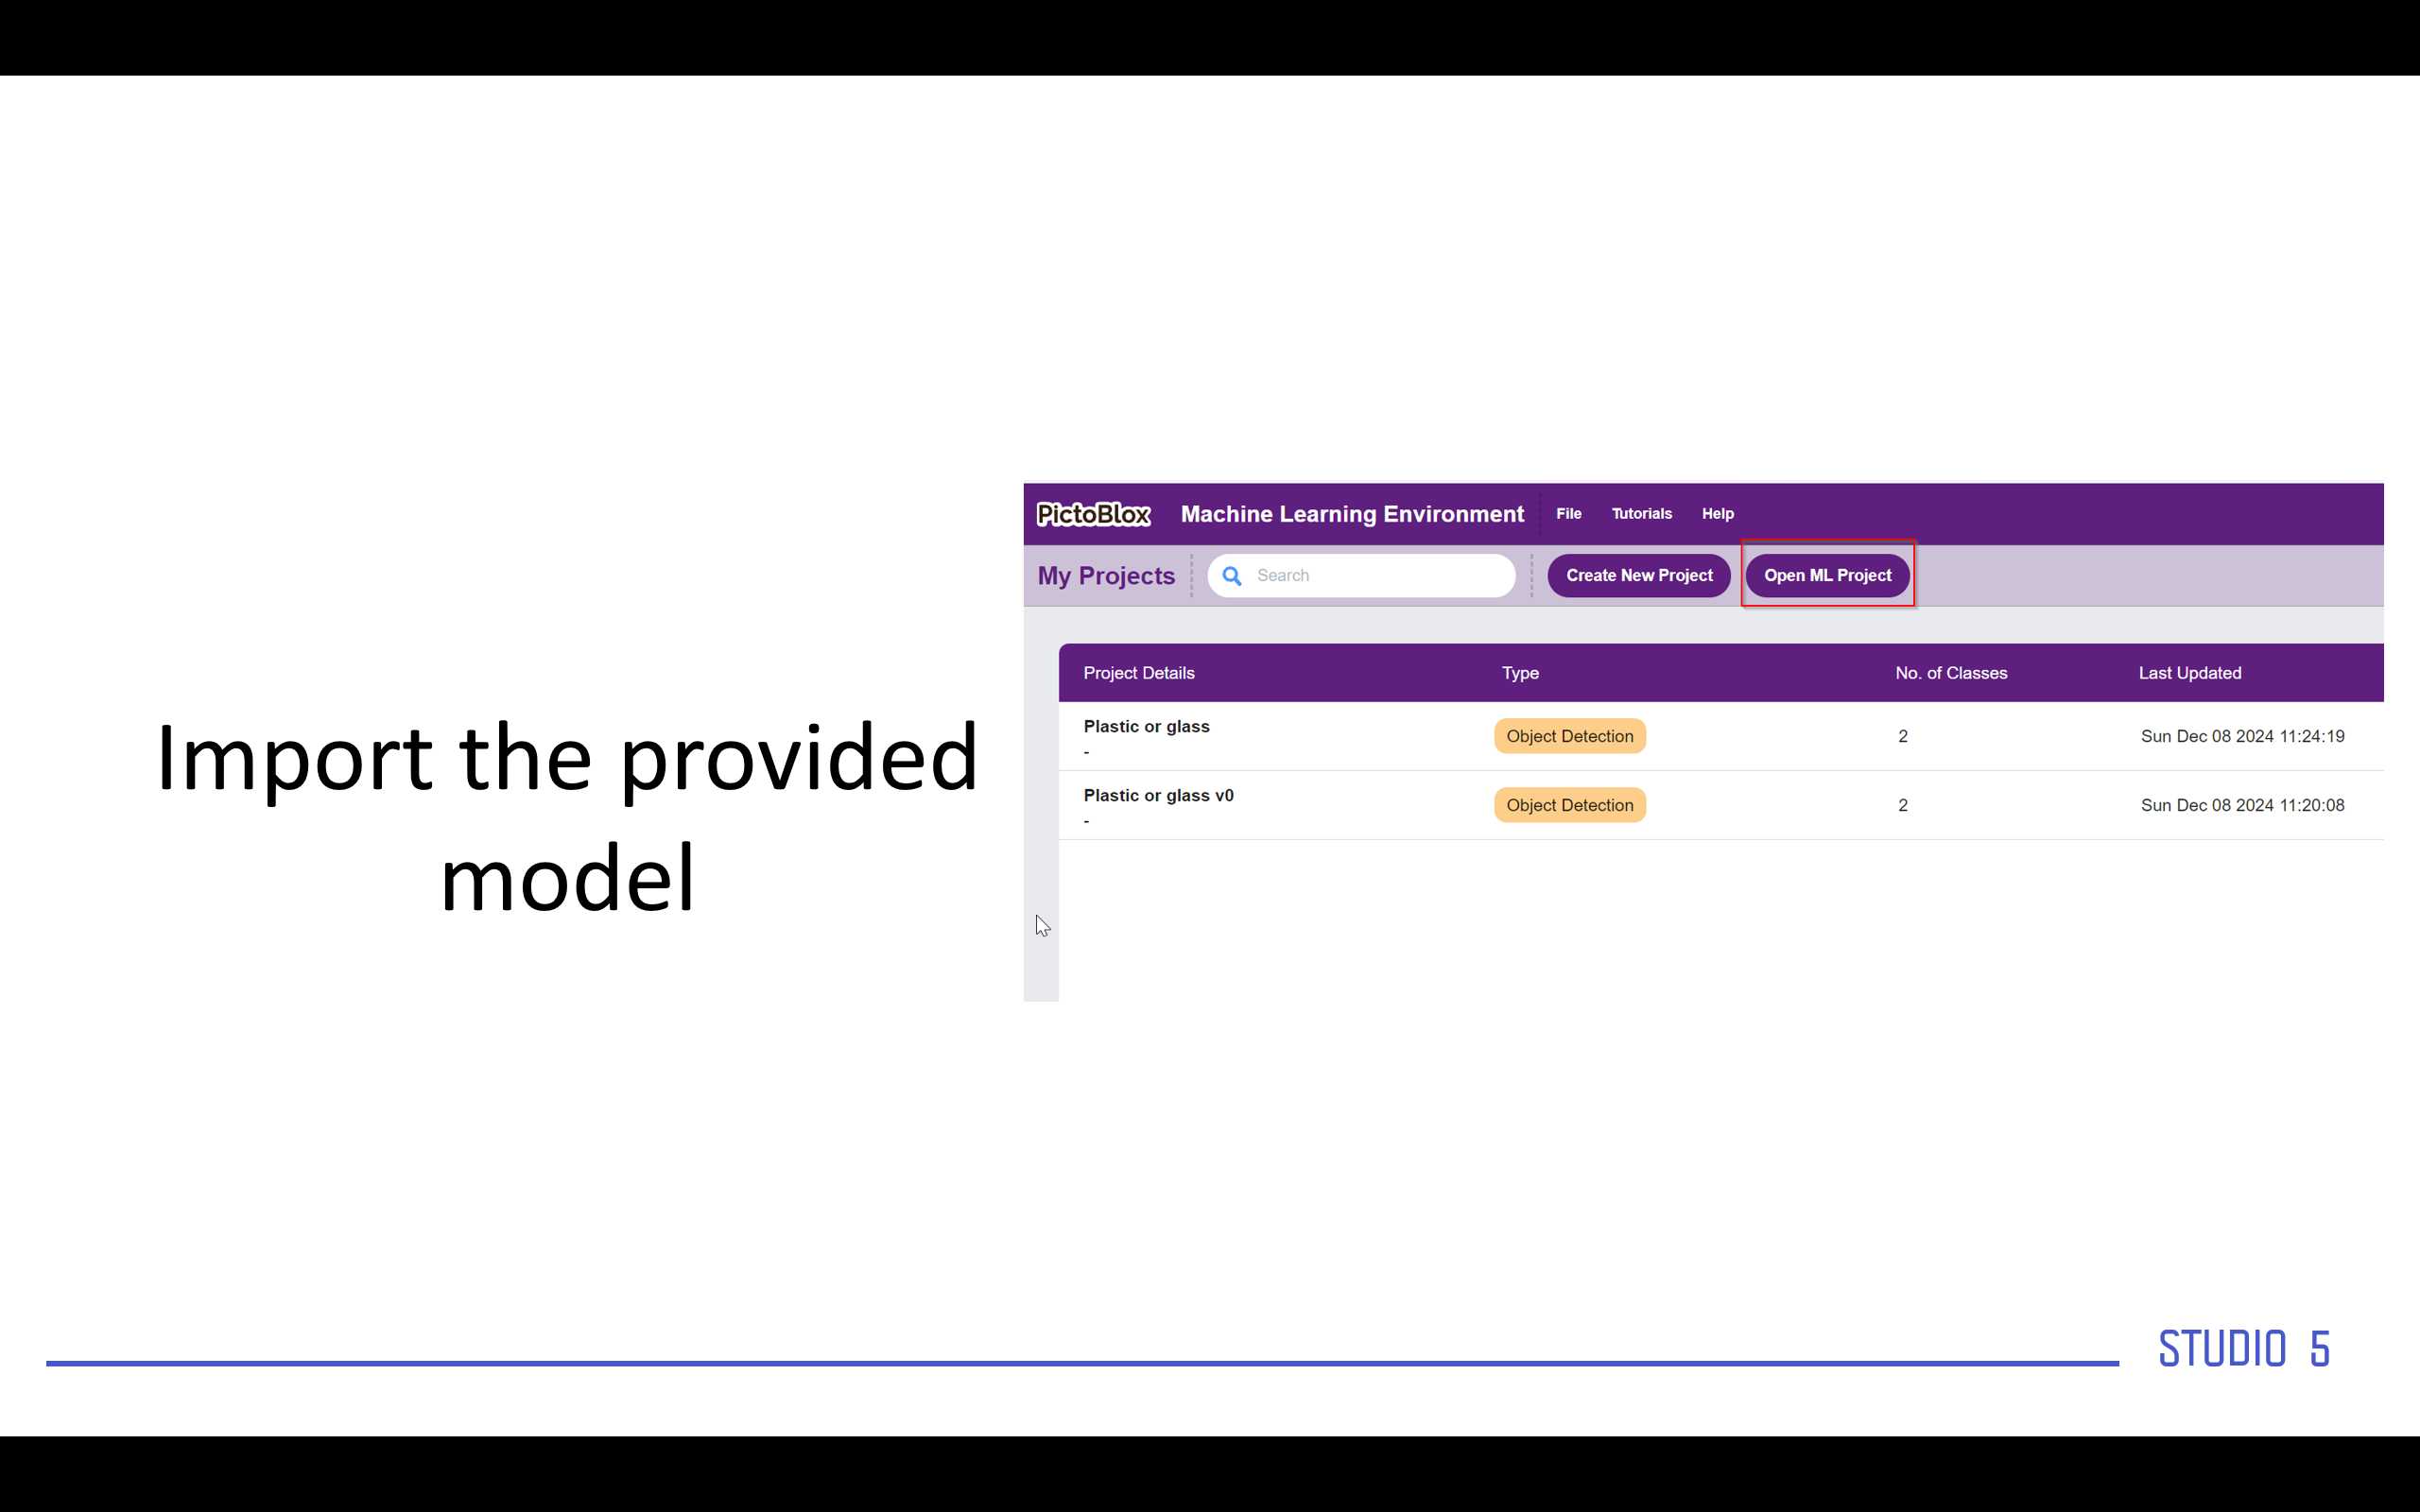
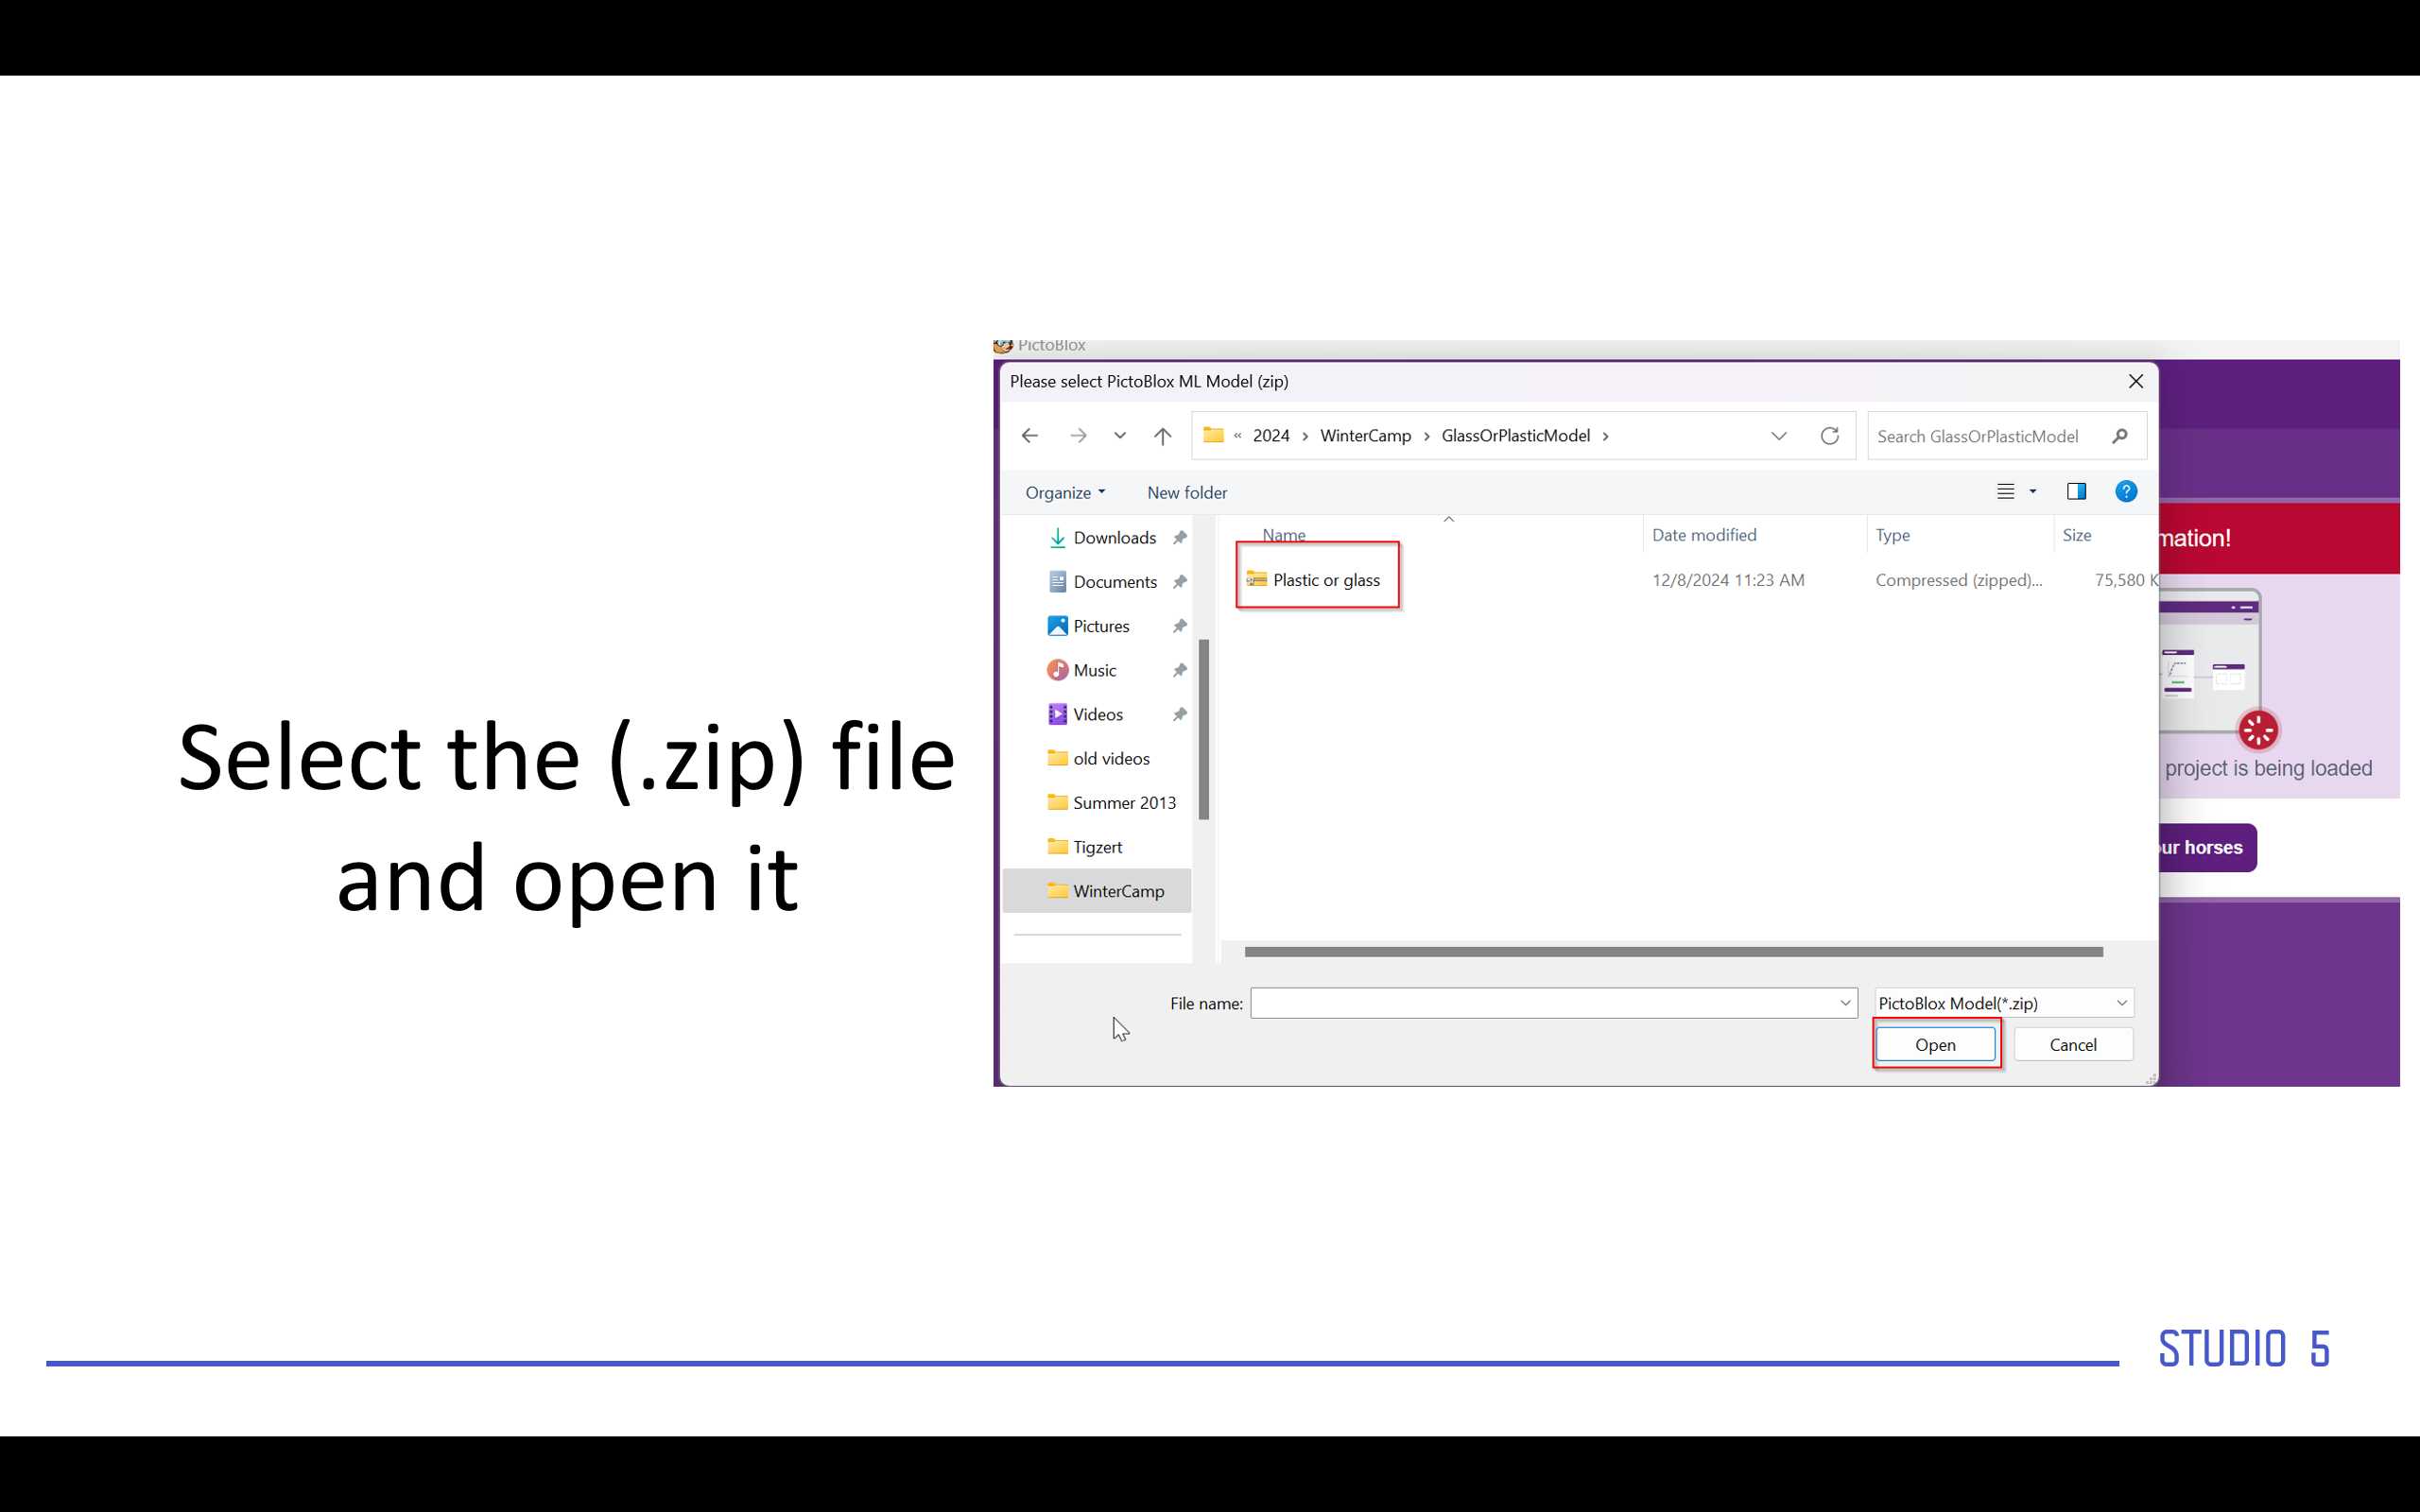
In the participant case they are not going to train the model they will get to know how, but they will receive the model pre trained from my side to save time and they will only import it.
to import pre trained or ready model.
For the code please find it attached in the attachment section.
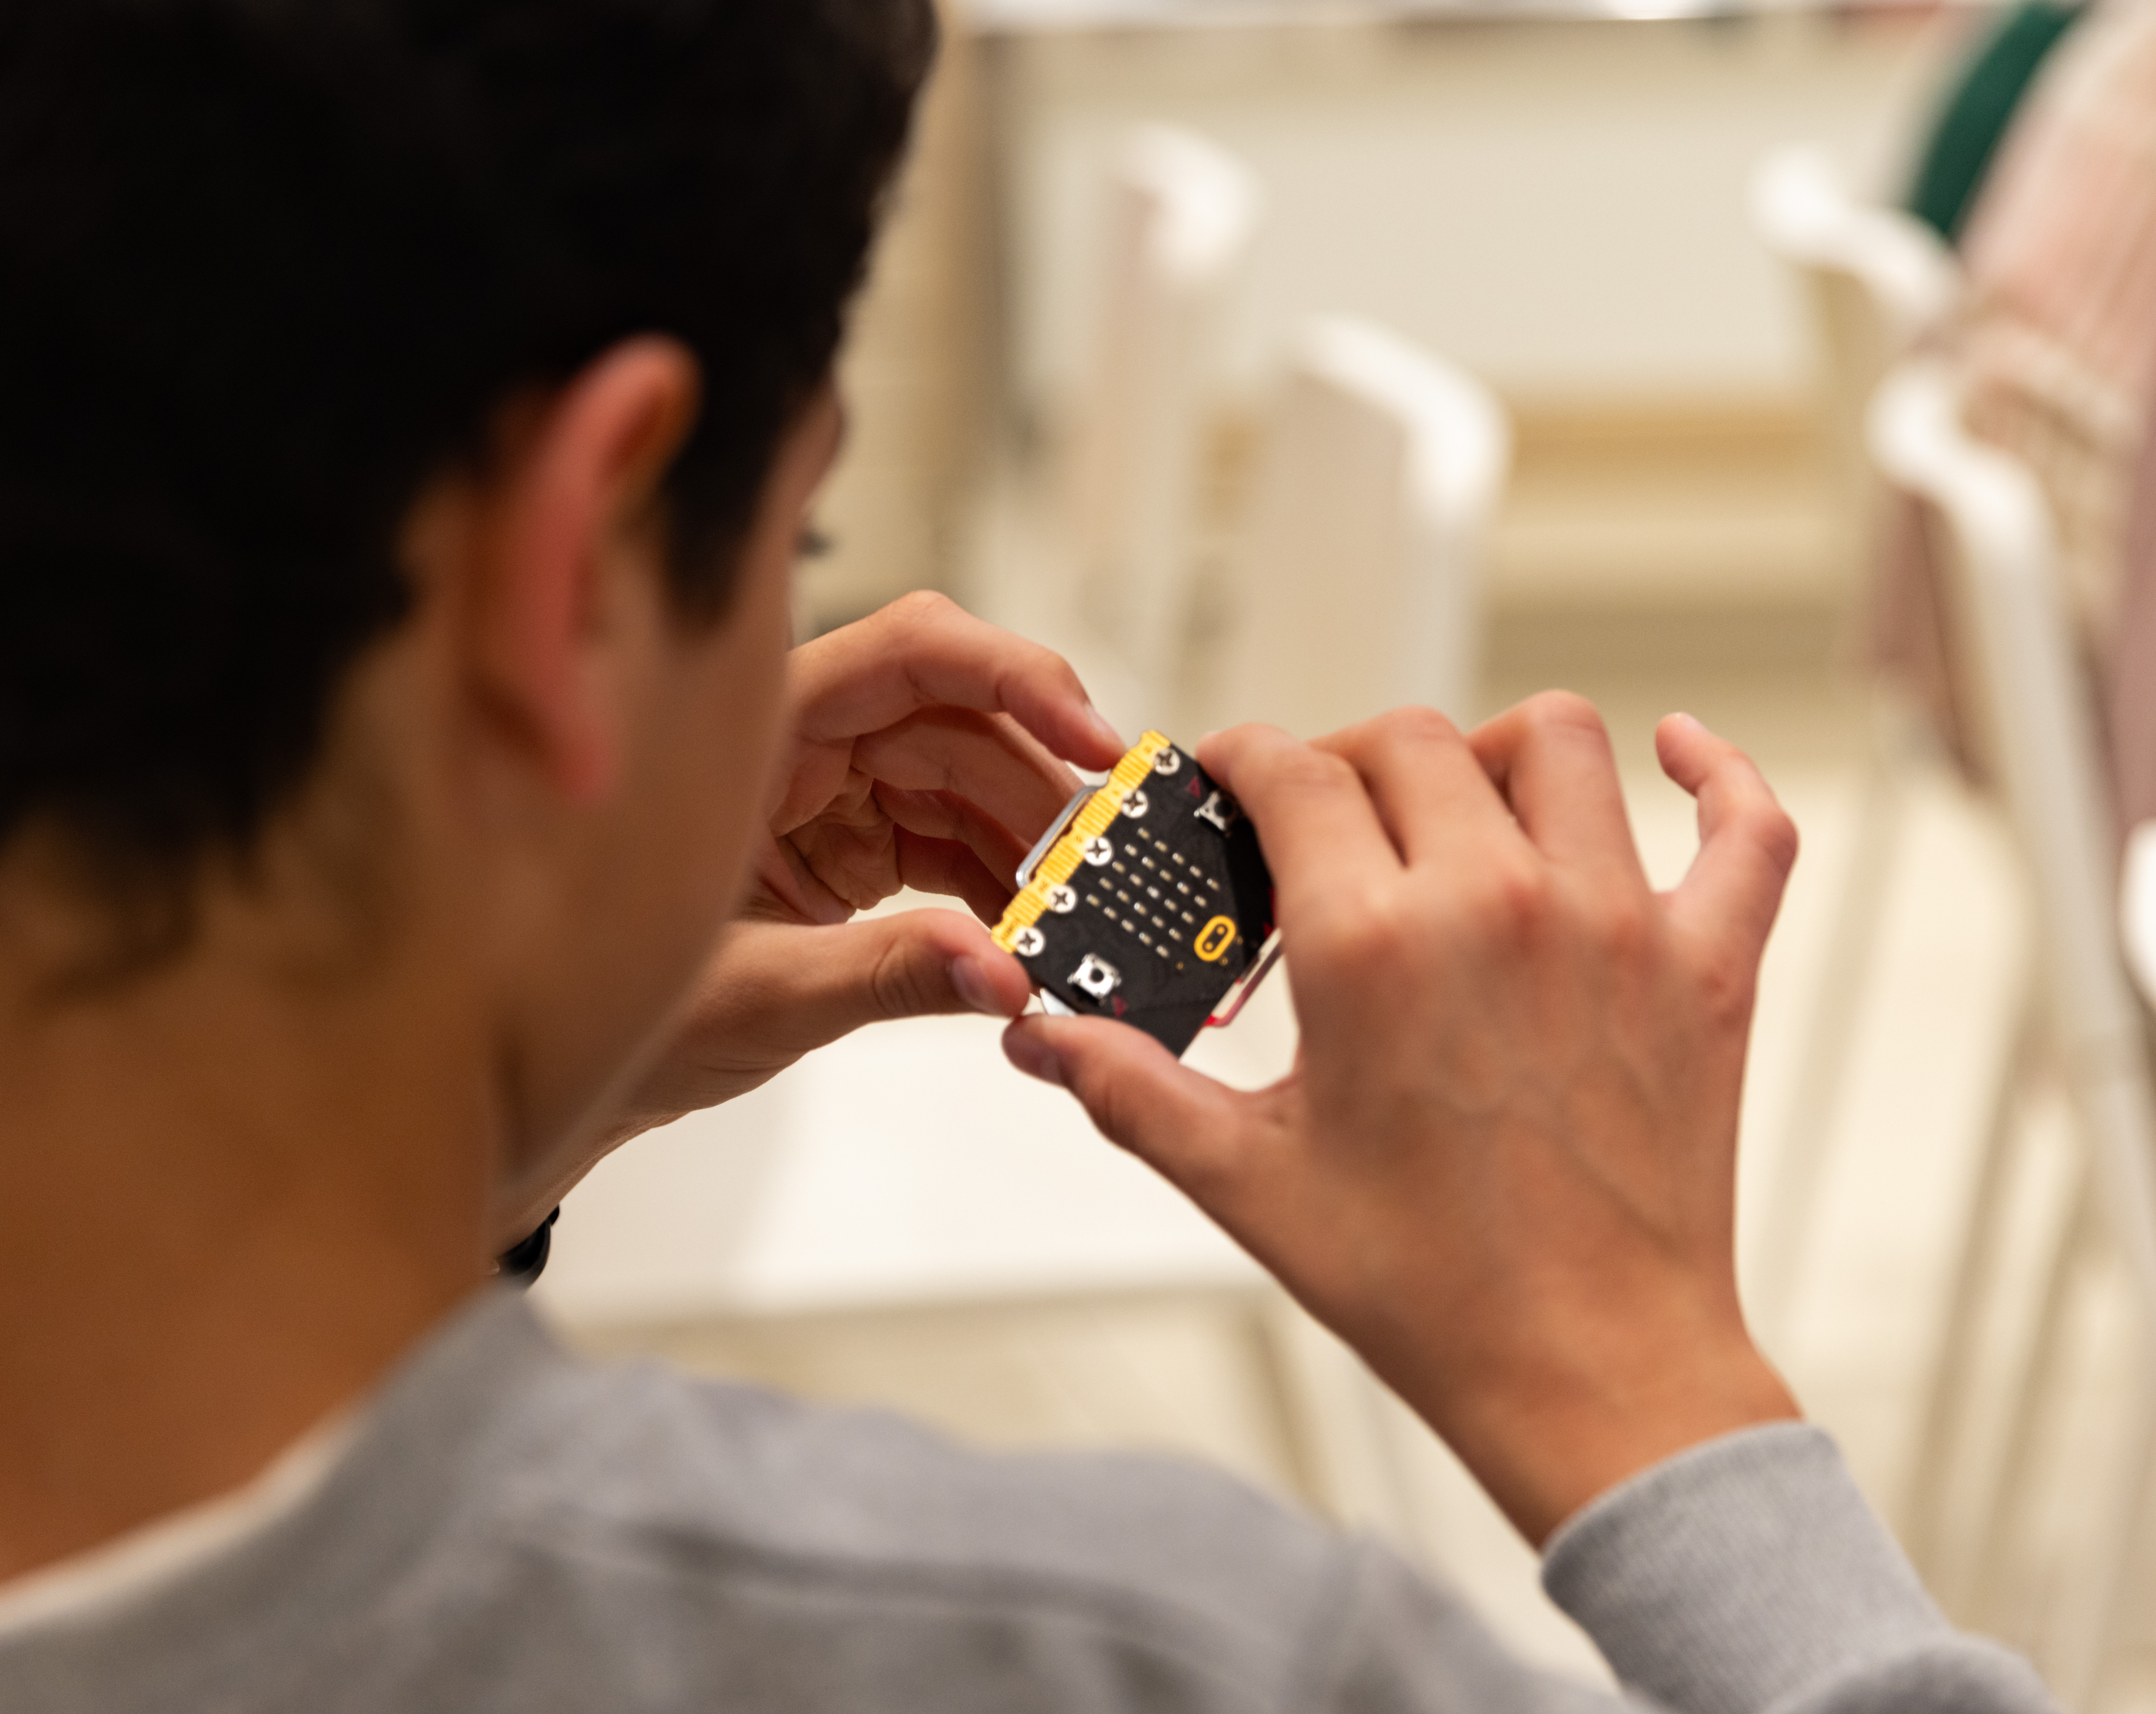
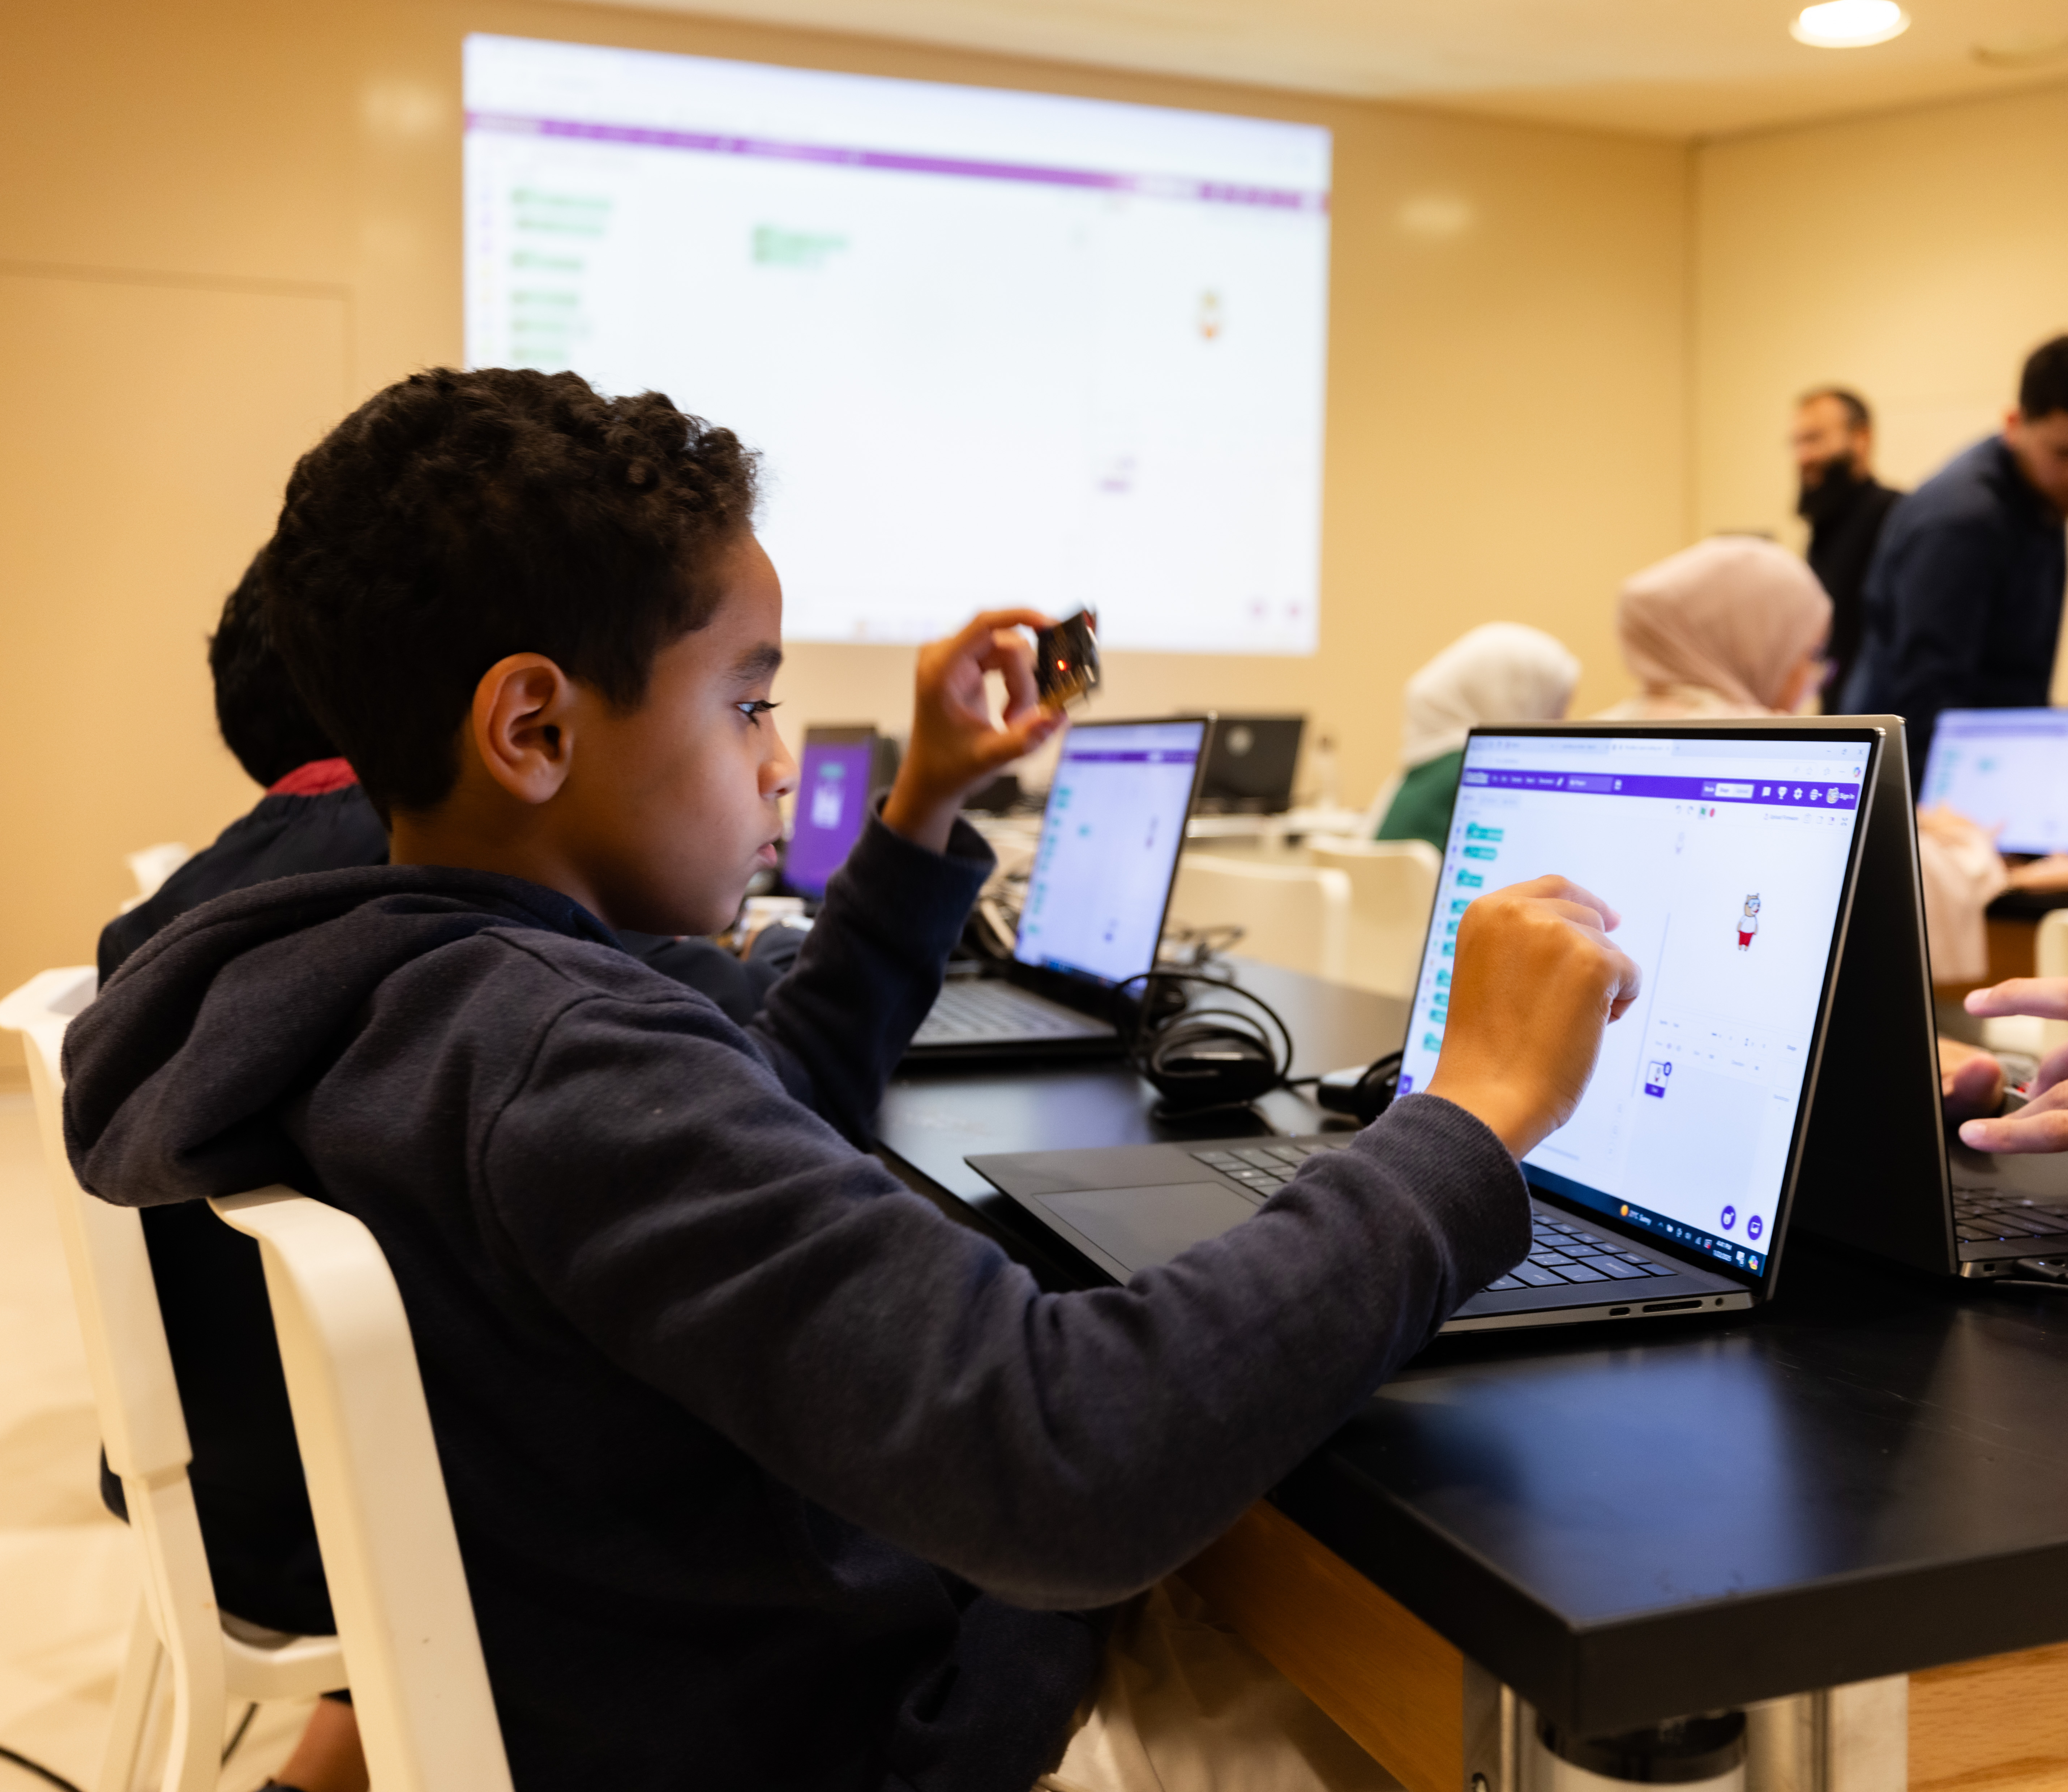
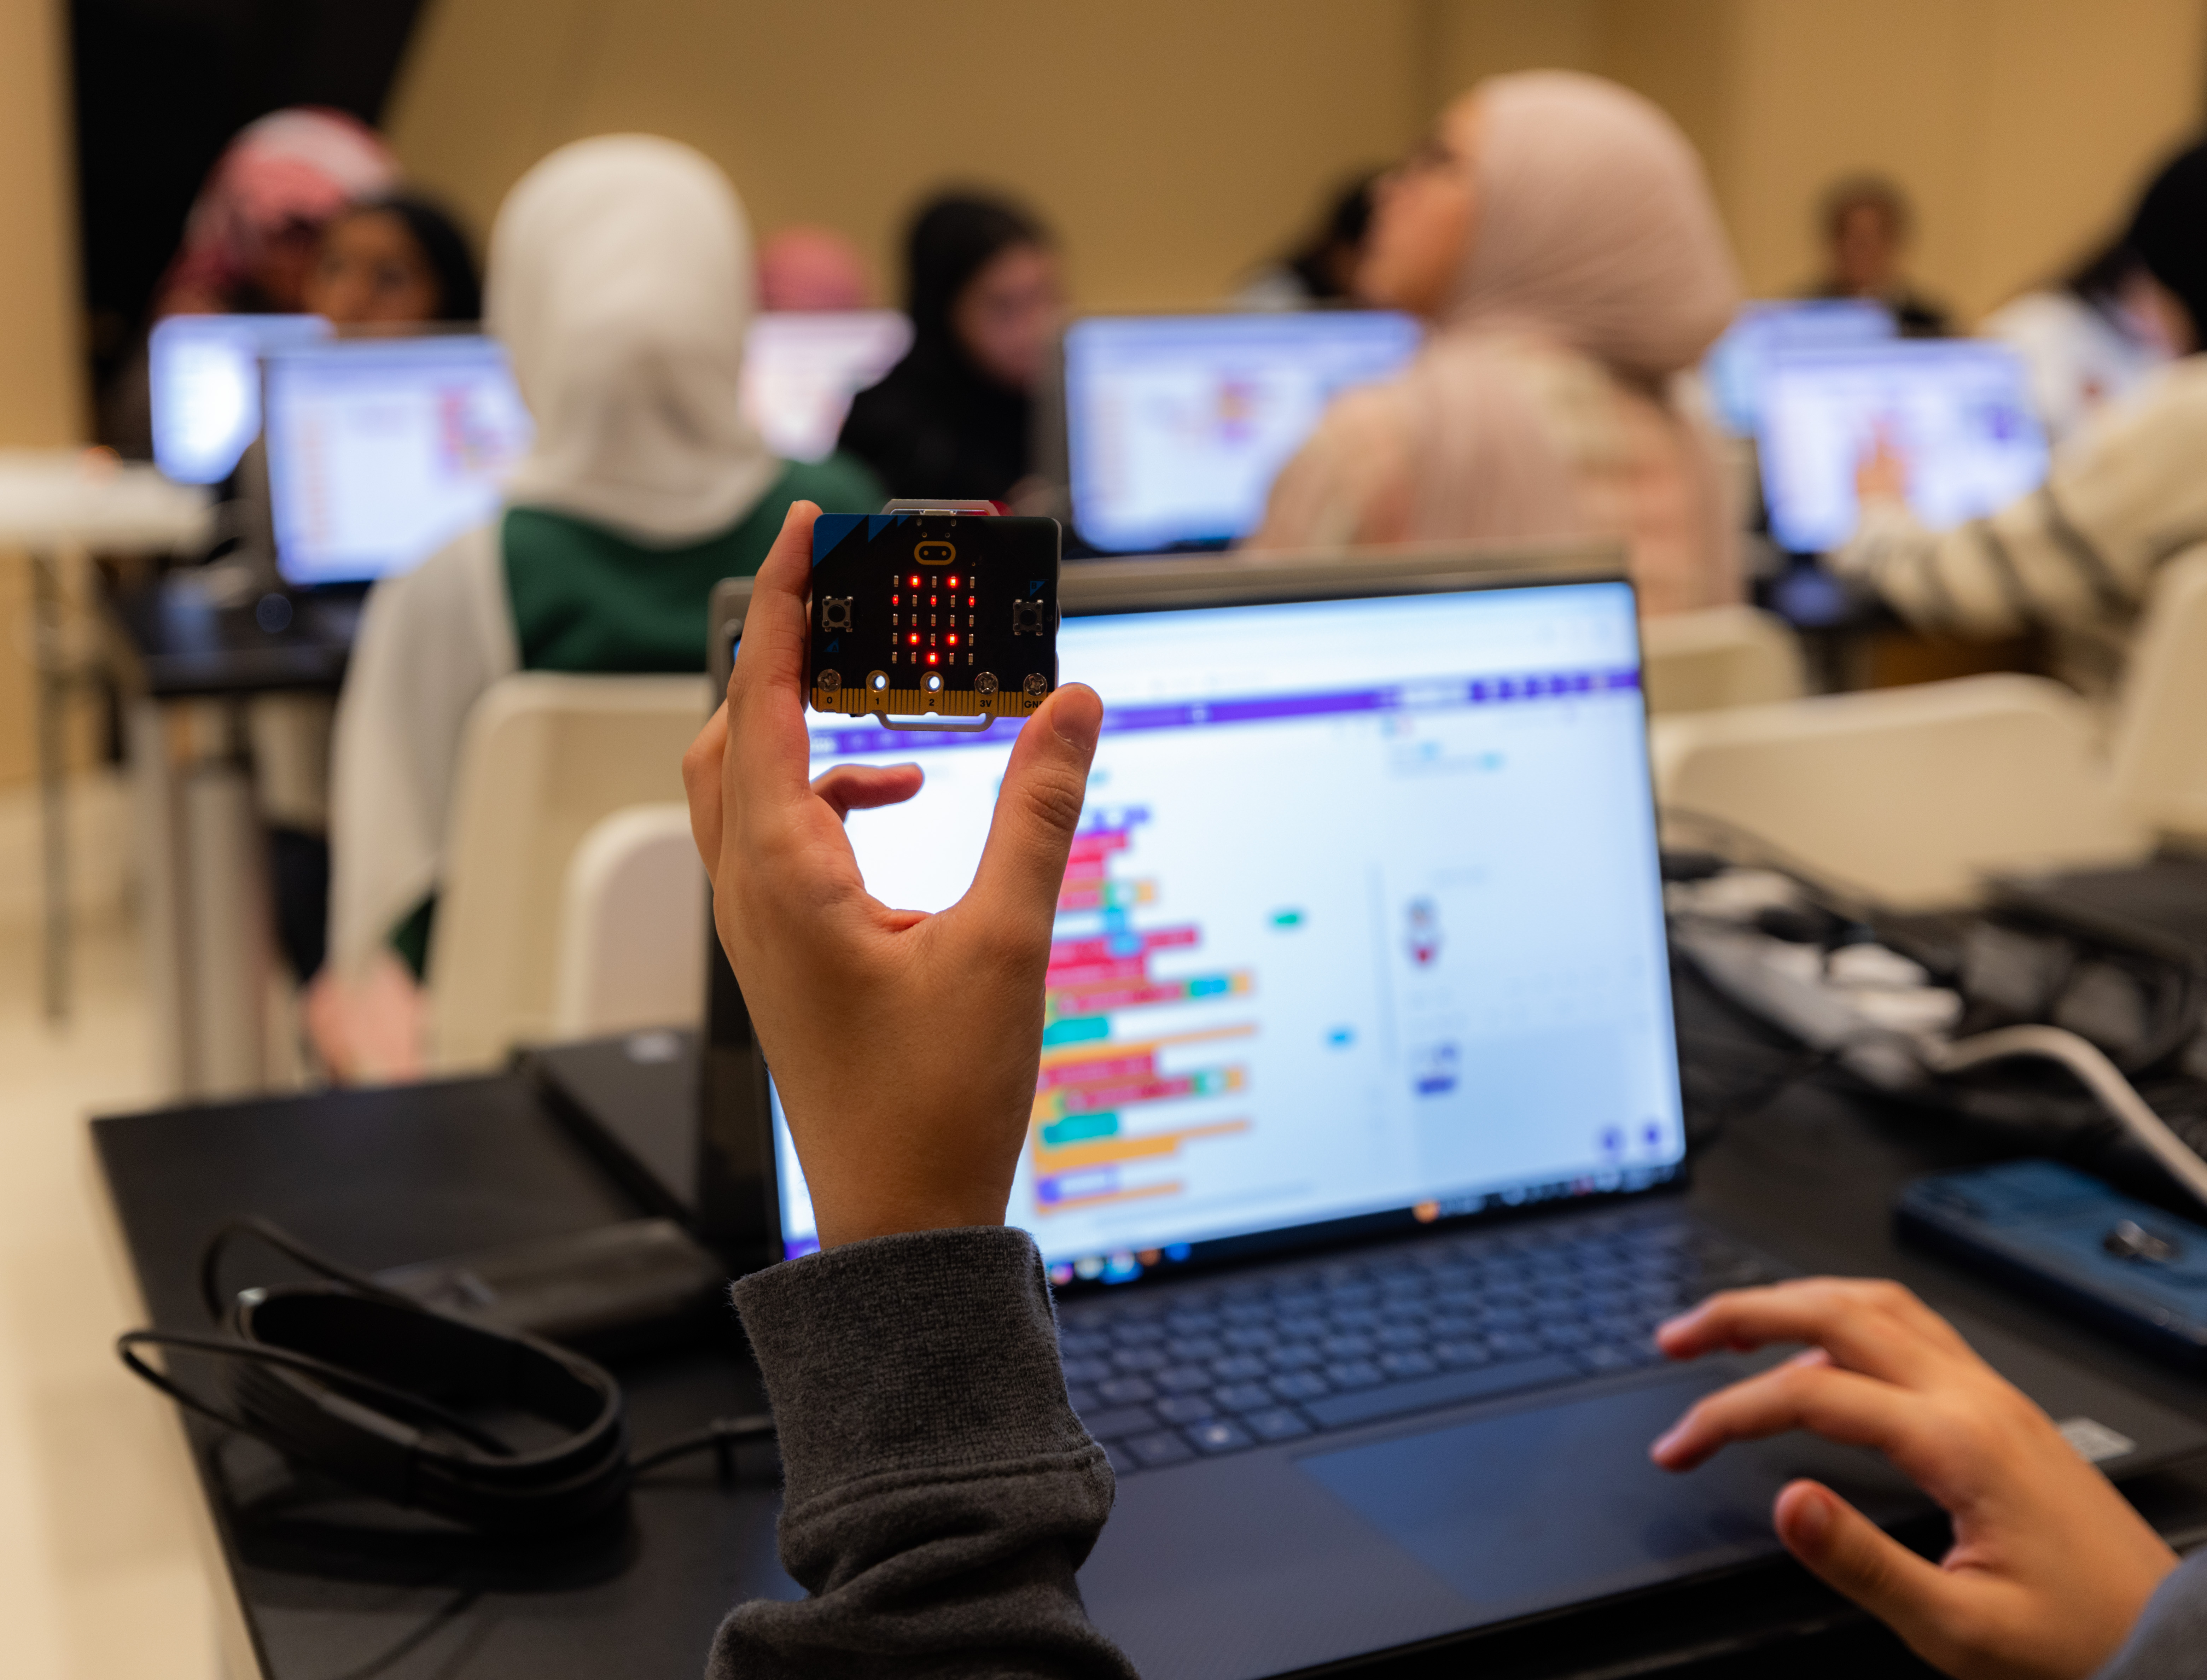
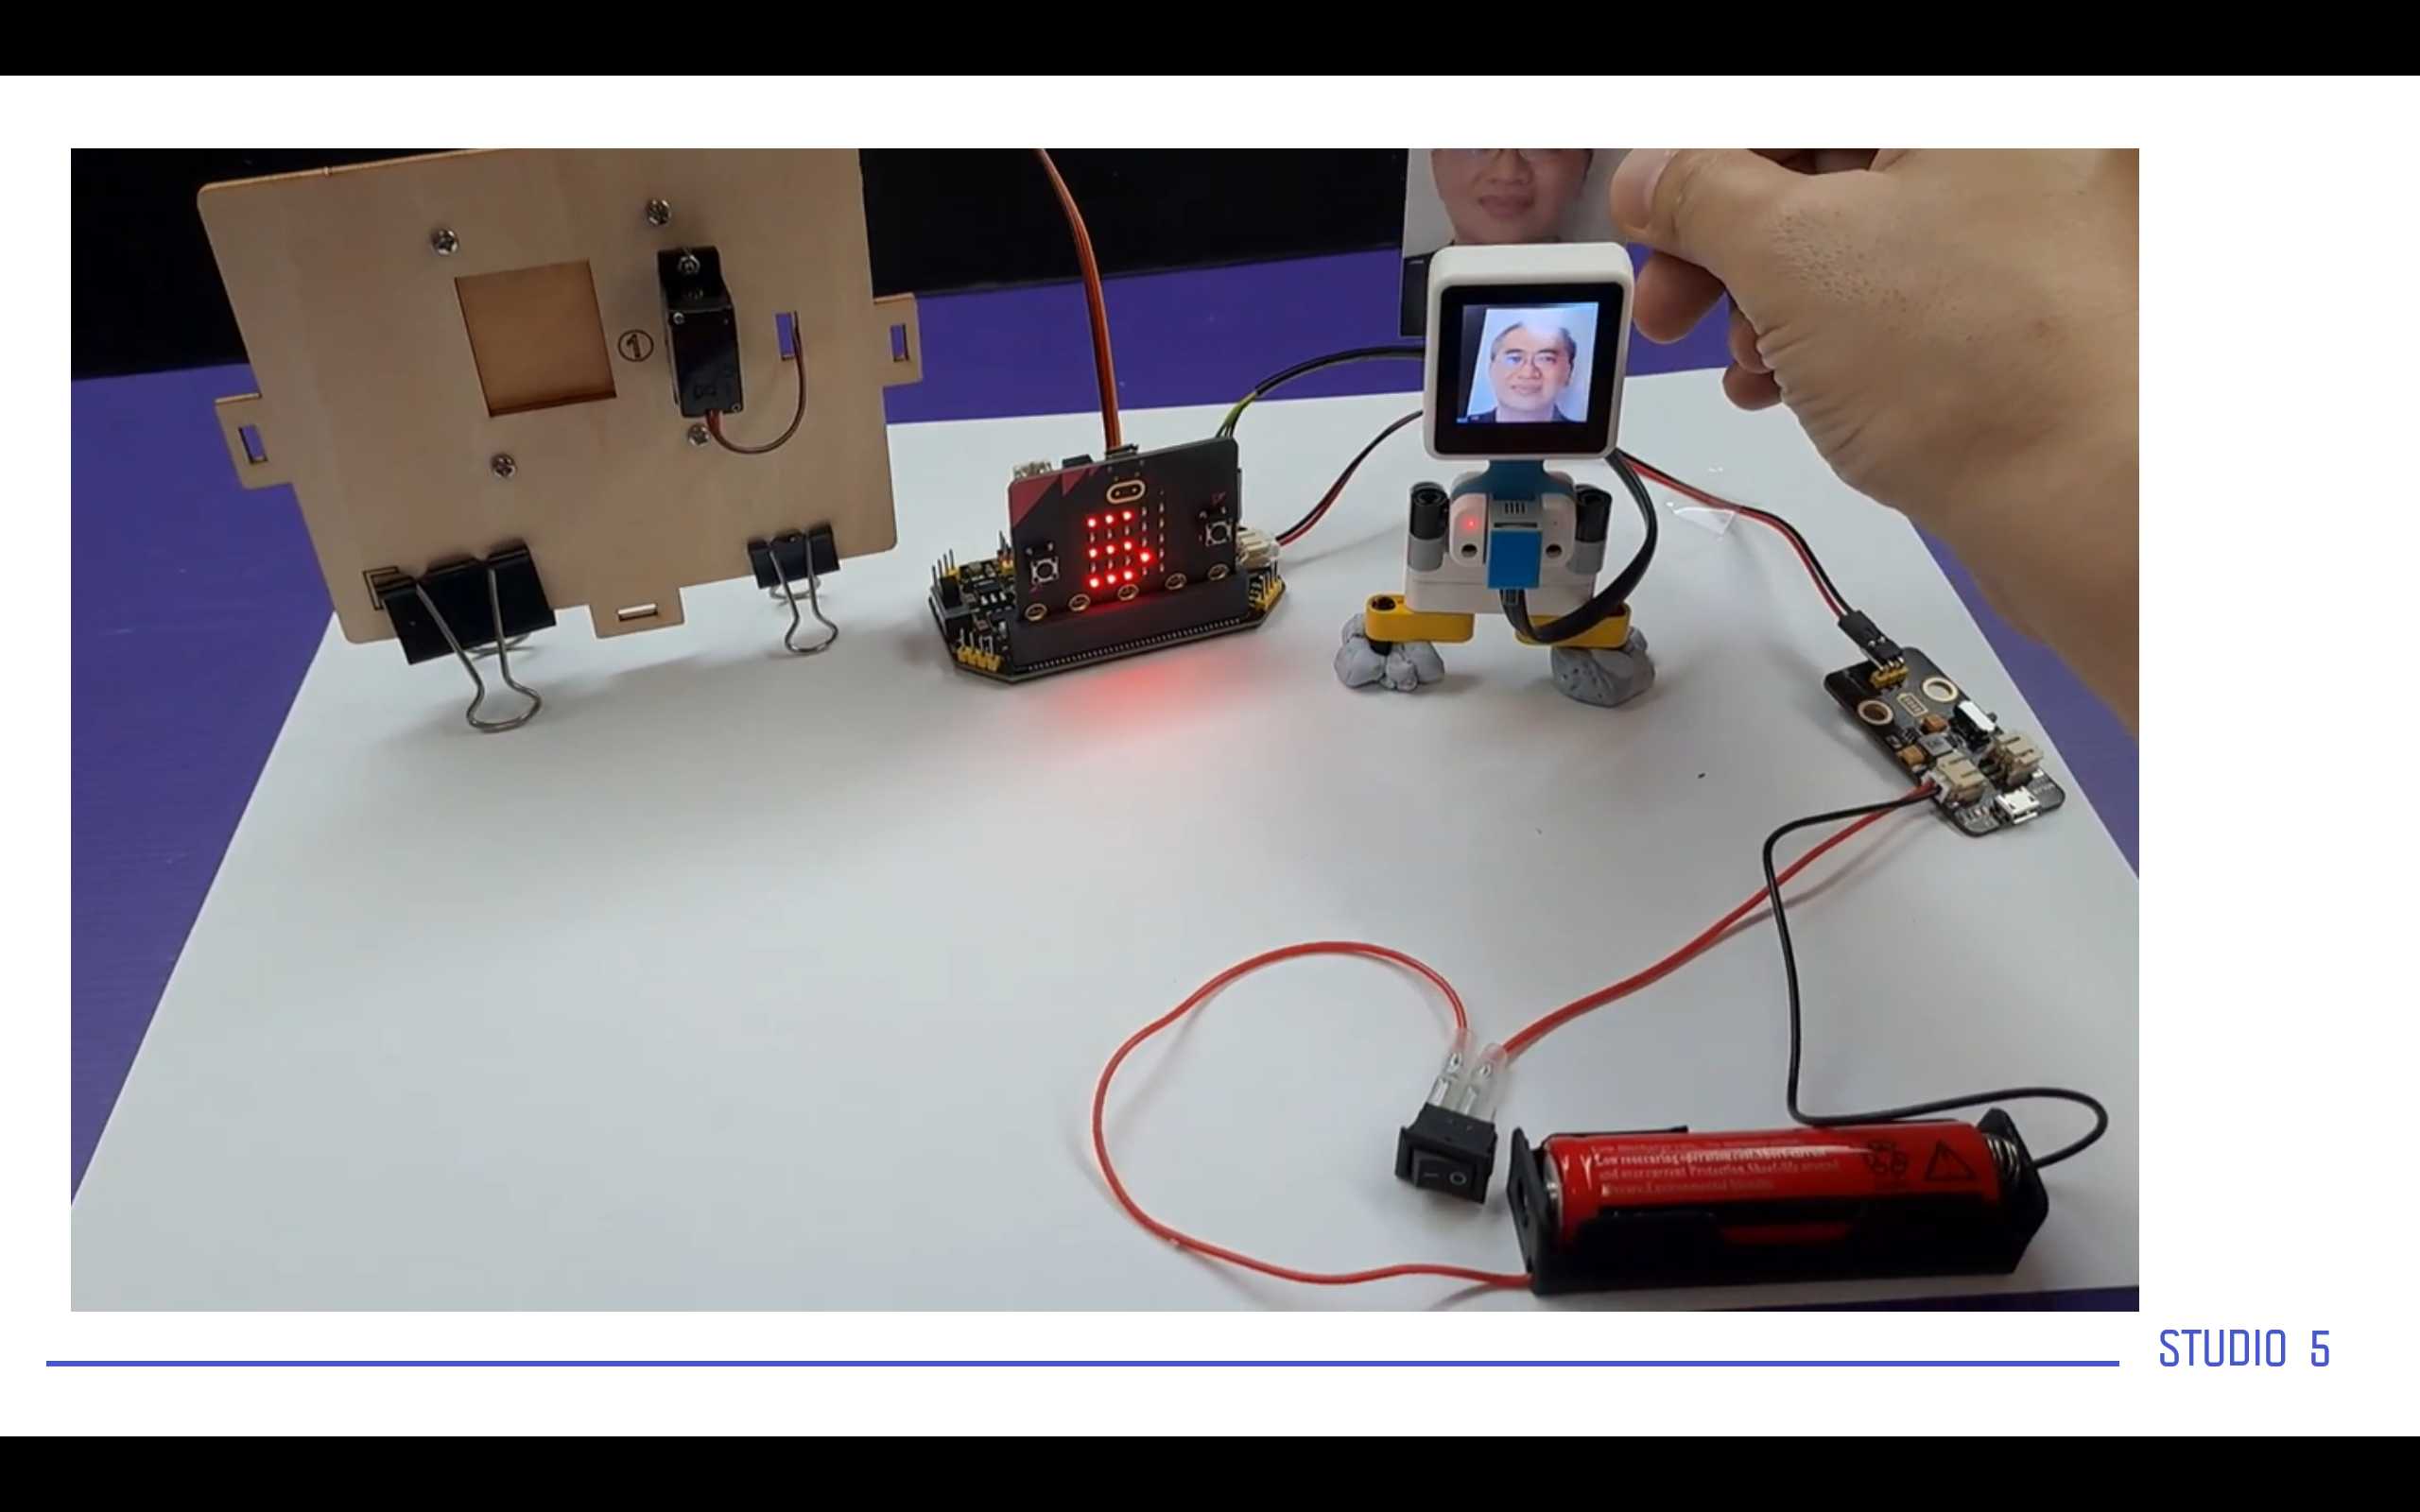
In this day we will talk about the hardware part and the needed knowledge in order to code and operate.
At the beginning we will recap the previous 2 days and its important the give the students the opportunity to talk about what they have got.


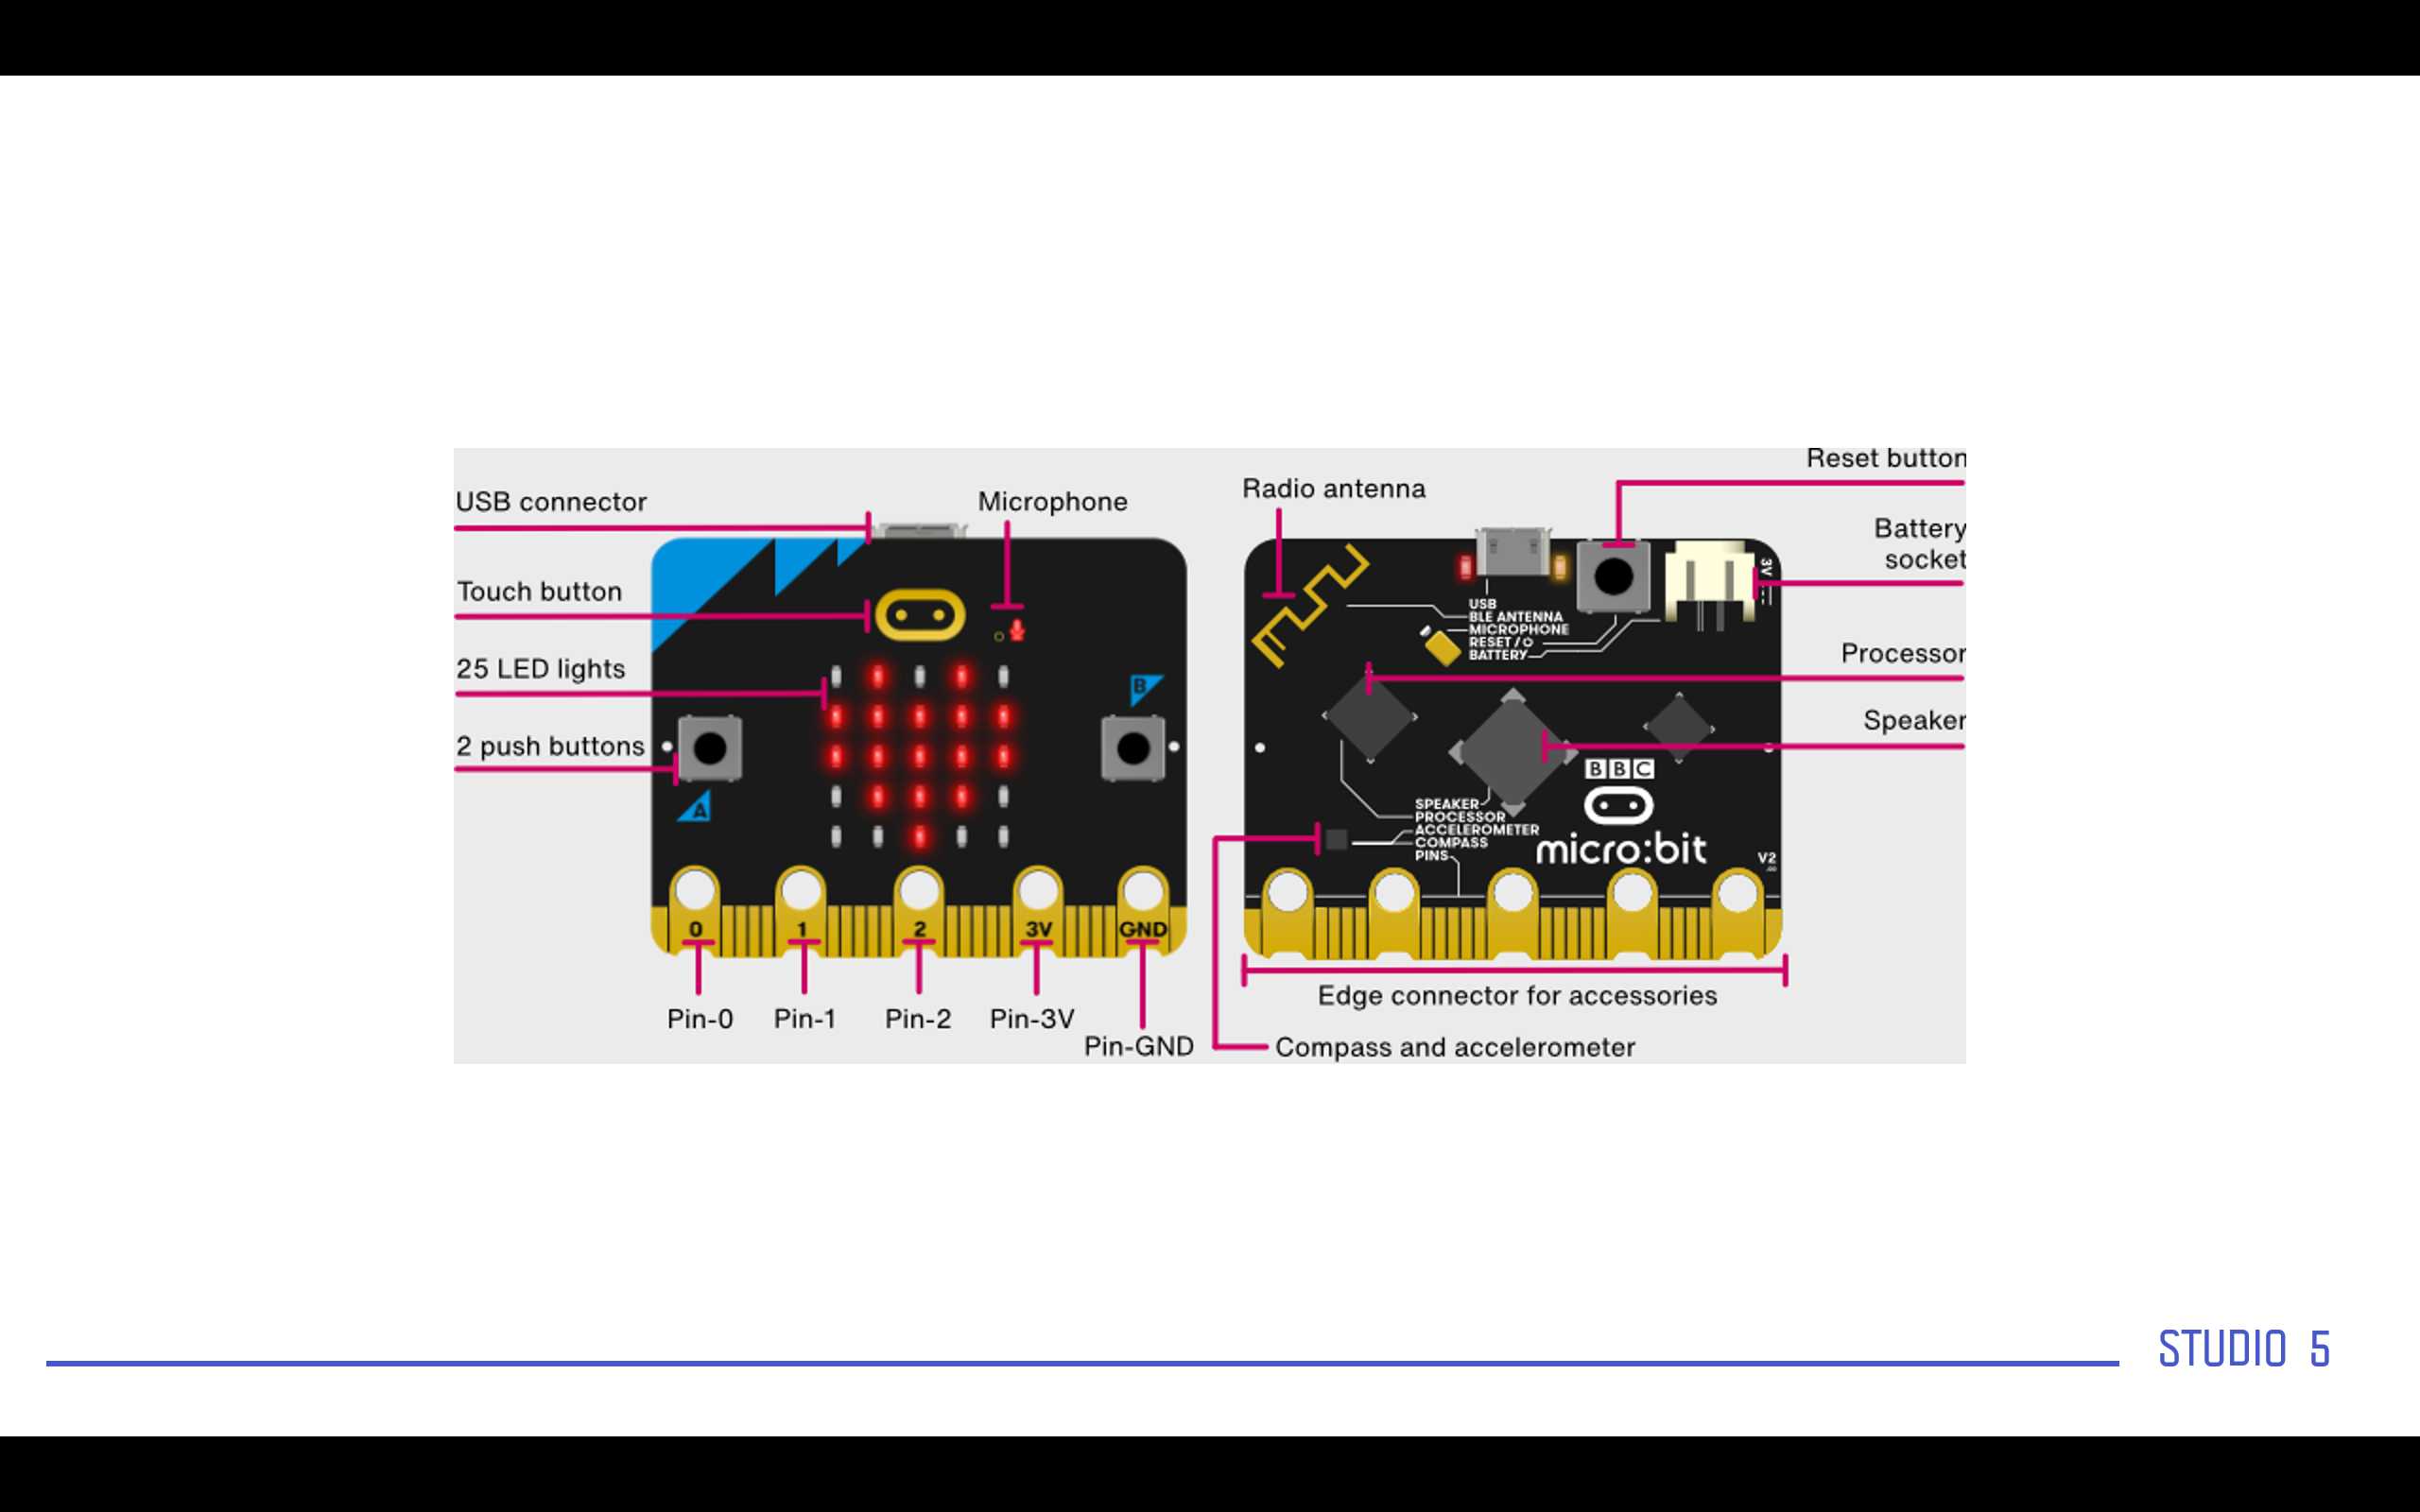
At this point I will explain what is the MicroBit MCU and how its different from the others.
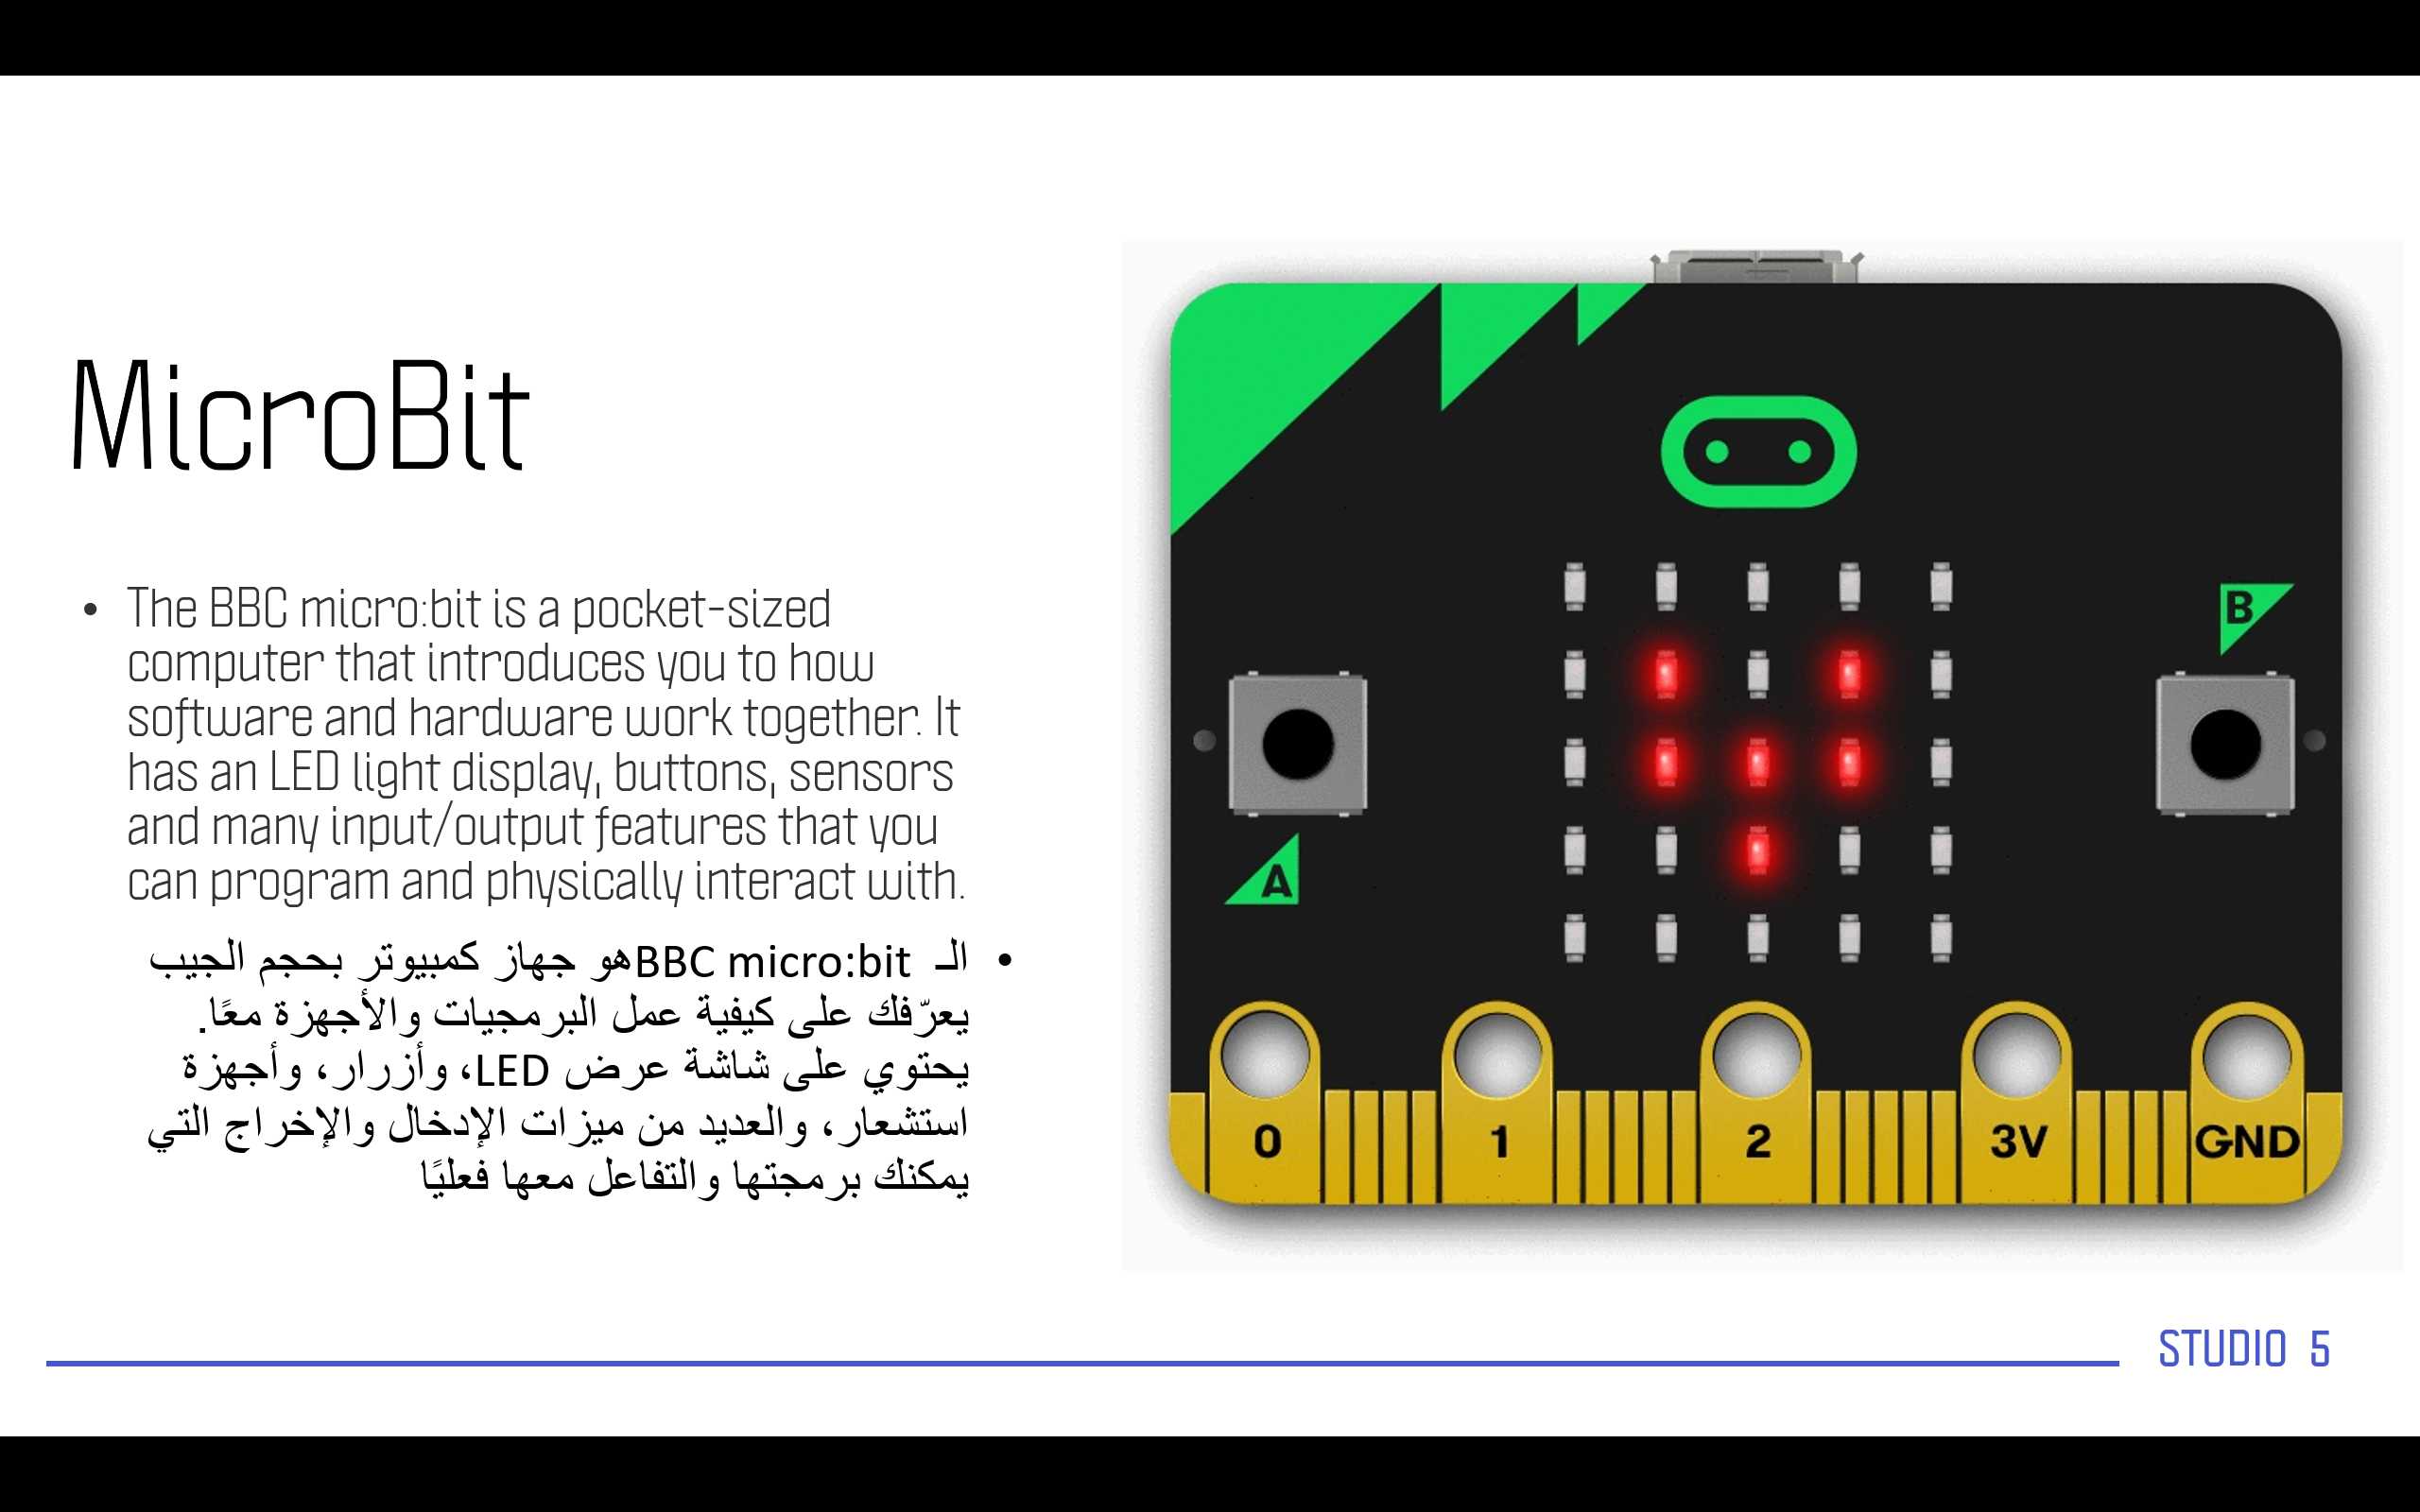
Then I will show a video about the capabilities of the Microbit
Then we need to talk about the sensors as a components used to get data from the surrounding to be then fetched to the processor.
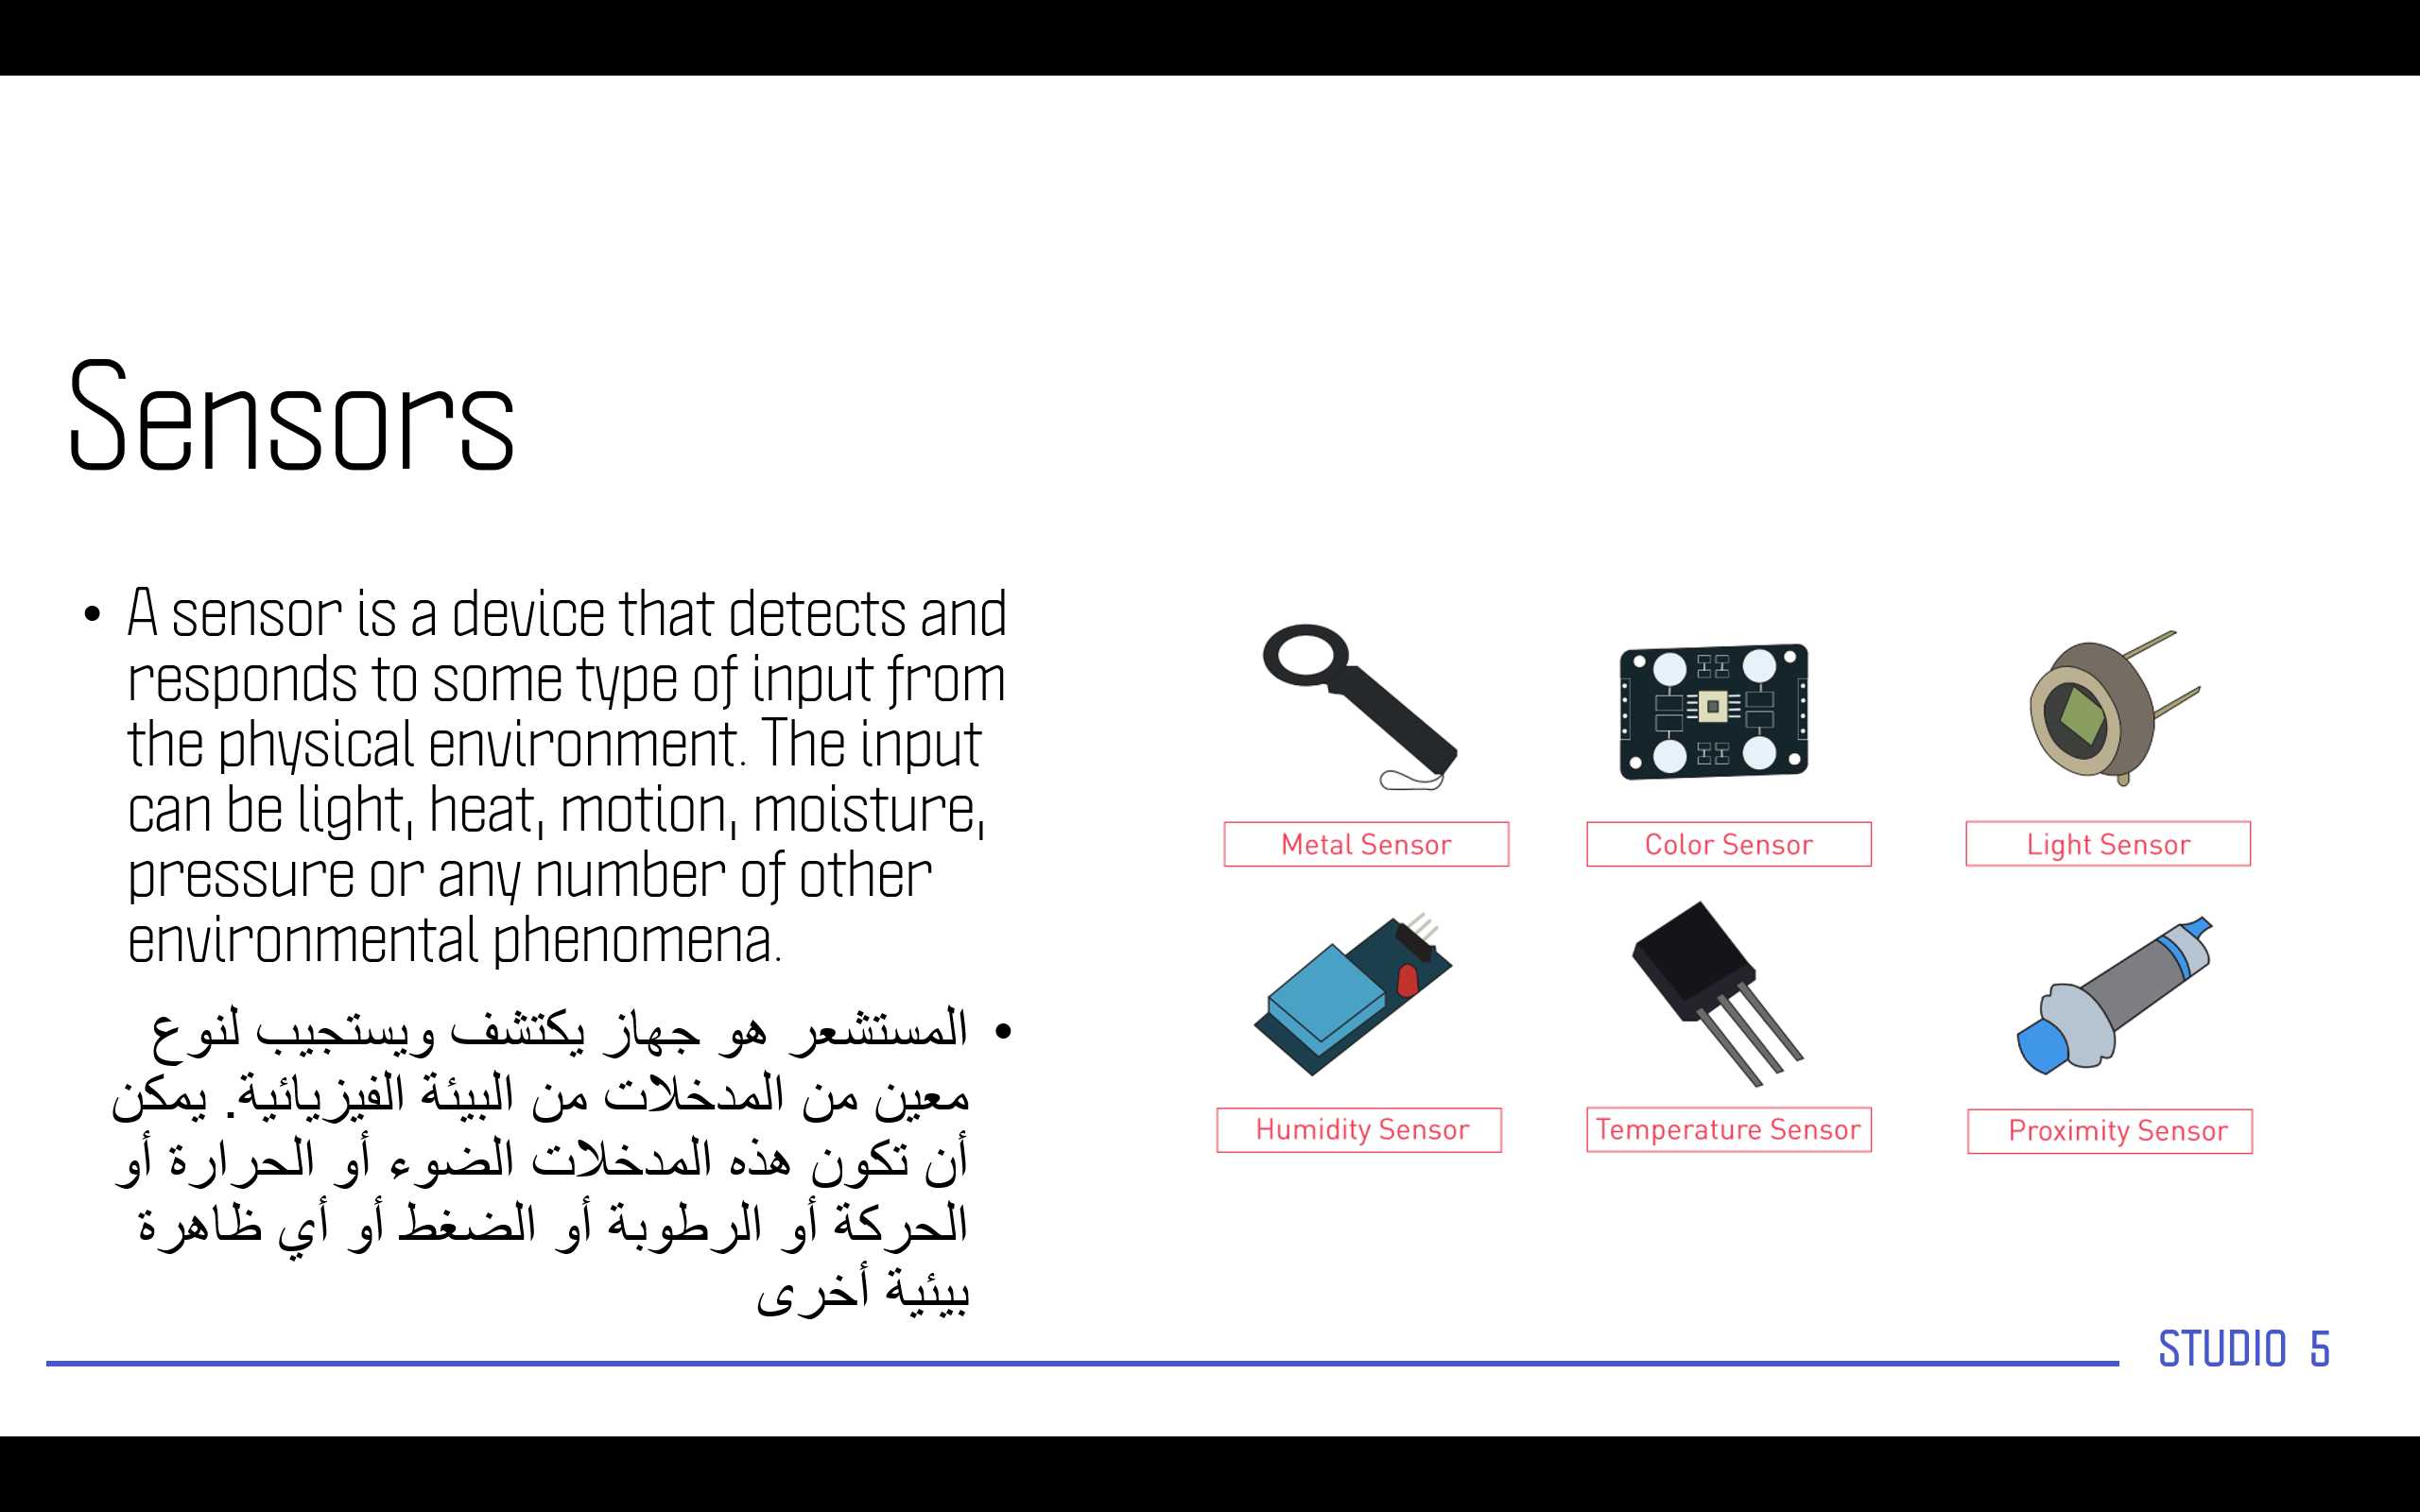
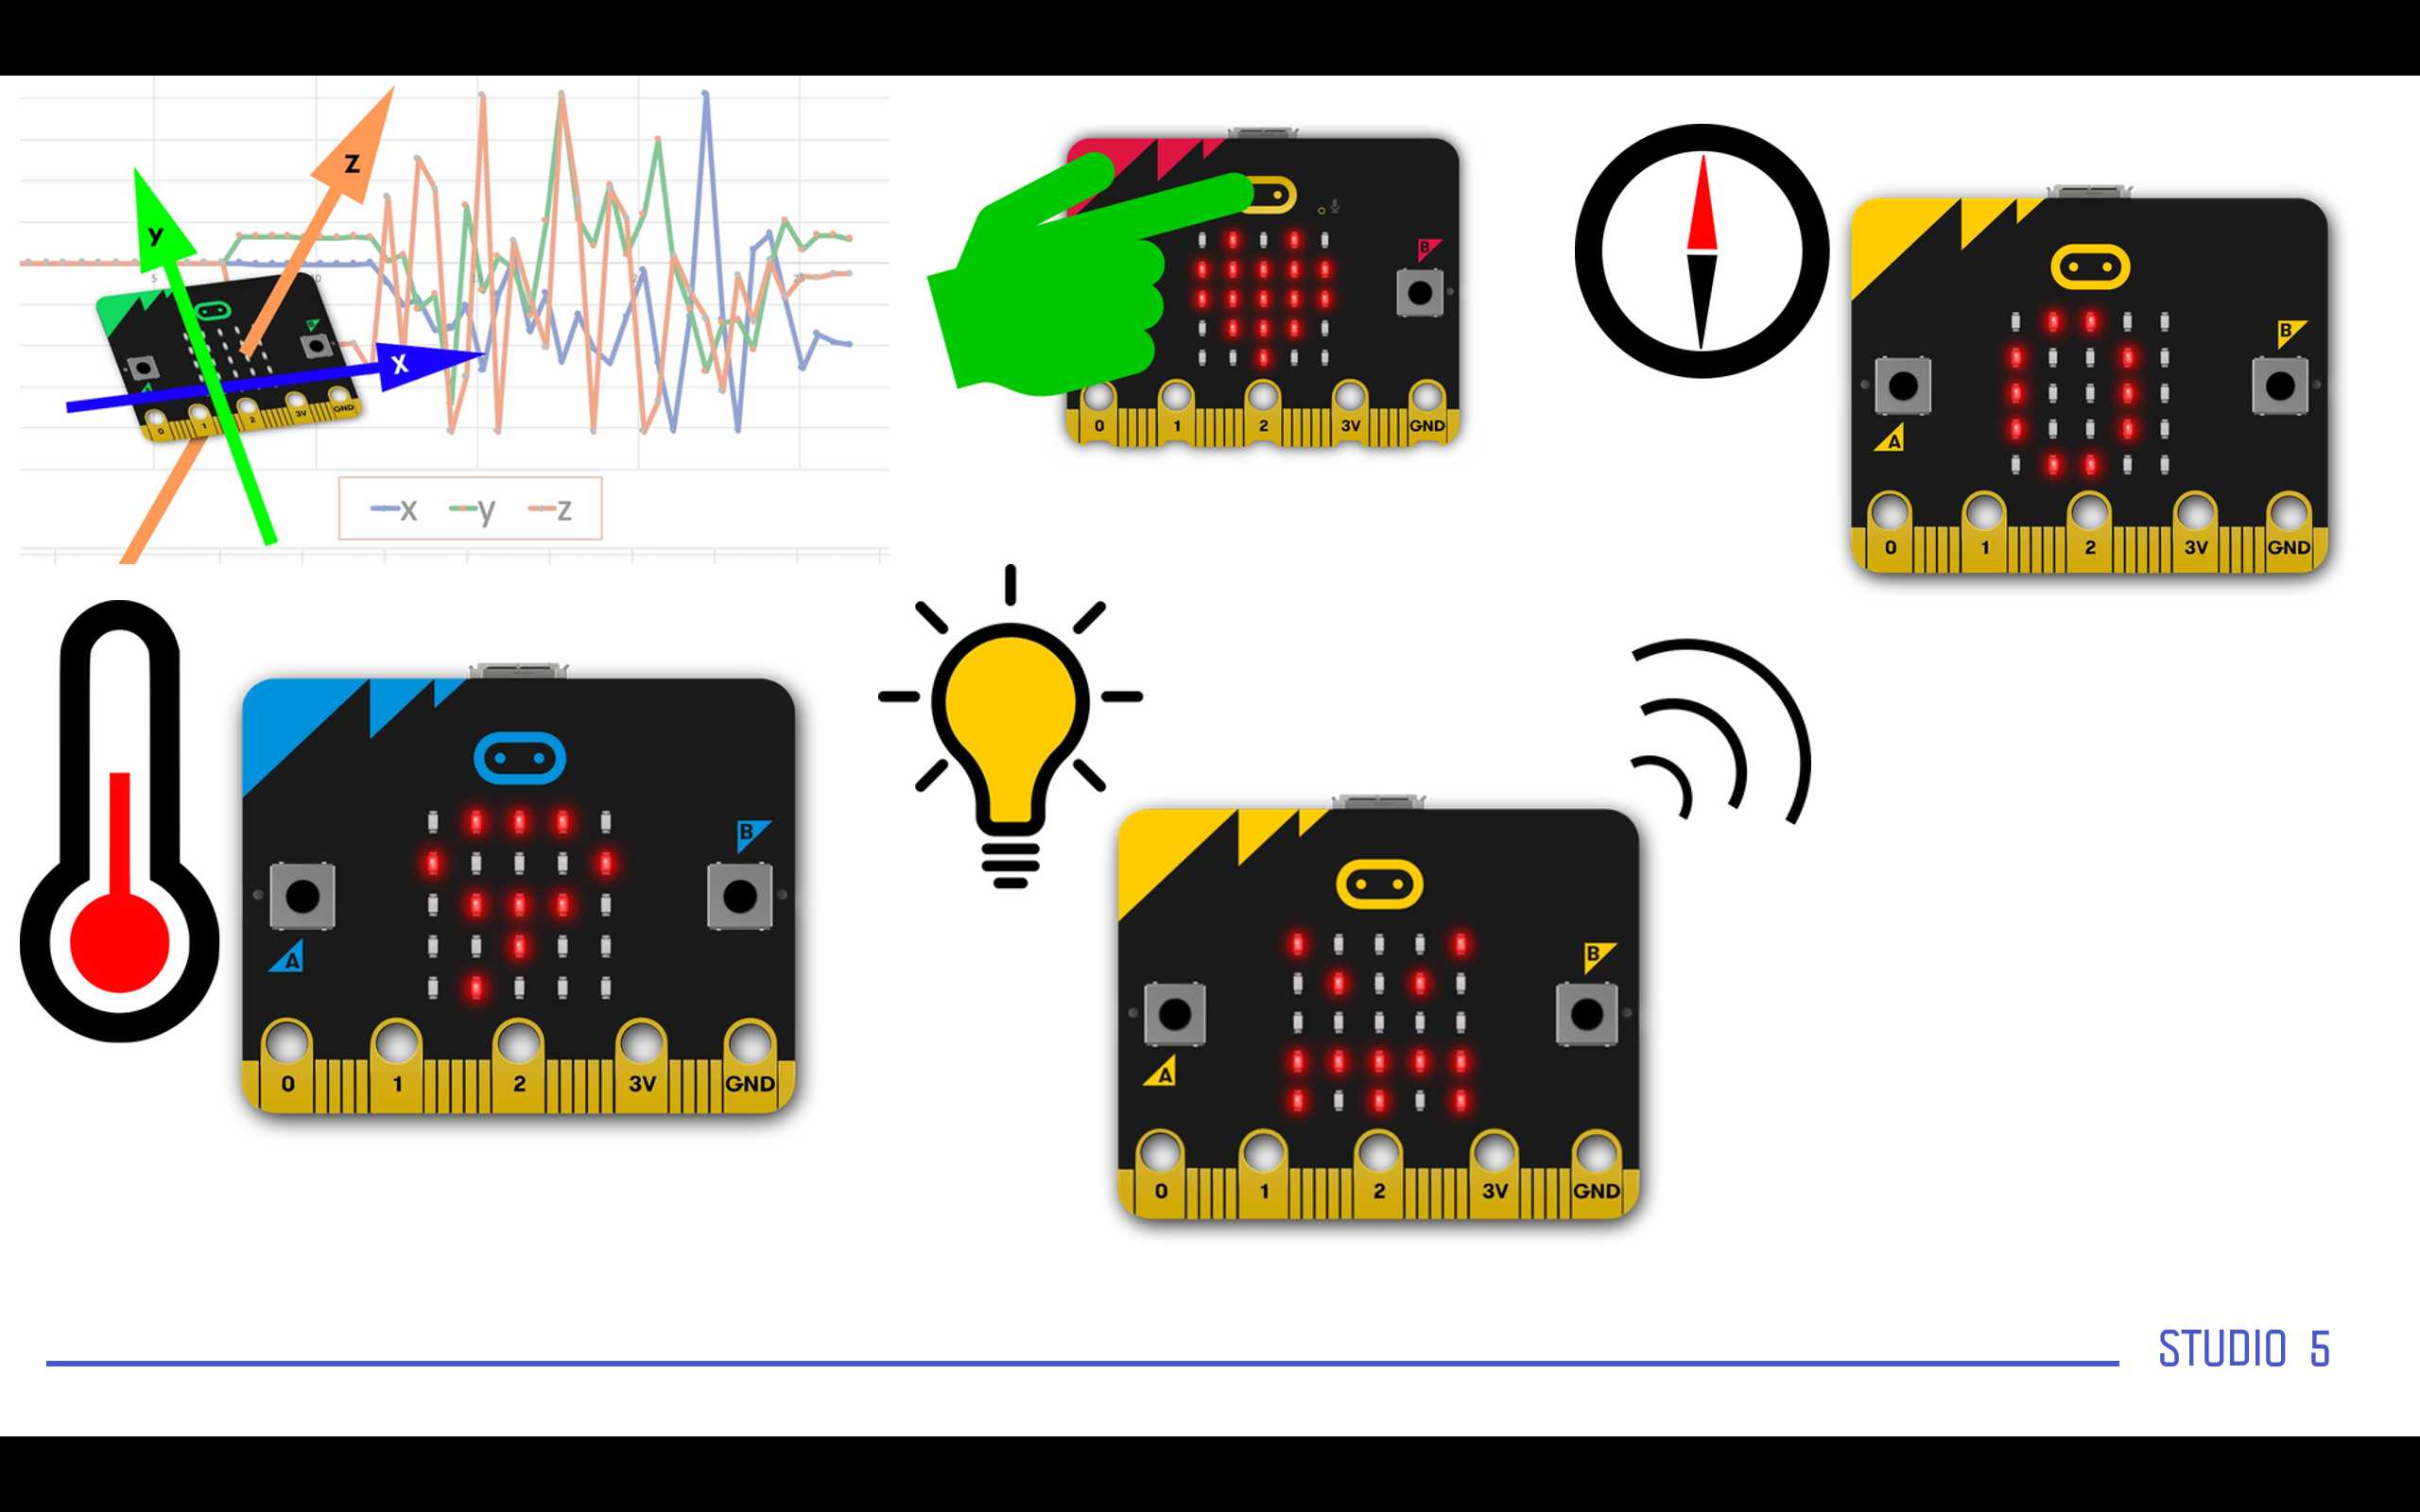
Then we need to show the number of sensor this MCU contains.
Then I will show a video that explain a project built using the MicroBit MCU.
The video is attached to the presentation.
Now We need to explain what we are going to do in this day.
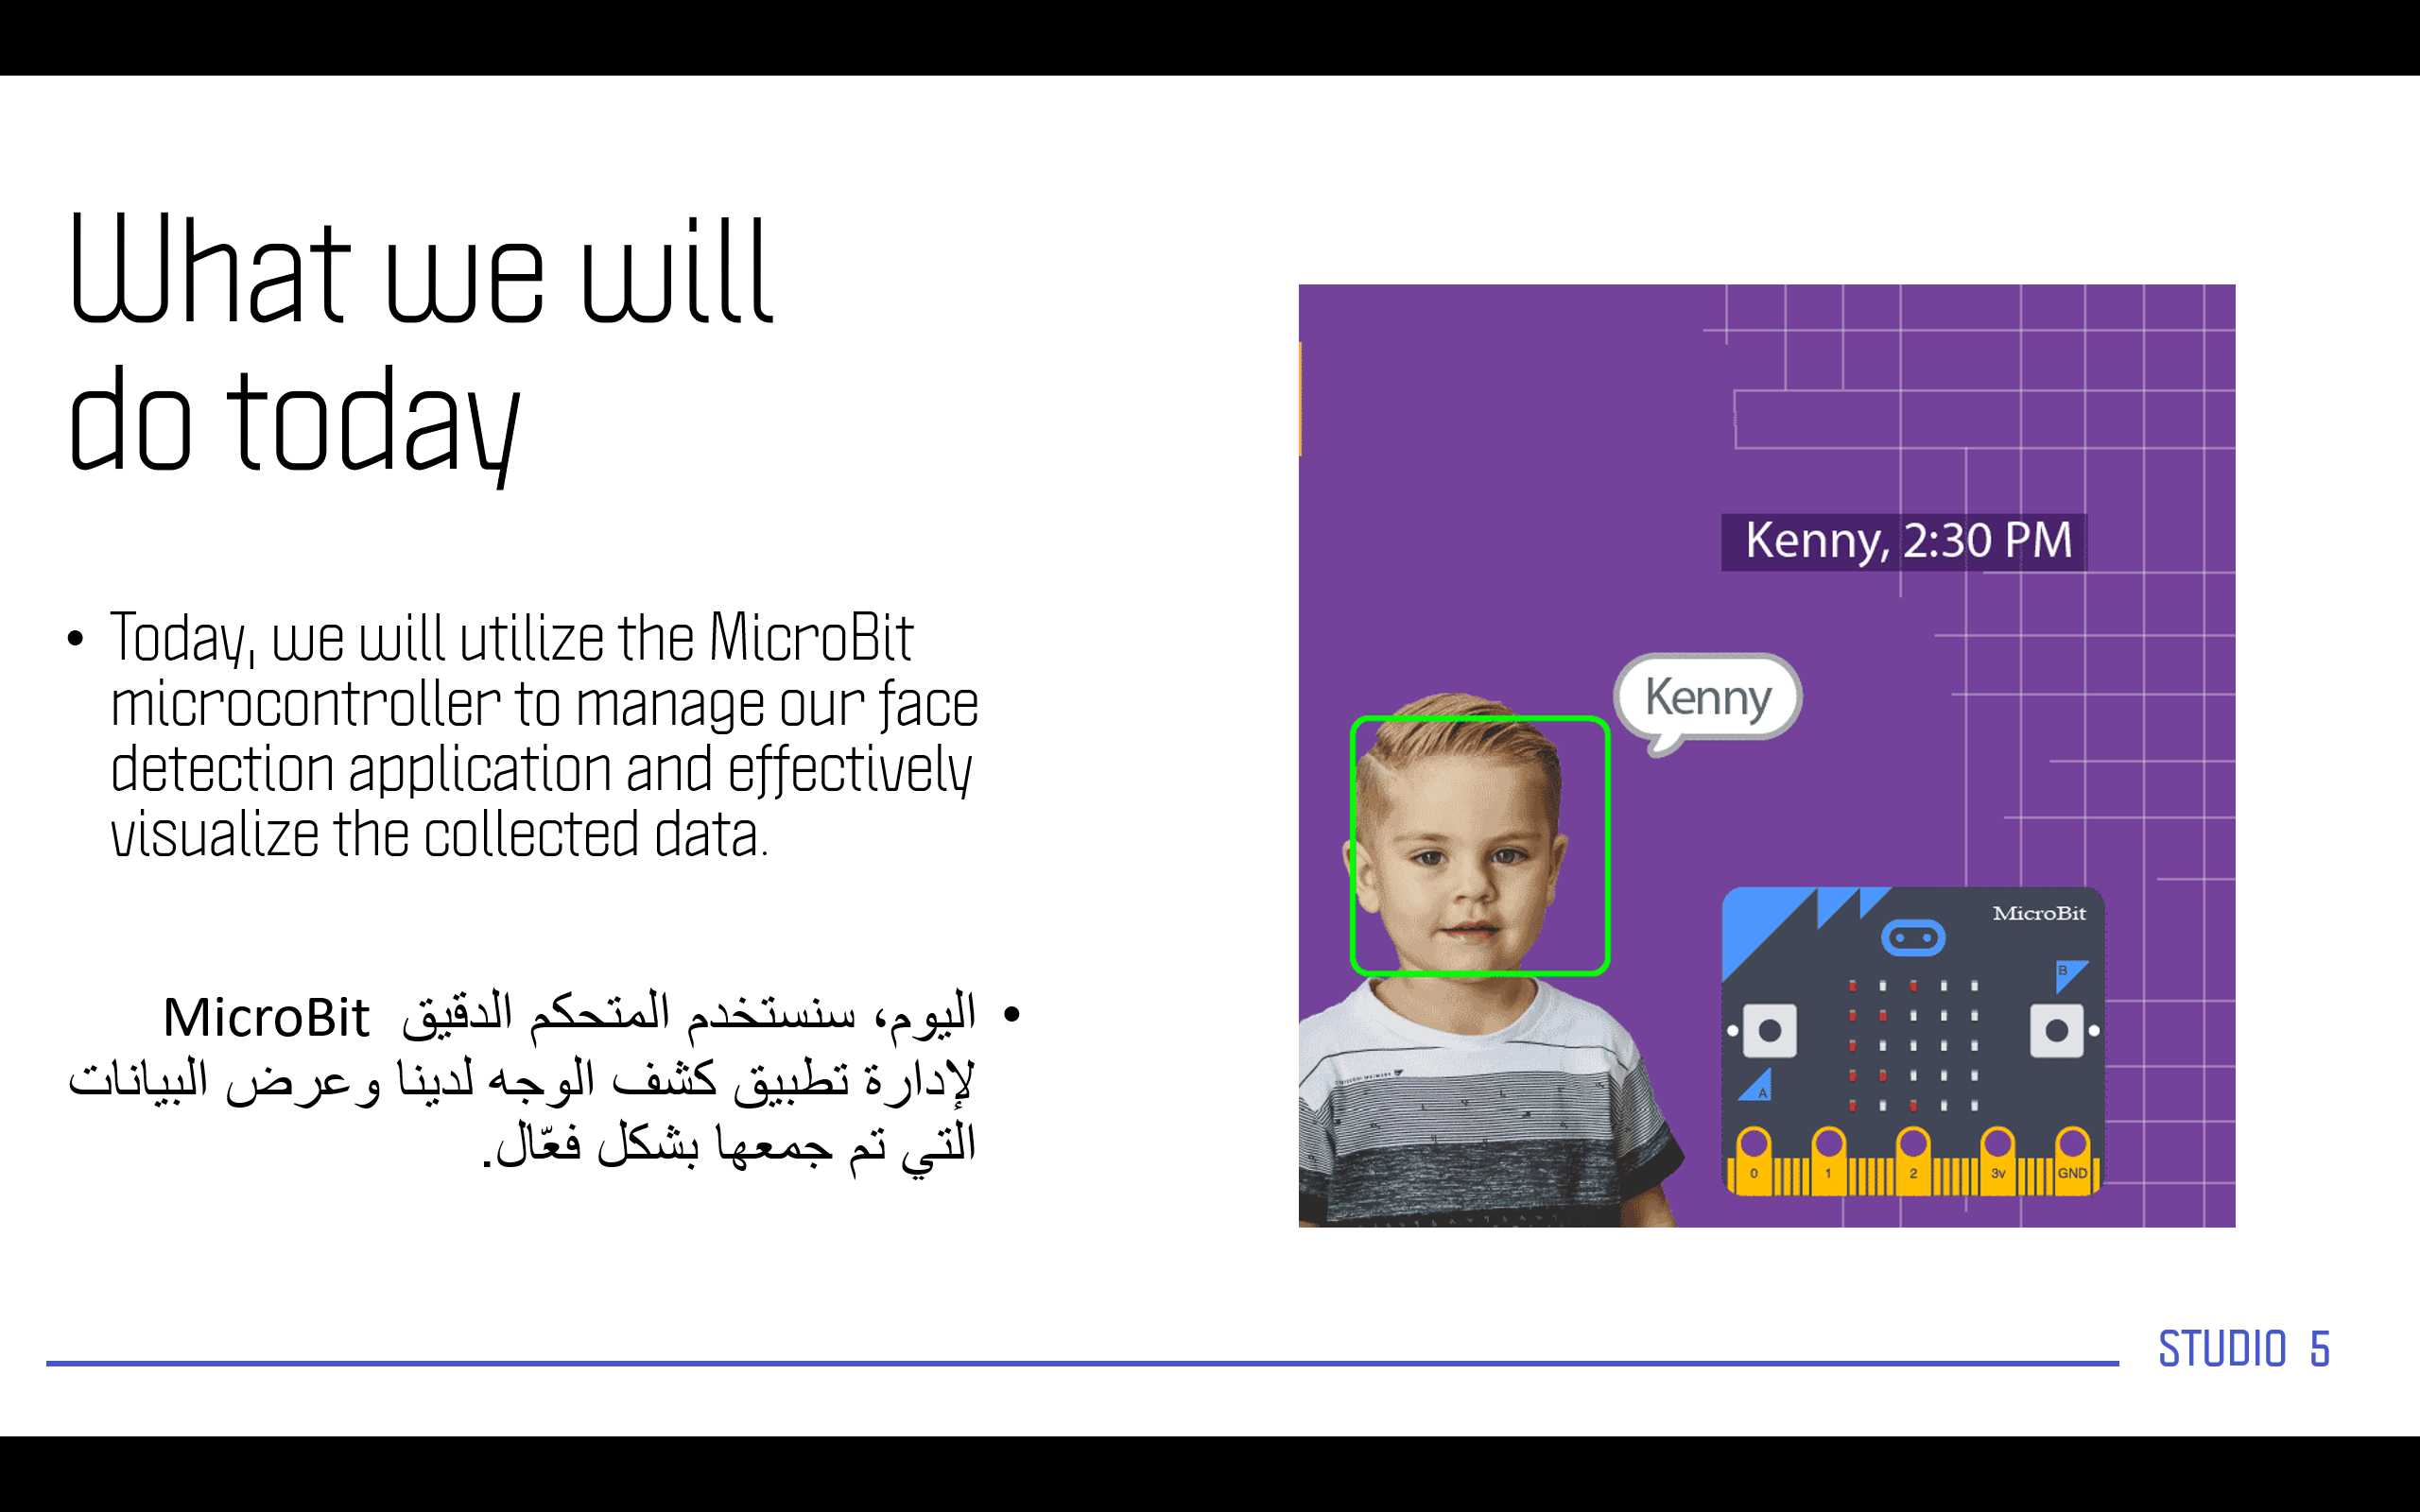
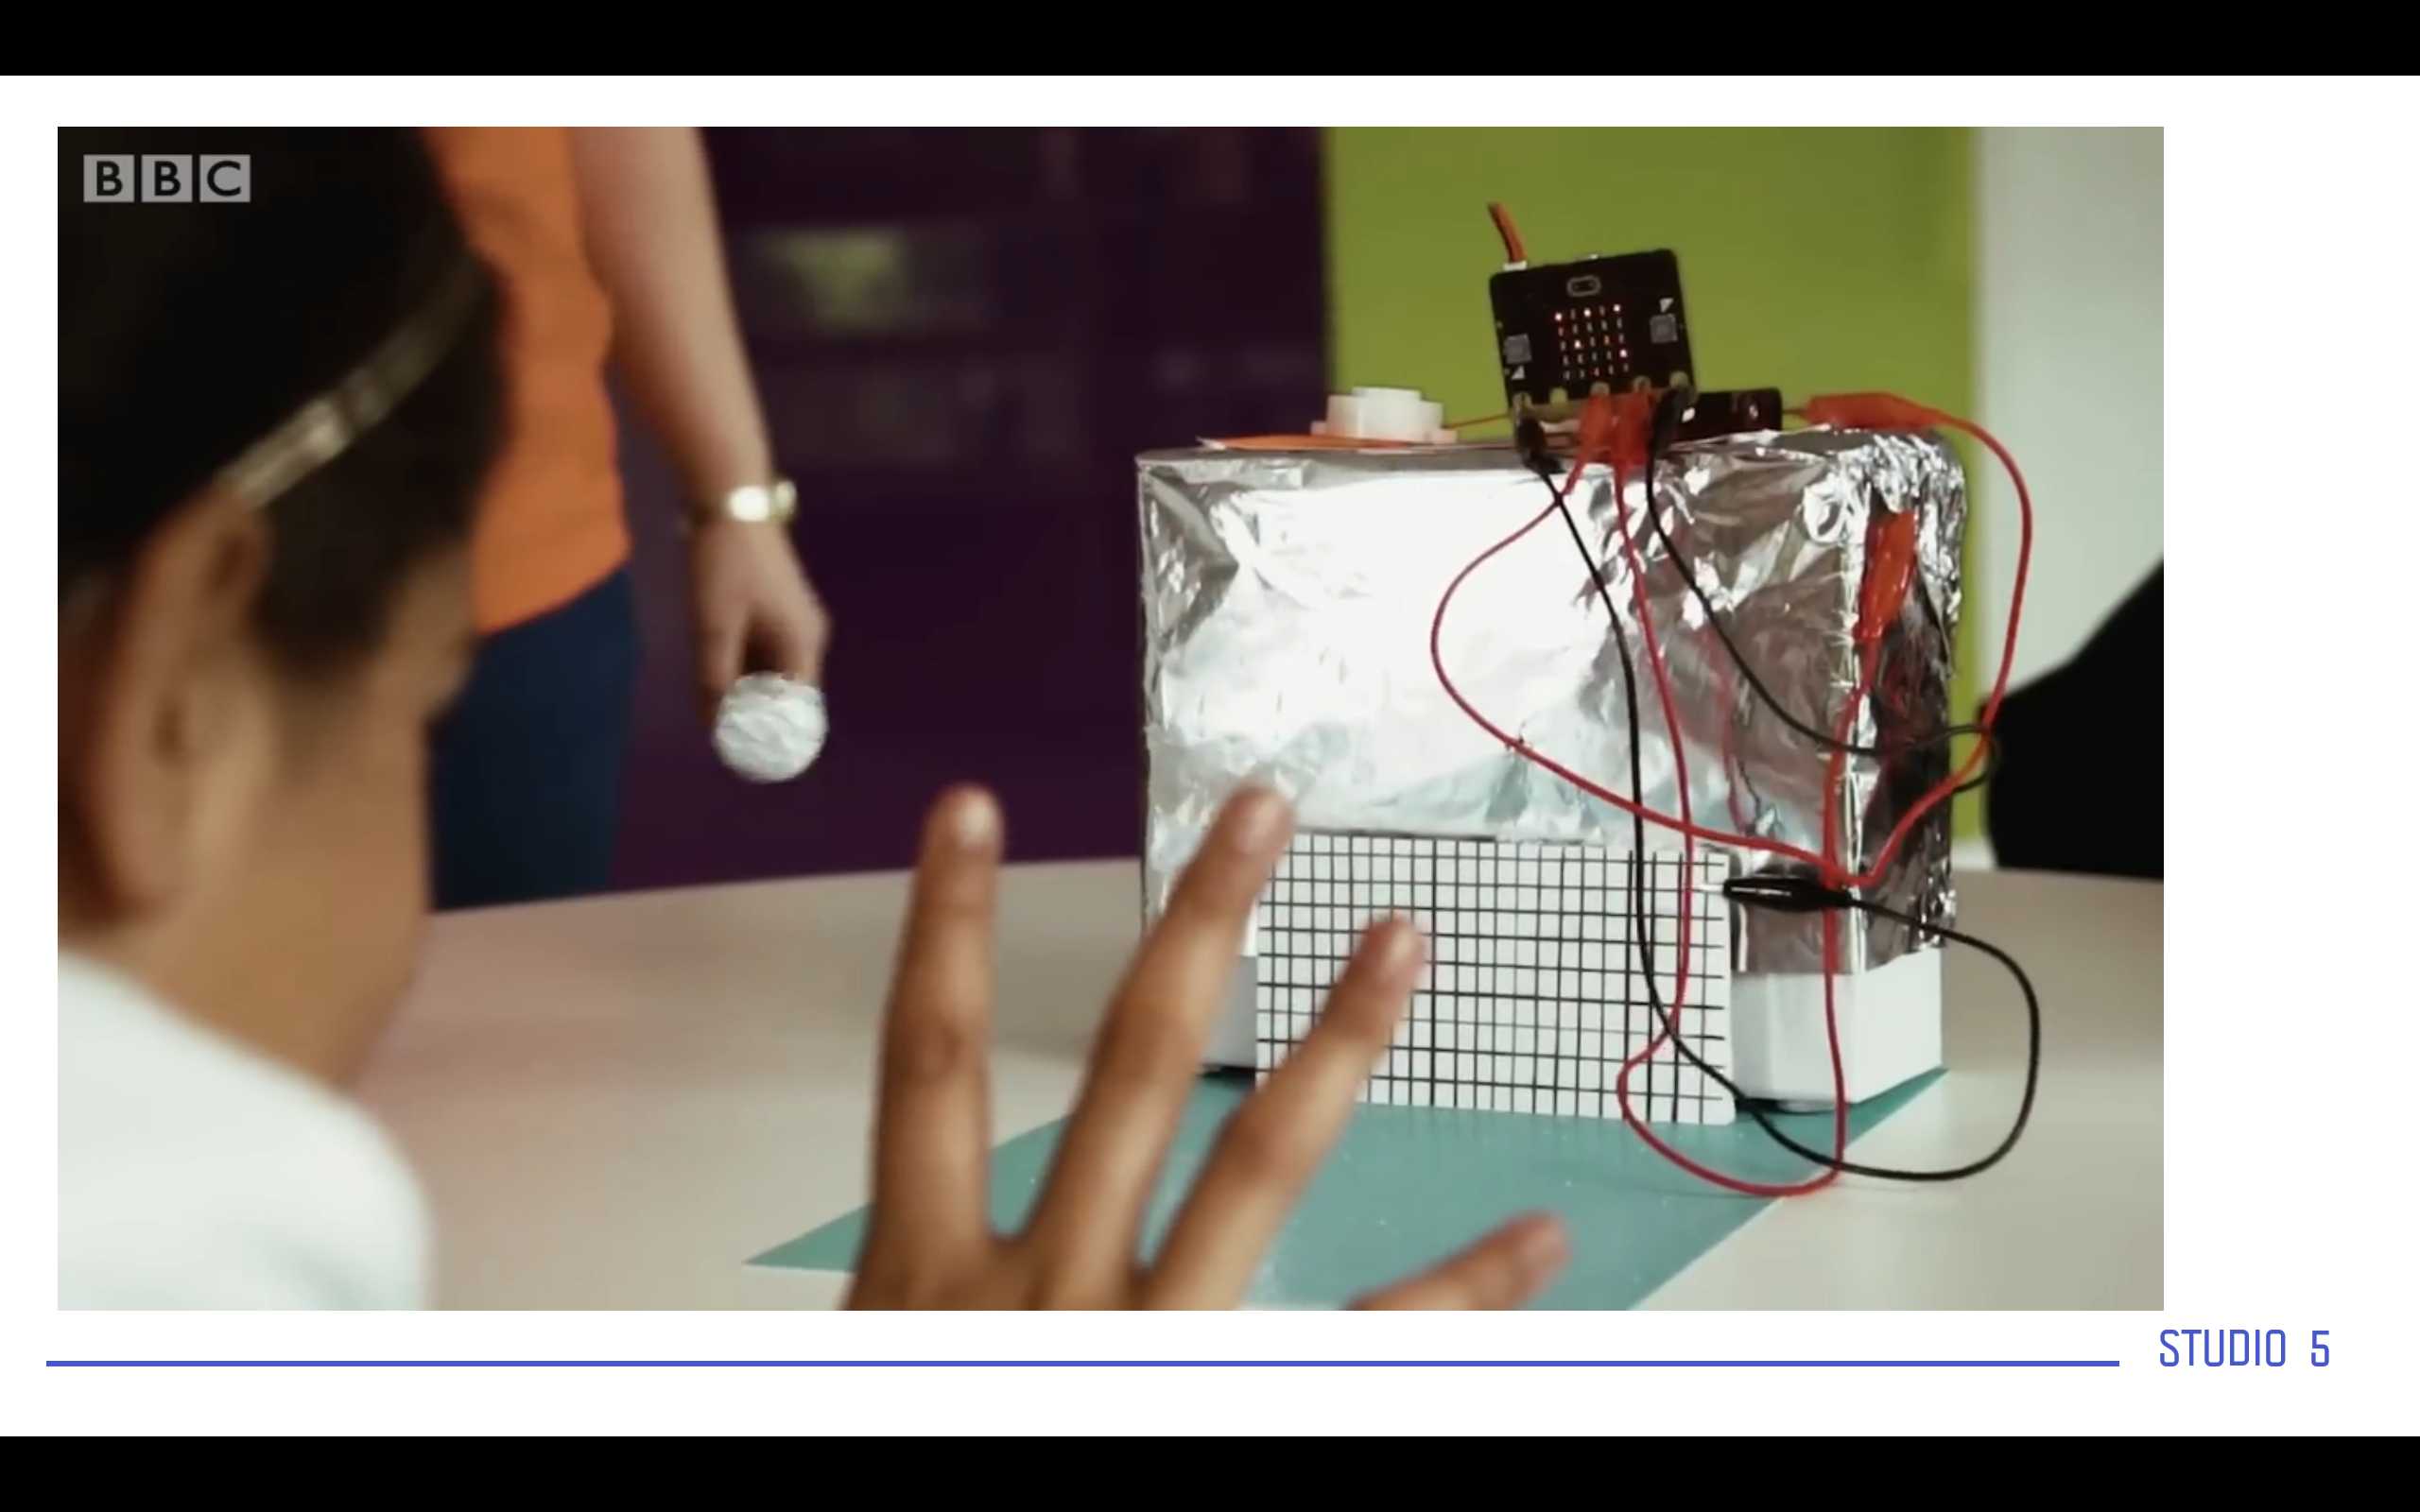
Today we will use the MicroBit MCU, it will be linked with application we created previously; the one we trained to recognize the plastic and the glass.
But this time the microcontroller will be the main controller for the input and the output so we will use the pushbuttons in order to instruct the app when to start recognition and when to test.
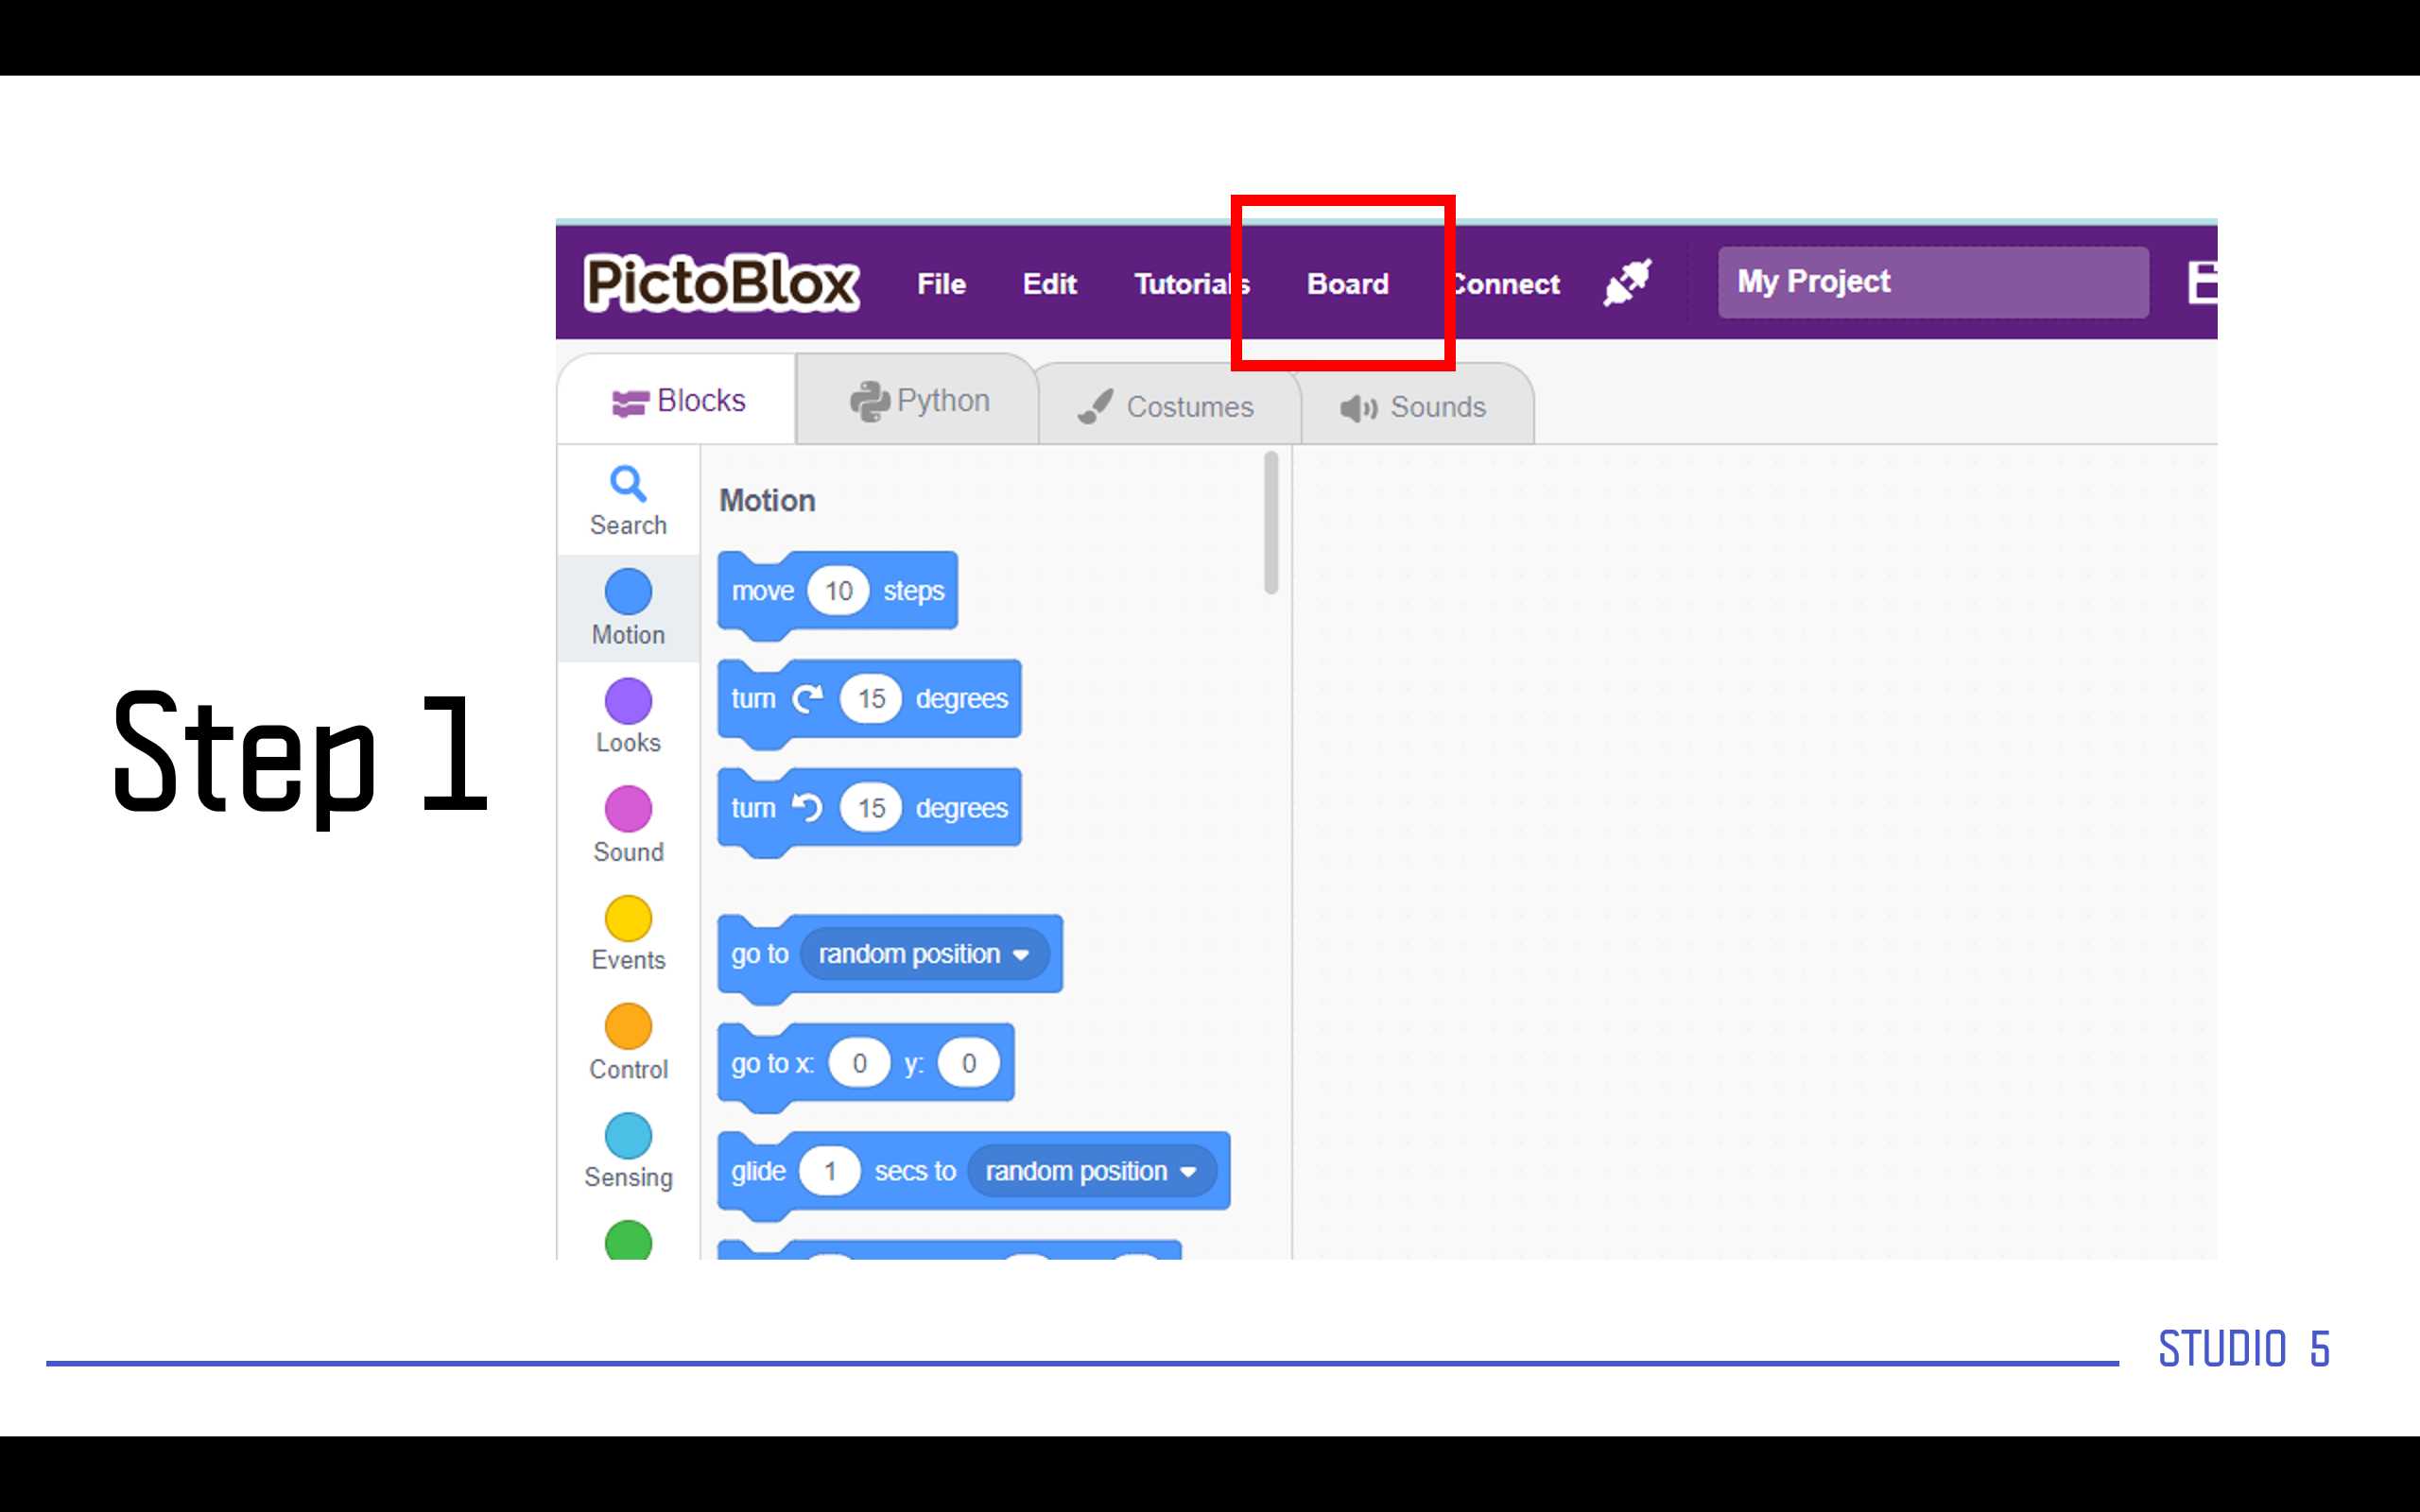
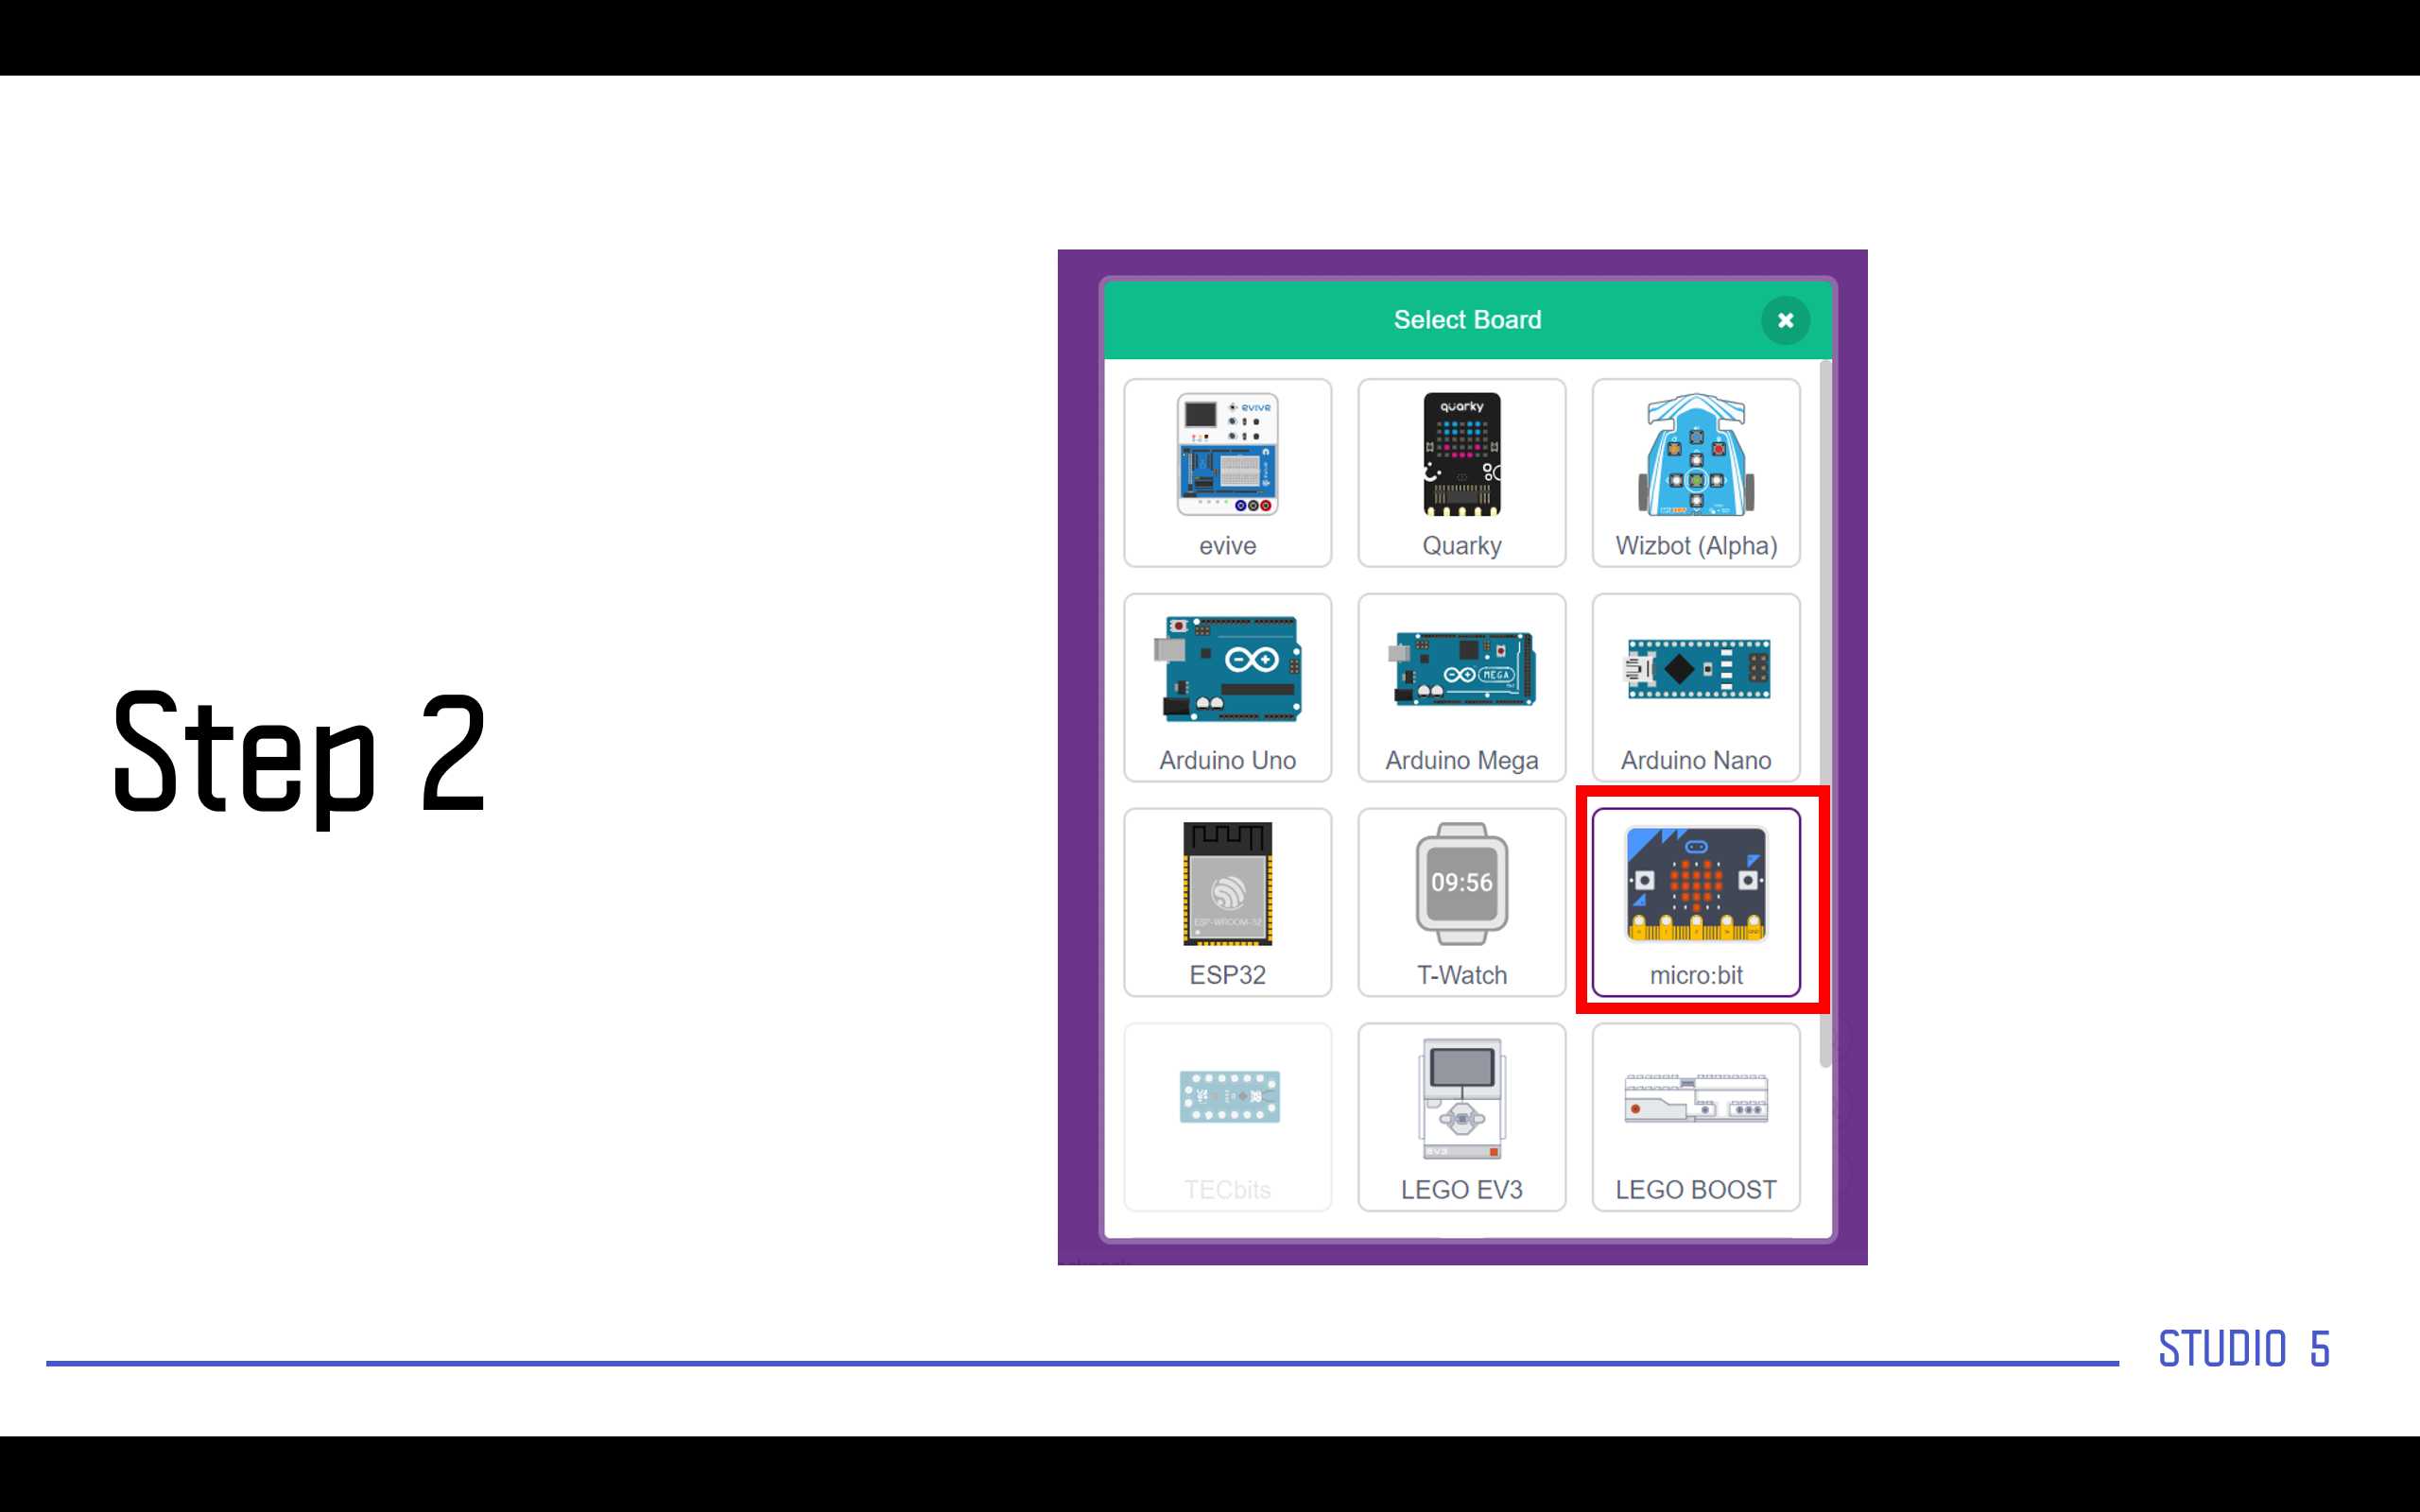
Now I will list the steps to link the MicroBit with the pictoblox.

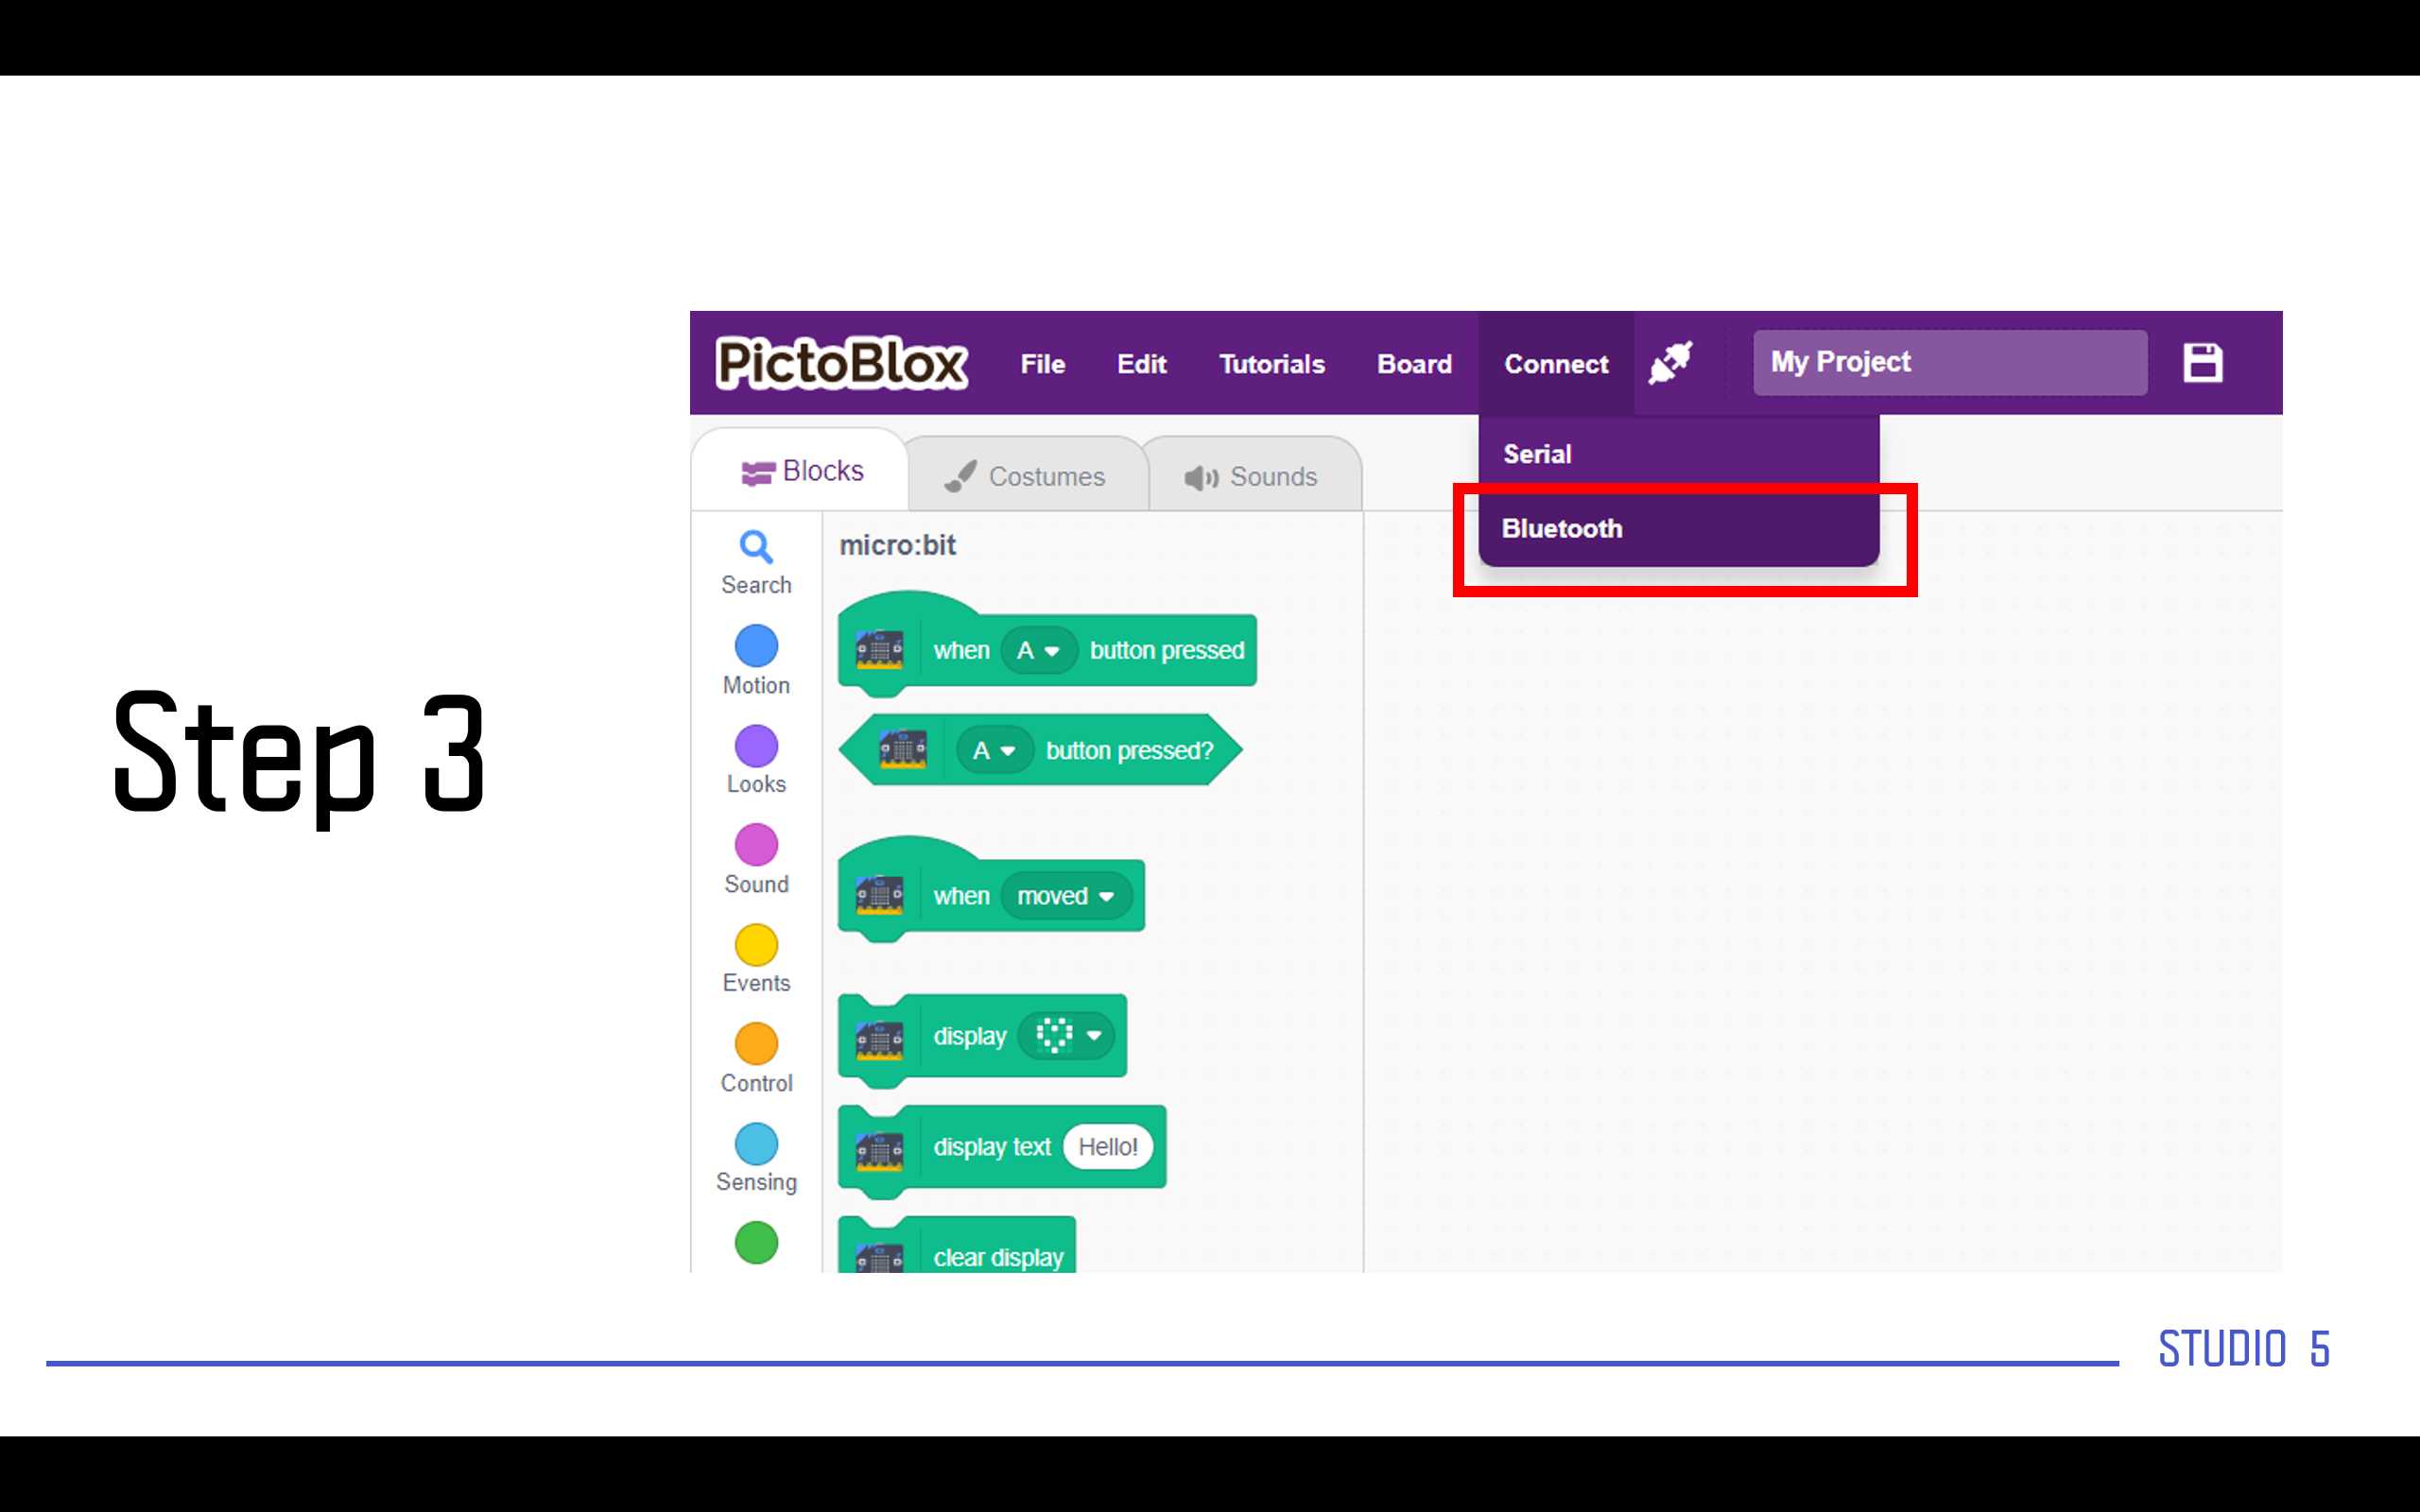
The first step is to choose the board type from the board list.
Then we need to connect it through Bluetooth from the connect list beside board list.
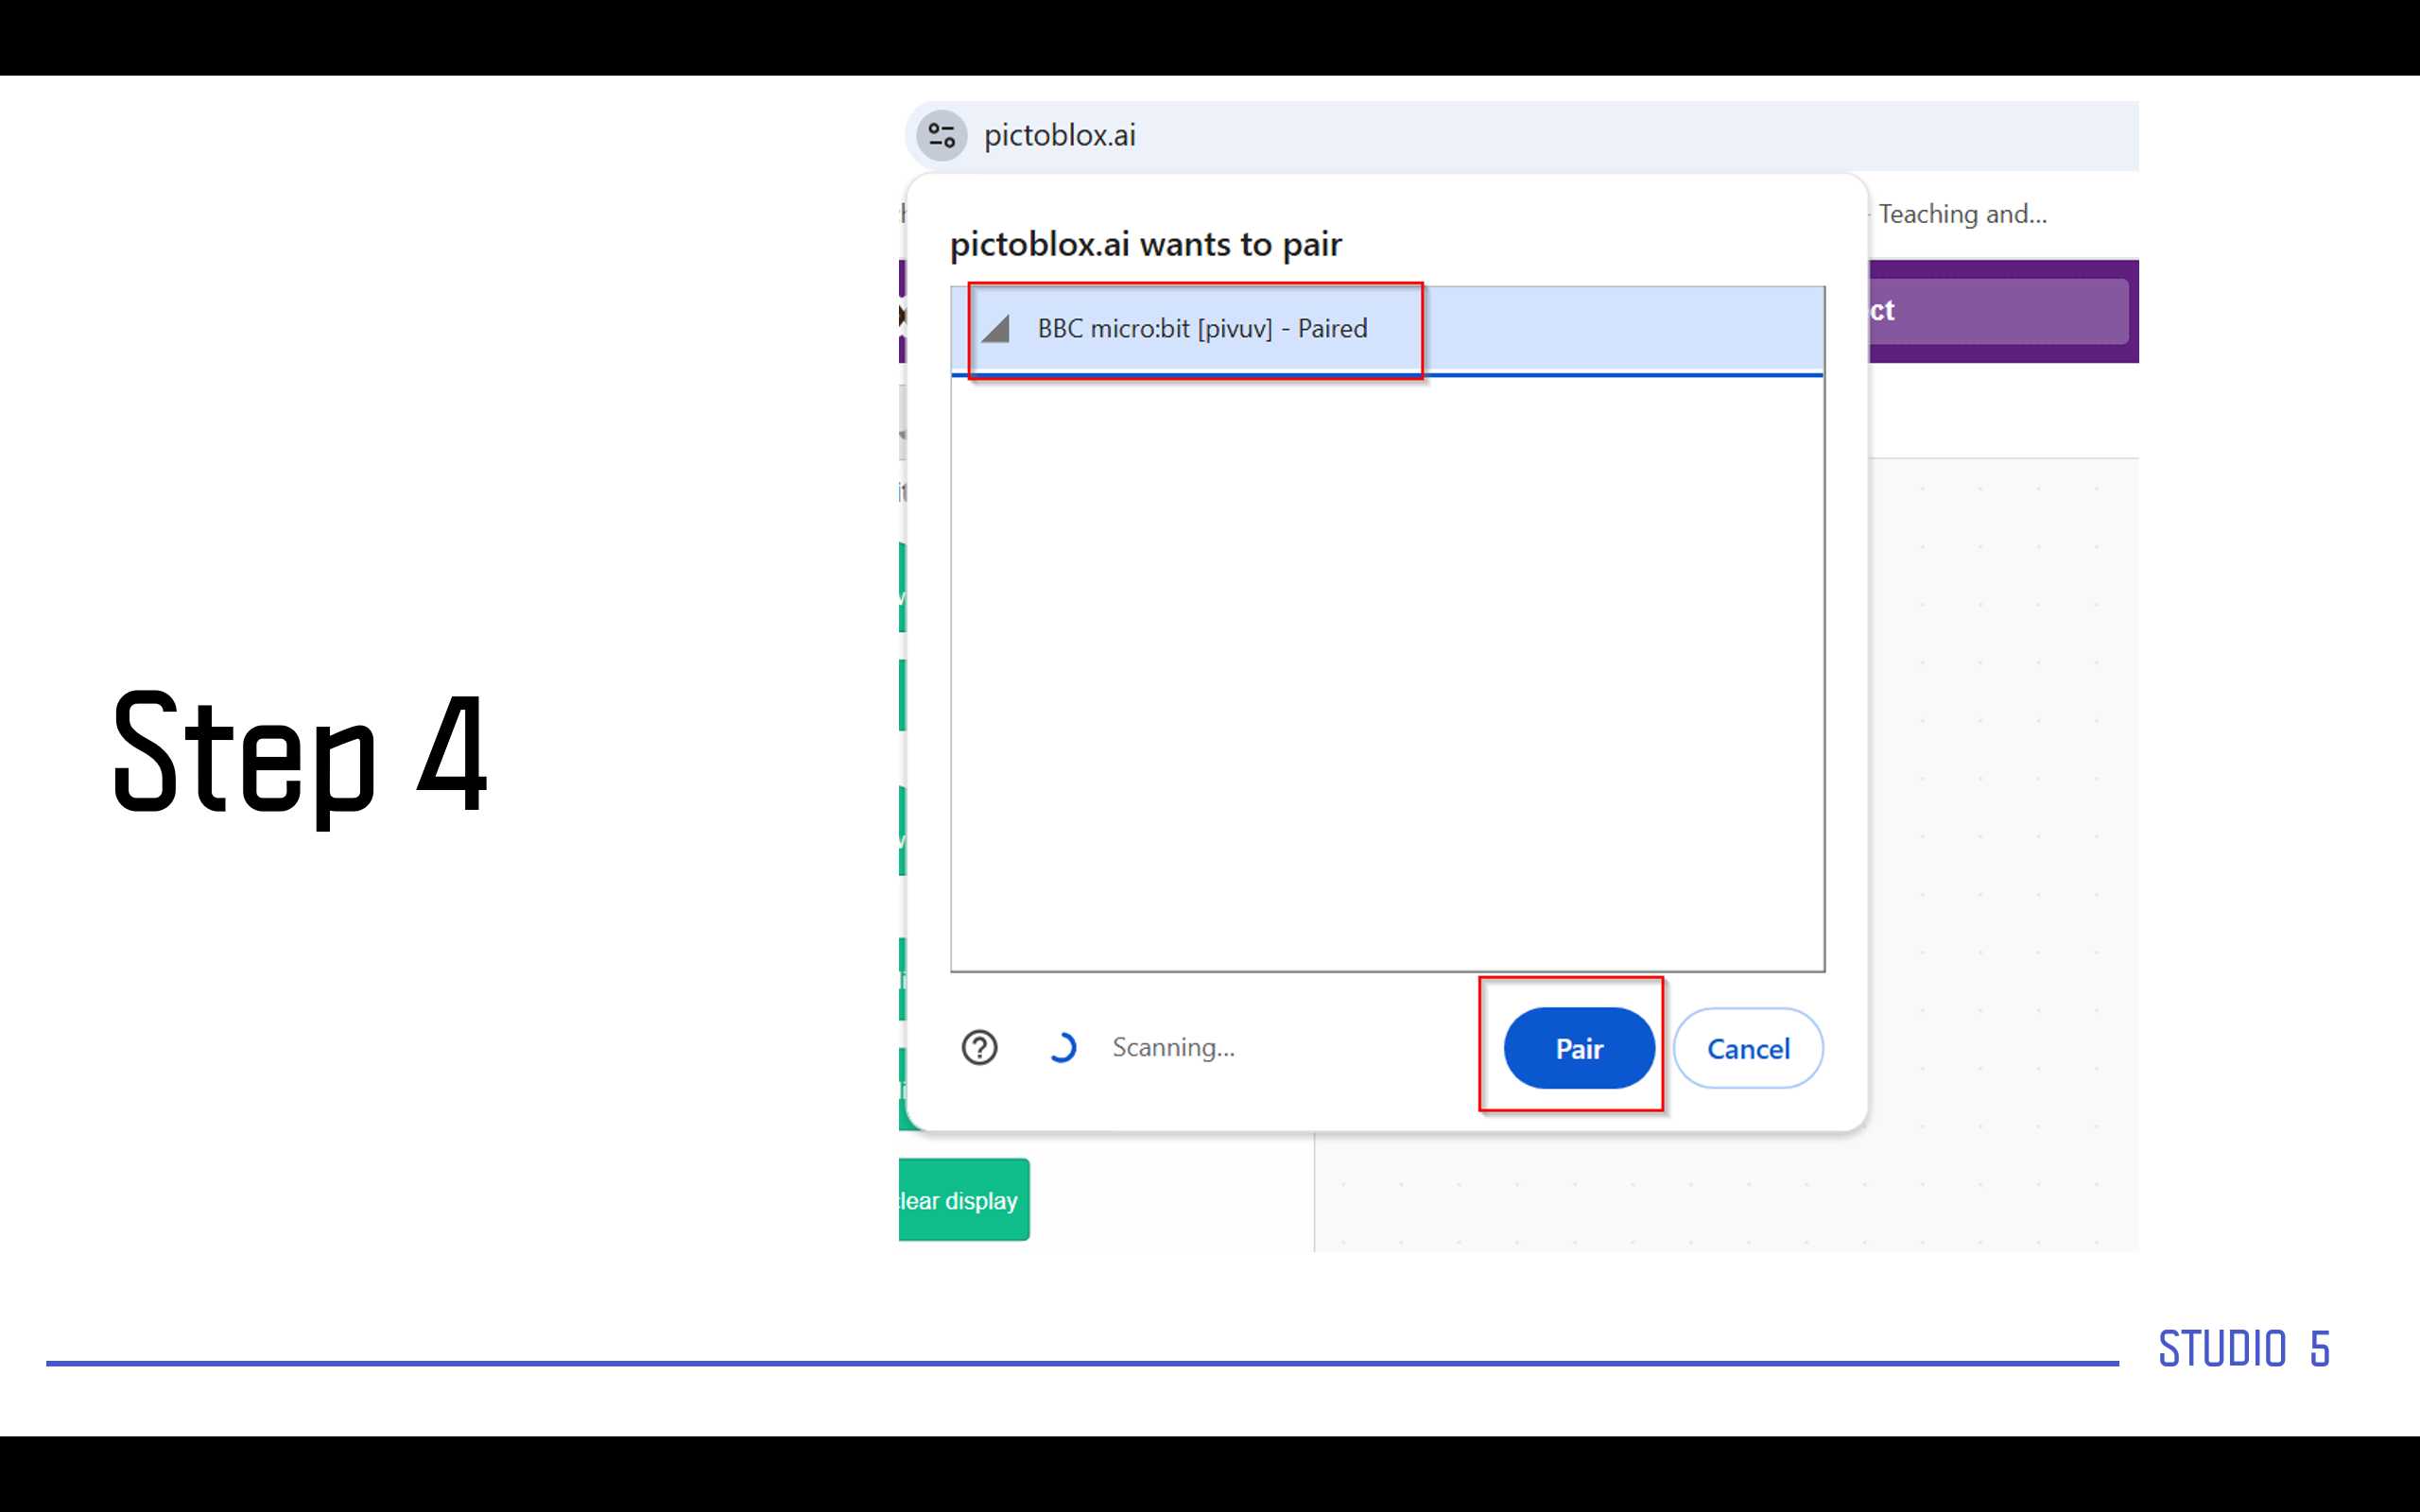
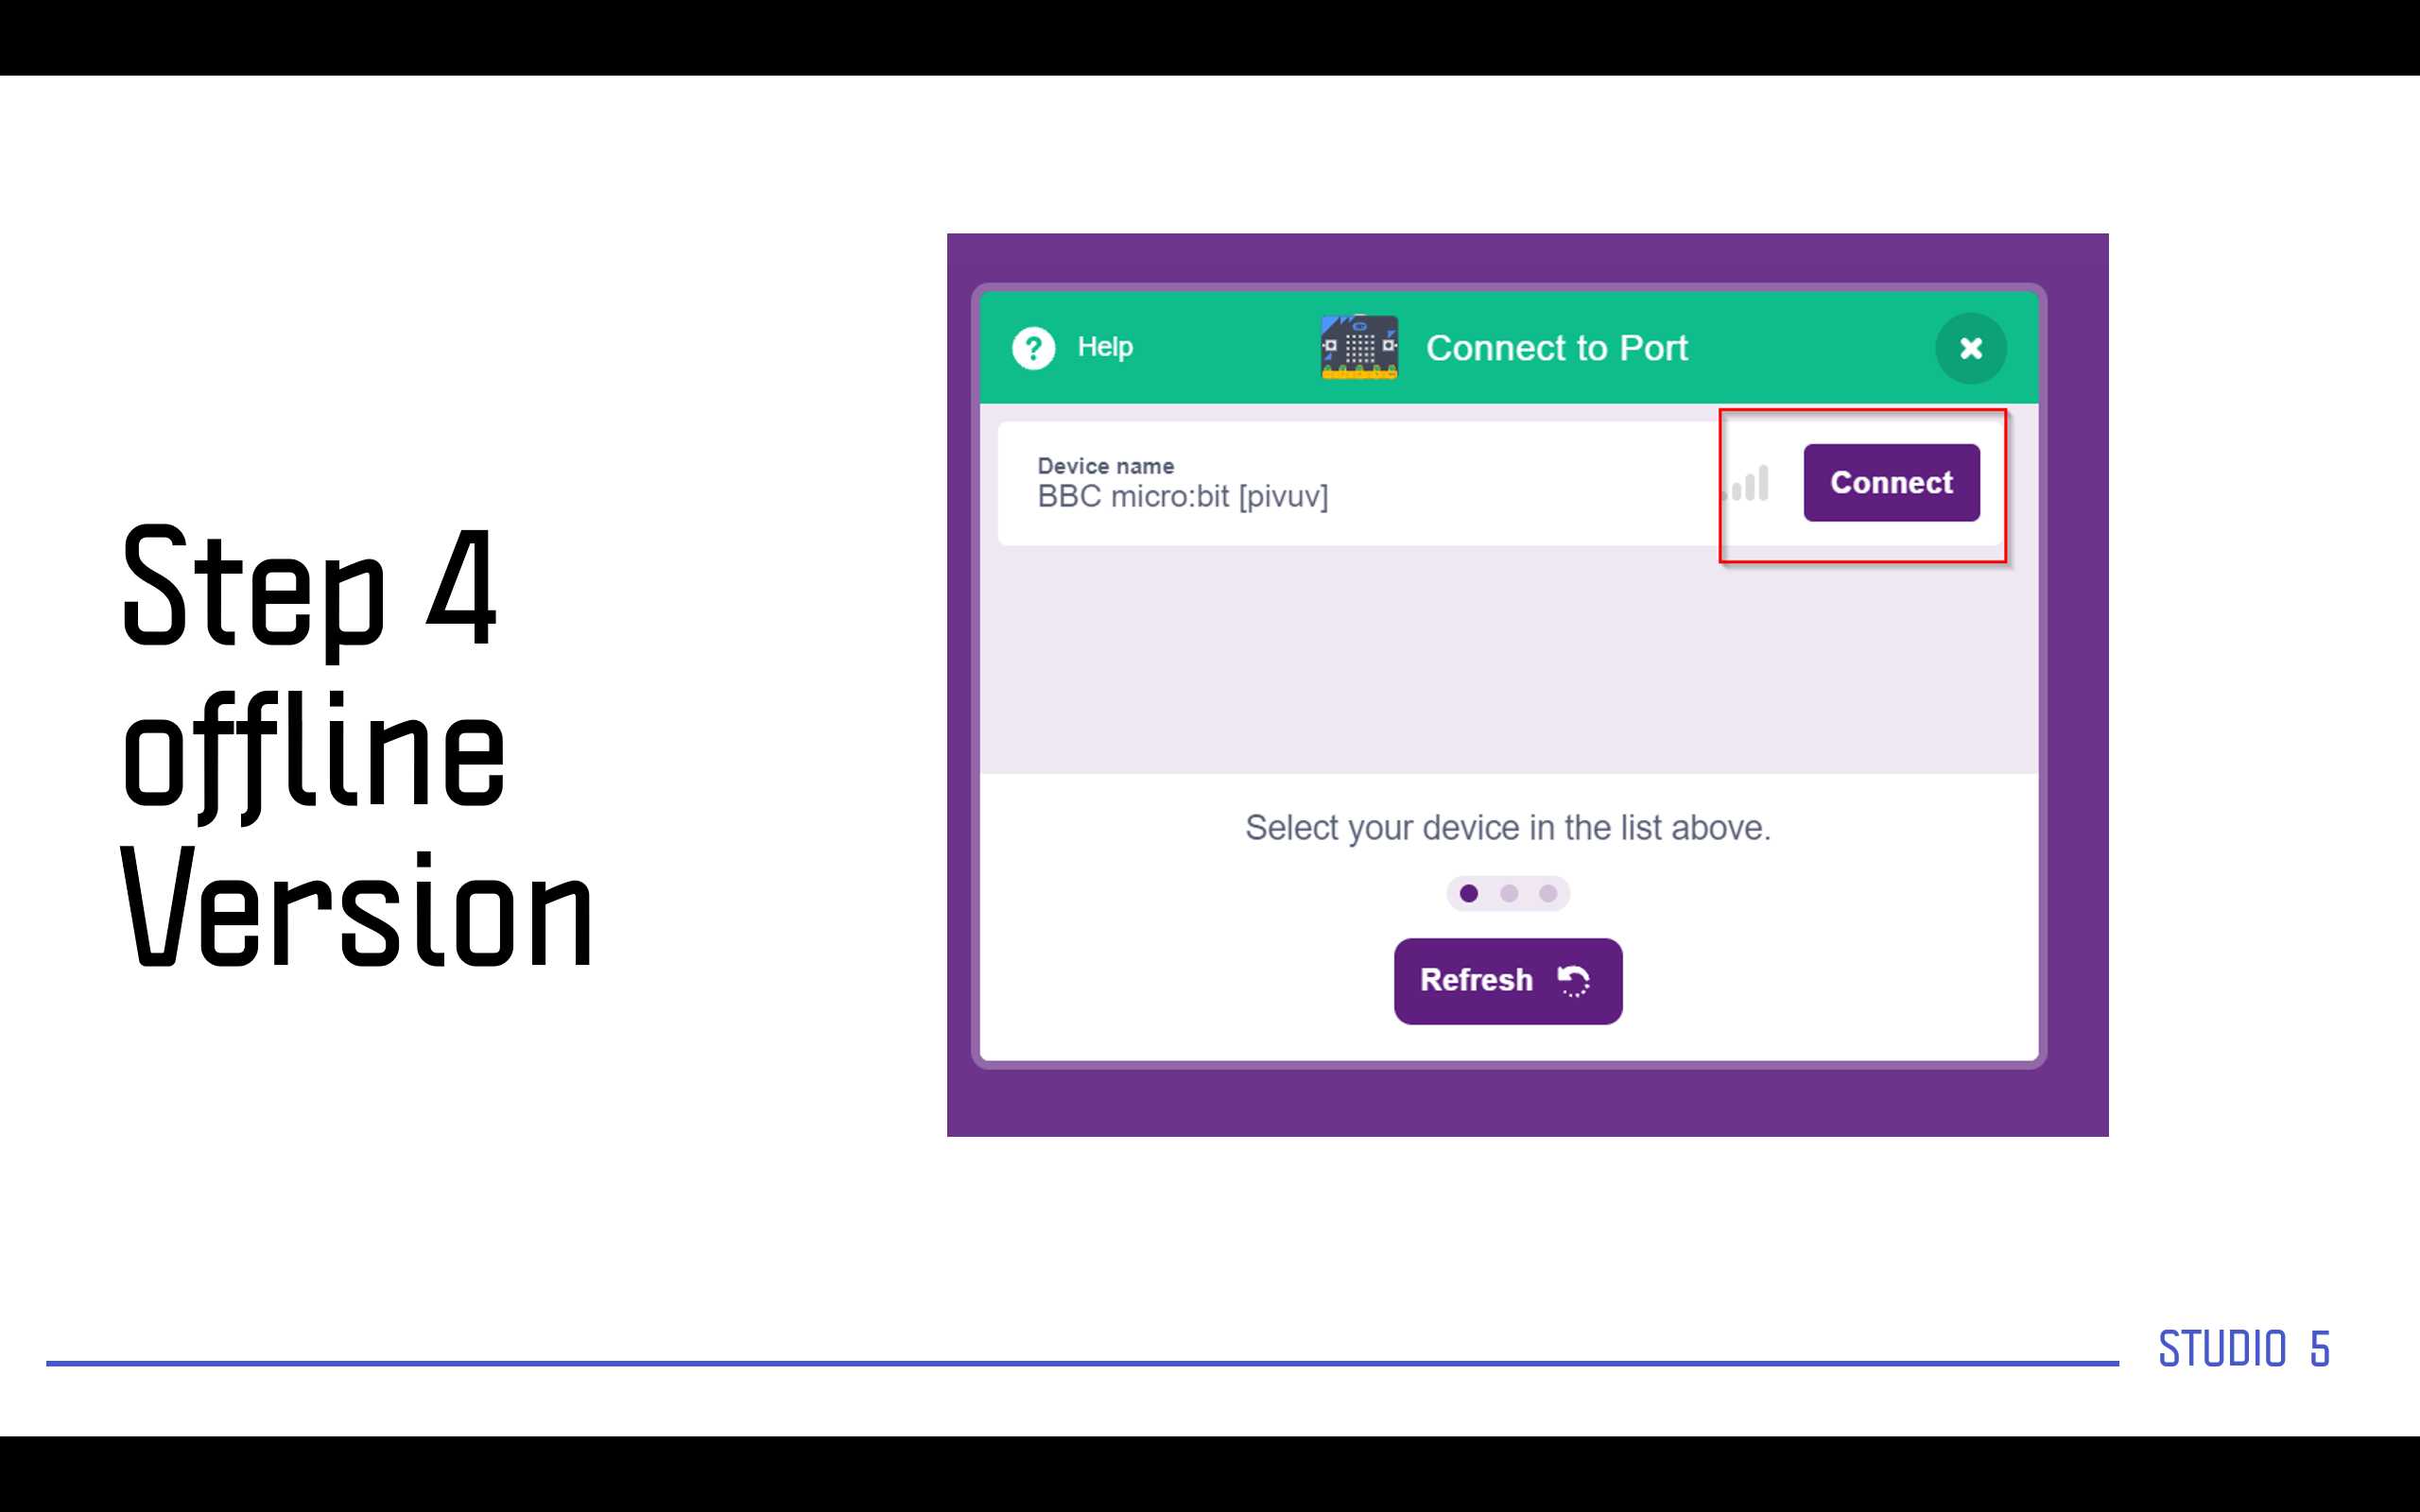
Now for the desktop version.
Now to check the connectivity we can check the beside logo near to connect.
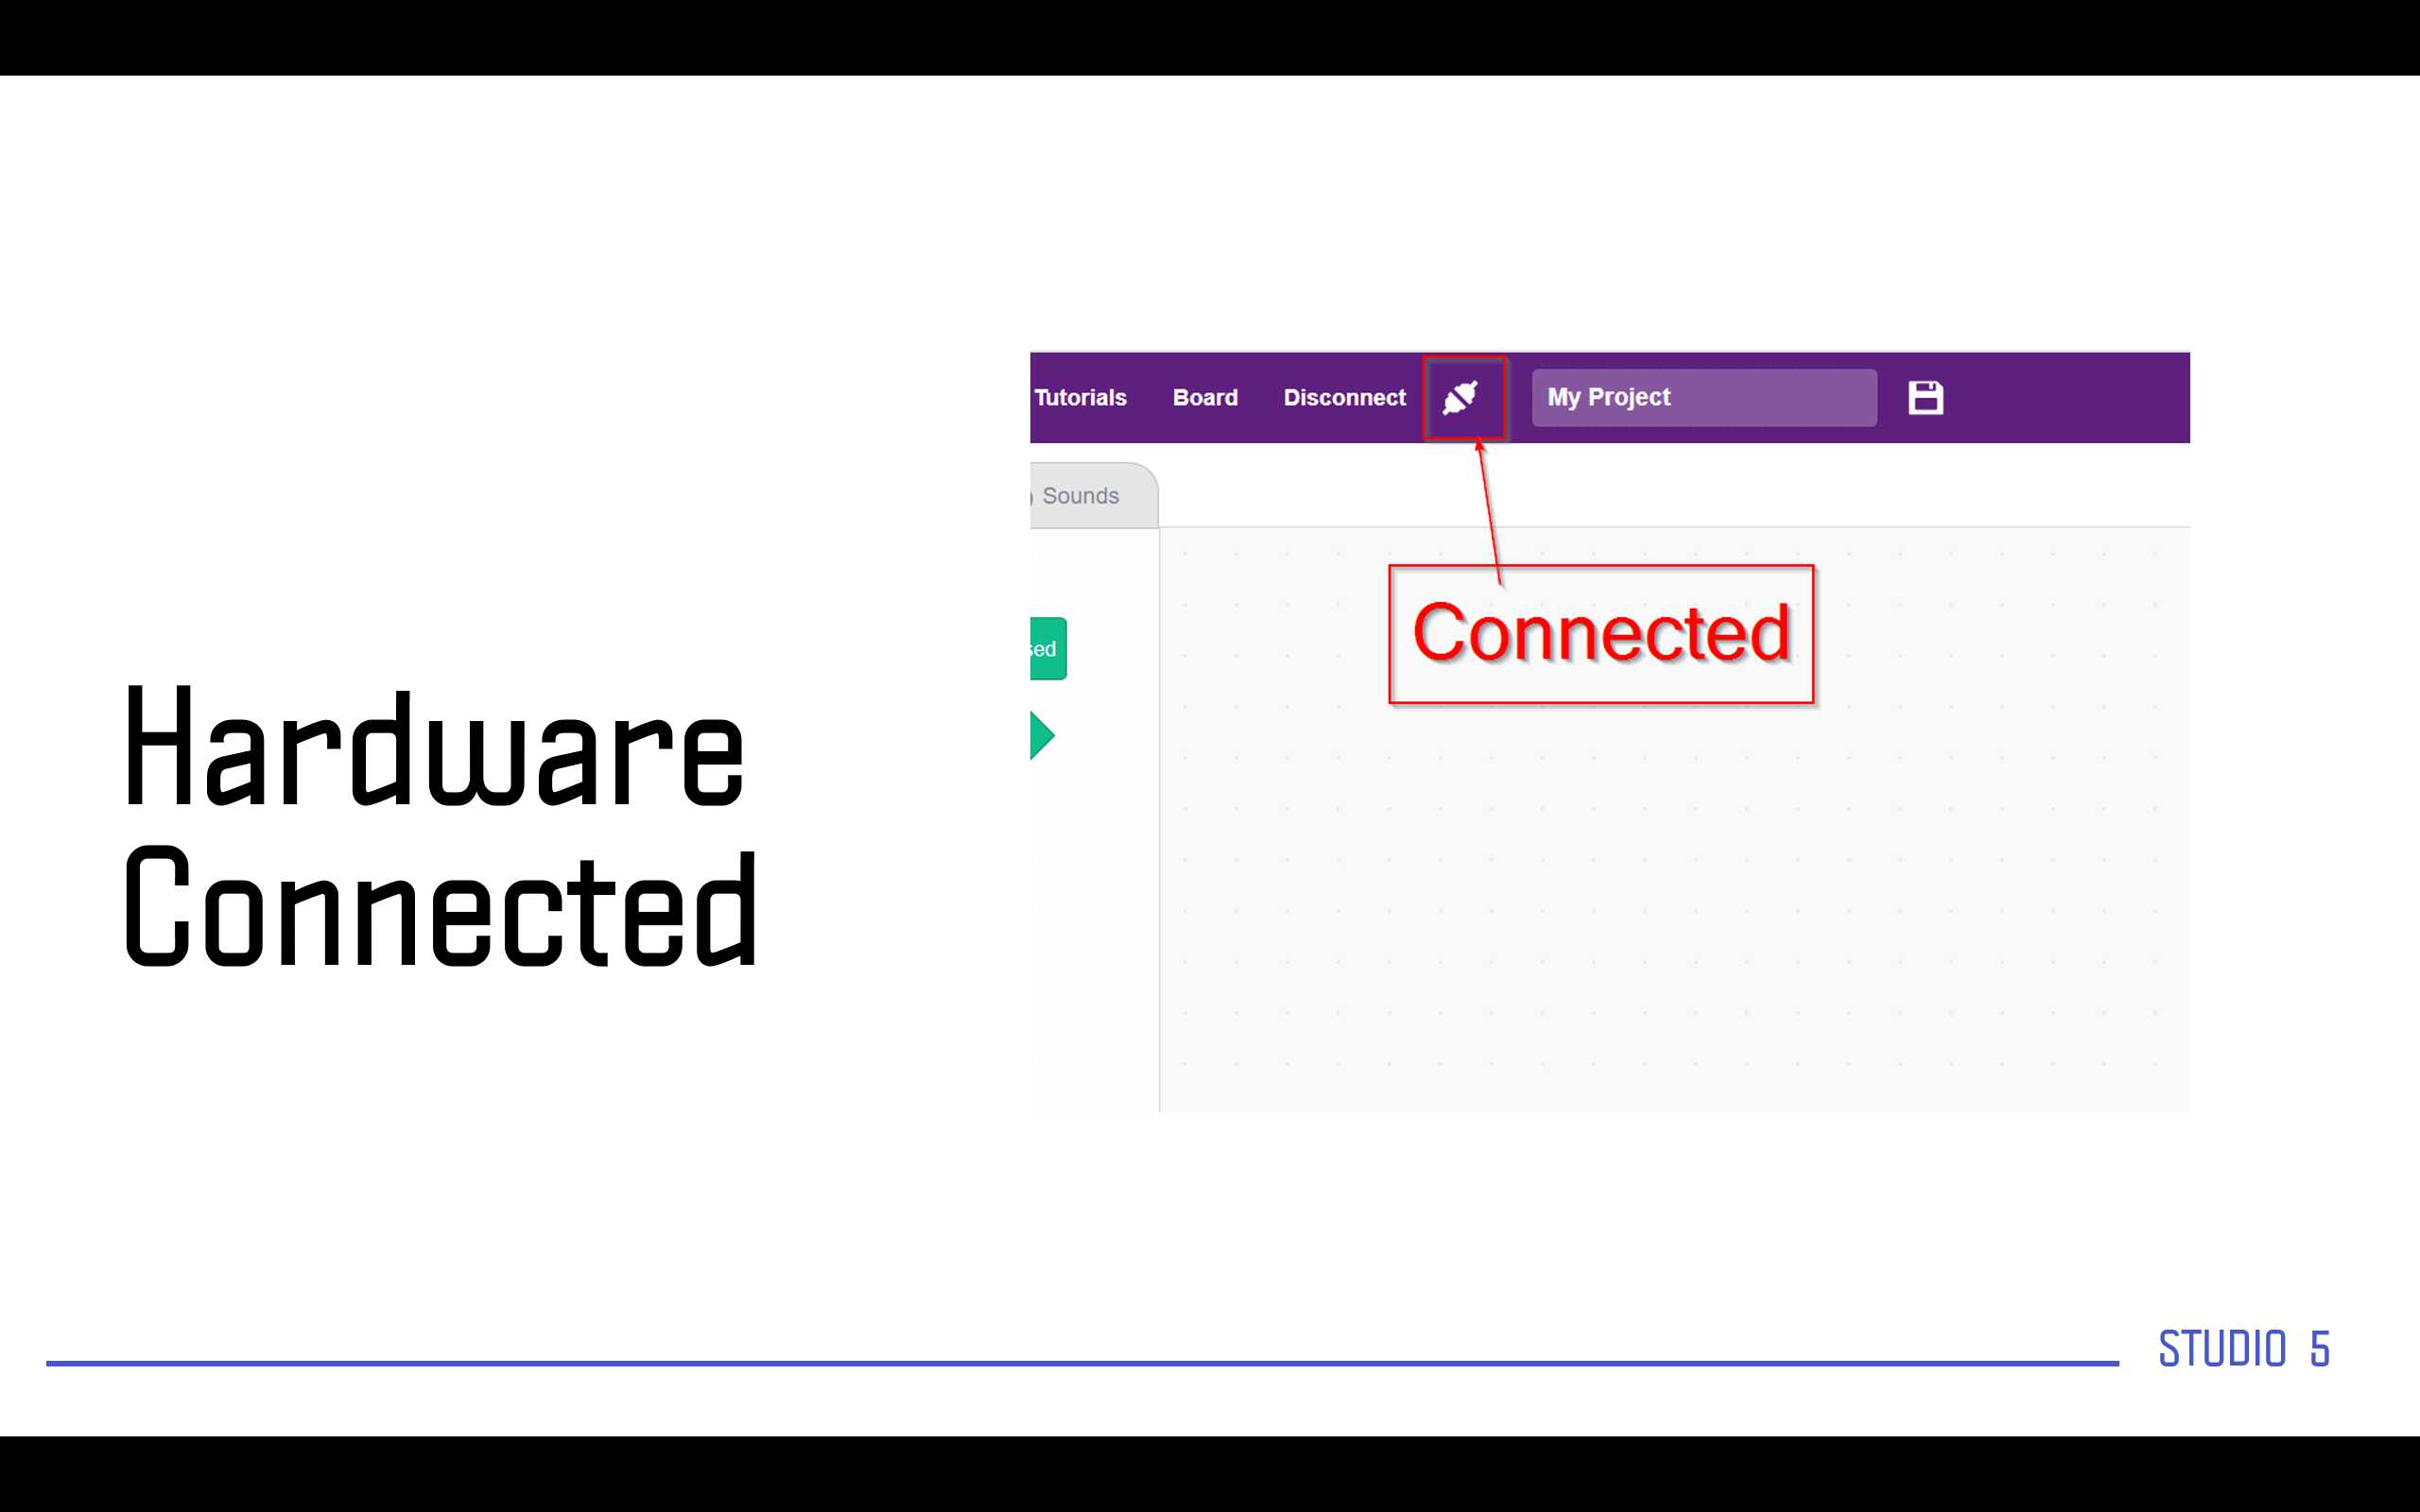
At this point we have the hardware connected and also the library installed for the coding.
Having trouble? Let us know by completing the form below. We'll do our best to get your issues resolved quickly.
"*" indicates required fields