- Loading…

During the first course of Arduino we introduce the children to the use of an Arduino and breadboard.
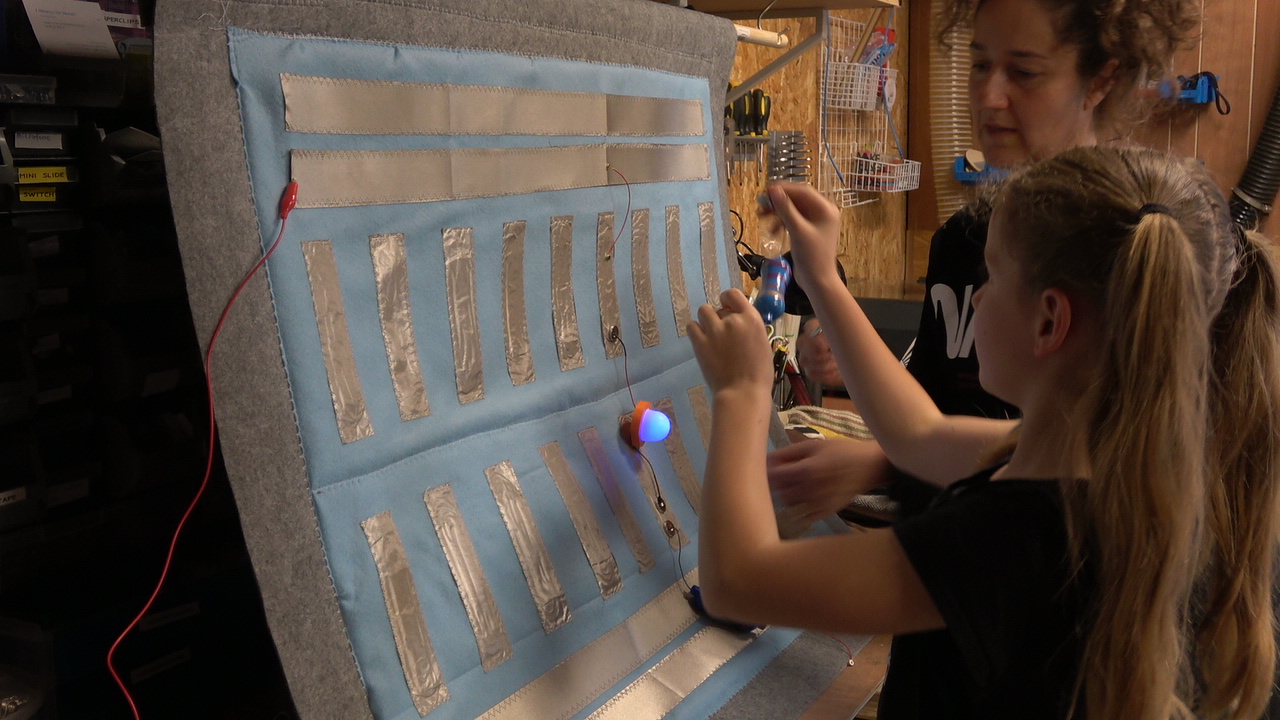
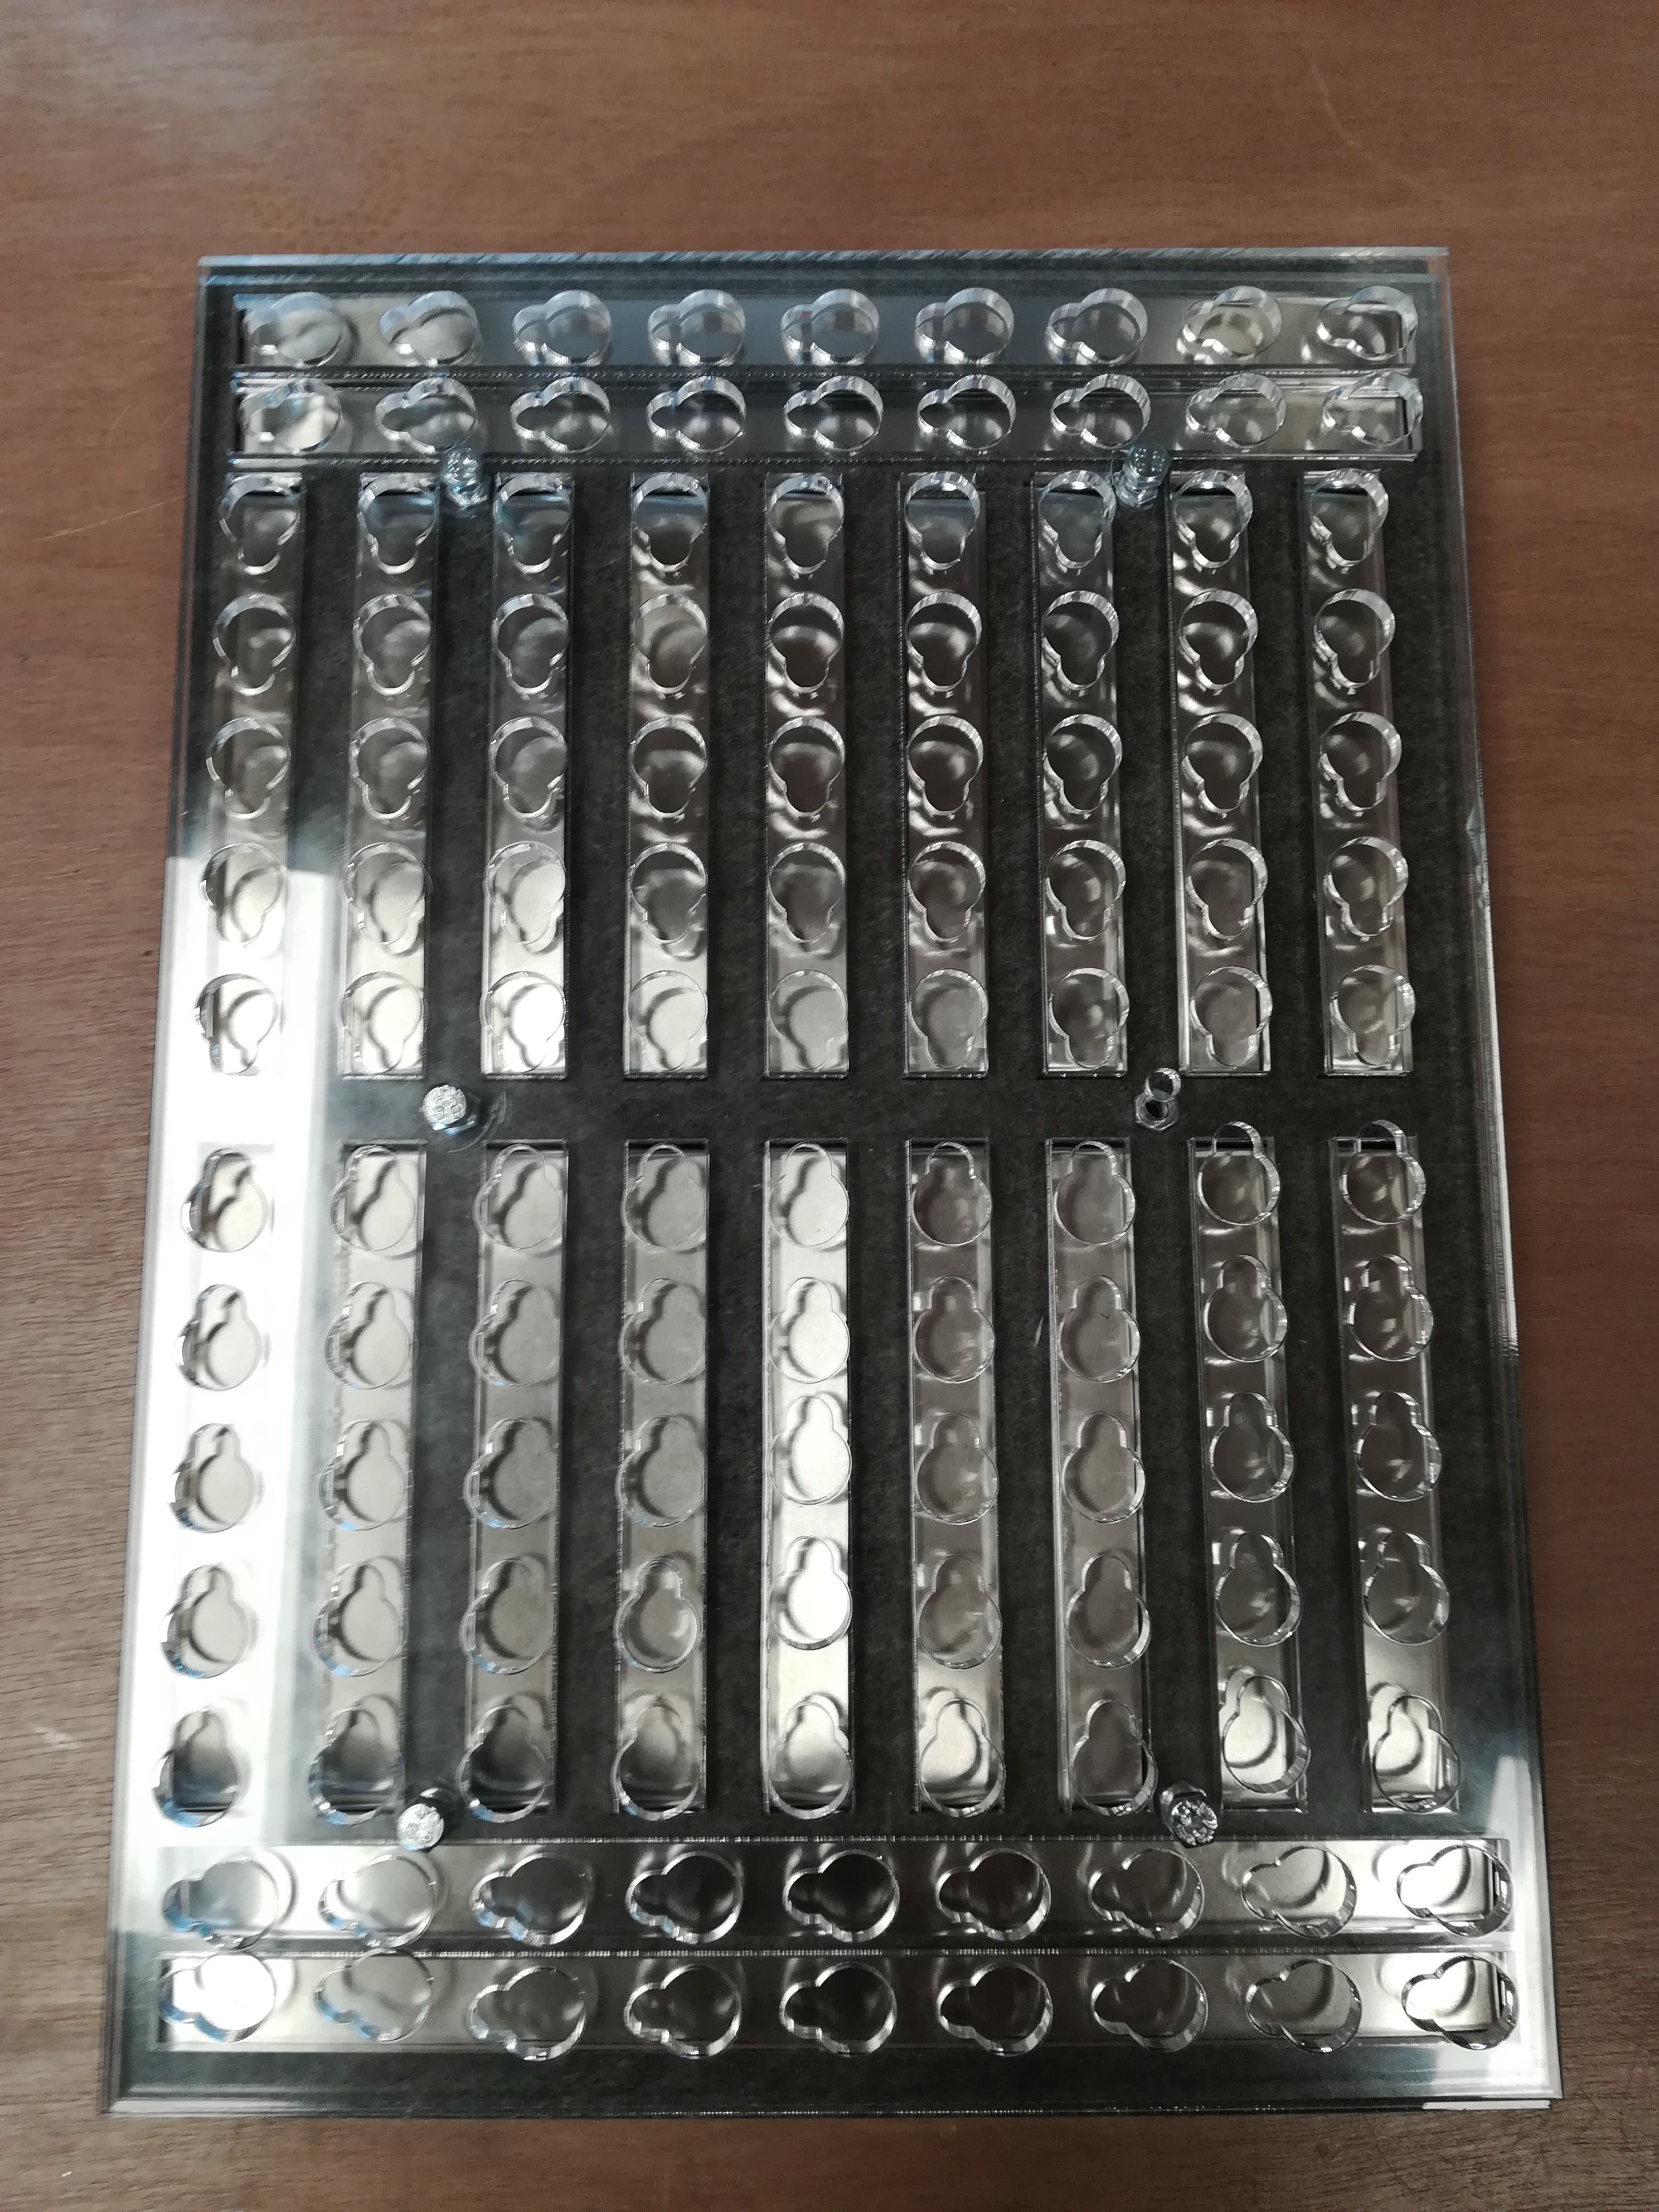
In order to do this we start with a general overview of what programming is, what a circuit is, what you can do with it, how a breadboard and arduino works. For this we developed a giant breadboard for the teacher, wich is the core of why we are submitting this lesson plan.
After that we let them make their first circuits on giant breadboards (A4 sized) while helping out and teaching on the giant teachers breadboard.
As not all children are interested in programming, we guide the whole group into booklet 3. After that they are free to choose if they want to keep practicing and learning or make another assignment with digital fabrication tools.
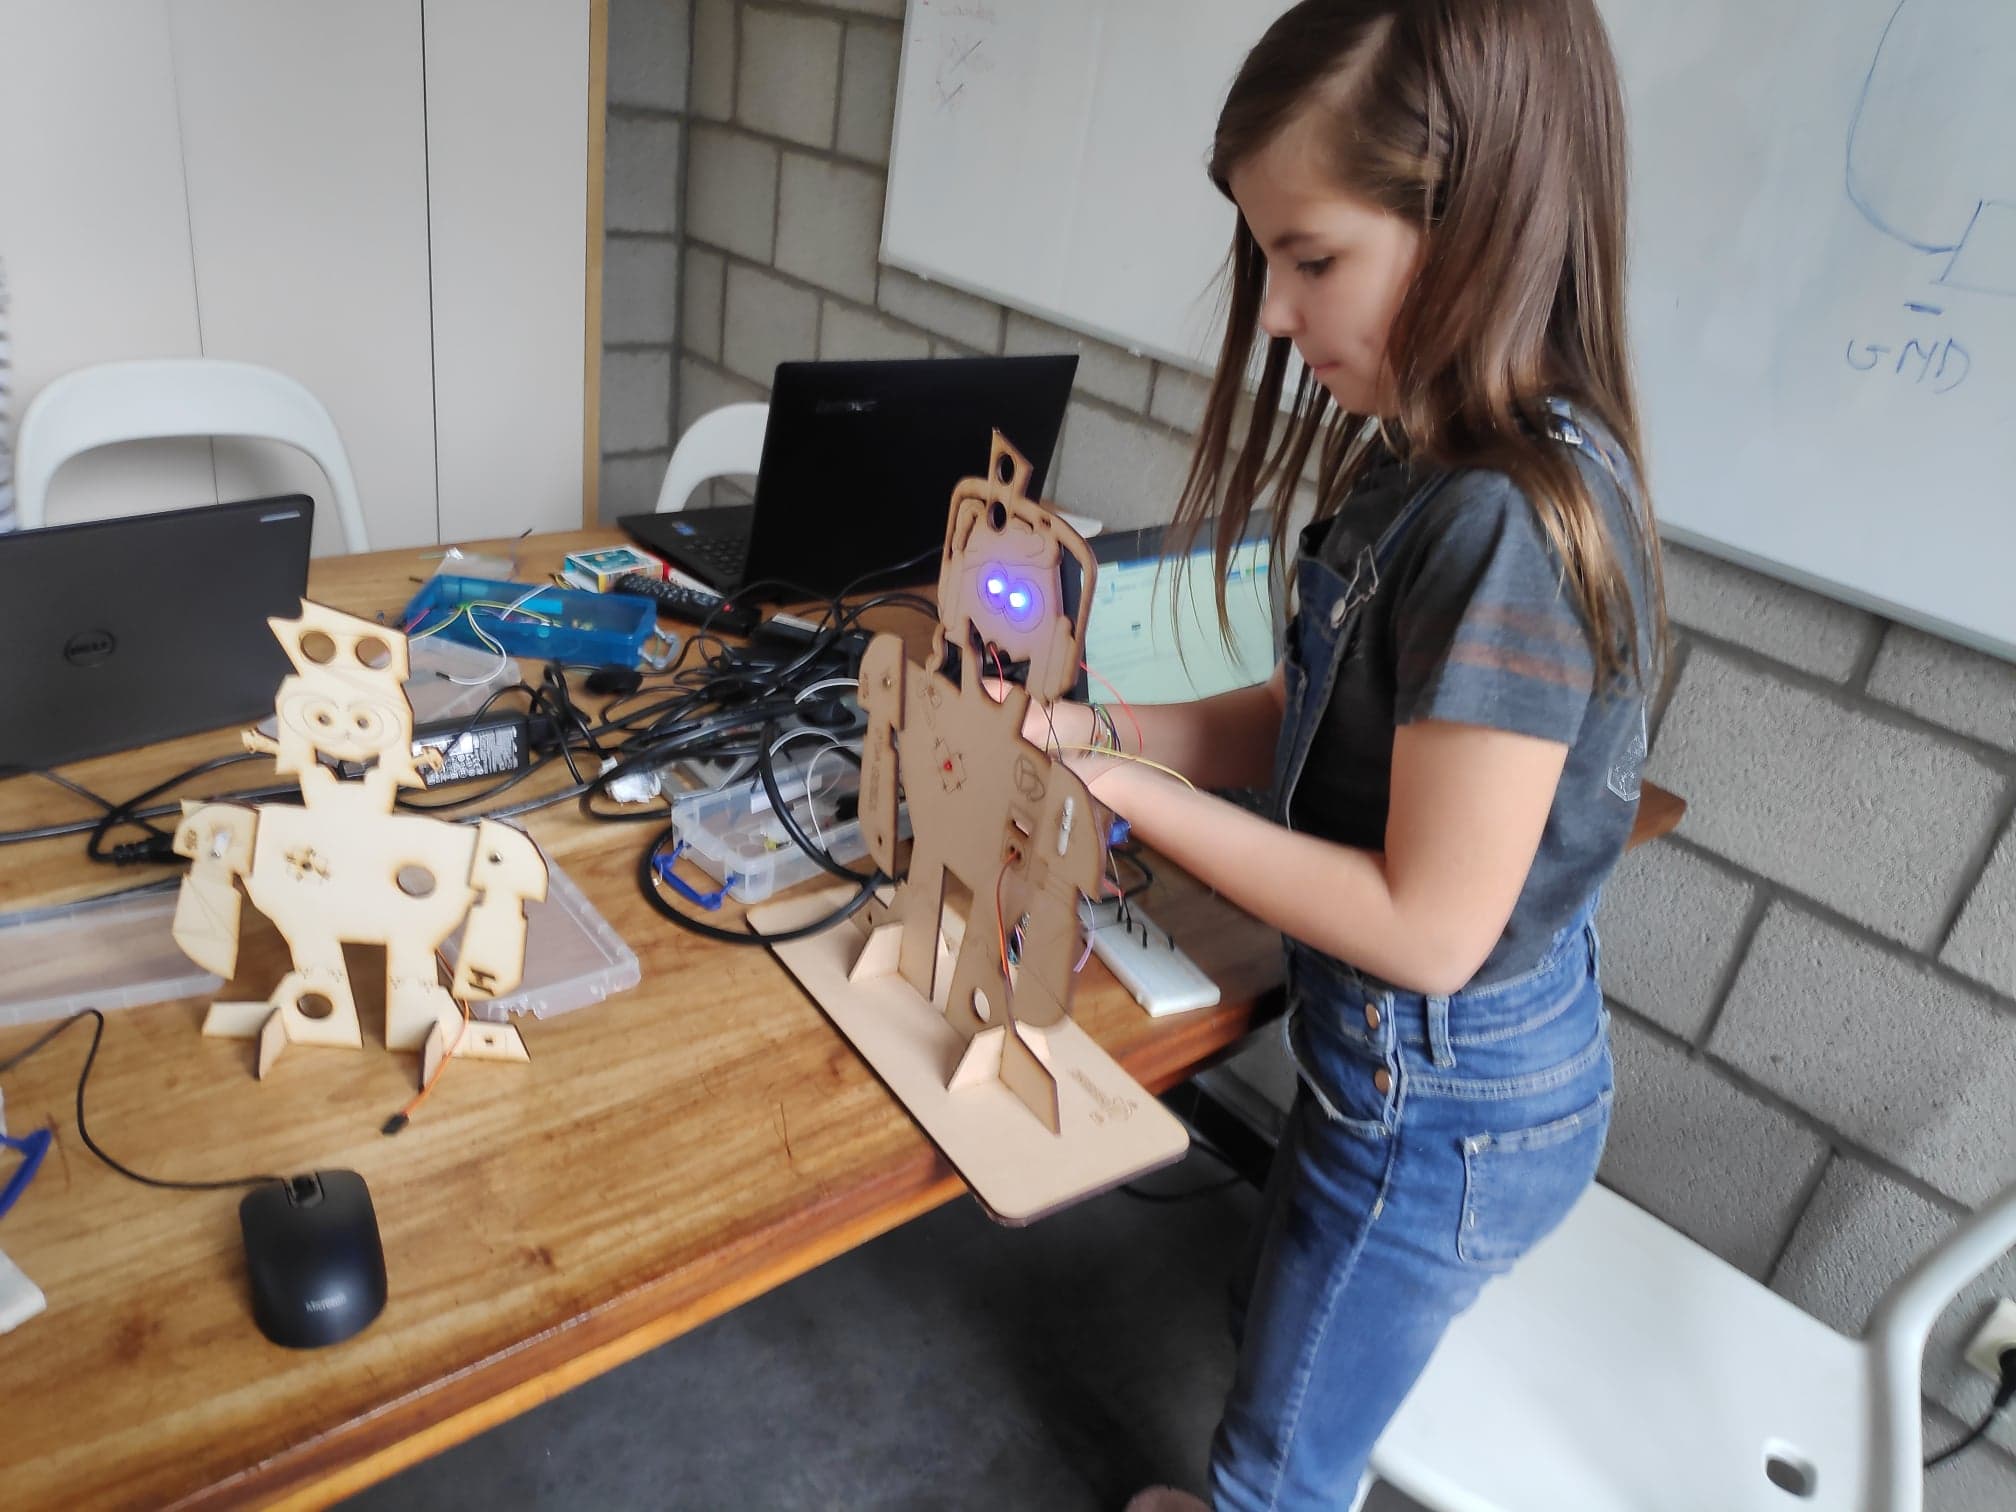
During the course the children get booklets (1 – 7) where they can learn about programming at their own passe. Most children get, in the time span of 3 hours, to booklet 3. To make everything more fun, we’ve developed Ugo and Tess and an owl that can function as a body to put the electronics inside.
The booklet index:


For this lesson you’ll need (12 students)
In the class
For teacher
For the children
Exercises
When the children enter the room we introduce ourselves as we are teachers that they have never seen before. After that, we introduce the workshop to them. We show them an Arduino and give some examples of what you can make with it.
Set up the presentation, set up the giant breadboard on the board.
Hand out all the basic components to the children of the giant kids breadboard (A4):
In the second step we're taking the kids on a walk through the Arduino hardware environment. We introduce and let them search for the most important parts and make them aware that they come in different shapes and colors. (We both use the official arduino, the Velleman copy, nano)
– We let the children look for the most important components and connectors. This includes power supply, digital vs analog pins, USB connector, ground pin (and how many), 5v pin (and how many).
– We also introduce them to the fact that Arduinos come in different shapes and sizes. So we talk for a moment about the Arduino Nano.
– We explain them breadboard. All the kids have the self made A4 breadboard in front of them and the teacher explains how to use a breadboard on the giant one in front of the class.
After the intro of the arduino we ask them the question on how they would connect everything, how the power runs. We introduce them breadboarding. They both see the small and big breadboard. - We explain them breadboard. All the kids have the self made A4 breadboard in front of them and the teacher explains how to use a breadboard on the giant one in front of the class. Students will understand how electricity flows though a circuit and will be able to use that knowledge to light an LED. As an experiment students can hold hands and hold the special device that we've made. Once the circle is closed, the device startes making sound and starts emimiting light. if you break the circle, the circuit is open and the ddevice stops emitting sound and light.
Give the kids their big breadborad (in pairs) and let them play with it.
Show them the lines, how current works.
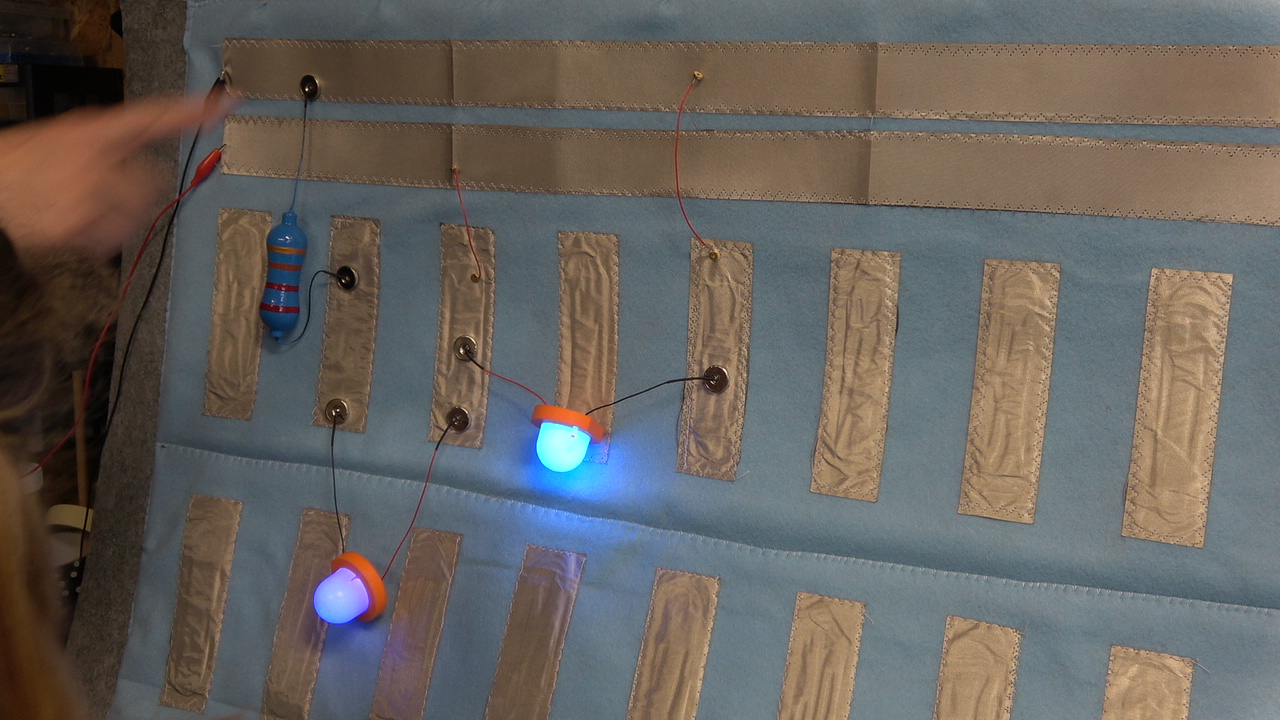
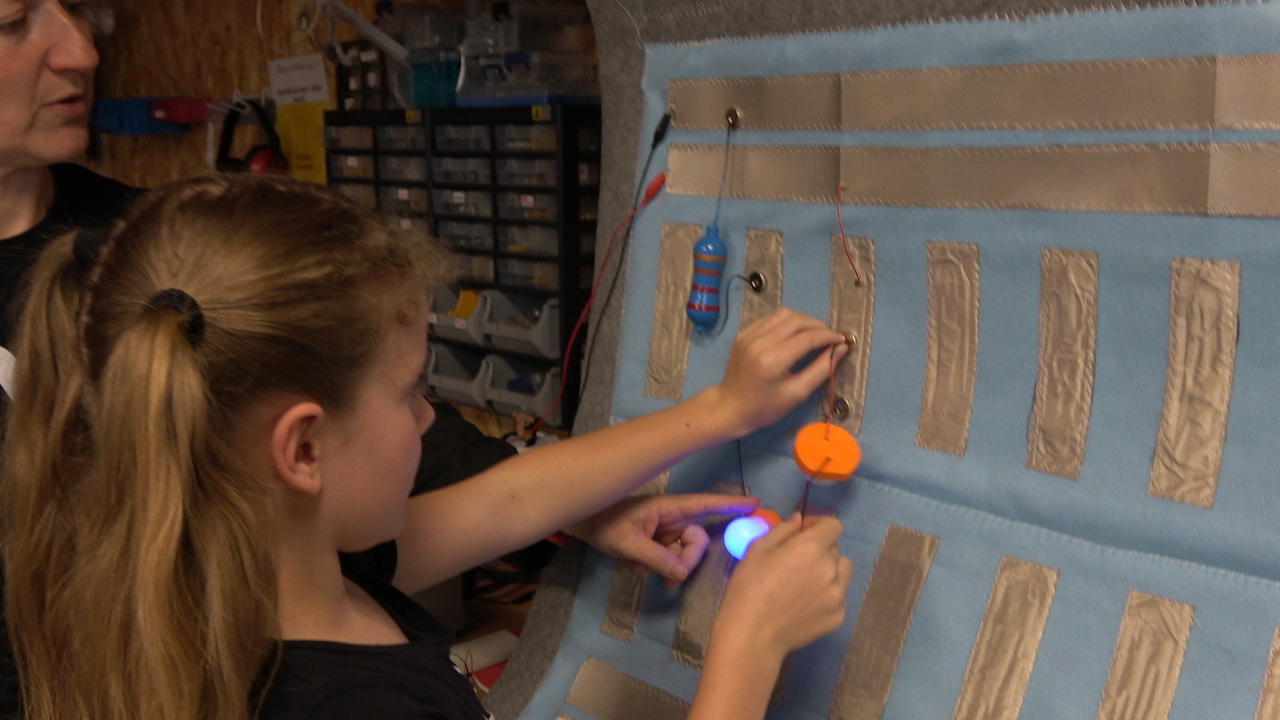
As most of the children are still new to breadbording, electronics and arduino, we make the first circuit together. This gives us the possibility of explaining electrical currents, LED's (+ and -), resistors. In the first step we let them discover all the components that they'll need.
Let the children take their giant breadboard and put it in front of them.
Let them find the LED in the components that they’ve gotten before.
Let them plug in the LED. Do’s it work? Why not? What else do you need?
Let them find the resistor. Whats special about it? What do the colors mean? Are all resistors the same? What exactly does a resistor? If you want you can use the water example (a dam, two bottles, entering a classroom as group…) or good images of how the resistor works.
Knowing all the basic components, we plug them in into the breadboard and make our first circuit. We connect the first circuit together and use the code that has been givein in the little booklet to program the Arduino. If there is time in the session you can let the kids draw the circuit that they think will work. This gives you the time to also explain the symbols of the components. And the children get to retry multiple times.
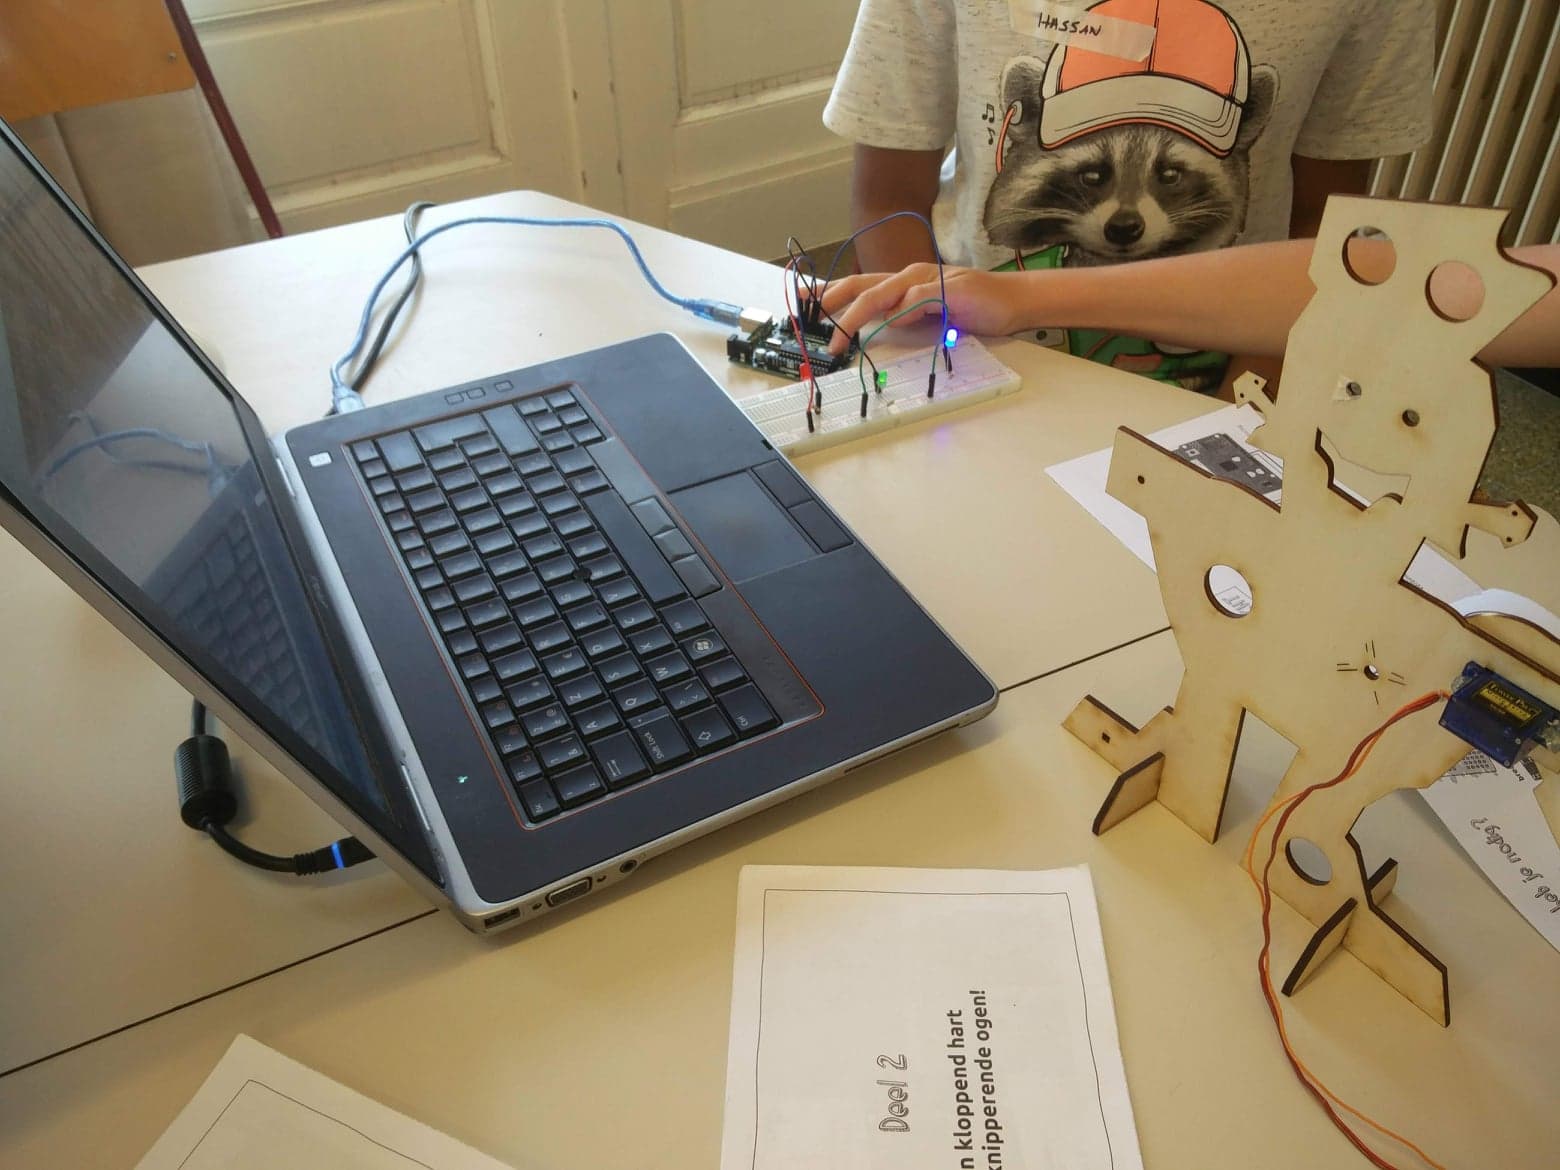
In the first booklet we want to let the hearth of Tess or Ugo beat. To do this, we need to program the board to start having a LED blink.
For writing the program we use https://blokkencode.ingegno.be/. It’s an adapted version from blockly that allows you to program with little blocks. Depending on our projects we make more blocks. e.g. For the FabAcademy we added a pure ATtiny85.
Let the kids experiment with the blocks and try to make their own code. As a teacher the first circuit that they are making, you guide them in the blokkencode environment.
Once the program has been programmed, it's time to upload the code to the arduino.
Explain the buttons in the blokkencode to the children. What saves your code, what saves the .xml file, what uploads directly.
Copy past the code into the Arduino IDE if needed. Depending on the laptops that we take with us, we can go straight from the Blokkencode to the arduino, or we have to pass through the arduino IDE.
Note: we’ve modified our chromebooks to run Linux. Because of that we need a server to run
Once the program has been loaded to the Arduino it is time for the children to see if the program does what they want it to do. The children will need to test, and review their code.
Once the code is compiled and programmed to the board the children will have 2 options:
In the first case the children can move on to the next exersice or change some variables in the code to change it.
If the code doesn’t do what the children want it to do, they will have to trouble shout the original code and look for mistakes. The children here will have to learn to think logical and for themselves and not ask for help every 5 steps to the teacher.
Once finished with the first booklet, they move on to the next.
Having trouble? Let us know by completing the form below. We'll do our best to get your issues resolved quickly.
"*" indicates required fields