- Loading…
Students will use ScratchJr to create a simple digital illustration of a story’s character, setting, or events and explain how it helps tell the story.
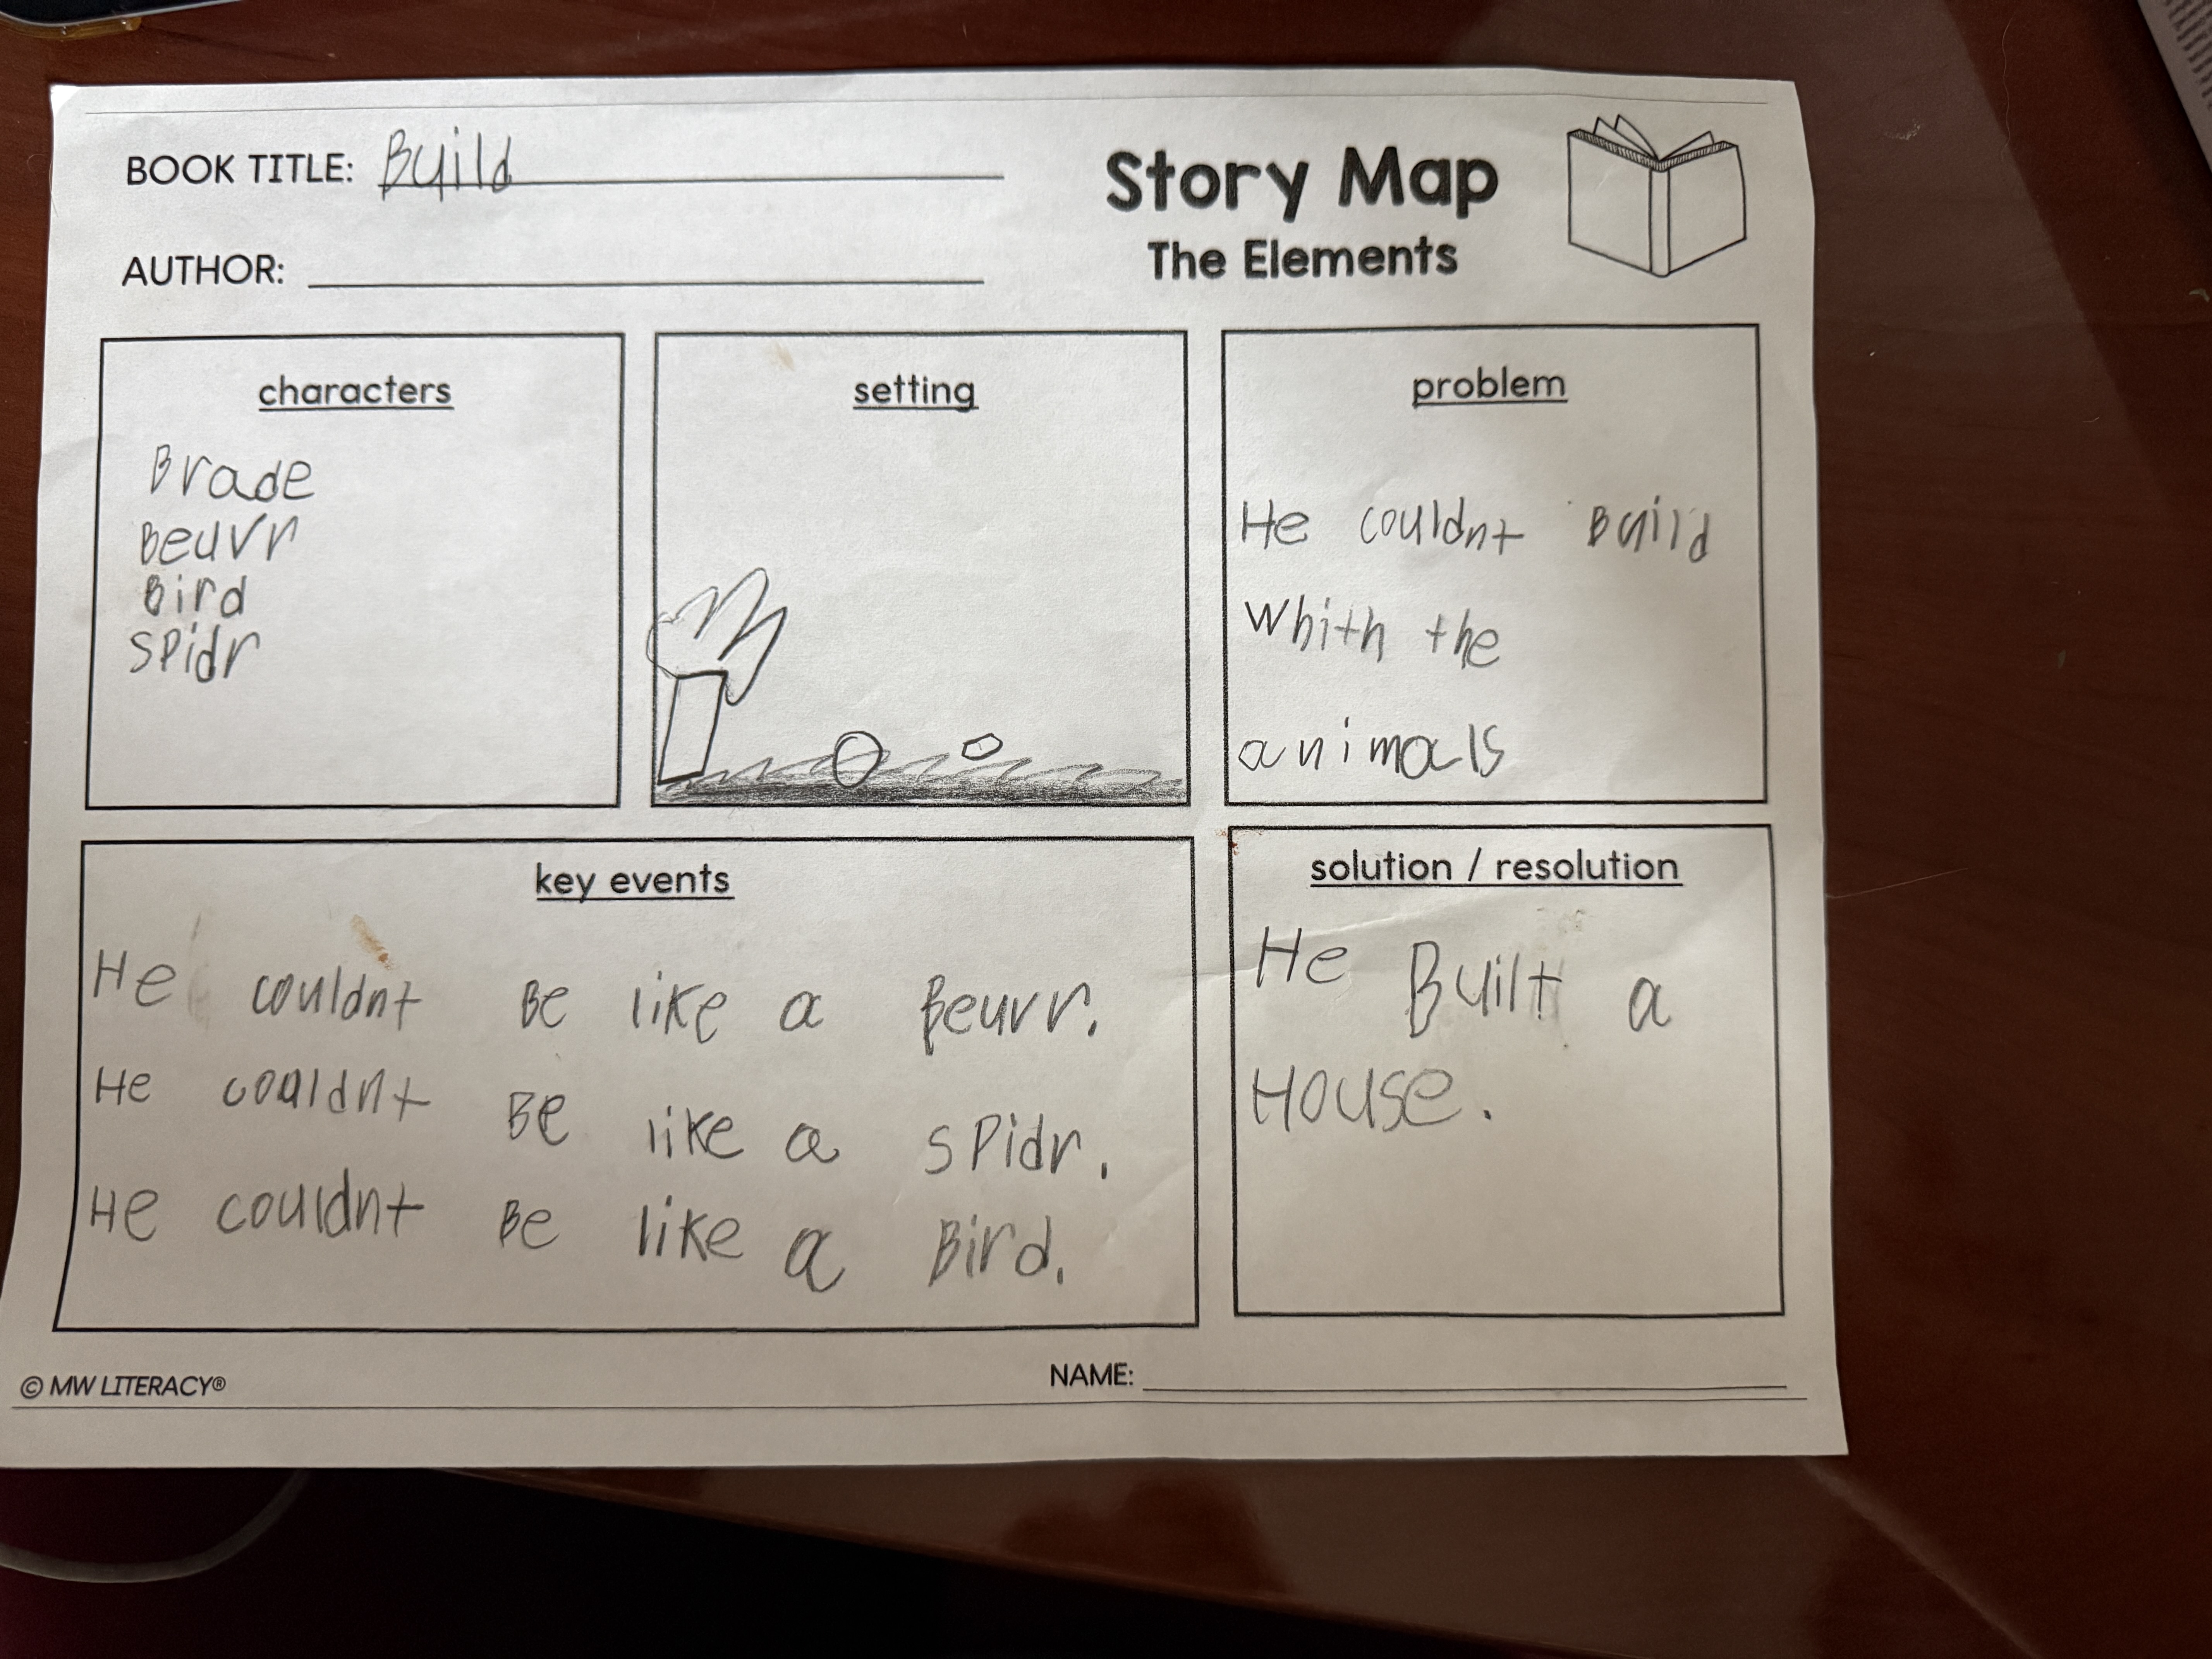
Story Map handout
A story to read (I read Build by Emily Lex)
iPad
Pencil
Students will identify characters, setting, and events in a story.
Students will explain how illustrations help tell a story.
Students will create a simple digital illustration using ScratchJr that represents a character, setting, or event.
This lesson was a bit of a challenge to begin with since I had never personally used ScratchJr and previously had only ever made two projects with scratch itself. It was a bit of a learning curve but once i figured out how it worked I really enjoyed it. I believe that this lesson did not need this to be a success but judging by how well my students liked it I would say it was a definite benefit. My students had never used ScratchJr before so I was a bit nervous on how that would work but overall it was not too challenging. I believe that using ScratchJr benefited this activity tremendously because my students who normally cannot recall details from a story were talking up a storm and answer all the questions correctly.
Engage students prior knowledge by asking what do pictures in a book help us understand? What types of things do we look and listen for in a story (setting, characters, plot)?
Before beginning to read ask students a couple of questions to guide their thinking about today’s project.
Ask students what do pictures in a book help us understand?
Ask students what types of things do we look and listen for when we are reading a story (setting, characters, and plot)?
Read your chosen story aloud and ask some guided questions throughout.
Read your story out loud and ask questions to get students thinking about key details from the story.
Ask students who are the characters?
Where is the story happening?
What is happening right now?
How does this picture help us understand the story?
Pass out a story map and help students fill in the information.
Pass out a story map and help students fill in the information.
Ask them to name or draw the main characters, key events, setting, problem, and solution.
Model where the information goes into each box.
Have students fill in each part of the story map.
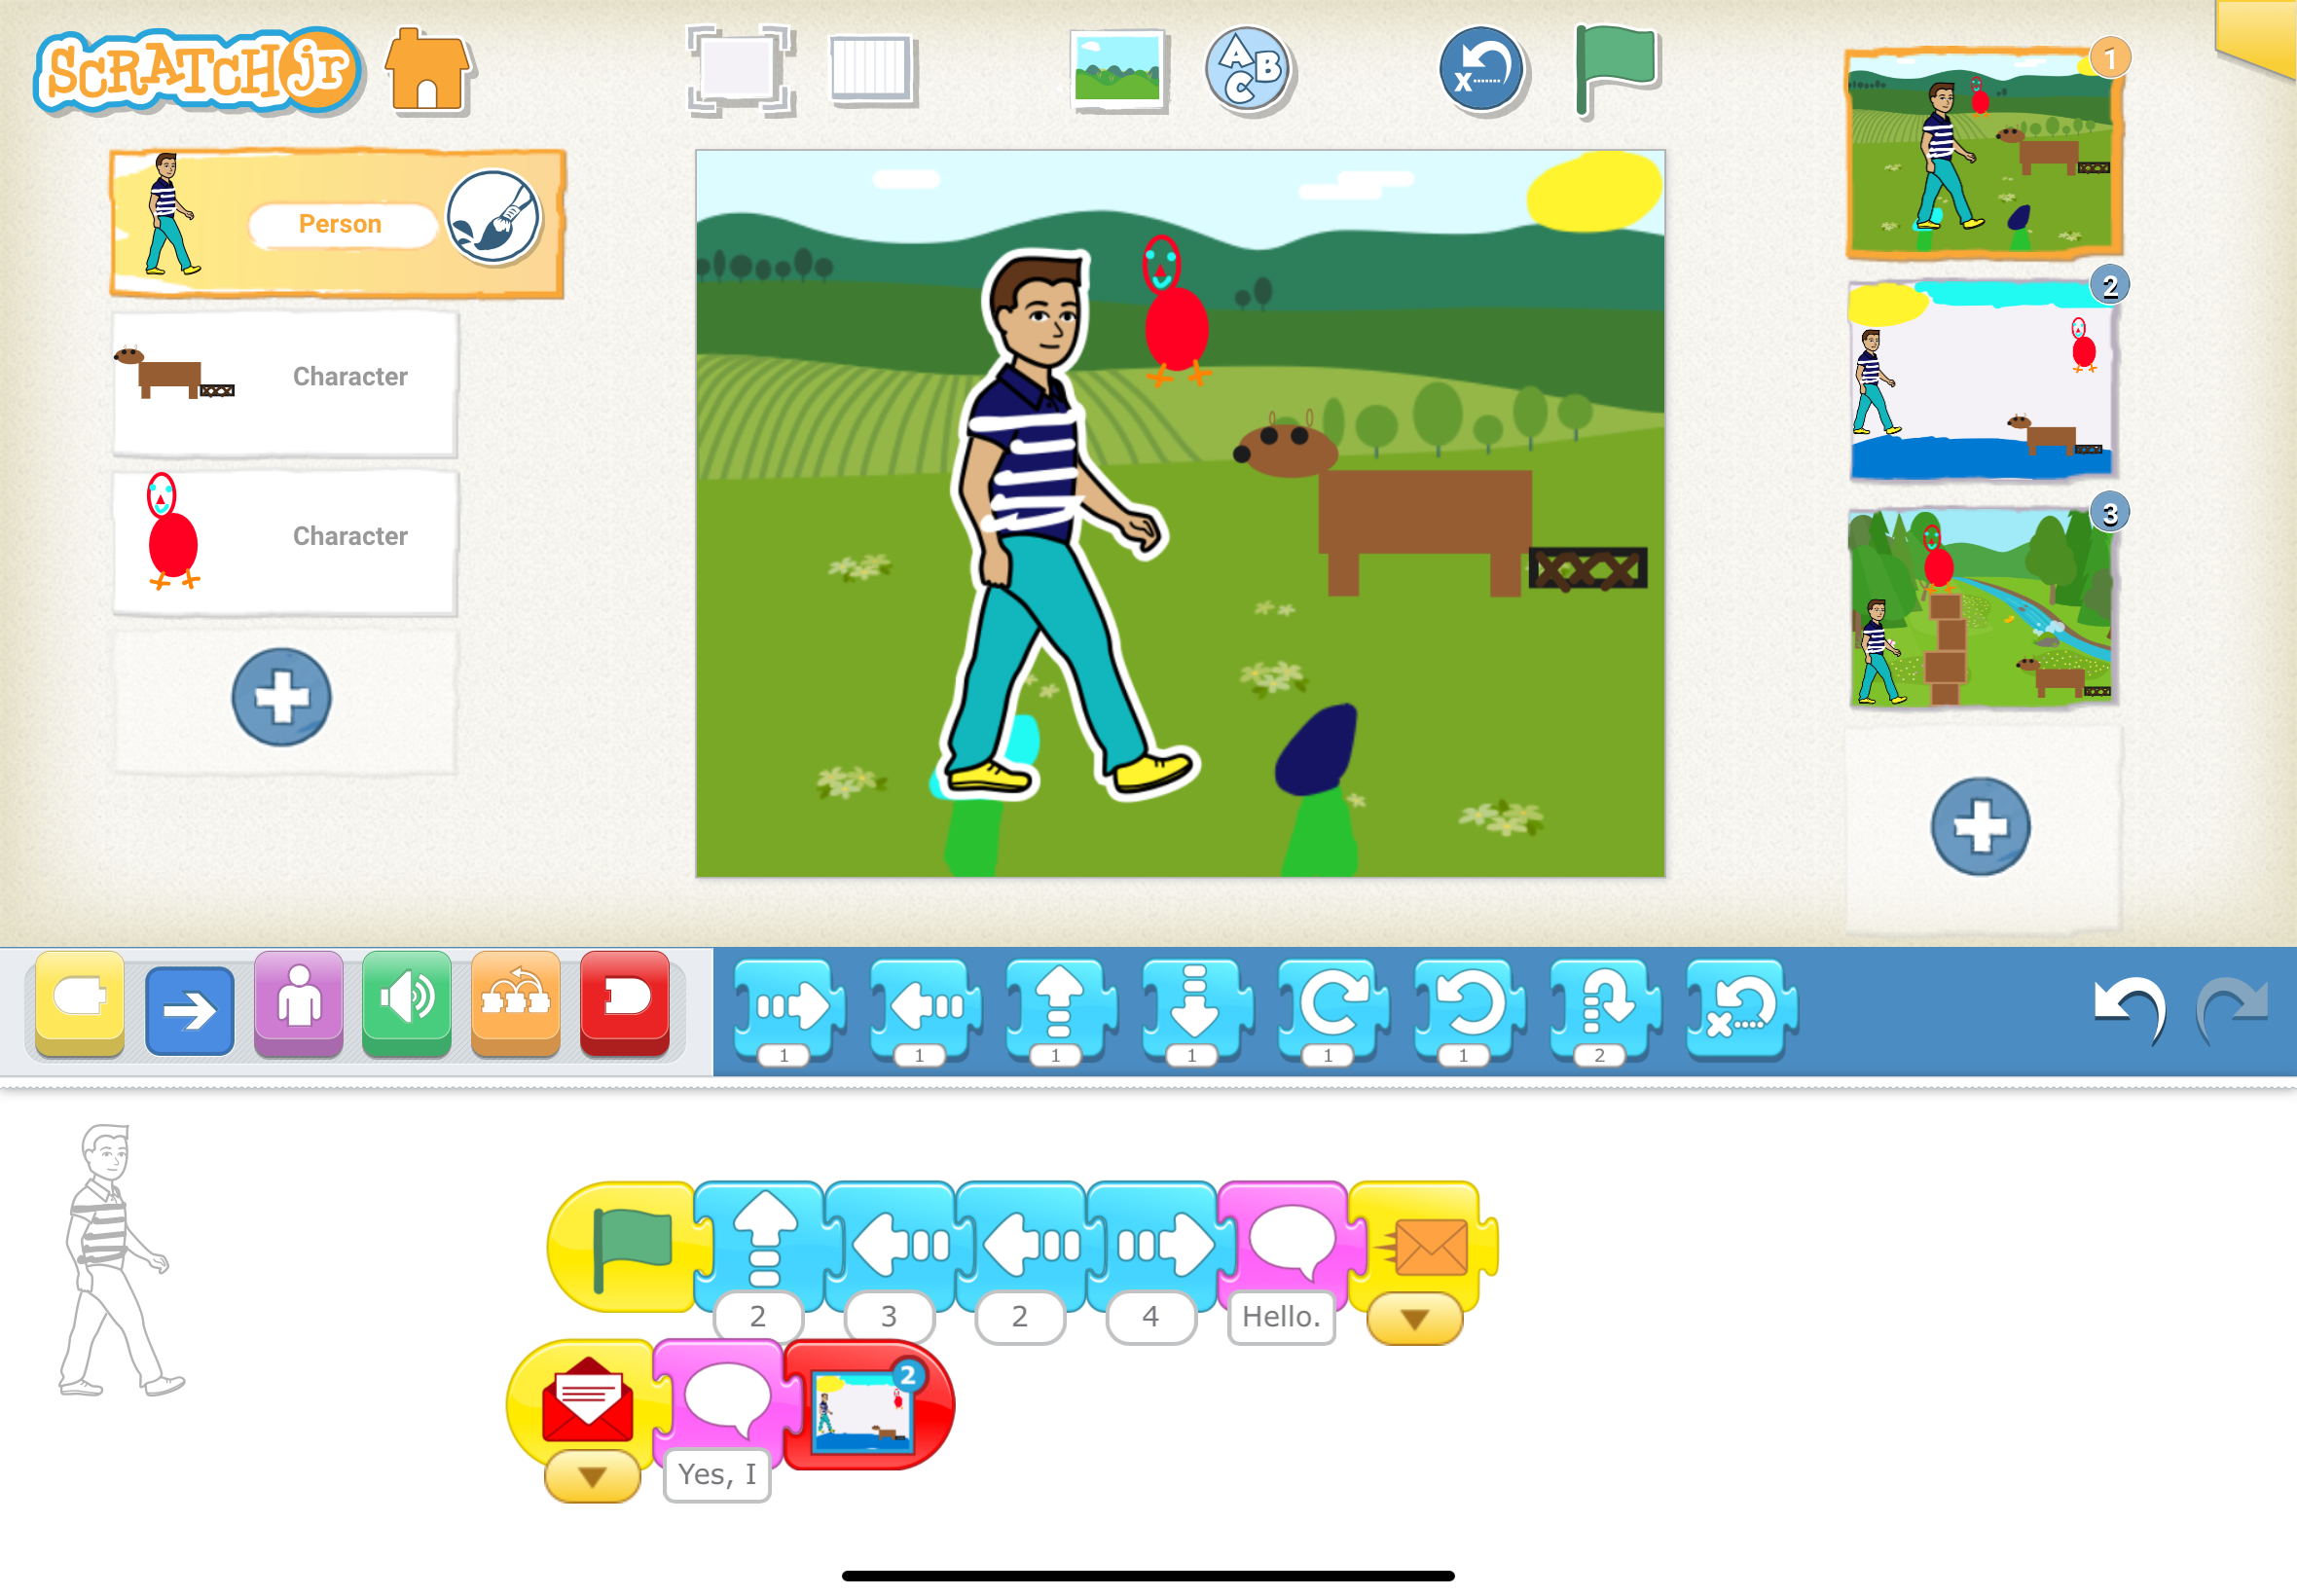
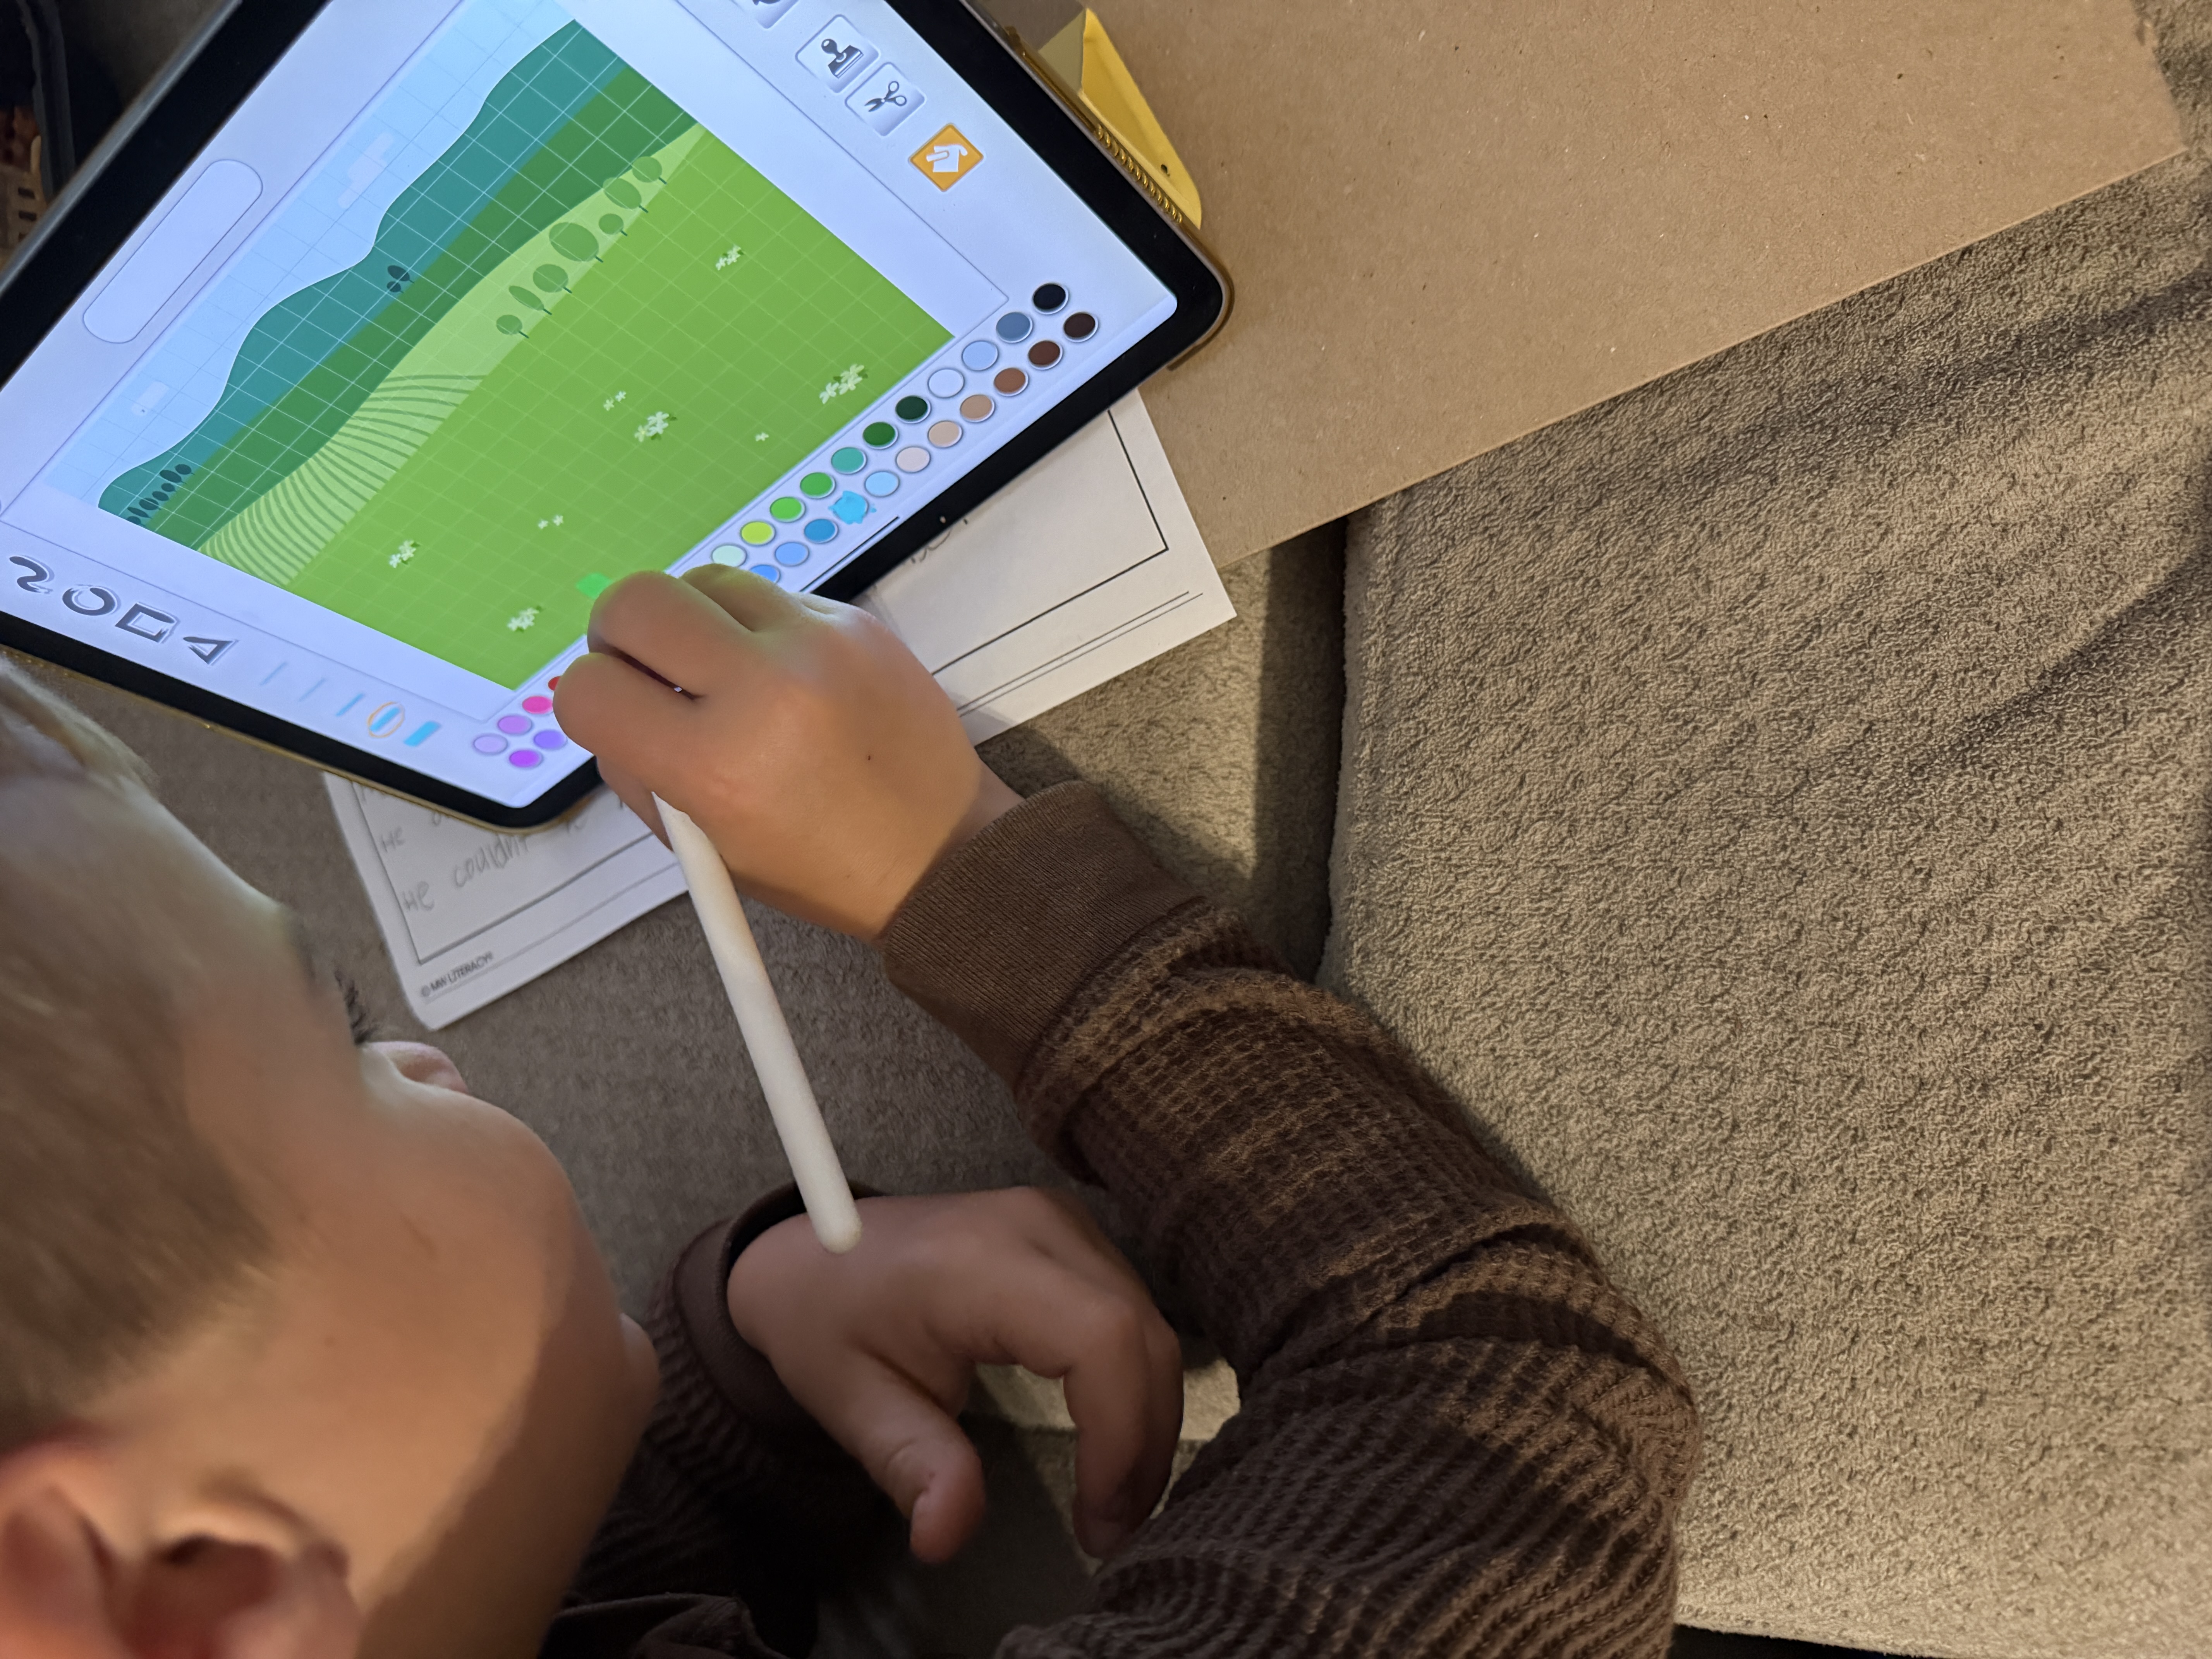
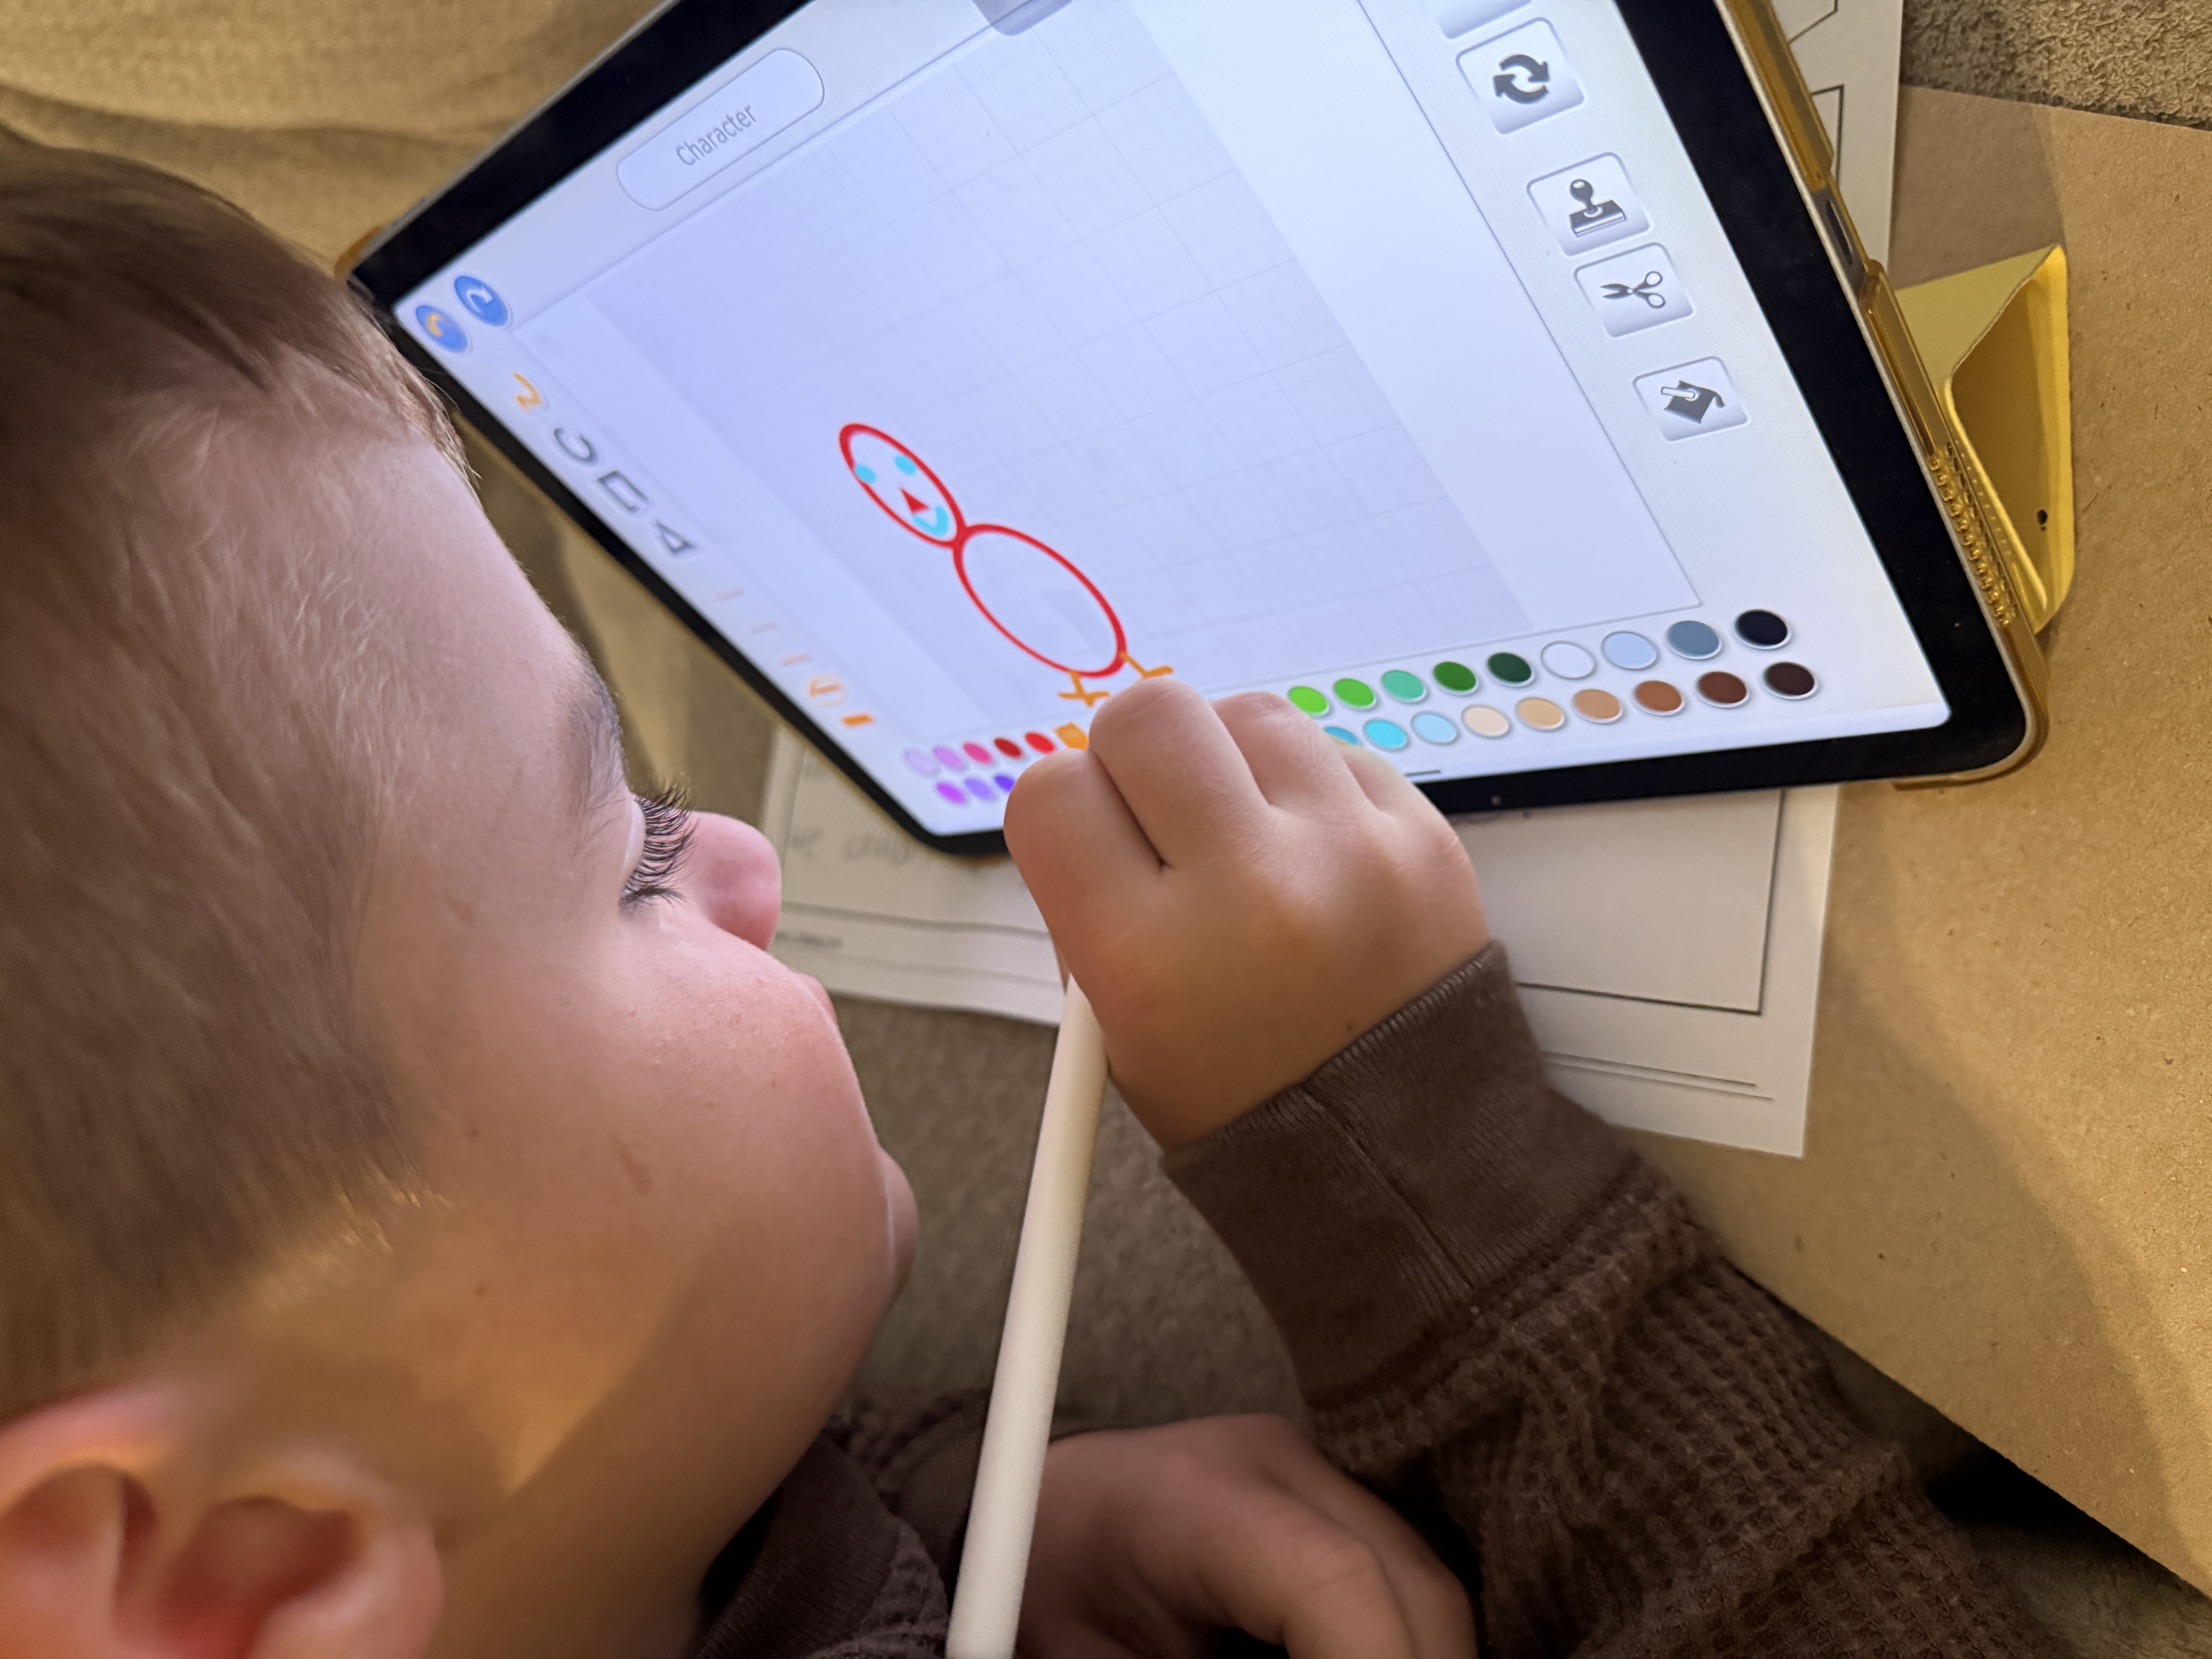
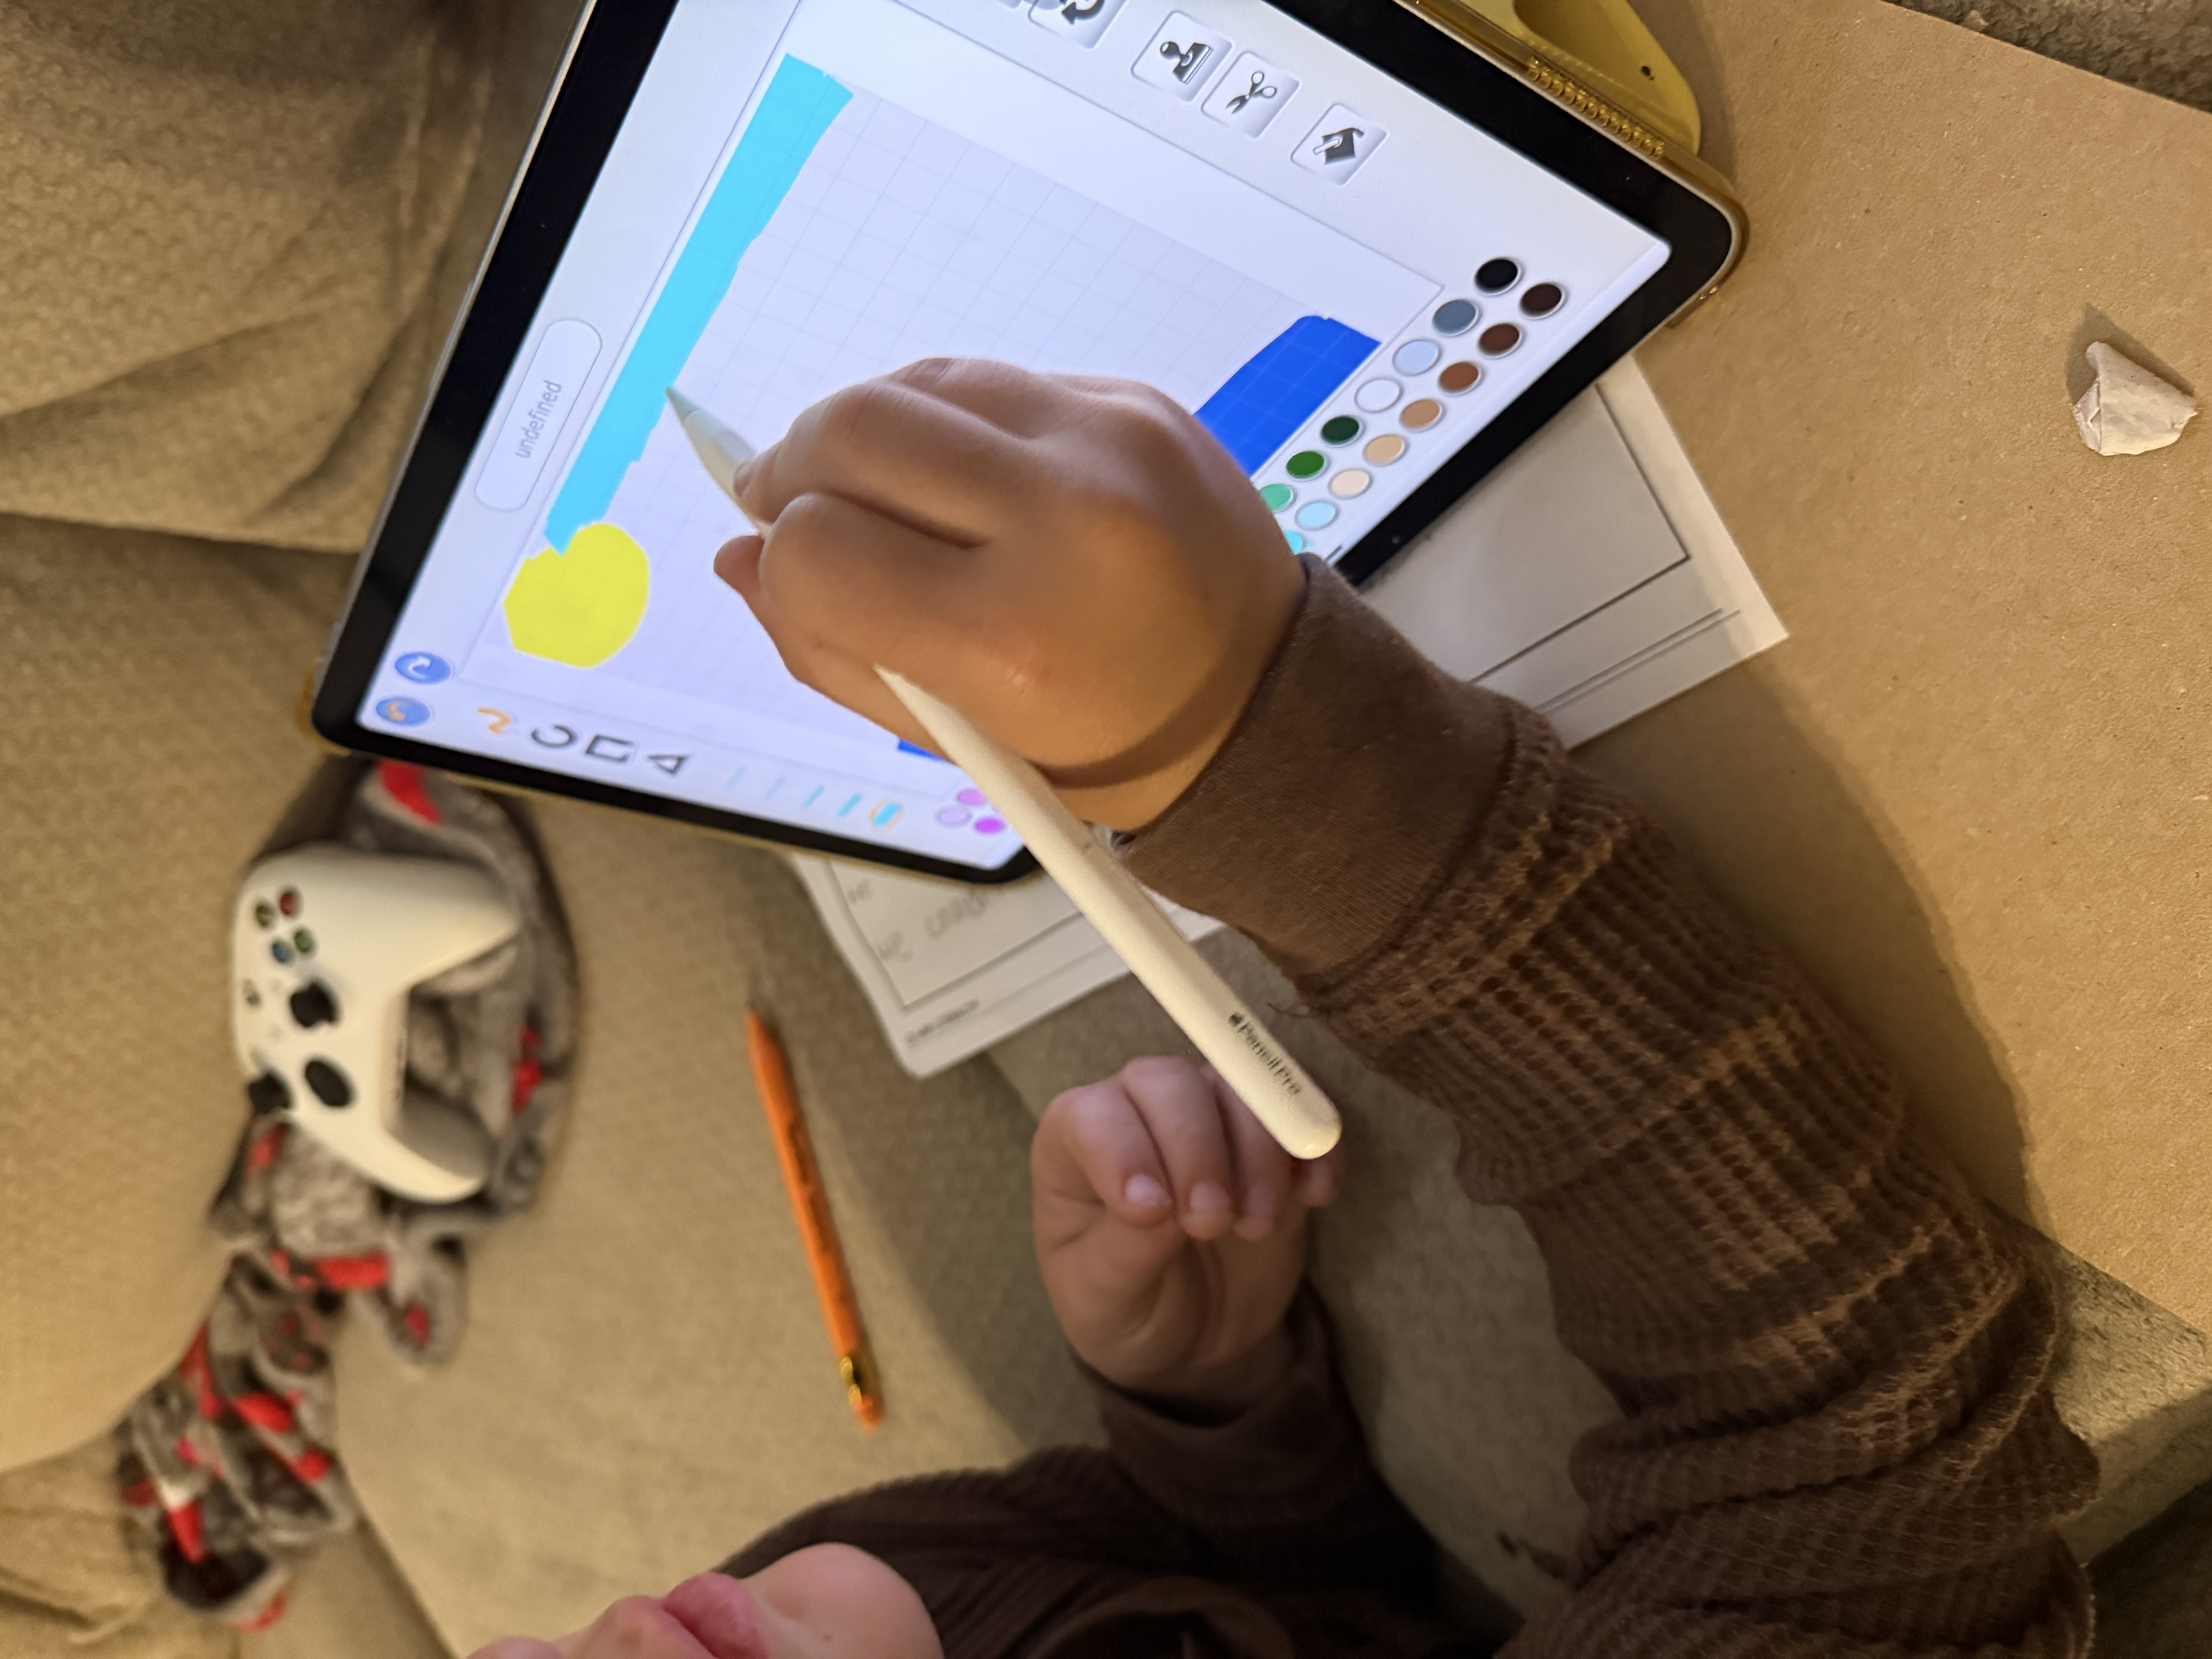
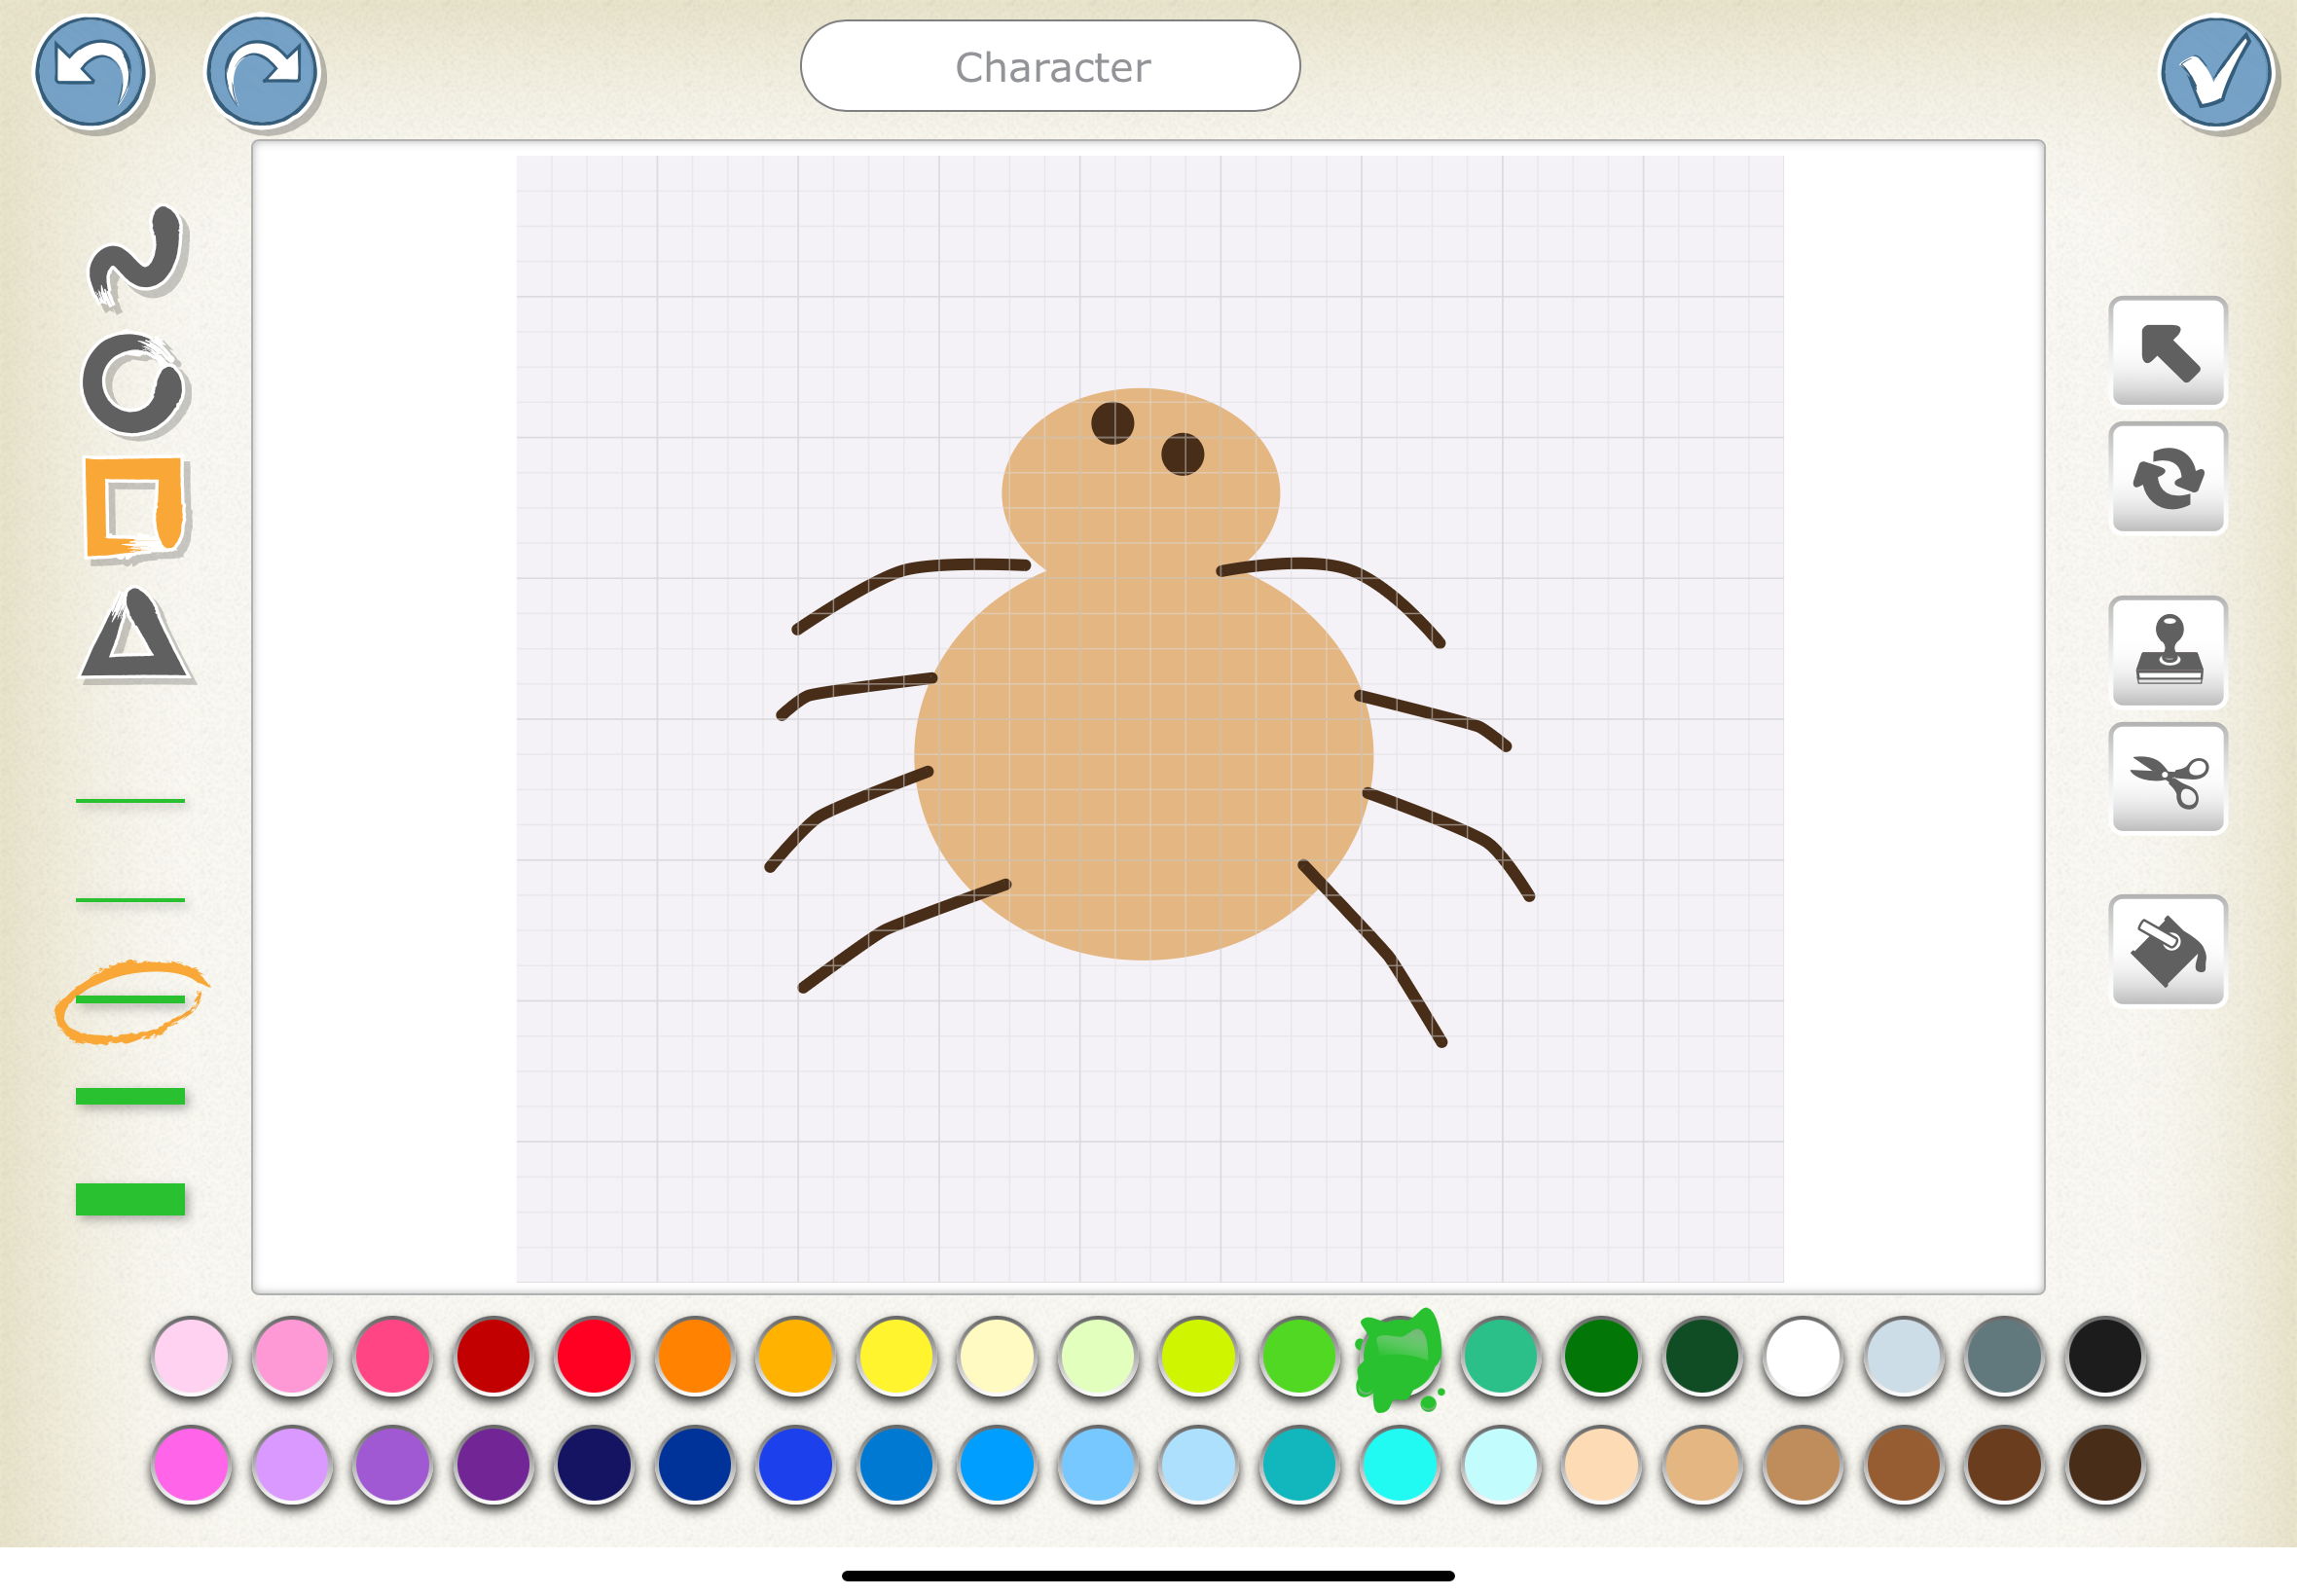
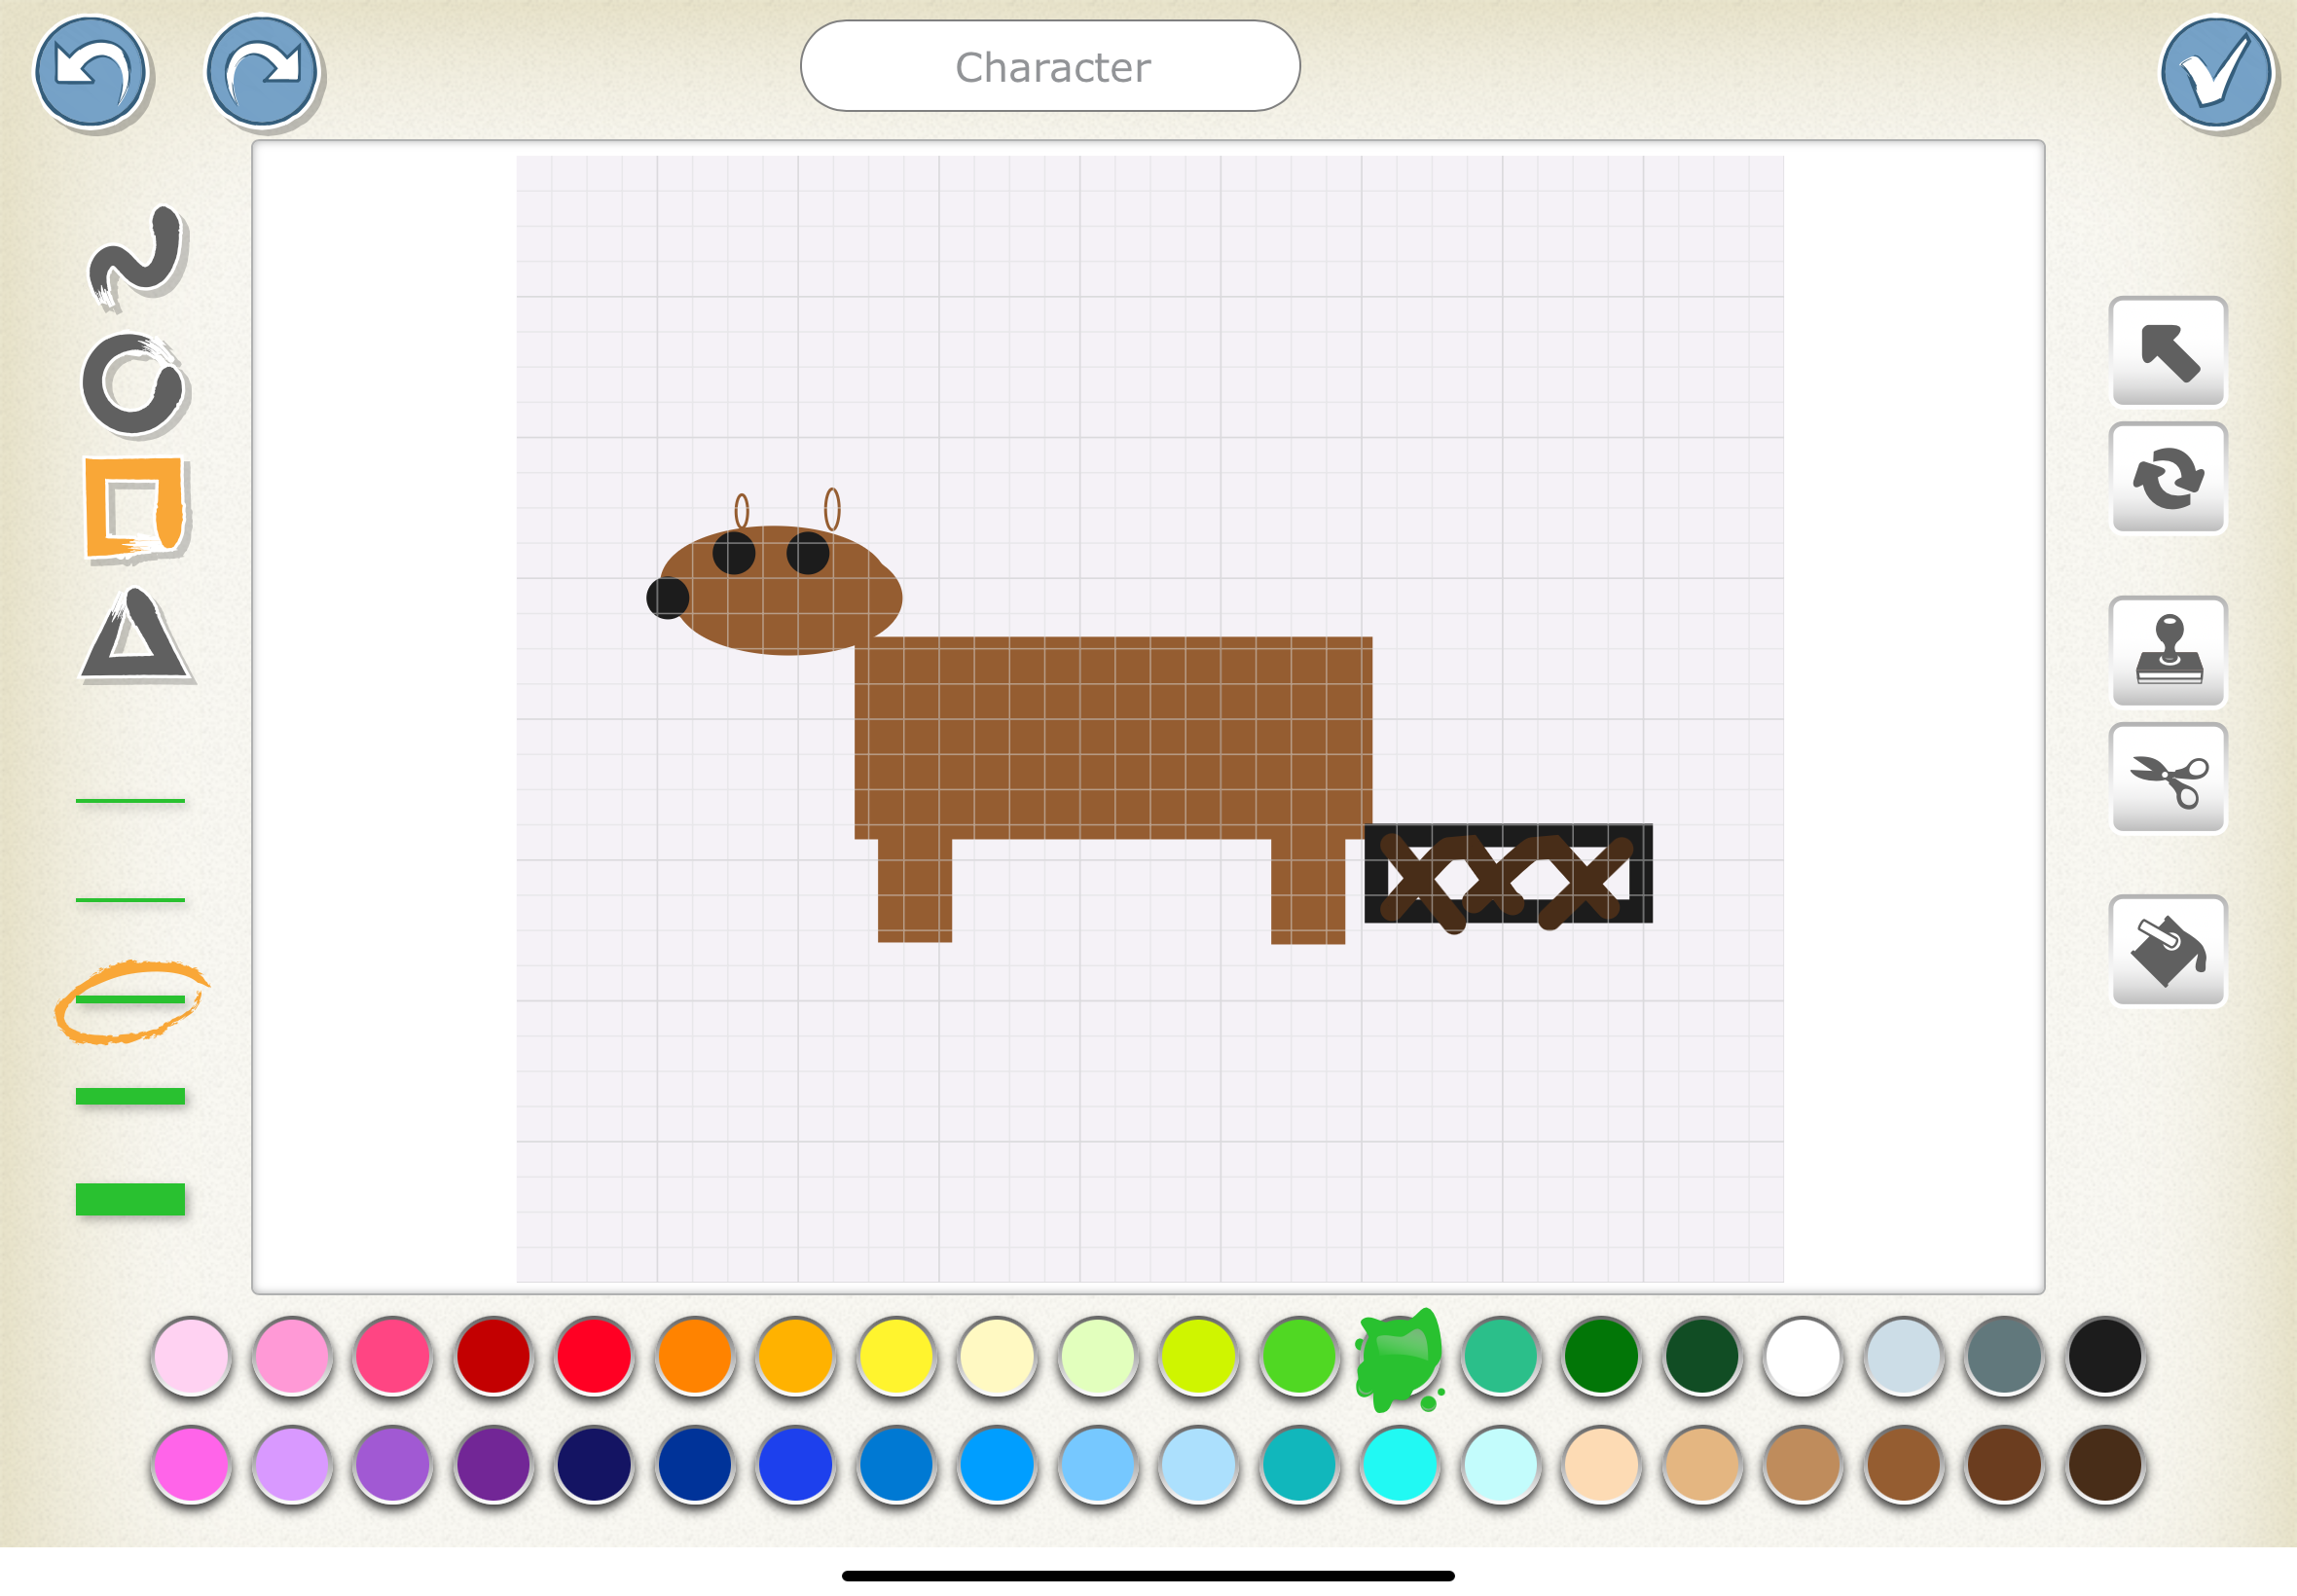
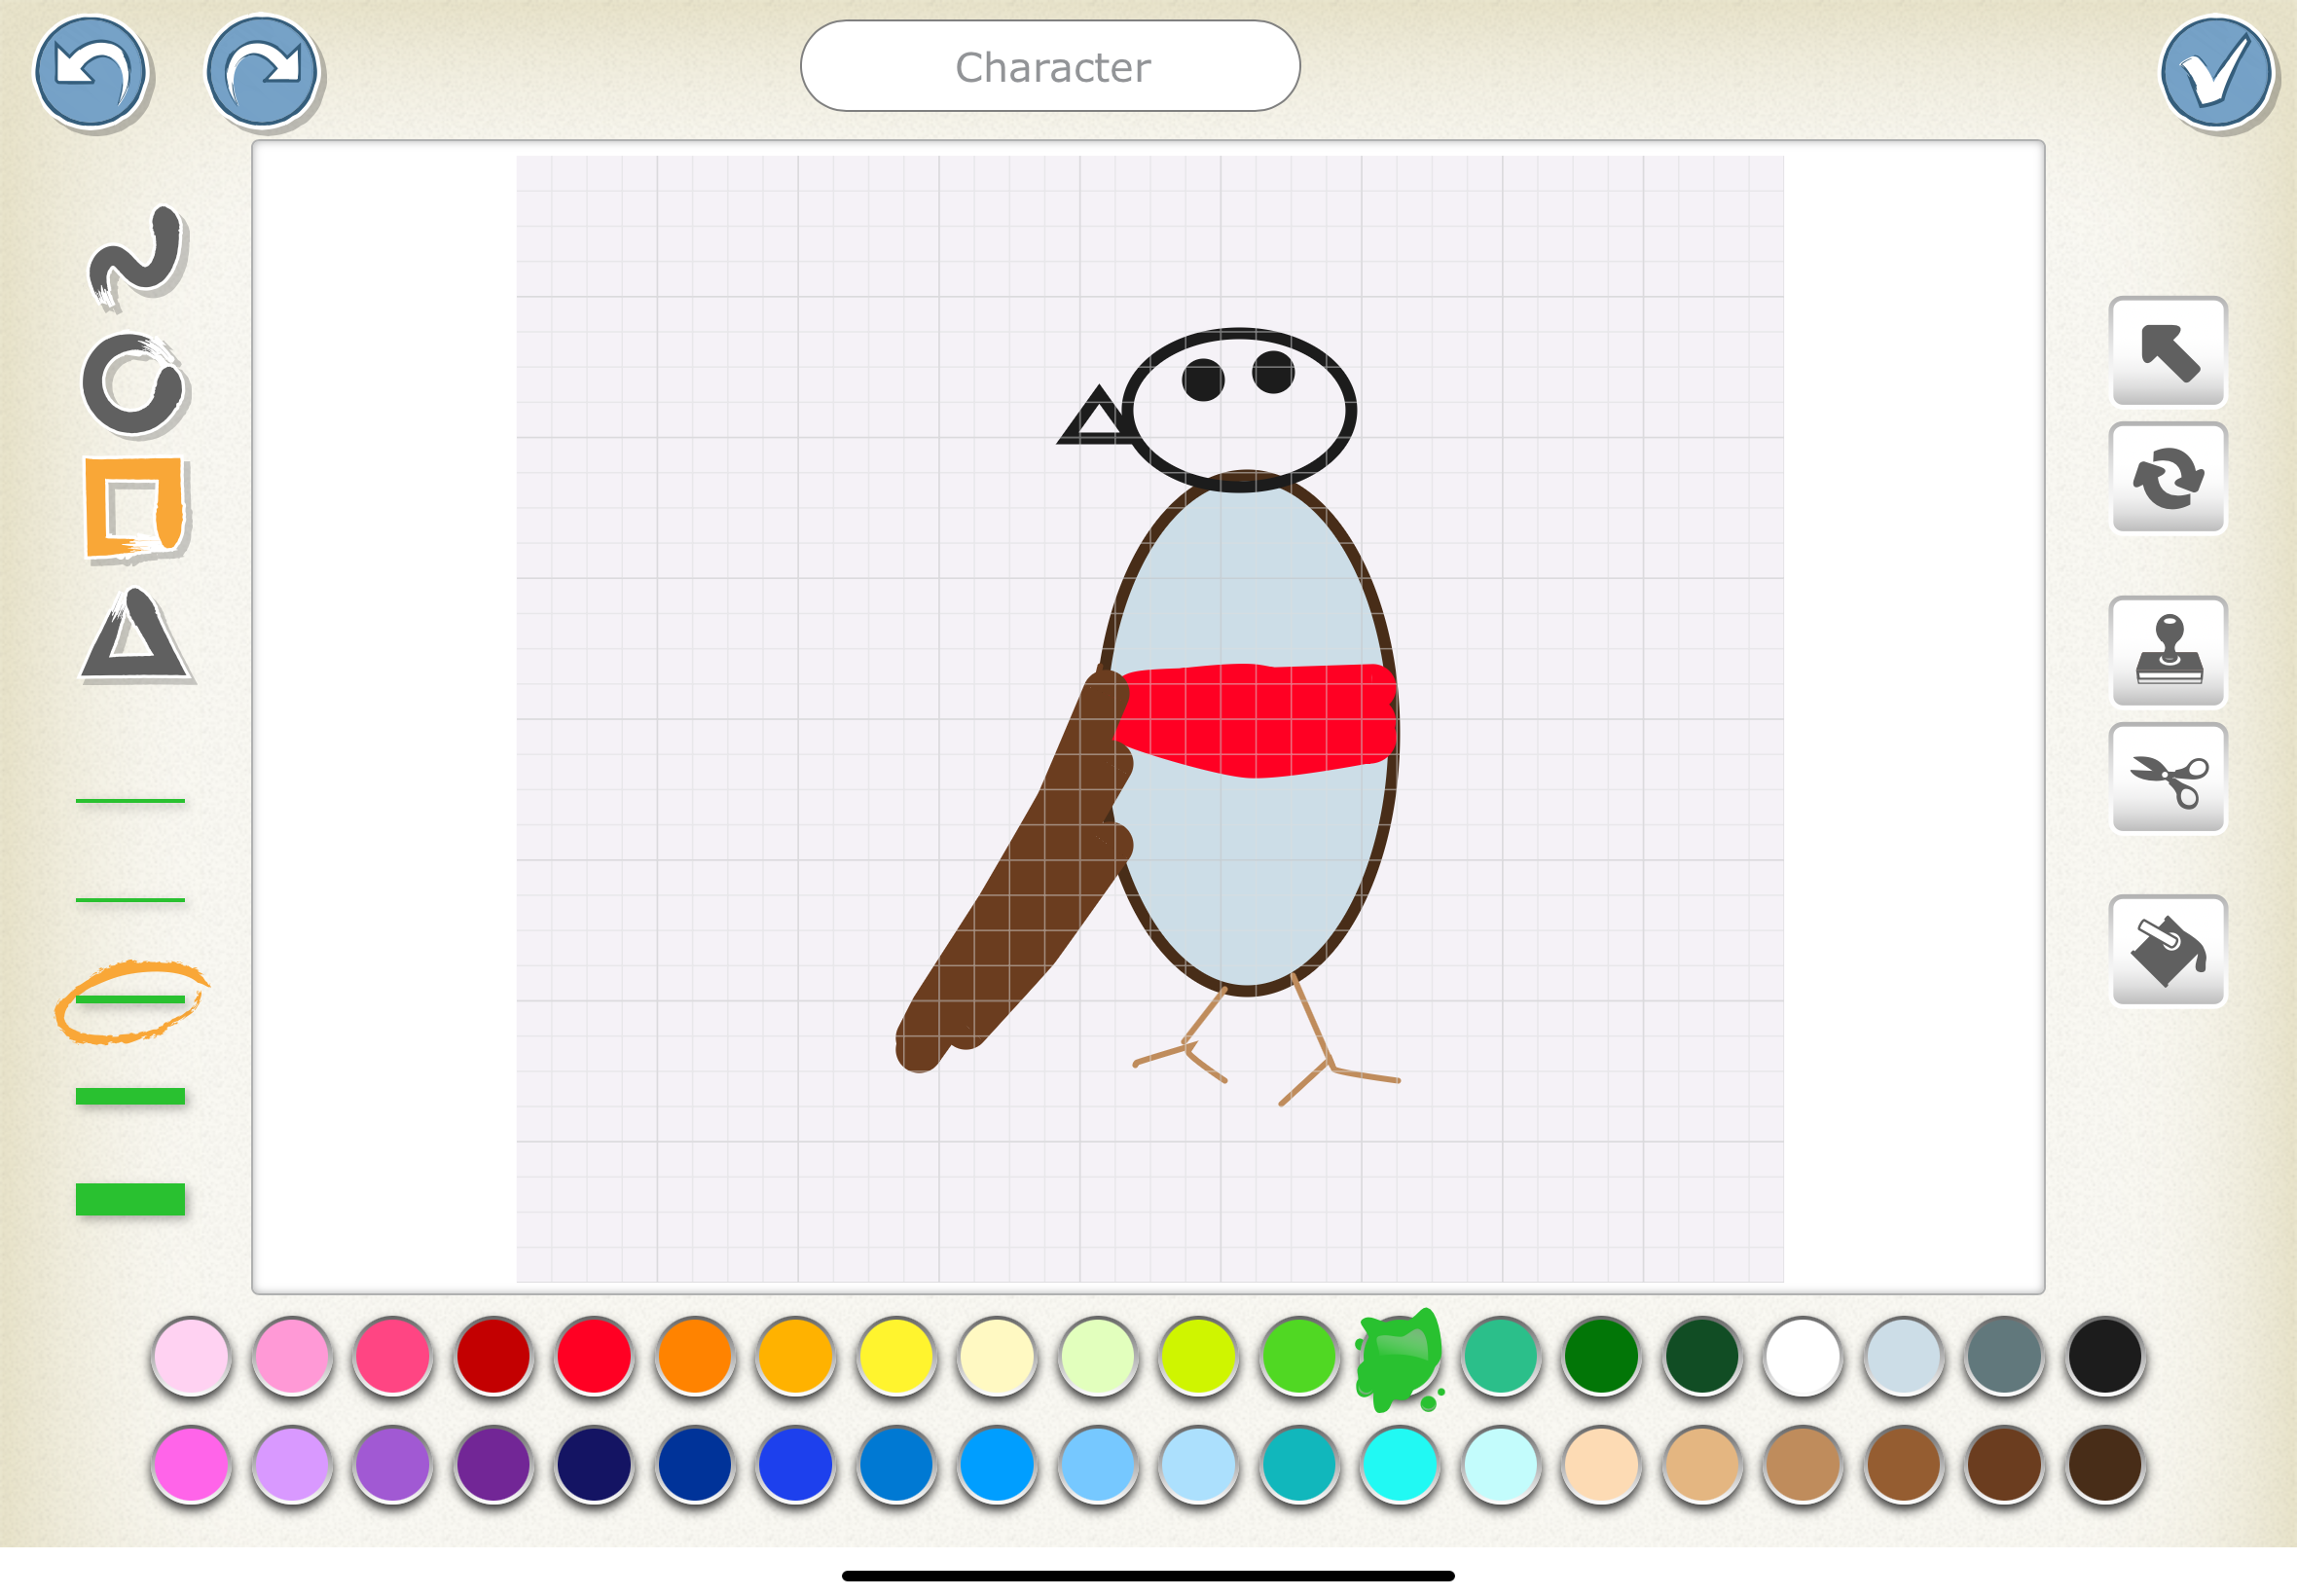
Model an example of how ScratchJr works. Explain to students that they will be using the information they just put in their story maps in a digital illustration.
Model for students how to use ScartchJr. Show them that they will use the information that they put in their story maps in ScratchJr to bring the story to life.
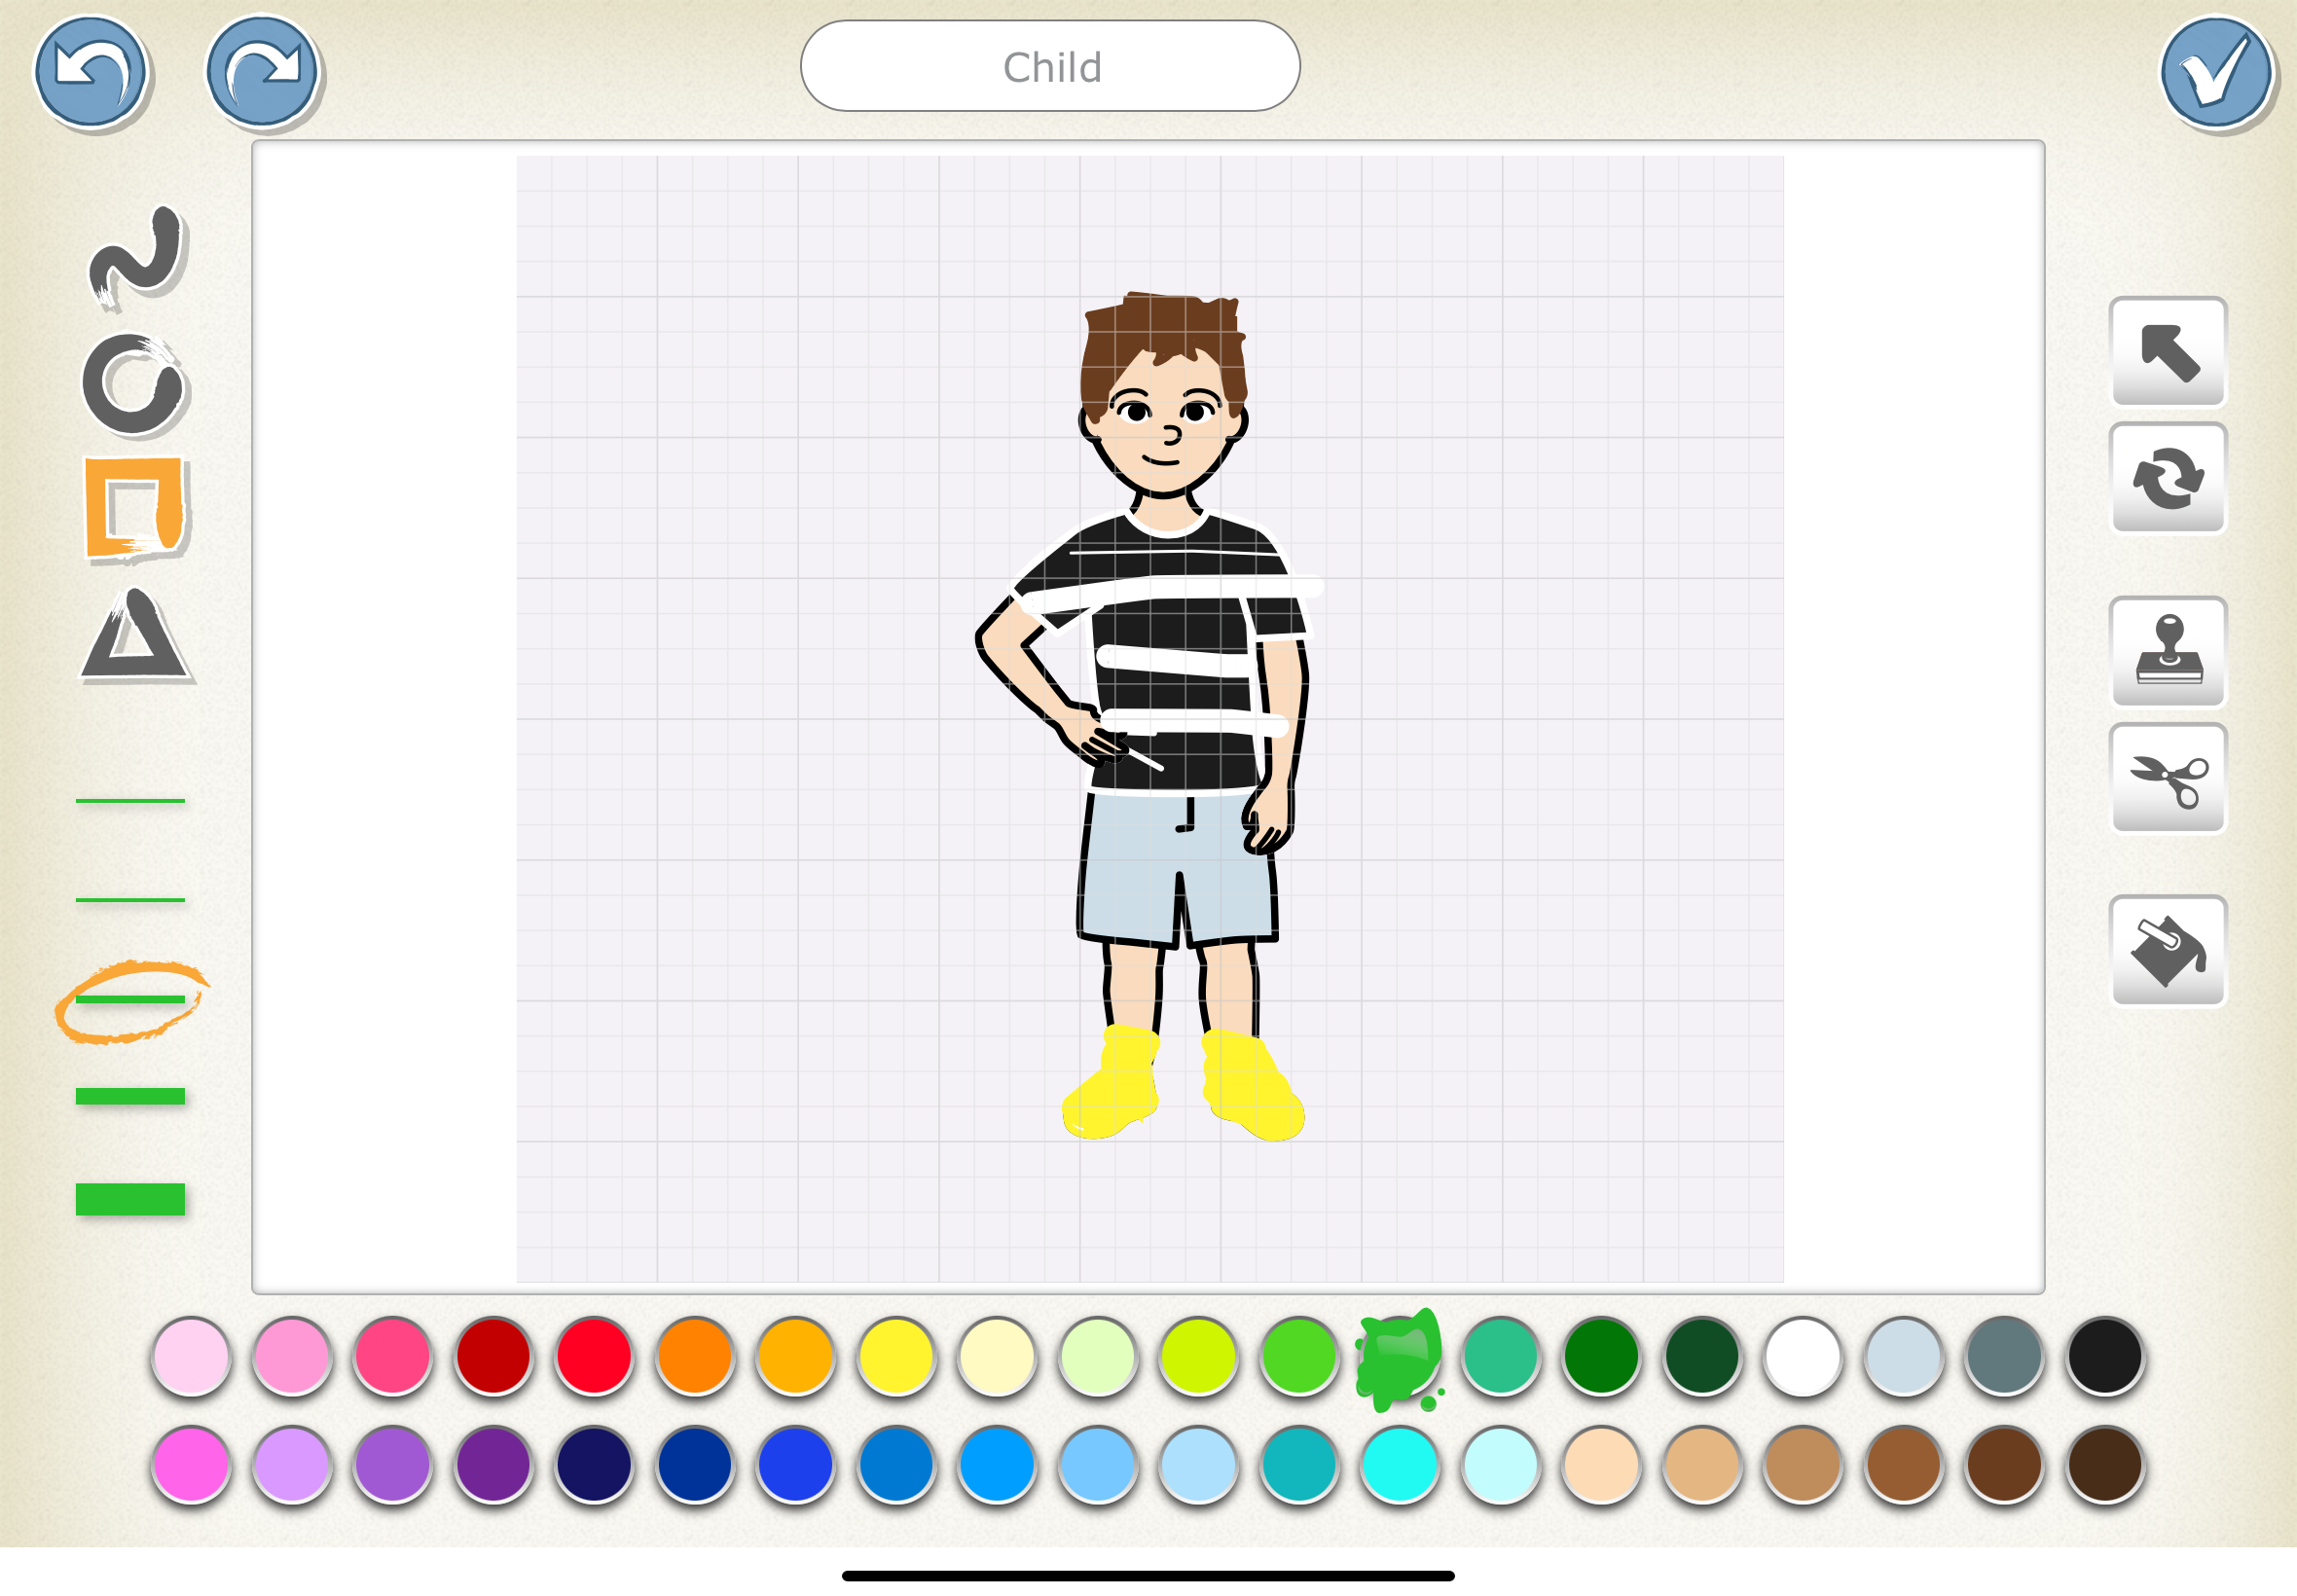
Step 1: Finding the perfect character- show students the button where they can choose different sprites or they can draw their own.
Step 2: Show students how to change the background to the best fit for the story or how to design their own.
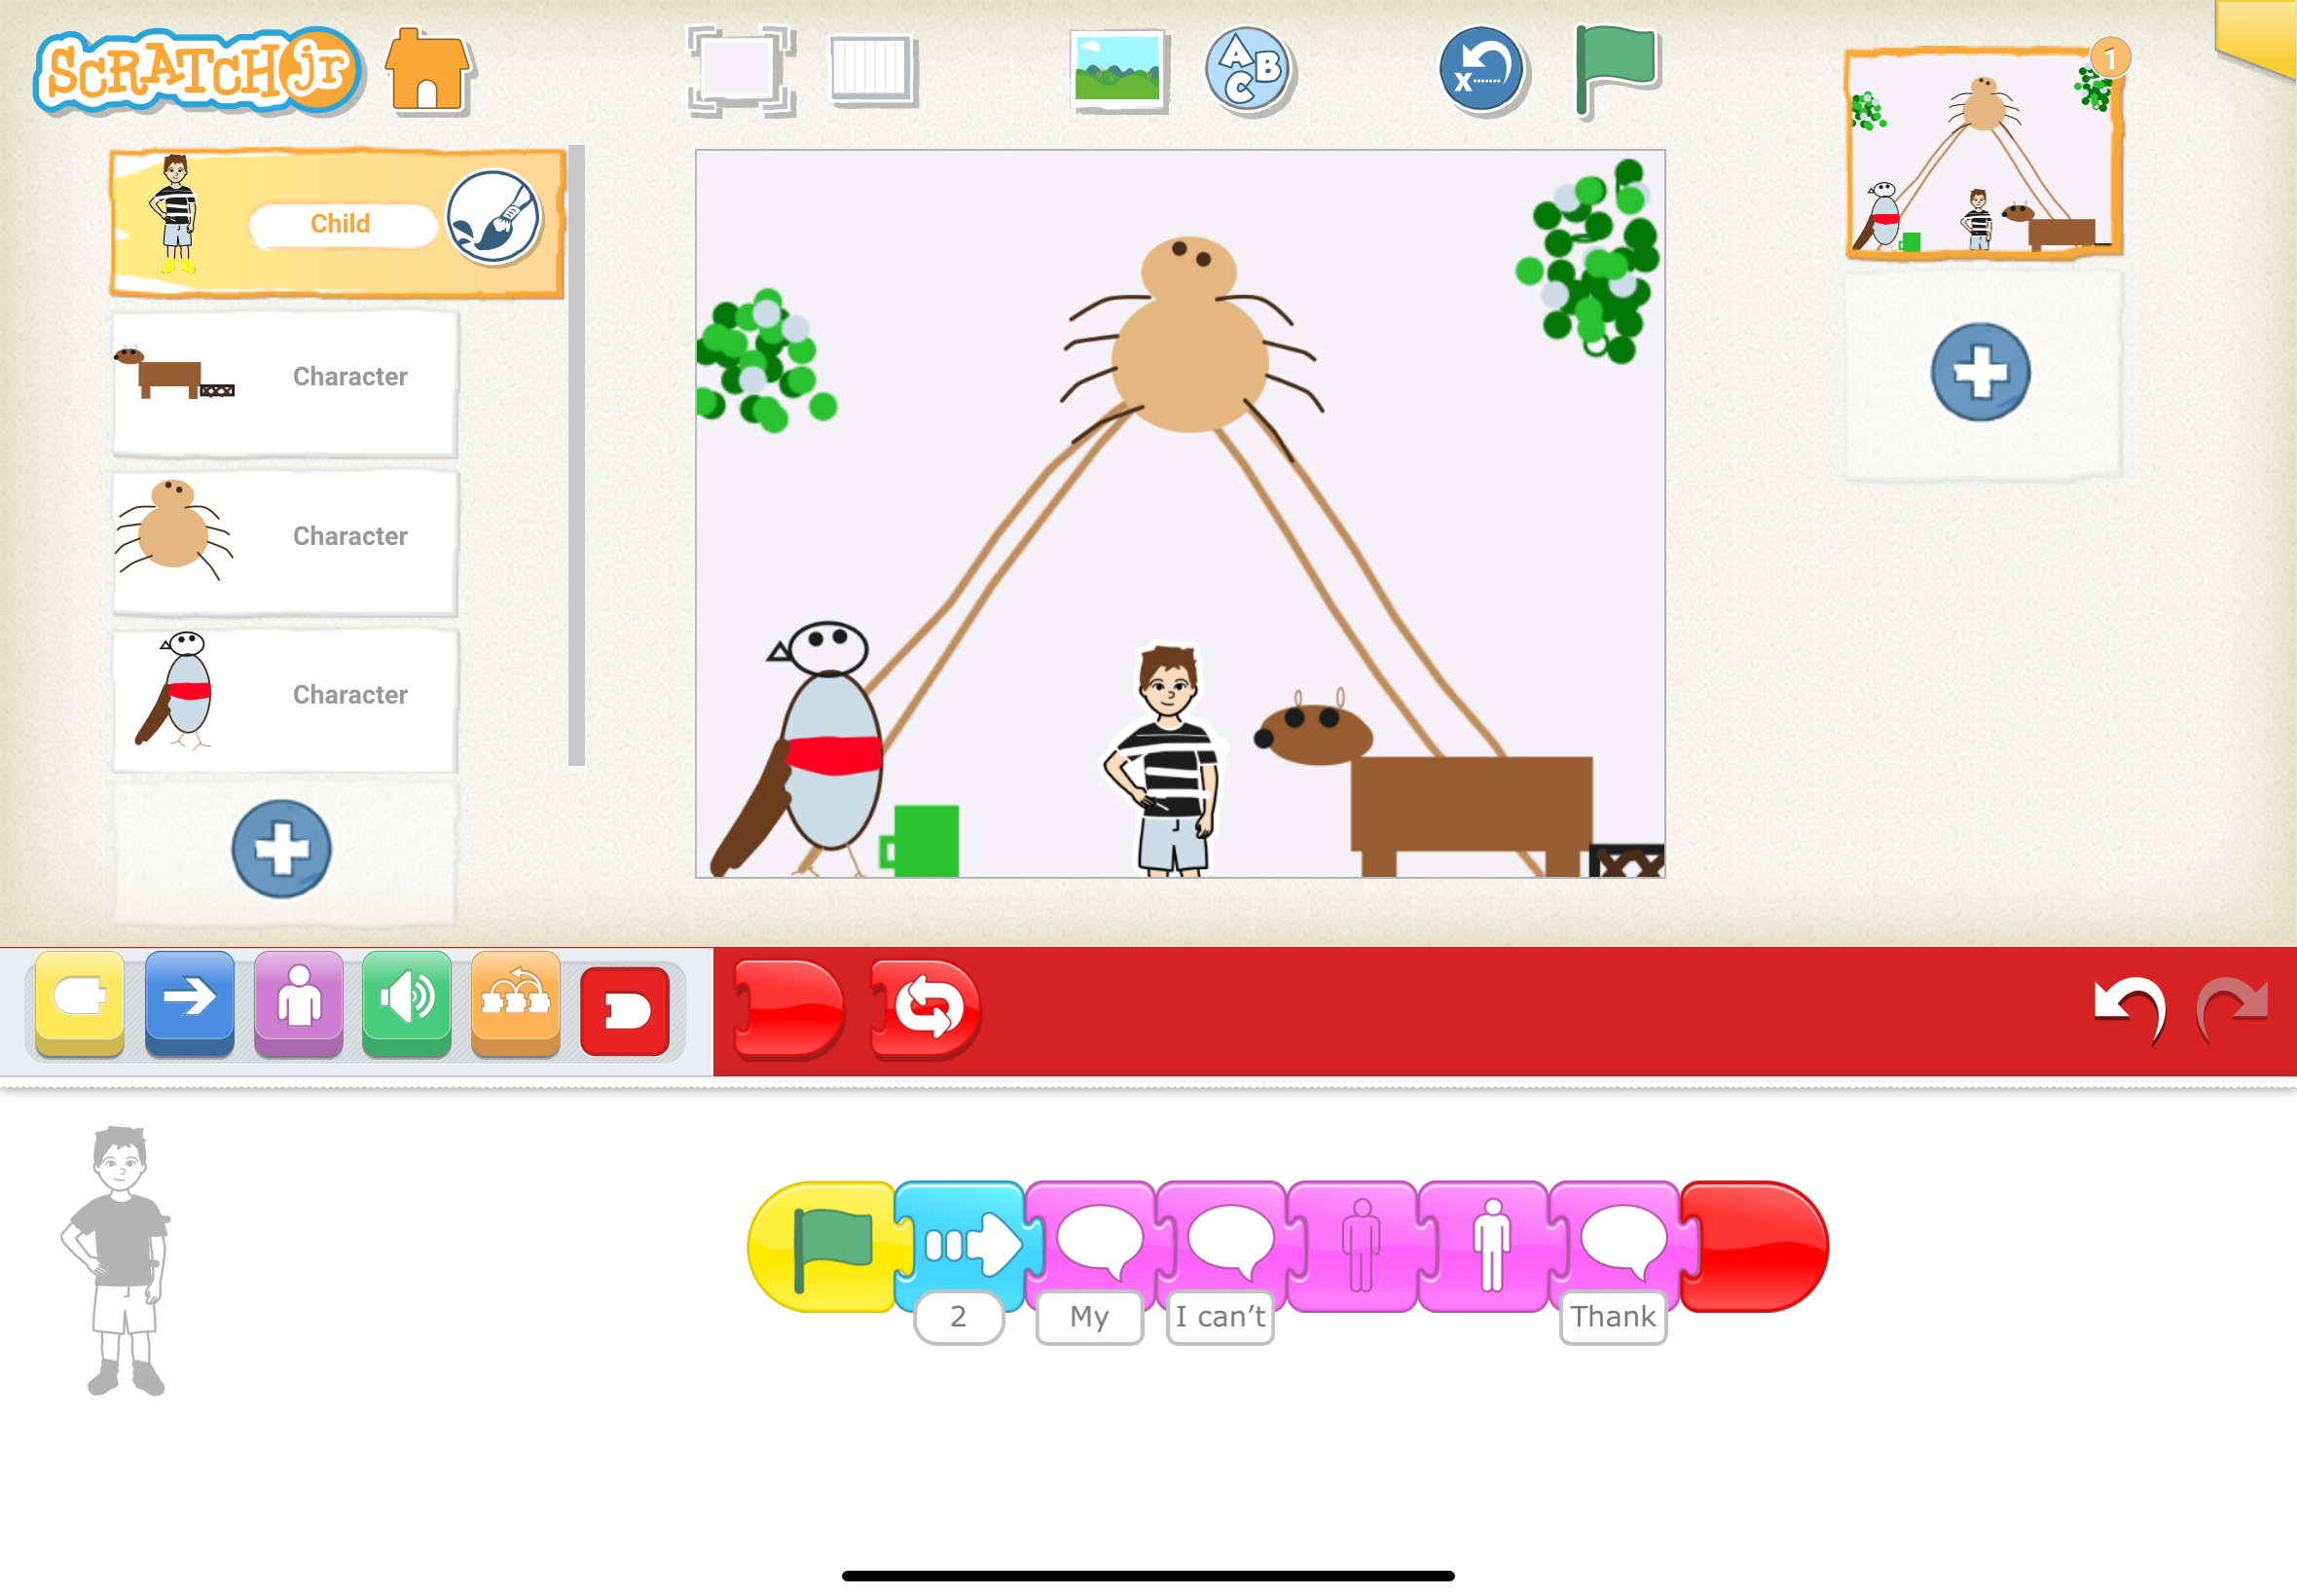
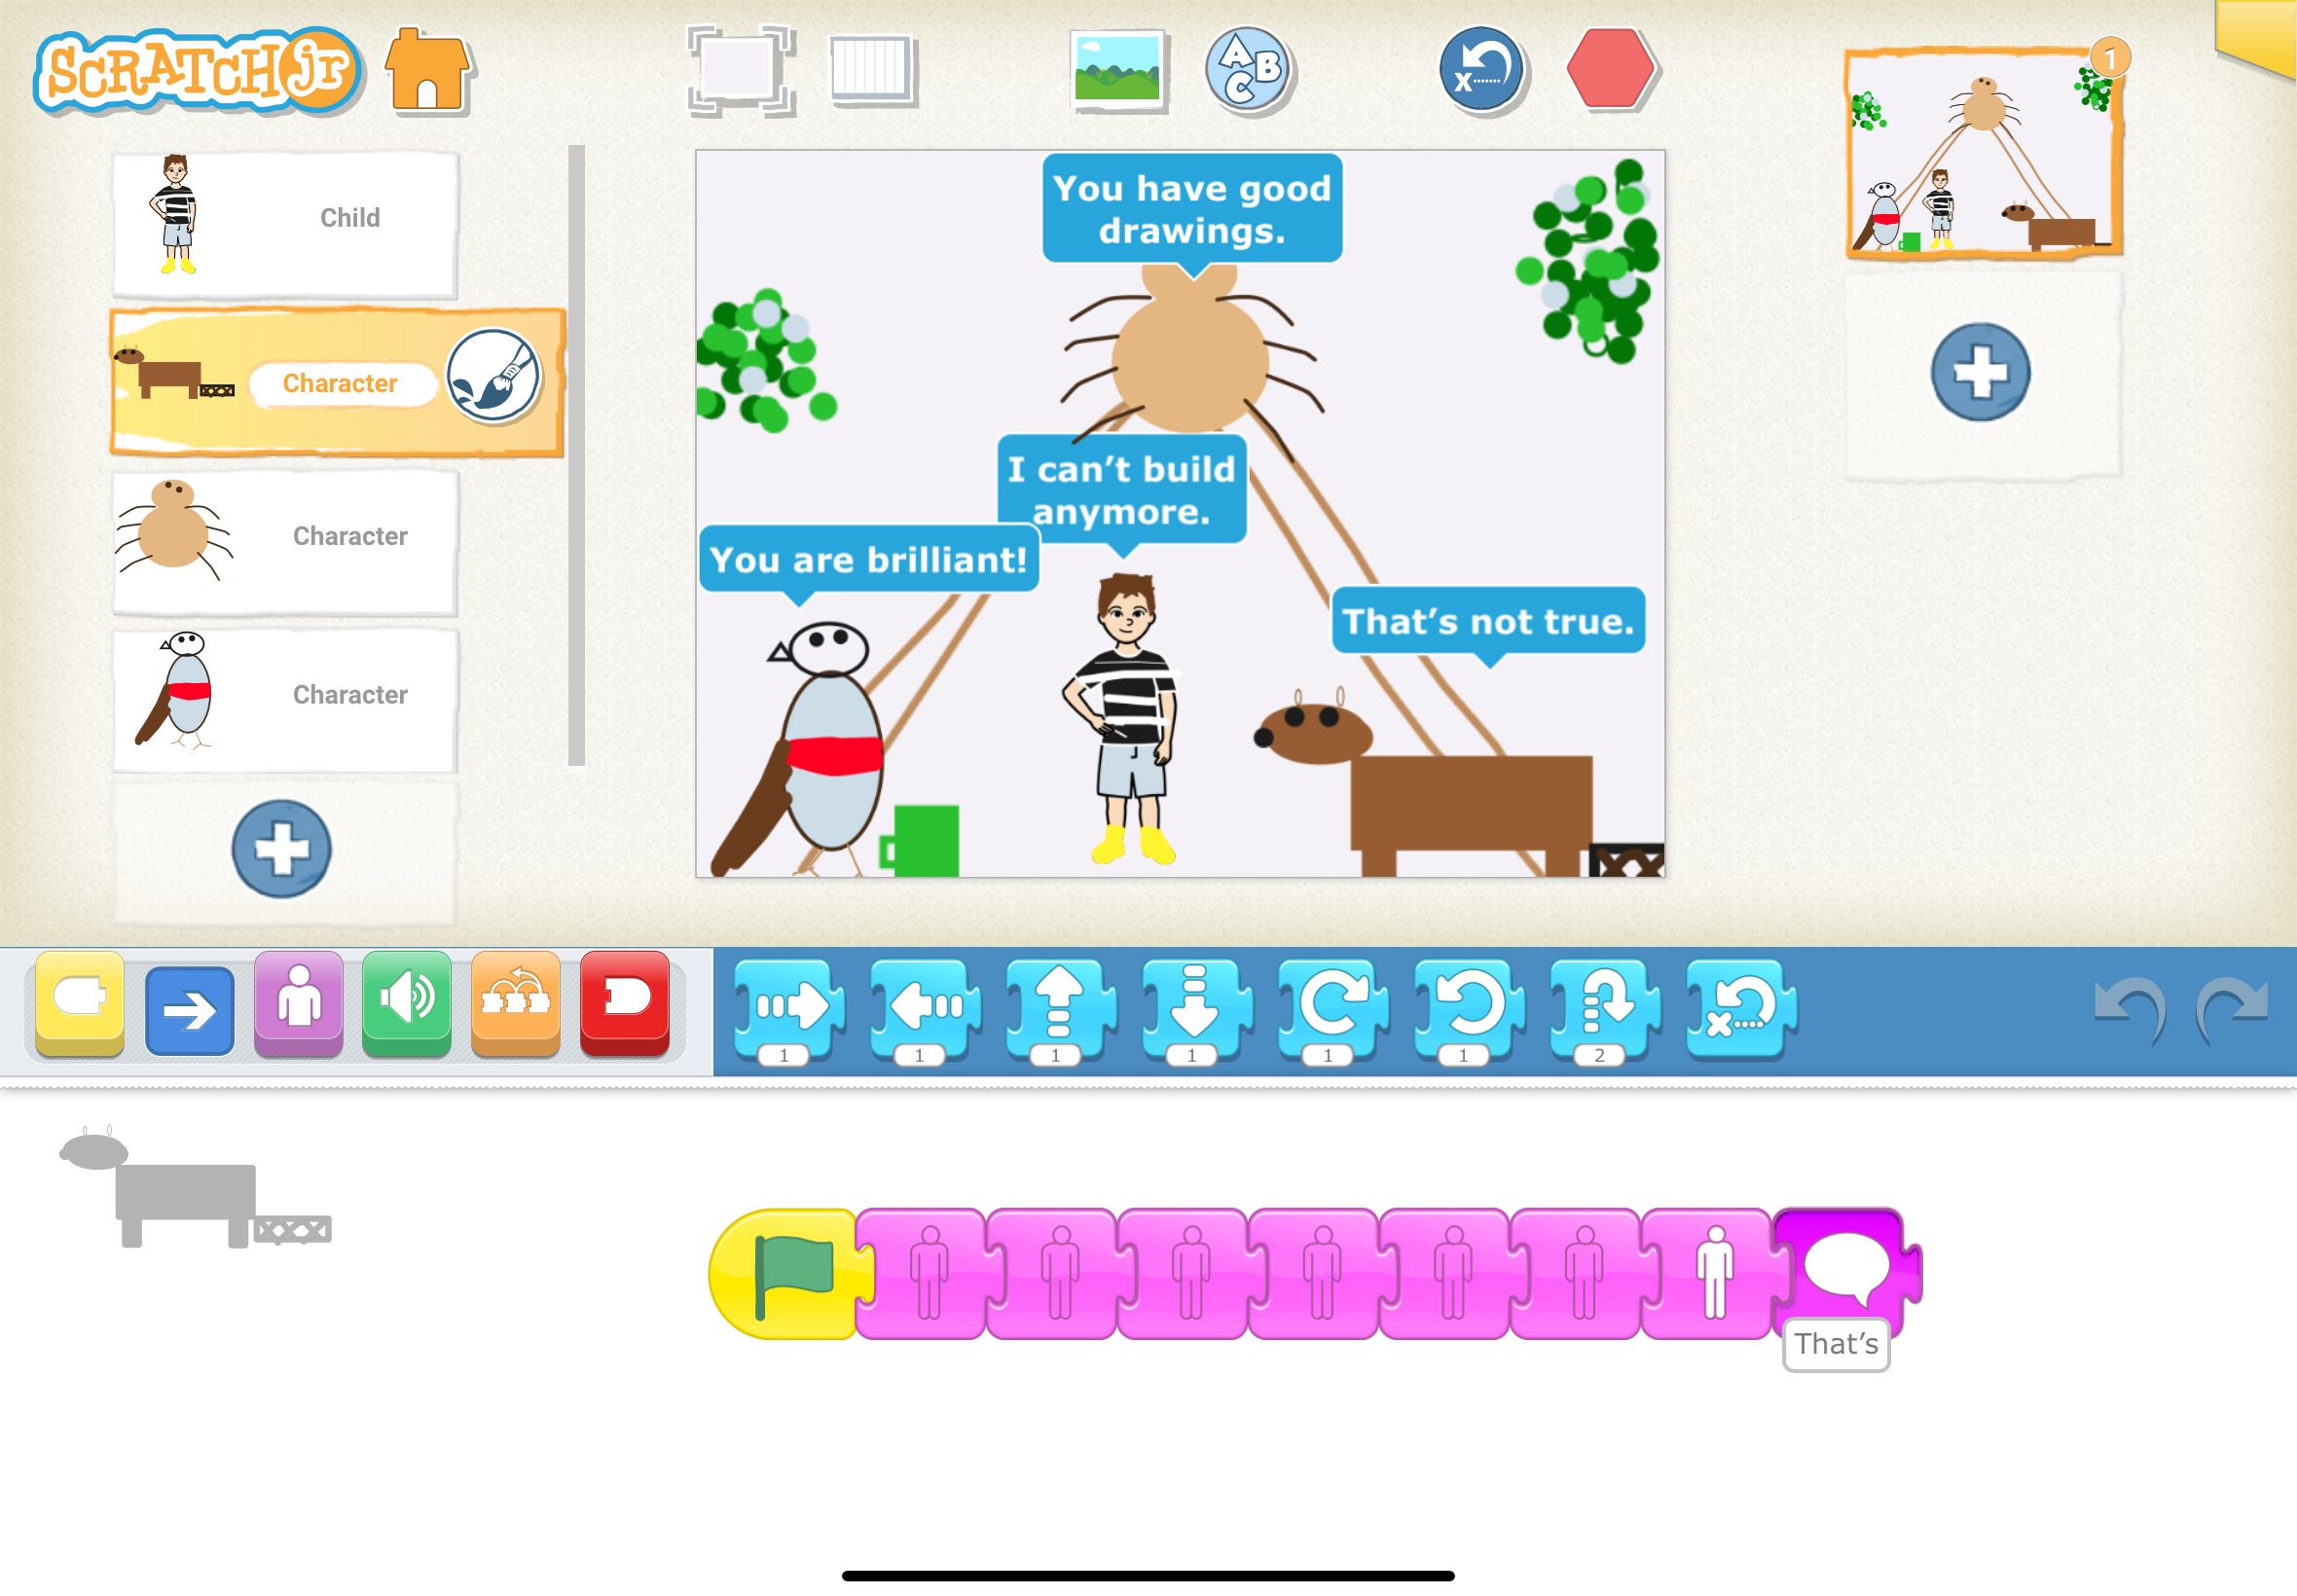
Step 3: Show students how to code their sprite and get them to say different things.
Step 4: Show students how to make their sprite move up, down, left, right, or in different directions.
Step 5: Allow students to create their own.
Having trouble? Let us know by completing the form below. We'll do our best to get your issues resolved quickly.
"*" indicates required fields