- Loading…

In this workshop, participants will be creating a 2D basketball game on Scratch platform. They will design the game from scratch and program it using block coding to simulate a basketball game.

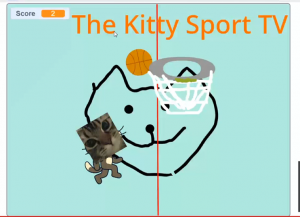
The participants will be introduced to the Scratch platform UI and how it works. They will also design and customize the game background and the player character.
Presentation:
1- Who are we and what we do in Studio 56.
2- Which zone we will be in today.
3- Introduction to teams UI.
4- Client letter of the workshop.
5- What is game development.
6- Inspiring video about video game development.
7- Video about Scratch software.
8- Introduction to Scratch UI.
9- What we will be doing.
Prototype:
1- Explain the UI of Scratch platform and structure of the platform.
2- Explain how you can add components to the UI.
3- Explain how you can change the properties of components.
4- Search for the appropriate background or design your own.
5- Explore the paint tools to edit existing components or design new unique components.
6- Add a player character component and change the looks of it to be unique.
7- Design the basketball basket using the pain tools.
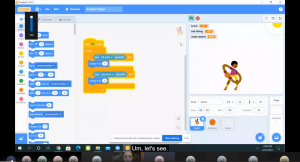
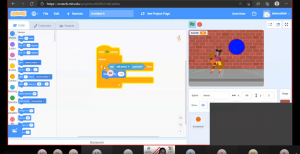
The participants will learn about block coding and how to program the actions of the game. They will add the needed blocks to the character and the circle components.
Presentation:
1- Overview on what was done on Day1.
2- Video about the meaning of coding.
3- The difference between block-based and text-based coding.
4- What we will be doing today.
5- Needed coding blocks.
Prototype:
1- Check if all needed components were added and ready to be used.
2- Explanation of the coding section in the Scratch platform.
3- Explanation of the different types of blocks and their meaning.
4- Program the character to move around the game (right and left).
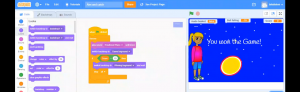
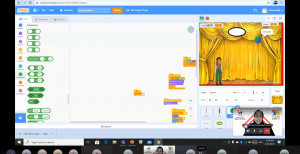
5- Program the winning scenario (when the score reaches 10).
6- Design the winning background.
7- Program the basket to move randomly with a specific speed (high or low).
8- Test the game and fix any issues found.

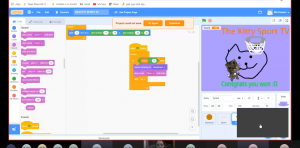
The participants will program the ball to be initiated when the player clicks on the space key and program other features of the game.
Presentation:
1- Overview on what was done on Day2.
2- Video about E-sports.
3- What are E-sports.
4- E-sports competition in Qatar.
5- What we will be doing today.
6- Needed coding blocks.
Prototype:
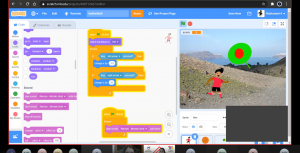
1- Program the ball to be initiated and thrown once the player clicks on the space key.
2- Program the score to increase by 1 when the ball touches the basket and broadcast a motivating message.
3- Program the score to be set to 0 whenever the game starts.
4- Test the code and fix any problems found.

The participants will learn how to record their own voice, edit it, and add it to the game. They will also learn how to import a sound file and add it to the game as background sound.
Presentation:
1- Overview on what was done on Day3.
2- What we will be doing today.
3- Needed coding blocks.
Prototype:
1- Explanation of the Sound section of Scratch platform.
2- Explanation of how to record your sound in Scratch.
3-Edit the sound and add it to the game using block coding.
4- Search for a sound file (.mp3) and import it to the game to be used as background sound.
5- Use block coding to add the background sound.
6- Test and fix any problems found.

The participants will test the final game, fix any issues, and share their games with others. They will also discuss the improvements they can make on the game to make it more interesting (ex: higher level with increased difficulty). They will also add their face picture to the body of the player.
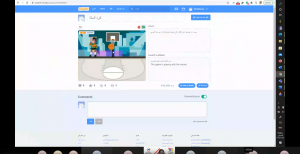
Having trouble? Let us know by completing the form below. We'll do our best to get your issues resolved quickly.
"*" indicates required fields